
Introduction
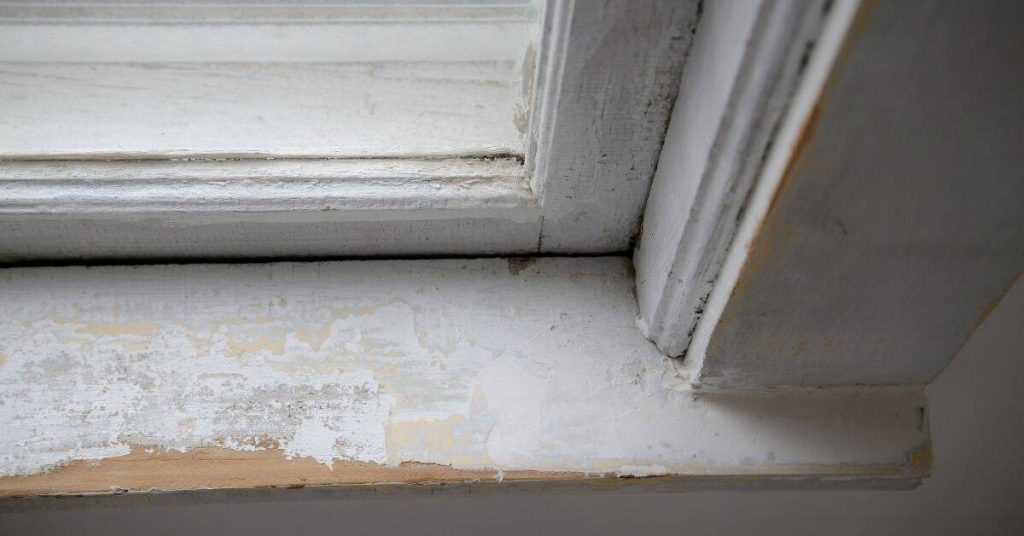
Peeling exterior trim paint is the finish flaking off due to moisture invading the surface. Before you redo it, check for moisture and prepare the area so you can scrub and inspect properly. This article walks you through pressure washing, scraping, and priming in a hands-on way.
Start by cleaning with pressure washing, then use a scraper to lift loose paint and seal edges. Apply an oil-based primer on bare wood or exposed edges, and consider an all-in-one exterior paint with primer for sections that are sound. Always check product labels and local rules to choose the right primer and finish.
Key takeaways
- Inspect moisture before scraping; damp wood fails primer adhesion and can rot.
- Test moisture with a gauge or pinless meter at multiple trim heights.
- Pressure wash with caution; keep nozzle distance and avoid saturating framing.
- Scrape flaking areas thoroughly; feather edges and remove loose material before priming.
- Use oil-based primer on oily or stained surfaces when required.
- Consider all-in-one exterior paint with primer for simple projects but verify coverage.
Table of Contents
- Introduction
- Key takeaways
- When to Tackle Peeling Trim and Why It Matters
- Moisture Checks and Diagnosis Before Any Prep
- Tools and Materials Checklist
- Cleaning the Surface: Pressure Washing and Gentler Alternatives
- Removing Peeling Paint Effectively and Safely
- Prep Repairs, Fillers, and Priming That Stick
- Painting the Trim and Accents for Durable Results
- Finishing Touches, Maintenance, Budgeting, Common Mistakes, and Eco Considerations
- Conclusion
- FAQ
When to Tackle Peeling Trim and Why It Matters
Ignoring peeling exterior trim invites moisture entry, wood rot, and faster paint failure. Left unchecked, problems can spread behind the trim and shorten the life of your finish.
Use a simple triage: document and dry, then decide whether to spot-treat or replace. Do a moisture check before you start: surface dampness, interior stains, soft spots, and recurring water sources. Early intervention saves time, reduces scope, and helps future paint stick better.
Visual indicators vs underlying problems
Peeling paint on exterior trim isn’t just an eyesore; it’s a warning sign. Here’s what to look for:
Blisters and Flaking: These could signal trapped moisture behind the paint, or failing caulk that’s letting water in.
Discoloration: Dark patches might indicate mold or mildew growth, which can cause wood rot. Yellowish stains could be from urine (animal or insect), which also damages wood.
Don’t stop at the surface. Probing and moisture tests will reveal if there’s rot or trapped water beneath.
Cosmetic fixes vs replacement triggers
Not all peeling paint means you need to replace your trim. Here’s how to tell:
Surface-level Peeling: If the wood underneath is solid and dry, you can usually repair it by scraping off loose paint, sanding, priming, and repainting.
Rot, Splitting, or Extensive Paint Failure: These are signs of deeper issues. Rotten wood needs to be replaced, as it’s structurally compromised. If more than 50% of the trim is affected, replacement might be more cost-effective than repairing.
Remember, if you’re unsure, it’s better to err on the side of caution and replace rather than risking further damage or safety hazards.
Moisture Checks and Diagnosis Before Any Prep
Before any scraping or priming, follow a simple moisture-detection workflow to find the root cause. Look for exterior leaks, flashing failures, and interior moisture migration, and fix the source first. Only when the area is dry and stable should you move to preparation.
Do visual checks for stains, mildew, and soft wood; use a moisture meter on trim and siding; inspect around doors, windows, gutters, downspouts, and roof edges. Trace moisture back to the source—roof leaks, compromised flashing, gaps, or drainage issues—and repair those first. Keep notes on readings, dry spells, and curing times to help future projects.
Using a moisture meter and interpreting readings
A moisture meter is your non-destructive tool for spot checks. Here’s how to use it:
1. Calibrate the meter before each use. This ensures accurate readings.
2. Take multiple readings on both trim and siding. Average them out to get a baseline.
3. Investigate further if you see relative differences of 5% or more between areas. Don’t rely on fixed numbers; moisture can vary across the surface.
Inspecting flashing, joints, and caulk lines
Examine these areas for signs of failure:
1. Roofline: Check for missing or damaged shingles, gaps at the roof’s edge.
2. Windows & Doors: Look for cracked or missing caulk, gaps around frames.
3. Joints & Caulk Lines: Inspect for cracks, peeling, or missing caulk. If found, decide whether to reflash or recaulk based on severity and extent of damage.
Seasonal and weather timing for moisture testing
Timing is key for accurate readings:
1. Test during or after dry spells. Moisture levels are more stable then, giving you a true picture.
2. Consider temperature: Warmer temperatures can drive moisture deeper into materials, while cooler temps push it to the surface.
3. **Recent weather** also matters. Heavy rain or snowmelt can temporarily raise moisture levels, skewing your readings.
Tools and Materials Checklist
This section lays out a practical, prioritized checklist of tools, protective gear, and materials you’ll need to repaint exterior trim. Organize by project phase: prep, repair, priming, and painting, so you can plan rentals and purchases without surprise gaps. It also covers substrate choices (wood, metal, old paint) and exposure factors, plus when to buy or rent and how to store materials to protect curing.
You’ll get a quick, needs-based flow from assessment to shopping to application, with substitutions like oil-based primer versus acrylic for different substrates. The point is saving time and money while staying safe—ventilation, eye and hand protection, fall prevention, and proper disposal per local rules. Always check product labels and manufacturer instructions for temps, drying, and compatibility.
Safety gear and equipment
Before starting any exterior trim work, ensure you have the right safety gear and equipment. Use this checklist to double-check everything before you begin.
- Respirator: Check that it’s in good condition and fits properly. Ensure it’s rated for dust particles (P100 or P95).
- Gloves: Inspect for tears or wear. They should provide a good grip and protect your hands from cuts.
- Eye Protection: Ensure they’re ANSI Z87.1 certified, fit well, and provide side protection. Safety glasses are not sufficient for trim work.
- Ear Protection: Check that your earplugs or earmuffs are in good condition and provide adequate noise reduction (NRR 25-30 dB).
- Fall Protection: If working above 6 feet, check harness, lanyard, and anchor points. Ensure everything is in good condition and properly secured.
- Ladder or Scaffold: Inspect for stability, safety features (feet, locks), and proper height for the job. Ensure it’s level and secure before climbing.
- Hard Hat: If there’s a risk of falling objects, check your hard hat for cracks or damage. Ensure it fits well and is secured.
- Steel-Toed Boots: Inspect for good condition and proper fit. They should provide ankle support and protect against falling objects.
Quick rule: Always prioritize safety over speed. Skipping safety checks can lead to serious injuries or costly rework due to accidents.
Cleaners, primers, and paint types explained
Before you start painting, use this checklist to ensure you have the right cleaners, primers, and paint for your project. This will help you achieve a durable, long-lasting finish.
- Cleaner: Use mild detergent or specialty mildewcides. Check product label for compatibility with your surface type (wood, metal, etc.).
- Mild Detergent: Mix a few drops in warm water, apply with soft brush, rinse thoroughly.
- Specialty Mildewcides: Follow manufacturer’s instructions for application and safety precautions. Test on small area first.
- Sealant Primer: Use for porous surfaces like bare wood or new drywall. Check if it’s suitable for your paint type (latex, oil-based).
- Oil-Based Primer: Good for high-humidity areas and stain-blocking. Check for proper ventilation before use.
- High-Adhesion Primer: Use on difficult surfaces like glossy paint or metal. Ensure it’s compatible with your topcoat.
- 100% Acrylic Paint: Durable, water-based, low VOCs. Check if it’s suitable for your climate ( Exterior: check freeze-thaw resistance).
- Alkyd-Modified Paint: Oil-based with added acrylic resins. Good for high-moisture areas. Check for proper ventilation and clean-up solvents.
Quick rule: Always prime before painting to seal the surface, improve adhesion, and enhance paint durability. Skipping this step can lead to peeling, cracking, or poor color coverage.
Consumables and prep tools
Use this checklist before starting any painting or finishing work to ensure you have the right consumables and prep tools for a smooth job.
- Scrapers: Check for straight edges, sharp blades (replace if dull), and secure handles. Ensure they’re suitable for the surface material (wood, metal, or drywall).
- Sanding supplies: Inspect sandpaper grit size (120-220 for most surfaces) and condition (no tears or holes). Check sanding blocks or sponges for wear.
- Fillers: Verify filler type matches surface material. Check expiration date, consistency (not too thick or thin), and that it’s suitable for the repair size.
- Caulk types: Ensure caulk is paintable, flexible, and suitable for the joint size and substrate. Check nozzle condition and that it’s within its usable life.
- Brushes: Inspect bristles (no missing or splayed), ferrule (secure and straight), and handle (firm grip). Ensure brush type matches paint type (natural bristle for oil-based, synthetic for latex).
- Rollers: Check cover (9″, 12″, or 18″ depending on surface area) and nap length (3/16″ to 3/4″ based on texture). Ensure roller frame is in good condition.
- Sprayer tips: Verify tip size matches paint viscosity. Check for clogs, cracks, or other damage. Ensure you have a spare tip.
- Single-use vs reusable tools: Use single-use tools (e.g., sanding discs) when dealing with contaminated surfaces to prevent cross-contamination. Reusable tools should be cleaned thoroughly between uses.
Quick rule: Always check consumables and prep tools before starting work. Using the wrong tool or a damaged one can lead to poor results, rework, and wasted materials.
Cleaning the Surface: Pressure Washing and Gentler Alternatives
Choose low-pressure washing for sturdy, newer trim when the surface is sound. Use soft-wash methods for delicate, aged, or moisture-prone trim to reduce damage. Watch for moisture indicators and avoid forcing water into joints or grain.
Stick to mild, biobased cleaners and follow manufacturer guidance for dilution and contact time; harsh chemicals can dull finishes and shock nearby plants. Thorough drying is essential before scraping or priming, with visible moisture-free surfaces and appropriate wait times. If you see frayed grain, lifted paint, or water creeping into joints, back off the pressure and reassess before continuing.
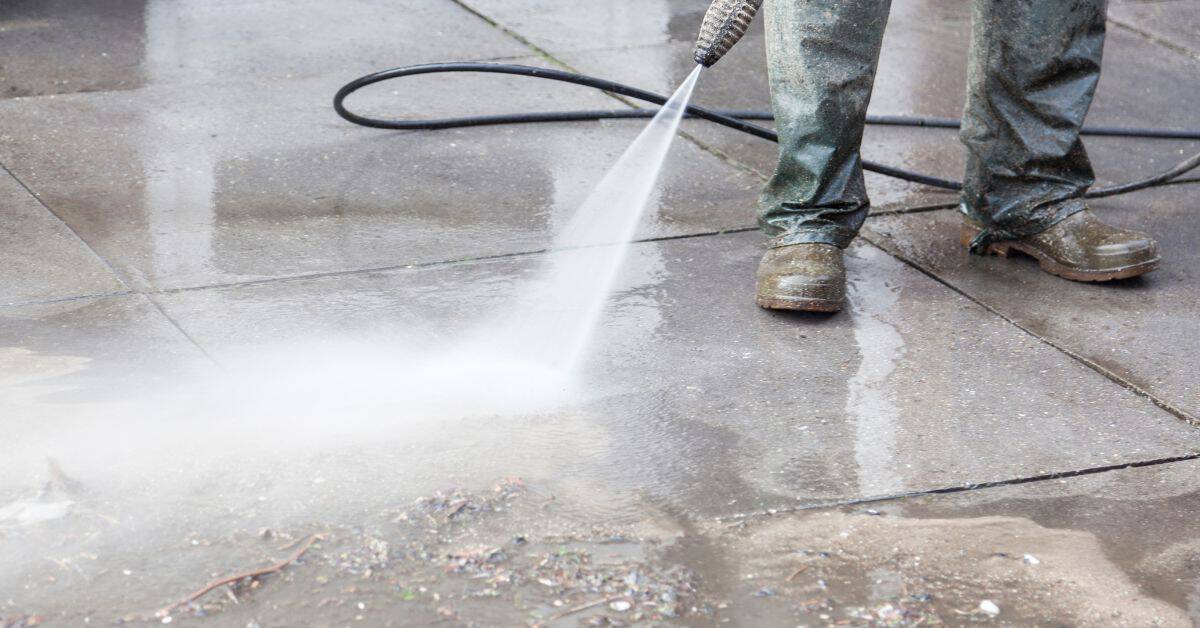
Pressure Washer Best Practices
Using a pressure washer on exterior trim can be tricky. Too much pressure, and you’ll damage the wood. Not enough, and you won’t get it clean.
Start with a wider spray pattern at reduced pressure. Hold the wand at an angle, about 12-18 inches from the surface. Test on an inconspicuous area first to check for any adverse reactions.
Remember: Wood is softer than concrete or brick. Be gentle, but thorough.
Soft Washing and Cleaning Solutions
For older trim or delicate surfaces, opt for soft washing. It’s gentler than pressure washing.
Use mild cleaners or house-wash mixes to remove mildew and dirt. Apply with a pump sprayer or soft-bristle brush. Let it soak for 10-15 minutes, then rinse thoroughly.
Avoid harsh chemicals like bleach or ammonia. They can damage wood finish and harm nearby landscaping.
Drying and Reinspection After Cleaning
Before scraping or priming, ensure your trim is completely dry. This step is crucial to prevent moisture-related issues.
- Wait time: Allow 24-72 hours for drying, depending on local humidity and temperature.
- Check for: New blisters or warping that may have been hidden by old paint. These could indicate rot.
- Recheck joints: Ensure no water remains trapped in corners or seams.
- Feel the surface: It should be cool and dry to the touch.
- Look for: Any signs of mold or mildew growth, which could indicate lingering moisture.
- Check weather: Ensure no rain is forecast before proceeding with scraping or priming.
- Inspect metal hardware: Check for rust or water intrusion around nails and screws.
- Recheck moisture levels: Use your moisture meter to ensure readings are below 15%.
Quick rule: If in doubt, wait another day before proceeding. Better safe than sorry!
Removing Peeling Paint Effectively and Safely
Start=”false”>Assess peeling extent, moisture, and health risks, then start with manual scraping and sanding to remove loose paint and feather edges before bringing in chemicals or heat. Emphasize thorough edge feathering and proper containment during this initial work. Always check product labels and manufacturer instructions for any specific guidance on your surface.
Start>
Lead paint safety matters: test for lead, use appropriate PPE, and set up containment to prevent dust spread. Follow local disposal rules for waste and cleanup, and avoid dumping scrap or dust anywhere you’re not allowed. When you finish, feathering and clean surfaces help primer adhesion and a smooth, durable finish.
Scraping and sanding techniques
Start by scraping off loose paint using a paint scraper. Hold it at a 45-degree angle to the surface for best results.
For stubborn areas, use a wire brush or a stiff-bristle brush to agitate the paint. Be careful not to damage the underlying wood.
Once most of the paint is off, switch to sanding with medium-grit sandpaper (around 120-grit) to smooth out surfaces and feather edges. This ensures new paint adheres properly.
Tip: Always sand in the direction of the wood grain to avoid scratches.
Chemical strippers and heat tools: pros and cons
For tough paint, consider using chemical strippers or heat guns. Both have their advantages and disadvantages.
- Chemical Strippers: Effective on multiple layers of paint, but can take time to work and may emit harmful fumes. Always use in a well-ventilated area.
- Heat Guns: Quickly softens paint for easy removal, but can be messy and requires careful handling to avoid scorching the wood.
- Neutralizing Residue: After using strippers or heat guns, clean surfaces with a suitable solvent like mineral spirits or denatured alcohol to remove any residue.
- Rentable Tools: Heat guns are often available for rent at hardware stores. Prices vary but expect around $20-$30 per day.
- Safety First: Always wear appropriate protective gear, including gloves and safety glasses, when using these tools.
Lead safety and disposal protocols
Before starting any work, test for lead paint. If your home was built before 1978, assume it may contain lead.
Containment: If lead is present, seal off the work area with plastic sheeting to prevent dust from spreading. Wear a respirator rated for lead dust.
Disposal: Double-bag waste in heavy-duty plastic bags and dispose of according to local regulations. Do not put it in regular trash or recycling.
Professional Help: If you find lead paint, consider hiring a certified contractor for safe removal. They have specialized equipment and follow strict safety protocols.
Prep Repairs, Fillers, and Priming That Stick
For prep repairs, choose the right filler or epoxy, fix small rot, holes, and gaps, and apply primers to seal bare wood and patched areas for lasting adhesion. Start by assessing moisture damage, removing loose material, cleaning, drying, and feathering edges before filling. Follow the repair with a suitable sanding routine to create a clean, receptive surface.
Why it matters: a solid prep and primer strategy prevents peeling and gives you a uniform base for paint, whether you spot-prime tight spots or do full-priming over larger patched areas. Use the filler type and primer according to the product instructions and the final paint system, and pay attention to environmental conditions and drying or recoat guidance on the labels. When in doubt, check the manufacturer instructions and local rules for safe practices.
Repairing rot and replacing compromised trim
First, assess the damage. If rot is minor, epoxy can patch it. But if more than 20% of a piece is affected, replace it.
Epoxy: Mix and apply according to package instructions. Let cure as directed before sanding smooth.
For replacements, use treated lumber or composite materials. Flash the sides with house wrap or felt paper. Seal ends with exterior wood sealer.
Choosing the right primer and application tips
For bare wood, use a sealing primer. For repaired spots, choose an oil-based or high-adhesion primer. Previously painted surfaces may need just a coat of paint.
Apply primers with a brush or roller. Work in manageable sections to avoid lap marks.
Let dry according to manufacturer’s instructions before sanding lightly and applying topcoat.
Caulking and joint prep before topcoat
Clean joints with a wire brush or scraper. Ensure they’re dry before caulking.
Use paintable exterior caulk. Apply with a caulk gun, tooling it into the joint with a damp finger or caulk smoother.
Let cure as directed before painting. This creates flexible seals that won’t crack over time.
Painting the Trim and Accents for Durable Results
Use a defined paint system for exterior trim: a bond‑enhancing primer with a matching topcoat in a trim-friendly sheen (typically semi‑gloss or gloss). Start with caulking and sealing gaps, then clean and lightly sand the surface, and let primer cure before applying full coatings in multiple thin coats.
Using cutting-in, back-rolling, and possibly spraying helps even coverage and weather resistance, but only after the primer has cured. The right sequence and prep prevent lap marks, brush streaks, and coating failure on moisture-affected wood. Always check the product label for cure times and test adhesion before topcoats; follow local disposal rules for rinsing or leftovers.
Brushes, rollers, and sprayers — which to use when
For exterior trim painting, you’ve got three main tools at your disposal: brushes, rollers, and sprayers. Each has its pros and cons.
Brushes are best for cutting in, that is, painting along edges where you don’t want to get paint on adjacent surfaces. They’re precise but can leave visible strokes if not used correctly.
Rollers are great for large, flat surfaces like siding or doors. They provide even coverage and a smooth finish. But they’re not ideal for detailed work or tight spaces.
Sprayers offer quick, full-coverage application but can be messy and wasteful if not managed properly. They’re best suited for large, flat surfaces like garage doors or big expanses of trim.
Application sequence and overlap techniques
The order in which you apply paint and the way you overlap coats can make a big difference in your final result. Here’s the best practice:
Start by cutting in with a brush along edges, then use a roller or sprayer to fill in the middle. This helps prevent lap marks – those visible lines where two strokes meet.
When rolling or spraying, maintain a wet edge. That means keeping your tool constantly damp with paint as you move along, so each stroke overlaps the previous one slightly. This ensures even coverage and no visible overlap lines.
For sprayers, use a technique called back-rolling or back-spraying. After spraying a section, immediately roll over it with a roller to ensure full coverage and smooth out any overspray. This helps minimize waste and provides a more even finish.
Visual checkpoints during and after painting
After each stage of your trim painting project, it’s crucial to inspect your work. Here’s a checklist to ensure everything looks right:
- Run prevention: Check for any drips or runs. If you see any, wipe them off immediately with a damp cloth.
- Even sheen: Look for any uneven gloss or matte spots. These could indicate missed areas or inconsistent application.
- Sealed end grains: Ensure all end cuts and edges are sealed. If not, they can absorb moisture and lead to rot.
- Caulked joints: Inspect all caulked seams for any gaps or cracks. If necessary, apply more caulk.
- Bubbles or wrinkles: Check for any air bubbles or wrinkled paint. These indicate improper surface preparation or application.
- All edges covered: Ensure all edges and corners are painted. Missed spots can lead to peeling later on.
- No visible lap marks: Inspect for any visible overlap lines. If found, lightly sand and repaint the area.
- Dry time: Allow each coat to dry according to manufacturer’s instructions before applying the next one. Rushing can lead to poor adhesion and peeling.
Quick rule: Always inspect your work after cutting in, filling, and coating. Catching issues early prevents costly rework later.
Finishing Touches, Maintenance, Budgeting, Common Mistakes, and Eco Considerations
This section covers finishing touches, maintenance, budgeting, common mistakes, and eco options, with moisture prevention as the first step. Start with a quick root-cause check for moisture—leaks, condensation, grading, and flashing—to guide finishing decisions and protect the investment. It also lays out a practical seasonal maintenance plan, a budgeting DIY vs pro checklist, and a list of mistakes to avoid.
Doing maintenance and choosing the right products now saves you money and avoids repeat failures later. The guidance helps you balance DIY effort with professional help, pick eco-friendly coatings, and handle waste properly. Always address moisture causes first to protect the investment and prevent hidden damage.
Routine maintenance and signs you need touch-ups
Regular upkeep is key to keeping your trim in top shape. Here’s a simple seasonal inspection plan:
Spring: Check for any winter damage. Look out for peeling paint, cracks, or warping.
Summer: Inspect areas exposed to direct sunlight. Heat can cause paint to fade and peel.
Fall: Before the cold sets in, ensure there are no gaps where water could seep in during winter rains.
Winter: Keep an eye on any areas prone to ice dams or snow buildup. These can cause moisture issues when they melt.
Budgeting checklist and hiring pros
Before you start, use this checklist to estimate costs and decide if DIY or pro hire is right for you.
- Materials: Primer, coatings, caulk. Get quotes from your local hardware store.
- Tools: Brushes, rollers, sprayers, sandpaper. You may need to invest in these if you don’t already have them.
- Time: Estimate how long the job will take. Weather delays can add extra days.
- Labor (if hiring): Get quotes from local painters. Ask about their experience with exterior trim work.
- Safety gear: Goggles, gloves, drop cloths. Don’t forget these essentials.
- Lead testing (if old home): Before you start, test for lead paint. It’s a hazardous material that needs special disposal.
- Waste disposal: Factor in the cost of disposing of leftover paint and other waste materials.
- Contingency fund: Always set aside 10-15% for unexpected costs.
Quick rule: If the job is too big or complex, it’s often worth hiring a pro to avoid costly mistakes.
Common mistakes to avoid and greener alternatives
Here are some common pitfalls and eco-friendly solutions:
- Skipping prep: This leads to paint peeling. Always clean, sand, and prime surfaces.
- Painting wet wood: Moisture causes paint to peel. Ensure wood is dry before painting.
- Wrong primer/paint combo: Using the wrong primer can cause adhesion issues. Always use a primer suitable for your surface and paint type.
- Over-thinning paint: This weakens the paint’s durability. Follow manufacturer guidelines on thinning.
- Improper caulking: Caulk helps prevent water damage. Use a paintable, flexible caulk suitable for your joint size.
- Rushed drying times: Letting paint dry too quickly can cause cracking. Follow recommended drying times.
To go greener, consider using low-VOC or zero-VOC products. Recycle leftover paint where feasible and dispose of hazardous waste properly. Clean brushes and rollers with soap and water instead of harsh chemicals.
Conclusion
Take action with a solid plan now. Moisture control and proper prep protect the trim from rot, improve appearance, and save you cost and headaches down the line.
Check moisture first, then proceed in this order: clean the surface, repair where needed, apply fillers and primer, and finally paint; test a small area first and work in manageable sections.
Common mistakes to avoid are skipping moisture checks, using aggressive cleaners or too high pressure, and skipping primer or proper repairs. Always Safety first, keep the work area dry and well lit, wear eye and skin protection, and never rush the prep. Test a small area before committing to the whole job, and pause if you uncover rot or soft wood.
If you find widespread damage, soft framing, or persistent leaks, it makes sense to call a professional rather than push on alone. Finish with confidence, protect your siding, and enjoy durable results that look good for years to come.
FAQ
Is pressure washing the exterior safe for peeling trim, and what should I watch out for?
Pressure washing can help, but set the machine to a gentle stream and keep it at a safe distance. Don’t blast corners or soft wood; you can damage the substrate or drive moisture in. If unsure, test a small area first and follow the equipment maker’s instructions.
How do I know when I’ve scraped off peeling paint enough to start repairing?
You want all loose paint removed and the edges feathered so the new coating has a solid edge to grip. If you run your hand and feel a noticeable edge or flaking, keep scraping until the surface feels smooth and sound. Check the wall by sight and touch, not just guesses.
Should I use oil-based primer on the trim, and what are the risks?
Oil-based primer can seal, block stains, and improve adhesion on tricky surfaces. Read the label for indoor/outdoor use and ventilation guidelines. If you’re unsure, compare with the manufacturer’s instructions or local guidance and choose a product labeled for exterior trim.
Can I paint with all-in-one exterior paint and primer, or do I still need a separate primer?
All-in-one products can work on clean, sound trim, but peeling edges or repaired areas may still benefit from a dedicated primer. If you’re covering bare wood or stained areas, lean toward a primer first. Always check the product label for surface suitability and recoat times.