
Introduction
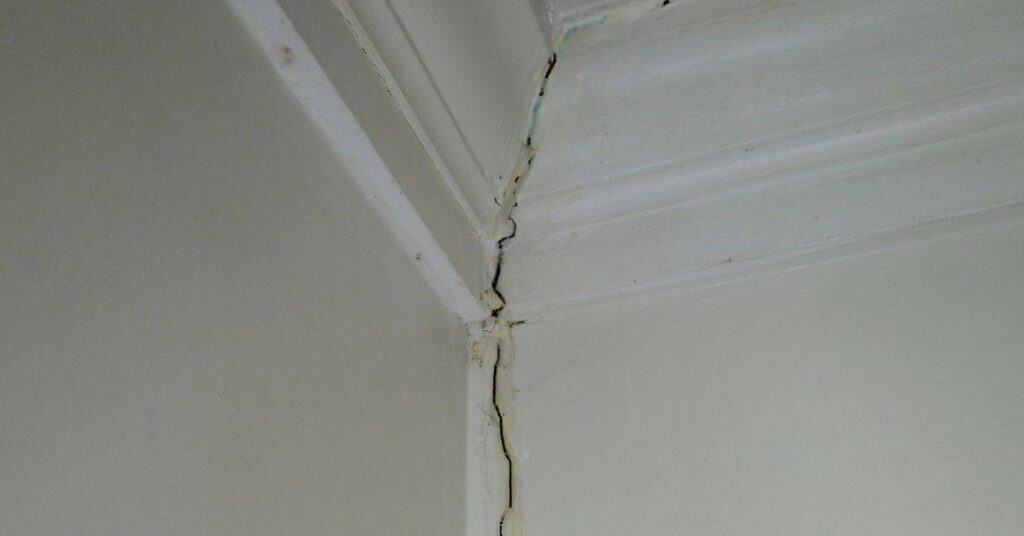
Rusted corner bead damage is when the metal trim at the wall corner has corroded and risks cracking the drywall.
You’ll see rust stains, flaky edge metal, or bent corners that don’t sit square. This article walks you through a practical, hands-on repair plan.
First, identify the damaged metal and assess if the drywall behind it is intact before removal. Carefully cut back the rusty bead and remove it without gouging the drywall, then fit a new corner bead and fasten it securely. Check the manufacturer instructions or local rules for fastener type and finish to avoid future cracks.
Key takeaways
- Identify rusted corner bead early to prevent drywall damage and framing corrosion.
- C Carefully cut back damaged drywall and metal without nicking studs or wires.
- Replace rusted beads with corrosion-resistant corner beads and secure with proper fasteners.
- Ensure flush alignment and precise feathering to minimize hairline crack propagation.
- Check for hidden damage behind drywall before sealing, patching, and finishing.
- Practice safety: turn off power, wear gloves, eye protection, and dispose metal safely.
Table of Contents
- Introduction
- Key takeaways
- Quick Overview and When to Repair Vs Replace
- Tools, Materials, and Safety Gear Checklist
- Identifying Rust and Hidden Problems
- Step-by-Step Cutting Back Technique
- Rebuilding Options: Repair Techniques and Materials
- Finishing, Feathering, and Preventing Hairline Cracks
- Long-Term Prevention and Maintenance
- Cost-Effective DIY Tips and When to Call a Pro
- Conclusion
- FAQ
Quick Overview and When to Repair Vs Replace
Cutting back and rebuilding the corner bead is often enough when the core of the corner is solid, the substrate is intact, and corrosion is localized. If misalignment or extensive corrosion reaches the backing, full replacement may be warranted. Use this as a decision framework to avoid chasing cracks forever.
Look for signs of corrosion depth, concrete spalling, rebar exposure, and any backing damage behind the corner. Assess whether the drywall or structure behind the bead remains secure and true. Estimate typical trade work hours, tools needed, and material costs, then add a contingency for moisture or rework as needed.
Assessing the extent of rust damage
First off, you gotta understand that rust comes in two flavors: surface and structural. Surface rust is just a cosmetic issue, but structural rust can weaken your walls.
Inspect behind corner bead: Start by checking the corners of your walls. Rust often shows up here first. Gently tap the corner bead with a screwdriver handle to listen for hollow spots or crumbling. If you hear something, that’s structural rust.
Now, let’s talk about how far to cut back. Rust can penetrate deep into drywall, so you need to find out just how far it goes. Here’s what to do:
1. Use a magnet to check if rust has penetrated the paper surface. If it sticks, that means rust is present.
2. Gently cut into the drywall with a utility knife where you suspect rust. Be careful not to damage any wires or pipes behind the wall.
3. Once you’ve exposed some rust, measure how deep it goes. If it’s more than 1/4 inch deep, you’ll need to cut back further to ensure you get all the rust out.
Remember, if you’re unsure about any of this, check your local building codes and manufacturer instructions. It’s always better to be safe than sorry when dealing with structural issues.
Repair vs replace decision checklist
Before you start any work, use this checklist to help decide whether to repair or replace your concrete. It’ll save you time and money in the long run.
- Rust depth: Check how deep the rust goes. Use a screwdriver or chisel to scrape away any loose material and expose the steel. If it’s less than 1/8″, repair is likely sufficient. More than that, consider replacement.
- Bead adhesion: Inspect where the concrete meets the steel (the ‘bead’). Tap it with a hammer; if it sounds hollow or crumbles, adhesion has failed. This needs to be addressed in your repair or replacement plan.
- Underlying framing: Check if there are any issues with the underlying support structure. If framing is compromised, repair won’t help – you’ll need to replace everything.
- Repeated cracking: If cracks keep reappearing after repairs, it might be a sign of deeper issues like settlement or movement. In this case, replacement could be the better option.
- Crack width: Measure crack widths. Hairline cracks (less than 1/8″) can often be repaired. Wider ones may indicate more serious problems that require replacement.
- Spalling: Check for flaking or scaling of the concrete surface. If it’s localized, repair might be enough. Widespread spalling could mean you need to replace the entire slab.
- Delamination: Tap the surface; if it sounds hollow, delamination (separation of layers) may have occurred. This needs attention in your repair or replacement plan.
- Deterioration rate: Consider how quickly the concrete is deteriorating. If it’s fast, replacement might be more cost-effective than repeated repairs.
Quick rule: If you find any of these issues severe or widespread, it’s usually best to replace rather than repair. Always check local building codes and consult with a professional if you’re unsure.

Tools, Materials, and Safety Gear Checklist
Core tools include a reciprocating saw or oscillating tool, an angle grinder with a cutoff wheel, a hammer and cold chisel, a utility knife, a tape measure, a square, and a pry bar. Blade sizes and grit ranges should be checked against the manufacturer instructions or label; budget alternatives are acceptable if they meet the task.
Materials should cover replacement corner bead (metal or vinyl), patching or hydraulic cement, bonding agent, reinforcing mesh or fiberglass tape, and a skim coat or mortar mix. Include corrosion-inhibiting sealant if you expect moisture exposure. Safety gear should include eye protection, gloves, a respirator or dust mask, hearing protection, and appropriate clothing, plus dust control and drop cloths.
Personal protective equipment (PPE) and ventilation
Safety comes first when dealing with rust, dust, and paint fumes. Use this checklist before starting your repair.
- Eye/face protection: Wear safety glasses or goggles to shield from debris and sparks.
- Respirator/dust mask: Protect your lungs with a respirator rated for dust (e.g., N95) or a dust mask. Rust can be harmful if inhaled.
- Gloves: Use disposable or reusable gloves to protect hands from rust, chemicals, and sharp edges.
- Hearing protection: Wear earplugs or earmuffs when using power tools like grinders or saws.
- Clothing: Wear snug-fitting clothing to minimize exposed skin. Long sleeves and pants are recommended.
- Ventilation: Ensure your work area is well-ventilated, or use a dust extraction system with your tools. This helps reduce the risk of inhaling harmful particles.
- Avoid windy conditions: If possible, repair on a calm day to minimize dust dispersion and keep paint fumes contained.
- Wet down surfaces: Before cutting or grinding, wet down rusted areas to control dust. Re-wet as needed during the process.
Quick rule: Always prioritize safety over speed. A few extra minutes spent on PPE can prevent serious health issues later.
Recommended tools and consumables
Having the right tools and materials makes your repair job easier and more effective. Here’s a checklist to help you gather what you need.
- Reciprocating saw or oscillating tool: For cutting through rusted corner bead. Use a metal-cutting blade (4–6 TPI).
- Angle grinder with cutoff wheel: For grinding off remaining rust and preparing surfaces. Use a 4–4.5 inch, 24–60 grit cutoff wheel.
- Hammer and cold chisel: For chipping away loose or stubborn rust. Be careful not to damage the underlying wall surface.
- Utility knife: For scoring and cutting through old paint and caulk. Use a sharp blade for clean cuts.
- Tape measure: Essential for accurate measurements when installing new corner bead.
- Square: To ensure straight lines and 90-degree angles during installation and repair.
- Pry bar: For prying off damaged corner bead and preparing the surface for repair.
- Replacement corner bead (metal or vinyl): Choose a type that matches your existing bead, if possible. Ensure it’s rust-resistant if replacing metal bead.
- Patching/fill material: Use a cementitious patch or hydraulic cement for filling gaps and holes. These set quickly and are strong.
- Bonding agent or adhesive: Apply this to help new corner bead stick to the wall surface and ensure a strong bond.
- Reinforcing mesh or fiberglass tape: Use this to strengthen repaired areas and prevent cracking. It’s especially useful for large repairs.
- Skim coat or mortar mix: Apply this after repair to create a smooth, even surface ready for painting.
- Corrosion-inhibiting sealant (optional): Apply this to protect repaired areas from future rust and moisture intrusion. It’s an extra layer of protection.
Quick rule: Invest in quality tools and materials. While budget-friendly options exist, they may not perform as well or last as long, leading to rework and additional costs.
Identifying Rust and Hidden Problems
Define rust types you might see on corner bead: surface rust versus deep pitting or active corrosion. Each type guides whether you replace the bead or address backing material. Refer to product data sheets or manufacturer guidance when in doubt.
Beyond rust, watch for water stains, mold, edge swelling, or tape lifting that signals moisture history and repair scope changes. Use a moisture meter and a thin putty knife to probe for hollow spots and fastener integrity. Document findings to adjust the plan as needed.
Visual and tactile indicators of corrosion
The first step in identifying rust on corner bead is to look for visible signs. Rust appears as red, orange, or brown flakes or powder on the surface. Here’s what you should be looking for:
Surface Rust: This is the most common type and usually indicates minor corrosion. It can often be sanded off and painted over.
Deep Pitting: If rust has penetrated deep into the metal, it will appear as small holes or pits. This requires more extensive repair, possibly including bead replacement.
Use your fingers to feel for loose beads or soft drywall edges. Map out the spread of corrosion to determine the full extent of damage.
Using moisture meters and probes
Moisture meters and small probes are essential tools for finding hidden leaks or wet framing. Here’s how to use them:
Set your moisture meter to the wood mode (if applicable) and scan the area around the rusted corner bead. Readings above 15% indicate a problem.
Use a thin putty knife to probe for hollow spots in the drywall or behind the corner bead. If you find any, use your moisture meter to check for moisture inside.
Check fasteners like screws and nails with your moisture meter. If they’re wet, it could indicate a leak or framing damage that needs repair before proceeding.
Step-by-Step Cutting Back Technique
Define how far back to cut from the rusted corner bead to expose