
Introduction
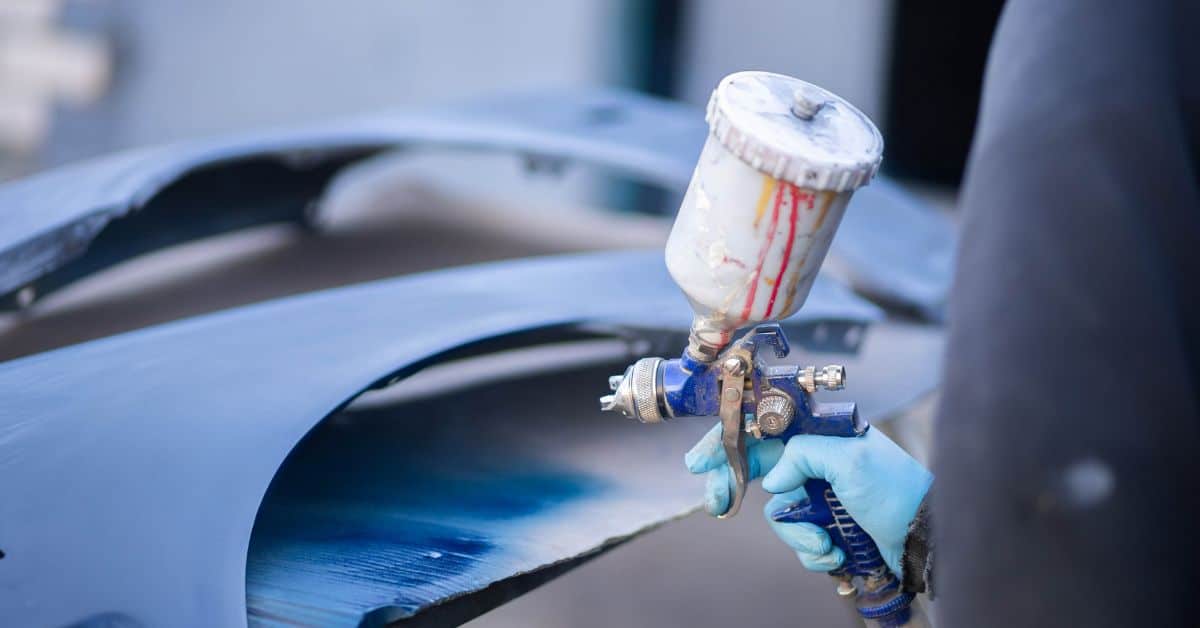
Cissing and fish eyes are paint flaws where the film pulls away and forms tiny voids around a contaminant. They’re usually caused by surface residues that keep the paint from sealing properly. Silicone or oily films on the surface are common culprits.
Prevention starts with a thorough clean and decontamination of the substrate so the paint can form a smooth, uniform film. If you see spots that look off, wipe and re-check the surface, then follow the manufacturer’s guidance for cleaners and compatible primers. Repair usually involves removing the affected area, re-cleaning, and re-priming before repainting; check your product instructions for acceptable repair steps.
Key takeaways
- Cissing and fish eyes are small craters or halos on paint film caused by contaminants.
- Silicone contamination sources include cleaners, release agents, and silicone-based products.
- Follow PPE guidelines and ventilation when applying degreasers and cleaners.
- Inspect surfaces before paint with hands-on visual checks and look for oily sheen.
- Remove contaminants at source by sealing work area and using dedicated brushes, rags, and PPE.
- Allow for rework planning and repairs if fish eyes appear, using proper re-prep.
Table of Contents
- Introduction
- Key takeaways
- Understanding Paint Cissing and Fish Eyes — Clear Definitions and Appearance
- Primary Sources of Silicone and Low-Surface-Tension Contaminants
- How Airborne Contaminants Travel and Settle on Surfaces
- Pre-Paint Surface Inspection and Visual Checkpoints
- Step-by-Step Surface Decontamination Procedure
- Preventive Shop Controls and Good Practices
- Repair and Rework Strategies for Fish Eyes and Cissing
- Planning, Safety, and Cost Considerations
- Conclusion
- FAQ
Understanding Paint Cissing and Fish Eyes — Clear Definitions and Appearance
Fish eyes are circular, crater-like voids that interrupt film continuity, often with a glossy ring around a clear center. Cissing appears as small dimples or pinhole-like impressions where the coating fails to wet correctly. These terms matter because they point to different root causes and corrective steps, not just a generic defect.
On wet films, fish eyes can look like shiny voids that disappear as the film dries, while craters may widen or deepen with time. On cured films, both defects may remain visible but behave differently under light and touch. Distinguish crater morphology from other defects like pinholes or blisters to guide decontamination and recoating decisions.
What fish eyes and cissing mean
Fish eyes and cissing are defects that appear on painted surfaces. They’re caused by localized surface tension failure around a contamination source.
Fish Eyes: These are circular voids or dish-shaped craters, often with a raised edge. Silicone and oils can produce these.
Cissing: This is when the paint forms tiny blisters or wrinkles on the surface. It’s usually due to improper surface preparation or contamination.
Visual differences and common misidentifications
Fish eyes, cissing, orange peel, solvent pop, and dust nibs all look different. Here’s how to tell them apart:
Fish Eyes: Look for circular or crater-like defects with a raised edge.
Cissing: See tiny blisters or wrinkles on the surface.
Orange peel has a textured, orange-peel-like appearance. Solvent pop looks like small bubbles bursting through the paint film. Dust nibs are tiny, hard particles embedded in the paint.
Primary Sources of Silicone and Low-Surface-Tension Contaminants
Typical silicone sources include polishes, release agents, silicone-based sealants, anti-foam additives, certain personal care products, and some tapes or adhesives. Even trace amounts can produce fish eyes or cratering in a freshly applied coating. These sources are often portable and can travel on tools, clothing, or air currents.
To manage this risk, trace sources quickly by interviewing operators, reviewing product usage logs, and performing targeted surface tests in suspected zones. Implement a four-step workflow: identify sources, contain and isolate, decontaminate and test, then verify before coating. Documentation and routine housekeeping help prevent recurrence.
Process and product sources in the shop
The paint shop itself can be a hotbed of silicone contamination. Here are some common culprits:
Body shop cleaners often contain silicones to help degrease and clean surfaces. Detailing compounds, used for polishing and protecting car bodies, also frequently include silicones.
HVAC systems might use silicone-based oils that can leak or be carried by airflow into your paint booth. Materials used during masking and prepping, like certain tapes and adhesives, may also contain silicones.
Personnel and touch-transfer sources
Your team’s personal care products can unintentionally introduce silicone contamination. Here’s how:
Skin lotions, hair products, or even sunscreen can contain silicones that transfer onto parts when touched. This is especially true for gloves and clothing that have been previously used in contaminated areas.
To control this, ensure your team knows not to bring these products into the work area. Provide clean gloves and aprons, and encourage regular hand washing.
How Airborne Contaminants Travel and Settle on Surfaces
Air currents, HVAC transfer, spray booth plumes, exhaust outlets, and hang-drying zones can carry silicone droplets and oily aerosols long distances. Humidity and temperature influence how far particles travel and where they deposit. Defects can appear remote from the source due to shared air paths.
Look for deposition patterns across panels, especially near intakes or vents, and note inconsistent adhesion near air movement zones. Use smoke tests or flow indicators to map patterns, review maintenance logs, and plan staged cleaning to reduce recontamination risks. Plan isolation or enclosure where practical to minimize spread.
Typical pathways and hotspots
Airborne contaminants don’t just float around aimlessly. They follow specific routes, often concentrating on certain surfaces. Here’s where to look:
Spray booths are prime suspects. Contaminants can cycle through intake and exhaust systems, creating a loop of trouble.
Open doors and windows let in fresh air, but they also invite contaminants from outside or other parts of the workshop.
Drying racks and workbenches are where contaminants love to hang out. Check these hotspots for signs of silicone droplets or oily aerosols.
Monitoring and detection tactics
Catching contamination early is key to preventing widespread issues. Here are some simple monitoring methods:
Set up white test panels. If they show signs of contamination, it’s time for a deeper clean.
Perform solvent wipe tests. Wipe surfaces with a suitable solvent and check for residue. If you find any, you’ve got contamination.
Regular visual checks are crucial. Inspect surfaces for abnormal spots or inconsistent adhesion before painting.
Pre-Paint Surface Inspection and Visual Checkpoints
Establish contamination indicators such as visible residues, silicone transfer, and differences between fish eyes and crater defects. Distinguish silicone issues from water, efflorescence, or other mineral deposits. Document observations to support corrective actions.
In addition to visual checks, perform tactile assessments like drag tests for slickness and test surface tackiness. Note substrate moisture, temperature, and dew point alignment, as these factors affect test validity. Use a standard inspection log with photos and repeatability notes before primer or topcoat.
Solvent Wipe and Tape Adhesion Checks
Before applying primer or topcoat, perform these checks to reveal any oils, silicones, or poor adhesion areas.
- Prep solvent: Use isopropyl alcohol (IPA) or an approved solvent. Saturate a clean cloth.
- Wipe test: Wipe the surface in multiple directions. Look for residue transfer, color change, or streaking.
- Tape pull: Apply painter’s tape, let it sit, then pull off quickly. Check for residue or poor adhesion.
- Repeat: Re-wipe and re-tape areas that show contamination or poor adhesion.
- Inspect edges: Check corners and edges where contaminants often hide.
- Document findings: Note any issues, their locations, and actions taken.
- Re-evaluate after cleaning: If you’ve cleaned the surface, repeat these checks to ensure decontamination was successful.
- Consistent results: Ensure all tests show no residue or poor adhesion before proceeding with primer or topcoat.
Quick rule: If tests fail, re-evaluate and clean the surface. Do not proceed until tests pass.
Test Spray Panels and Dry-Hold Trials
Before starting high-value work, always test your paint on a small panel or inconspicuous area to confirm no fish eyes appear.
- Prepare panel: Prep a small, hidden area (e.g., behind a door) matching the main surface.
- Spray test: Spray your paint on the panel using your intended method and pressure.
- Let dry: Allow the paint to dry according to manufacturer’s instructions.
- Inspect for fish eyes: Check the panel for any signs of fish eyes or other defects.
- Dry-hold test: If no issues, perform a dry-hold test by taping over the panel and pulling off quickly after drying.
- Re-spray if needed: If fish eyes appear, re-evaluate your prep, spray method, or paint. Re-test until clear.
- Document results: Note test conditions, outcomes, and any actions taken.
- Proceed with caution: Only start high-value work after passing multiple tests under similar conditions.
Quick rule: Never assume your paint will perform perfectly. Always test first to avoid costly rework.
Step-by-Step Surface Decontamination Procedure
Follow a fixed sequence: wash, rinse, degrease, dry, decontaminate with approved agents, then a final wipe. Insist on proper order to reduce recontamination and ensure a film-free surface. Verify each step with an inspection before moving forward.
For each step, specify detergents, agitation methods, water quality, and dwell times that maximize contaminant removal without harming the substrate. Always check labels or SDS/technical data sheets for compatibility with primers and coatings before use.
Step-by-Step Process
The following is a clear, numbered sequence of practical steps for step-by-step surface decontamination procedure. This will ensure your surfaces are clean and ready for painting.
- Preparation: Gather necessary tools, PPE, and check safety measures like ventilation. Ensure water supply is adequate and at suitable temperature (around 100°F/38°C).
- Wash: Use a pH-neutral detergent with mechanical agitation (e.g., pressure washer or scrub brush) to remove loose dirt and debris. Rinse thoroughly.
- Rinse: Rinse the surface with clean water, ensuring no soap residue remains. Repeat if necessary.
- Degrease: Apply a degreaser suitable for your substrate (e.g., concrete degreaser) and let it dwell for 10-15 minutes to break down oils and greases. Rinse again.
- Dry: Allow the surface to air-dry completely or use heat guns/blowers to speed up the process. Ensure no moisture remains, as it can cause defects.
- Decontaminate: Apply an approved decontamination agent (e.g., silicone remover) following the manufacturer’s instructions and safety guidelines. Let it dwell for the recommended time (usually 15-30 minutes).
- Final Wipe: Using a lint-free cloth dampened with an approved solvent, wipe the surface to remove any residue or contaminants.
- Inspection: Perform a final inspection to ensure the surface is clean, tack-free, and residue-free before proceeding with painting. If unsure, consult a professional.
Recommended cleaning products and methods
To effectively clean your surfaces, use the following types of cleaners at appropriate stages:
pH-neutral wash: Use this first to remove dirt and debris. It’s safe for most substrates and won’t leave residue that could affect paint adhesion.
Dedicated silicone removers: Apply these after degreasing to target silicone-based contaminants. Follow the manufacturer’s instructions and safety guidelines, ensuring compatibility with your substrate and coatings.
Solvent wipes/clay bars: Use these for final-stage cleaning or spot treatment of stubborn residues. Ensure they’re compatible with your surfaces and won’t damage them.
Always verify the compatibility of cleaners with your substrates, primers, sealers, and coatings using product labels and SDS/technical data sheets to avoid damaging your surfaces.
Final wipe and preparation immediately before painting
The final-stage cleaning is crucial to minimize recontamination prior to applying primer or topcoat. Follow these steps:
Approved solvent wipe: Use a lint-free cloth dampened with an approved solvent (e.g., xylene, methyl ethyl ketone) to wipe the surface. This removes any remaining contaminants and ensures a clean surface for painting.
Tack-free inspection: After wiping, allow the surface to sit for 10-15 minutes to ensure it’s tack-free. This indicates that no residue or solvent remains on the surface, making it ready for primer application.
Timing is essential in this final stage to prevent recontamination. Perform the final wipe immediately before painting to maintain a clean, film-free surface.
Preventive Shop Controls and Good Practices
Engineering controls include directional airflow, HEPA filtration, and clear shop zoning to separate coating, curing, and cleaning activities. Dedicate tool/material stations to prevent cross-contact and carryover of residues. Workflows should minimize overlap that leads to recontamination.
Administrative controls cover standardized checklists, visible signage, and routine decontamination between tasks. Use sealed, labeled consumables and proper waste handling to cut contamination risk. PPE and training, plus routine inspections, help sustain prevention gains and reduce rework.
Environmental and consumable controls
First, let’s control our environment. Silicone can travel on air currents, so we need to manage airflow.
Use HEPA filtered booths or portable HEPA filters near painting areas. This traps airborne contaminants, including silicone dust from sealants and polishes.
Speaking of sealants and polishes, keep them away from paint areas. They’re silicone-rich and can easily contaminate surfaces.
Now, consumables. Stick to silicone-free tapes, masks, and cleaners. Silicone in these products can transfer onto surfaces and cause issues later.
Personnel procedures and training
Next, let’s set some shop rules for our crew. No lotions or creams in the paint area – silicones can be present in these too.
Mandate clean-room garments. These help prevent touch-transfer contamination.
Change gloves often and wipe hands regularly with a clean, damp cloth. This minimizes silicone transfer from hands onto surfaces.
Training is key. Ensure everyone knows these rules and their importance. Use audit checklists to verify understanding and adherence.
Repair and Rework Strategies for Fish Eyes and Cissing
Use decision criteria that consider defect type, size, location, substrate, coating system, and service conditions to choose spot repair or full panel recoat. Map defect boundaries and document observations before starting repairs. Isolation and containment are key to preventing spread during repair.
Repair steps include gentle feathered sanding, thorough cleaning, and verifying decontamination with a solvent wipe or industry-standard check. Prime and refinish as directed by the coating system, then inspect for new defects and confirm adhesion. Consult manufacturer guidance when needed and record all relevant data for QA traceability.
Spot Repair Workflow
For small, isolated defects like fish eyes or cissing, spot repairs can save time and material. Here’s how to do it right:
Isolate the defect: Contain the area using painter’s tape to prevent contamination of surrounding surfaces.
Gently sand: Lightly sand the affected area using fine-grit sandpaper (e.g., 220 or 320 grit) to feather edges and promote adhesion. Be careful not to create new defects.
Clean thoroughly: Use recommended cleaning products and methods from your earlier surface decontamination procedure to remove oils, contaminants, and any residue from sanding. Verify complete decontamination with a solvent wipe or ISO cleanliness standard.
When to Strip and Refinish the Complete Area
Sometimes, spot repairs aren’t enough. Here are signs it’s time for a full strip and recoat:
Multiple defects: If fish eyes or cissing cover a large area, attempting spot repairs could lead to an uneven finish.
Widespread contamination: If your initial surface inspection revealed extensive contamination, a full strip and recoat might be necessary to ensure a durable, long-lasting finish.
Failed spot repairs: If previous spot repair attempts have failed or new defects appear after reapplication, it’s time to consult the coating manufacturer and consider stripping the entire area for a fresh start.
Planning, Safety, and Cost Considerations
Start with a pre-job planning checklist that covers materials, tools, surface prep steps, and a small test patch to verify adhesion and decontamination efficacy. Assess environmental factors to tailor ventilation and safety measures. Document responsibilities and schedule early to prevent delays.
Address safety PPE and chemical handling, waste management, and ventilation requirements. Consider cost implications of prevention versus rework, including downtime and material waste. Define a plan for testing surface cleanliness, silicone residue removal, and acceptance criteria before proceeding to coating steps.
Pre-job risk checklist and mitigation steps
Before you start any decontamination work, go through this checklist to minimize risks.
- Verify cleaning products: Check that you have the right solvents for the job. Some silicones require specific chemicals to remove them.
- Prepare test panels: Always do a small-scale test patch first to ensure your chosen method works on your surface.
- Isolate contamination sources: Identify and isolate areas with heavy silicone contamination to prevent spread during cleaning.
- Trained staff: Ensure your team knows how to handle solvents safely and follow the decontamination process correctly.
- Check surface condition: Inspect for any damage or weaknesses that could be exacerbated by cleaning.
- Moisture test: Check for moisture behind walls, under flooring, etc. Solvents can trap moisture, leading to mold growth if not dried properly.
- Verify ventilation: Ensure adequate airflow in the work area to prevent solvent buildup and fumes.
- Check local regulations: Make sure you’re compliant with any local rules regarding hazardous waste disposal and solvent use.
- Contingency plan: Have a backup plan if contamination is detected during the process, such as stripping and refinishing the entire area.
Quick rule: If you skip these checks, you risk damaging surfaces, wasting materials, or even causing health hazards.
Safety, PPE and regulatory notes
Your safety and compliance are paramount during this process. Here’s what you need to know:
Wear appropriate PPE: Gloves, goggles, coveralls, and a respirator or mask are essential when handling solvents.
Safe solvent use: Always follow the manufacturer’s guidelines for safe handling and storage. Never mix different types of solvents together.
Familiarize yourself with local regulations and SDSs (Safety Data Sheets). They provide crucial information on safe usage, potential hazards, and proper disposal procedures.
Cost implications and decision factors
The key cost drivers in this process are materials, labor, downtime, and waste. Here’s how to consider them:
Rework costs: If you don’t decontaminate properly the first time, you’ll face additional labor, material waste, and potential project delays due to rework.
Prevention costs: Investing in proper training, controls, and consumables upfront can prevent these issues, but there’s an initial cost involved.
To estimate economic trade-offs, document the following for your given shop: expected rework rate, surface contamination risk, primer/adhesive compatibility costs, labor rates, material costs, and downtime impacts on project schedules.
Conclusion
Protecting your finish comes down to controlled prep and clean surfaces. By spotting silicone contamination early and following a steady decontamination routine, you protect durability, appearance, and safety.
First, inspect the area and surface for any signs of fish eyes or cissing, then plan your cleaning and decontamination steps in the right order, using small tests first and stopping if you see any adverse reaction. Check more than one spot, verify that tools and cloths are free of low-surface-tension residues, and confirm the surface feels clean to the touch before applying paint or sealant. Keep the cleanup area organized, ventilated, and free of clutter, and wear the proper eye and skin protection at all times. If in doubt, run a quick test in a hidden patch to confirm the process won’t cause damage.
Common mistakes to avoid are skipping a test area, rushing steps, and overwetting or using incompatible cleaners that can leave residues. Safety rules to follow: seal off dust-creating zones during work, use clean rags and dedicated tools, dispose of cleanup waste properly, and never apply finish over a surface that hasn’t passed the inspection. Keep airflow controlled, work in good light, and never force a repair that would gouge or haze the surface.
If the surface shows persistent gloss loss, stubborn contaminants, or repeated fish eyes after careful decontamination, consider calling a pro before you compound the problem. A professional can spot hidden sources and suggest wash methods or primers that fit your material and budget. Stay methodical, stay safe, and you’ll get a smooth, lasting result you can be proud of.
FAQ
What exactly are cissing and fish eyes, and how do they show up in paint?
Cissing looks like tiny gaps or craters where the paint didn’t film evenly. Fish eyes are small, circular craters that appear where the surface pushed back and left a bare spot. Both tell you the surface wasn’t clean enough or had contamination.
What causes silicone contamination to form fish eyes or cissing?
Silicone and low-surface-tension residues on the surface repel water and pucker the film. These contaminants can come from old sealants, wax, cleaners, or certain primers and lubricants. Check the product label and manufacturer instructions to see if it leaves residue.
How can I prevent these defects during prep and painting?
Start with a thorough decontamination and follow the product’s prep steps. Use clean tools, fresh paint, and avoid silicone-based products near the work area. If in doubt, test a small area first and verify the surface is dry and clean per the maker’s guidelines.
What repair steps should I take if I already have fish eyes or cissing?
Sand lightly to feather the edges and re-clean the surface before recoating. If the issue persists, remove the affected layer and reapply with proper cleaning and a fresh batch. Always confirm the surface is free of contaminants by checking the label or instructions before proceeding.