

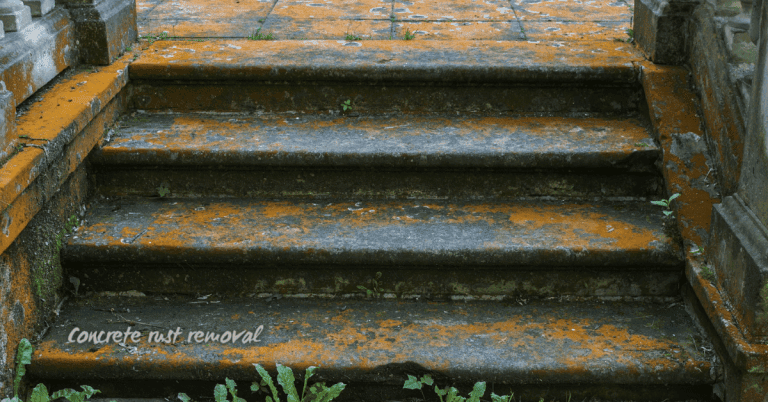
Introduction
Degreasing concrete means removing oil and grease from the surface without leaving a soapy film. Start by loosening the stain with a detergent or degreaser as per the product label, then use a poultice or a scrub with a stiff brush and rinse thoroughly with clean water. Make sure you rinse lots and check that no residue remains before finishing.
Practical options include simple mixes like baking soda, a little vinegar, dish soap, or hydrogen peroxide applied to the stain and allowed to work, followed by rinsing. For tougher spots, consider commercial degreasers or professional methods such as pressure washing, while avoiding harsh steps that could damage or etch the concrete; always follow manufacturer instructions and test on a small area first. Plan for future prevention by sealing or using absorbent mats, and check local rules or product labels for safe use and disposal guidance.
Key takeaways
- Understanding porosity and stain age guides degreasing strategy and product choice.
- Use detergents with thorough rinsing to prevent soap films and residue on surfaces.
- For oil stains, use poultices or absorbents; baking soda, dish soap, or hydrogen peroxide can help.
- Mechanical methods like pressure washing or grinding may be required for deep stains.
- Safety: wear gloves and eye protection, ventilate area, and never mix cleaners.
- Seal concrete after cleaning and address spills promptly to curb future stains.
Table of Contents
- Introduction
- Key takeaways
- Why Degreasing Concrete Is Different — Porosity, Penetration, and Stain Age
- Tools and Materials Checklist for Safe, Effective Degreasing
- Detergents and Rinse Methods That Do Not Leave Soap Residue
- Poultices and Absorbent Methods for Deep or Set-in Stains
- Mechanical and Professional Methods: Pressure Washing, Grinding, and Specialty Services
- Bioremediation and Environmental Impact of Cleaning Choices
- Step-by-Step Cleaning Plans and Maintenance Schedules
- Conclusion
- FAQ
Why Degreasing Concrete Is Different — Porosity, Penetration, and Stain Age
Concrete isn’t a uniform sponge. Porosity governs how deeply an oil or grease stain can travel, so higher porosity means deeper penetration and a bigger role for absorptive poultices or solvent-assisted extractions rather than simple surface cleaners. A quick porosity check, like a water bead test or a simple absorption run on a small area, helps you gauge treatment intensity. Visual cues such as darkening or lingering odor also hint at deeper saturation that needs a staged approach.
Distinguishing surface cleaning from deep extraction matters because fresh stains often respond to rinses and mild detergents, while older stains require stronger chemistries or repeated poultice applications to draw oils out of the pores. Plan a flow: start with milder cleaners for quick surface flushes, move to poultices or solvent-based options for medium penetration, and reserve repeated cycles or professional methods for very old or polymerized stains. Always check label guidance, manufacturer instructions, and local rules before mixing cleaners or applying strong solvents.
Fresh vs. old stains — cleanup urgency and expected results
Fresh oil spills on concrete can be tackled quickly with absorbents or light detergents. They haven’t had time to penetrate deep, so expect good results.
Older stains, however, have seeped in. They need stronger chemistry, repeated poultice applications, or even mechanical action. Expect a longer process and potentially less-than-perfect results.
Remember, old stains might have polymerized, making them harder to remove entirely.
How concrete porosity and sealers change strategy
Porous concrete absorbs oils deep. Here’s how it affects your cleanup:
- High porosity: Use poultices or solvent-assisted extractions to draw out absorbed oils.
- Low porosity: Surface cleaning might suffice, but test first.
Sealers protect concrete. They change strategy like this:
- Unsealed: Oils can penetrate; use full range of methods.
- Sealed: Oils sit on top; surface cleaning or light poultices usually work.
Tools and Materials Checklist for Safe, Effective Degreasing
Safety first: equip appropriate PPE, including gloves, eye protection, and respiratory protection where needed. Keep ventilation in open work areas and avoid trapping fumes near walls or doorways. If you’re dealing with coatings or sealers, plan for neutralizing residues and protecting adjacent surfaces.
Assemble a complete toolkit: stiff brushes, scrapers, absorbents, compatible solvents or poultices, testers, pumps, and rinse aids. For pressure washing, note the surface and spray settings, then compare options for nozzle types and water flow. Decide whether to buy or rent based on project size, frequency, and the availability of professional gear on your side. Always verify concrete mix types, coatings, sealants, and epoxy floors compatibility with your chosen cleaners and methods using product labels and manufacturer guidance.
Brushes, scrapers, pressure washers, and application tools
Before you start degreasing, gather the right tools to ensure effective cleaning.
- Stiff-bristle brush: For scrubbing tough grease. Not too stiff, or it might damage the concrete.
- Scraper: To remove thick grease deposits before brushing.
- Pressure washer: Essential for rinsing. Rent if you don’t own one.
- Nozzle types: Fan nozzle for general cleaning, targeted nozzle for tight spots.
- PSI and GPM: Pressure washer should have at least 1200 PSI and 1.6 GPM for effective degreasing.
- Extension wand: To reach high or hard-to-get areas.
- Safety nozzle: To prevent injury from high-pressure water streams.
- Pump sprayer (optional): For applying degreasers if you’re not using a pressure washer.
Quick rule: Always test your tools on a small, hidden area first to avoid damaging the concrete.
Degreasers, household cleaners, poultice materials, and absorbents
Choose the right degreasing agents based on your grease type and concrete condition.
- Commercial degreaser: For heavy-duty grease. Always test on a small area first.
- Dish soap: Suitable for light grease. Avoid strong soaps that can leave residue.
- Baking soda: A mild abrasive and degreaser. Mix with water or use as a poultice.
- Hydrogen peroxide (3%): Can help break down grease stains. Use carefully, as it can lighten concrete color.
- Kitty litter: Absorbent for fresh grease spills. Leave on until dry, then sweep off.
- Clay poultice base: For tough stains. Mix with degreaser and apply as a paste.
- Baking soda poultice: Less messy than clay. Mix with water and degreaser, apply, cover, and let sit.
- Rinse aid (optional): To help water sheet off and prevent streaks or residue.
Quick rule: Never use acid-based cleaners on concrete. They can damage the surface.
Personal protective equipment and safe handling supplies
Safety first! Always wear appropriate PPE when degreasing.
- Rubber gloves: To protect hands from chemicals. Choose a good fit for better grip.
- Eye protection: Safety glasses or goggles to prevent chemical splash in eyes.
- Respirator (optional): For heavy-duty degreasers with strong fumes. Choose a NIOSH-approved model.
- Long sleeves and pants: To protect skin from chemicals and high-pressure water streams.
- Waterproof boots: To prevent slipping and protect feet from chemicals.
- Berms or drain covers: To contain runoff and prevent contamination of drains or water sources.
- Trash bags: For disposing of used absorbents and other waste materials.
Quick rule: Always follow manufacturer’s guidelines for PPE use and disposal of chemicals.
Detergents and Rinse Methods That Do Not Leave Soap Residue
Surfactants can leave a thin film if they foaming agents or high concentrations linger, especially when temperatures are warm and water is hard. The right detergent behaves differently on porous concrete, and its formulation matters for residue. Look for low-foaming, biodegradable options and note whether a formulation is alkaline or solvent-based.
Rinse strategy matters as much as the cleaner. Start with a clean-water rinse, apply the detergent in a targeted manner, then perform thorough rinse passes and finish with a clean-water flush. Water quality affects results, so consider distilled or deionized water when mineral content or pH could leave trace residues. Use test patches and surface wipe checks to confirm a complete rinse before sealing or resealing. If unsure, consult product data sheets, labels, or local guidance before proceeding.
Choosing detergents that rinse clean — product attributes to look for
When selecting a detergent for concrete degreasing, choose one with low-foaming or neutral-rinse properties. These detergents are designed to break down easily and won’t leave behind soap residue.
Look for these indicators on the label:
- Low foaming: This means the detergent produces minimal suds, making it easier to rinse off.
- Biodegradable surfactants: These break down naturally and won’t leave a film behind.
- Alkaline-based: Unlike solvent-based degreasers, alkaline detergents are less likely to leave residue. They also work well on concrete due to its alkaline nature.
Rinse techniques: hot water, flow rate, squeegees, and multiple rinse passes
To ensure a thorough rinse:
- Use hot water (around 140°F or 60°C) to help break down the detergent.
- Apply water at a steady flow rate using a pressure washer or garden hose, ensuring continuous contact with the surface.
- Use a squeegee or wet-vac to remove standing soapy water. This helps prevent residue from drying back onto the concrete.
- Repeat the rinse process multiple times, until the runoff is clear and no suds are present.
How to test for soap residue on concrete
Before sealing or resealing your concrete, perform a simple test to ensure all soap residue is gone:
- Observe the rinse water clarity. If it’s clear and suds-free, you’re likely good to go.
- Perform a tactile/residual feel test: Run your hand over the surface. If it feels smooth and residue-free, you’re done. If it feels slippery or sticky, re-clean and rinse.
- Check for any staining or streaking. If present, re-clean and rinse until the surface is clean and clear.
Poultices and Absorbent Methods for Deep or Set-in Stains
Poultices shine when stains are set in or deeply absorbed, and they complement rinsing steps in a full degreasing plan. They’re preferred over aggressive scrubbing when you need to avoid smearing or embedding oils further. Identify whether a poultice will suit the stain type and concrete porosity, then choose the right formulation.
Poultice options include absorbent powders plus a solvent or mild oxidizer, with alternative binders and commercially available products. The mechanism relies on capillary action and adsorption to pull oils from pores before mechanical agitation. Apply a thick paste, maintain dwell time as needed, cover if required, then remove and rinse thoroughly. Consider ventilation and PPE, and verify compatibility with any existing coatings.
Common poultice recipes and how to choose them
A poultice is a mix of absorbent powder, solvent or oxidizer, and sometimes a binder. Here are common bases:
Absorbent powders: Diatomaceous earth (DE) or bentonite clay. DE is lighter, dries faster; clay sticks better, works slower.
Solvents/Oxidizers: Choose based on stain type. For oils, use mineral spirits or citrus solvents. For rust, try oxalic acid. Hydrogen peroxide for mold/mildew.
Application, dwell time, removal, and repeat treatments
Apply poultice thickly to the stain. Cover with plastic if needed. Let it sit:
– Oils: 24-48 hours
– Rust/Mold: 12-24 hours
Remove when dry. Rinse thoroughly. If stain persists, reapply or switch to mechanical cleaning.
Limitations of poultices and when they are not appropriate
Poultices won’t work on very deep stains or coated surfaces. Here’s why:
– Deep stains: Poultices can only draw out so much. Deep contamination needs mechanical agitation.
– Coated surfaces: Poultices won’t penetrate sealers. Remove sealer first, or switch to a compatible method.
Mechanical and Professional Methods: Pressure Washing, Grinding, and Specialty Services
Pressure washing offers different benefits depending on temperature and nozzle choice. Hot water can help loosen residues on some finishes, but cold water reduces risk of etching. Consider surface type and finish to avoid fiber damage or coating disruption.
Grinding provides a higher-impact option for embedded grime or stubborn oils, with attention to wear on sealers or thin coatings. When you lean into specialty services like chemical stripping or professional-grade degreasers, know what to expect from an experienced workflow. In all cases, use PPE, ventilate, prep the surface, mask adjacent materials, neutralize residues, and verify surface pH after any treatment. Save professional calls for stubborn stains, large areas, delicate finishes, or coatings that complicate DIY methods, and be sure to outline typical workflows and turnaround when you hire a pro.
Pressure Washing Best Practices and Environmental Precautions
When pressure washing concrete, choose a nozzle with a 40-degree angle for most surfaces. For delicate finishes or stamped concrete, use a 15-degree nozzle.
Keep the pressure below 1200 PSI to avoid damaging the surface. Hot water can help dissolve grease and grime, but it may also cause etches on certain types of concrete. Always test in an inconspicuous area first.
Contain runoff using tarps or barriers to prevent contaminants from entering local waterways. Check with your municipality for discharge rules before starting the job.
Abrasive and Chemical Options: Grinding, Acid Washing, and Coatings Removal
Mechanical grinding is ideal for embedded grime or oil. Use a diamond blade to avoid damaging the concrete. Expect to spend around 2-4 hours per 100 sq ft, depending on the severity of the stain.
Acid washing can strip stains quickly, but it also etches the surface, changing its profile. Wear full PPE, including acid-resistant gloves and goggles. Neutralize residues with a base solution afterwards.
For coatings removal, consider professional-grade degreasers or poultices. These are strong chemicals that require proper ventilation and safety measures.
Hiring a Pro — What to Ask, What to Inspect, and How to Compare Quotes
Ask potential contractors about their experience with similar jobs, the methods they use, containment measures, and disposal procedures. Request itemized quotes to understand what’s included in the price.
Inspect their work on-site if possible. Check for signs of damage or improper cleaning techniques. Ask for references and follow up with them.
When comparing quotes, consider the total cost, not just the hourly rate. A higher-priced service may offer better equipment or more thorough containment measures. Always prioritize quality over price.
Bioremediation and Environmental Impact of Cleaning Choices
Microbial or enzymatic cleaners work by breaking down grease and oil matrices with biological action rather than harsh solvents. They’re generally gentler on the concrete surface but can be slower with stubborn or highly hydrophobic stains. Fresh grease and cooking oils are often good candidates, while older deposits may require combined approaches.
When choosing greener options, weigh environmental safety against speed. Look for third-party certifications, non-toxic surfactants, and biodegradability, while avoiding phosphates and aggressive oxidizers. For disposal, follow local regulations and control runoff to prevent drain contamination. Use patch testing, monitor pH and residue, document results, and plan maintenance to reduce recurrence while balancing cost and environmental goals.
How Bioremediation Cleaners Work and When to Use Them
Bioremediation cleaners harness the power of microorganisms or enzymes to break down grease, oil, and other organic contaminants. They’re like tiny, natural cleaning machines.
Here’s how they work: Microbes or enzymes target the molecular bonds in grease and oil matrices, breaking them apart without harsh solvents. This process takes time – typically 24 to 72 hours – but it’s gentler on surfaces and better for diffuse or older contamination.
These cleaners are great for fresh grease, cooking oil, and biofilms. However, they might not be the fastest option for stubborn, old, or highly hydrophobic stains. For those, you may need to pair them with pre-treatments, mechanical agitation, or detergents.
Managing Wastewater, Runoff, and Local Disposal Rules
Proper management of wastewater is crucial to prevent environmental damage. Here’s how you can do it:
Isolate drains: Cover or plug floor drains before cleaning to prevent contaminated rinse water from entering the system.
Use containment: Place containment barriers around work areas to capture any runoff. This could be as simple as a few strategically placed tarps or more complex systems for larger projects.
Check local regulations: Before allowing rinse water to enter storm or sanitary systems, check with your municipality about disposal rules. Some places may require treatment before release, while others might prohibit it altogether.
Environmental Pros and Cons of Common Degreasers
When choosing a degreaser, consider both its effectiveness and environmental impact. Here’s a comparison of biodegradable formulations versus solvent-based cleaners:
Pros
- Biodegradable formulations break down naturally in the environment.
- They’re generally safer for users, with lower toxicity levels.
- Many are non-flammable and have low volatile organic compounds (VOCs).
- Some can be used on a wide range of surfaces without causing damage.
Cons
- Biodegradable cleaners may not work as quickly or effectively on tough stains compared to solvents.
- They might require more product and scrubbing for optimal results.
- Some users may find the cleaning process takes longer due to slower action.
- Cost can be higher than solvent-based alternatives.
Solvent-based cleaners, while often faster-acting, have environmental drawbacks like slow biodegradation, high VOCs, and potential surface damage. The choice depends on your specific needs, budget, and commitment to sustainability.
Step-by-Step Cleaning Plans and Maintenance Schedules
Three practical workflows fit common scenarios. Start with a quick emergency clean for fresh spills, emphasizing blotting, a light degreaser, and a fast rinse. After a brief check for moisture, you should be ready to reseal or recoat if the surface is clean.
For set-in stains, select an appropriate poultice or enzyme cleaner and apply in layers, covering as needed to maintain dwell time, then mechanically agitate and rinse thoroughly. Repeat as necessary. Finally, set up a seasonal maintenance plan with monthly inspections, quarterly deep cleans, and biannual resealing, tracking results in a log and adjusting products as the surface wears. Always verify compatibility with existing coatings, ensure proper ventilation and PPE, and test on a small area first before full application.
Step-by-Step Cleaning Process
The following is a clear, numbered sequence of practical steps for your step-by-step cleaning plans and maintenance schedules. It starts with preparation and safety checks, then does the main work, and finishes with cleanup or final checks.
- Preparation: Gather necessary tools (brushes, degreasers, PPE), check surface compatibility, and ensure proper ventilation.
- Safety Checks: Test cleaner on a small area, put on appropriate PPE, and confirm no reactions occur with existing sealers or coatings.
- Main Work – Quick Clean: For fresh spills, blot rather than scrub, apply a light degreaser solution, agitate with a stiff brush, rinse with clean water, and perform a rapid moisture check.
- Main Work – Deep Clean: For set-in stains, select an appropriate poultice or enzyme-cleaner, prepare a paste, apply in layers, cover to maintain dwell time, mechanically agitate during removal, and thoroughly rinse; repeat as needed.
- Final Checks: Document product names, ratios, dwell times, and water temperature. Perform moisture test after rinse and re-check after 24-72 hours for any residual staining or odor.
Emergency quick-clean procedure for fresh spills
When you spot a fresh spill on your concrete, act quickly to prevent penetration. Here’s how:
1. Blot the spill immediately using paper towels or rags. Do not scrub as this can drive the stain deeper into the pores of the concrete.
2. Apply a light degreaser or detergent solution to the affected area. Use a spray bottle for even application and to avoid over-wetting.
3. Let the solution sit for 5-10 minutes, then agitate gently with a stiff brush. Rinse thoroughly with clean water using a garden hose or bucket.
Deep-clean workflow for long-set stains
For set-in stains, follow this workflow to effectively remove them:
1. Assess the stain: Identify the type of stain and its severity. This will help you choose the right cleaner.
2. Choose a degreaser: Select an appropriate poultice or enzyme-cleaner based on your assessment. Always test on a small, inconspicuous area first.
3. Apply and agitate: Prepare the poultice according to instructions, apply in layers, cover with plastic to maintain dwell time, then mechanically agitate during removal using a stiff brush or pressure washer (if appropriate). Thoroughly rinse the area.
Routine maintenance and inspection checklist
Use this checklist to keep your concrete surfaces clean and well-maintained. Perform these tasks quarterly or as needed:
- Monthly Inspection: Check for new stains, cracks, or other signs of damage.
- Quarterly Deep Clean: Follow the deep-clean workflow to remove any set-in stains.
- Biannual Re-sealing: Apply a fresh sealant to protect your concrete and prevent future staining.
- Drip Trays/Mats: Place drip trays or mats under outdoor furniture, grills, or other potential sources of spills to catch drips before they hit the ground.
- Track Results: Keep a maintenance log noting products used, dates, and any issues encountered.
- Adjust Methods: Based on your results, adjust your cleaning methods or products as needed.
Quick rule: Regular maintenance is key to preventing small problems from becoming big, expensive ones. Stay on top of it!
Conclusion
What you do next matters as much as what you tried. Degreasing concrete the right way protects porosity, prevents stain sag, and keeps the surface looking solid long after the job is done. Stick to safe methods, and you’ll dodge costly mistakes and repairs.
Test first in a small area to confirm you’re not chasing the stain or leaving residue, then work in a consistent order: assess porosity and stain age, gather the right detergent or poultice, rinse thoroughly with clean water, and dry before rechecking. If cleaning with detergents, choose products that rinse clean and avoid leaving soap behind; if deeper stains show up, use a poultice or absorbent method and repeat as needed, then consider mechanical options only after you’ve exhausted safer steps.
Two common mistakes kill results fast: using harsh cleaners without a rinse plan, and scrubbing too aggressively or using power tools where water ingress or oversaturation can occur. safety first means wear eye and skin protection, test patches, and keep venting and drying zones clear. Don’t mix cleaners unless you know it won’t generate fumes, and never let cleaners sit longer than the label says.
If the stain is stubborn, or if you’re dealing with structural concrete, moisture concerns, or delicate finishes, it’s smart to bring in a professional rather than push ahead. A pro can gauge porosity, choose compatible methods, and prevent surface damage. Stay practical, stay patient, and you’ll finish with a clean, durable floor you can point to with pride.
FAQ
What’s the best way to tackle fresh oil stains on concrete?
Blot up as much oil as you can with absorbent material, then rinse with water and apply a degreasing product or poultice designed for oil. Work it in according to the product label and repeat if needed. Don’t scrub with harsh solvents that could damage the surface without guidance.
Can I use common household mixtures like baking soda, vinegar, or Coca-Cola to remove oil stains?
Household mixtures can help lightly, but they aren’t reliable for deep stains. Use them only as a preliminary step and follow up with a neutral cleaner or a purpose-made degreaser. Always test a small area and check product instructions before wide use.
When should I consider commercial degreasers or professional methods?
For stubborn or old stains, commercial degreasers or professional methods may be needed. Read labels for safety and application guidance, and follow local rules. If you’re unsure, check the manufacturer instructions or ask a supplier for recommended options.
How can I prevent future oil stains on concrete?
Seal the concrete after it’s clean and dry, and address spills promptly. Use mats or absorbent barriers in trouble spots and keep a cleanup routine so stains don’t sit. Check the sealer’s maintenance needs and reapply as recommended by the maker.