
Introduction
Oil stains on concrete are marks from spilled oil that soak into the surface and can reappear after cleaning. This article walks you through poultice cleaners, degreasers, and why certain stains keep returning. It’s written for a hands-on DIY approach, with plain language and practical steps you can try.
You’ll learn how to apply a poultice cleaner, what to look for in degreasers, and how the oil-stain removal process typically unfolds. We’ll talk about product features and materials to consider and what to check on labels or manufacturer instructions before you buy. If a stain returns after treatment, reassess prep, absorbent material use, and contact time, and follow local rules and guidance.
Key takeaways
- Assess stain depth and type before choosing poultice or degreaser method carefully.
- Apply poultice evenly, cover with plastic, and allow thorough drying according to label.
- Degreaser choices vary; check compatibility with concrete surface and sealer.
- Agitation and mechanical brushing improve pickup and help lift embedded residues.
- Complete workflow blends degreaser, agitation, and poultice for better results.
- Always ventilate work area, wear PPE, and follow local disposal guidelines.
Table of Contents
- Introduction
- Key takeaways
- Quick Overview: How Oil and Grease Stain Concrete
- Poultices for Embedded Oil Stains
- Degreasers Suitable for Concrete Surfaces
- Complete Removal Workflow: Combining Degreasers, Agitation, and Poultices
- Why Some Oil Stains Return and How to Prevent Recurrence
- Safety, Environmental Impact, and Disposal Best Practices
- Tools, Materials Checklist and Cost Considerations
- Troubleshooting and Common Mistakes to Avoid
- Conclusion
- FAQ
Quick Overview: How Oil and Grease Stain Concrete
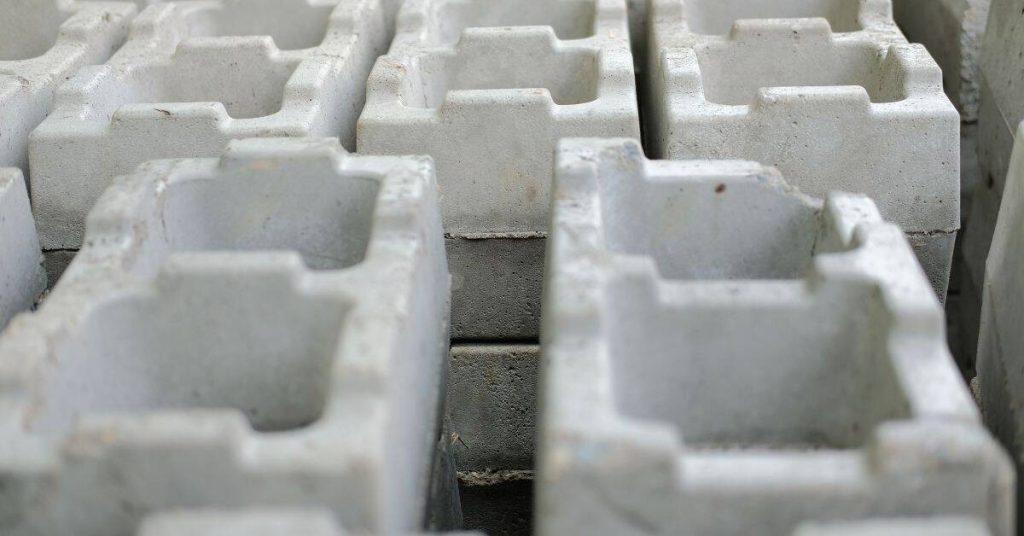
Oil and grease interact with concrete differently than with nonporous surfaces. Oil tends to bind with the porous matrix and can migrate inward, while grease may leave a sticky, layered stain if left untreated.
Embedded stains sit within capillary pores and are harder to shift with simple cleaners than surface slicks. Concrete porosity and moisture content drive how hydrocarbons diffuse and stain, influencing whether you tackle a fresh spill or an aged blemish.
Causes and common sources
Oil and grease stains on concrete are usually caused by vehicle leaks, cooking oil spills, machinery drips, or other hydrocarbon-based substances. The frequency and quantity of these incidents determine the severity of the stain.
Vehicle leaks, like engine oil or transmission fluid, can create large, dark stains over time. These often seep into the concrete, making them harder to remove.
Cooking oil spills and machinery drips typically leave surface-level slicks that can be easier to clean if addressed promptly. However, if left untreated, they too can penetrate and embed within the concrete.
How concrete porosity and age affect staining
The porous nature of concrete, along with its age and previous treatments, determines how deep stains go and what methods will work best to remove them.
Newer, well-cured concrete has a denser surface that can resist stain penetration. However, as concrete ages, its porosity increases, allowing oils and greases to seep deeper into the matrix over time.
Exposed aggregates or damaged surfaces can also accelerate staining due to increased surface area and reduced protection. Previous treatments like sealers may slow down absorption but won’t prevent it entirely if the stain-causing agent is given enough time to penetrate.
Poultices for Embedded Oil Stains
A poultice is a thick, absorbent paste that draws oils out of the surface. It’s often the best option for deep, set-in stains compared with scrubbing alone.
Poulticing works best on penetrated or older stains on porous concrete and smaller areas, while very sealed surfaces or large grease-heavy zones may respond less well. The typical recipe blends an absorbent base with a carrier and optional additives to pull contaminants toward the surface.
What a poultice does and the science behind it
A poultice is like a sponge for oil stains. It doesn’t just sit on top, but pulls the oil out of your concrete.
The secret? Capillary action and absorption. Imagine tiny tubes in the poultice sucking up the oil from the concrete’s pores. The more absorbent the poultice, the better it works.
Think of it like a big, strong magnet for oil. It attracts and draws out the stain, leaving your concrete cleaner.
DIY poultice recipes and material choices
The right materials make all the difference in a good poultice. Here’s what you need:
- Absorbent base: Clays, diatomaceous earth, or powdered fullers earth work well. Kitty litter can be used in a pinch.
- Solvent/binder: Water-based for light stains, solvent-based (like mineral spirits) for heavy ones. Match the strength to your stain’s severity.
- Optional catalysts: Enzyme or surfactant additives can boost performance but aren’t always necessary.
- Avoid: Don’t use materials that won’t bond well, like sand or gravel. They’ll just crack and fall off.
- Test first: Before applying to the whole area, test your recipe on a small spot to ensure it works as expected.
Step-by-step poultice application and removal
Here’s how to apply, wait, and remove your poultice for best results:
- Prepare the surface: Clean and dry the area. Remove any loose debris.
- Mix your poultice: Combine your absorbent base with a solvent or water until it forms a thick paste.
- Apply the poultice: Spread the paste evenly over the stain, about 1/4 to 1/2 inch thick.
- Cover and protect: Seal the poultice with plastic film to keep it moist. Tape the edges down.
- Wait: Leave it alone for 24-72 hours, depending on your stain’s severity.
- Test a small area: Before removing, check if the stain has lifted enough. If not, reapply and wait longer.
- Remove the poultice: Once done, gently scrape off the dried paste with a putty knife or trowel.
- Rinse: Clean the area with water to remove any residue.
- Dry and inspect: Let it dry completely, then check for any remaining stains. If needed, repeat the process.
Degreasers Suitable for Concrete Surfaces
Major degreaser categories include water-based/alkaline, solvent-based, enzymatic, and citrus/biobased products. Each type has its own strengths and limitations for concrete finishes.
Choose based on stain type and age, porosity, temperature, and how you plan to apply it. Safety, ventilation, and potential effects on sealers should also guide your pick.
Key product specs and labels to understand
When selecting a degreaser, read the label carefully. Here’s what you’re looking for:
pH level: Alkaline (high pH) cleaners are good for concrete but can damage some finishes. Acidic (low pH) ones should be avoided.
Biodegradability: Look for ‘readily biodegradable’ or ‘biodegradable’. This means it breaks down naturally, reducing environmental impact.
Certifications: EPA Safer Choice, Green Seal, or other eco-labels indicate lower toxicity and reduced environmental impact. Dilution and dwell time instructions are crucial to follow for effectiveness and safety.
Choosing the right degreaser for your situation
Match product strength to stain age/depth: fresh, light stains need mild cleaners; older, embedded ones require stronger ones.
Consider substrate condition: if concrete is porous or old, a stronger degreaser might be needed. But be cautious with acidic or high-pH products that could damage it further.
Prefer lower-toxicity options for sensitive areas like near plants or water sources. Always follow safety guidelines on the label and use PPE as directed.
For tough stains, consider a two-step process: start with an enzymatic or citrus-based degreaser to break down oils, then follow up with a stronger alkaline cleaner if needed. Always test spot durability before full application.
Complete Removal Workflow: Combining Degreasers, Agitation, and Poultices
Start by identifying the stain type and evaluating porosity, then sequence degreasing, rinsing, and poulticing for embedded residues. The goal is to loosen, wash away, and finally draw out remaining oils.
Match products to the surface and test a small patch first. Maintain a damp area for poultice application and follow label guidance for dwell times and repeat treatment if needed before a final rinse and dry.
Pre-treatment testing and small-area trials
Before tackling the entire stain, test a small, inconspicuous area. This helps you confirm:
Compatibility: Ensure your chosen degreaser and poultice won’t damage or discolor your concrete.
Dwell time: Check how long it takes for the products to work effectively on your specific stain.
Visual improvement: Assess if the treatment is lightening the stain enough to warrant full-area application.
Stepwise procedure for most stubborn stains
For tough stains, follow this step-by-step process:
1. Clean loose debris: Remove any dirt or dust that could interfere with product adhesion.
2. Apply degreaser and agitate: Spread the degreaser evenly, let it dwell as per label instructions, then use a brush or deck scrubber to work it into the stain.
3. Rinse or extract: Thoroughly rinse off the degreaser residue. If the stain persists, repeat the process before moving on to poulticing.
4. Apply poultice if needed: Mix your poultice and apply it thickly over the stain. Cover with plastic wrap or a damp cloth as directed by the product label.
5. Repeat testing: After removing the poultice, rinse and inspect the area. If the stain is still visible, repeat the process until satisfied with the results.
When to call a professional
While DIY methods can be effective for many stains, there are times when it’s best to leave the job to professionals:
Structural concerns: If you suspect the stain is due to structural damage or water issues, it’s wise to have an expert assess and address the problem.
Very large or hazardous spills: For extensive stains or those caused by hazardous materials, safety should be your top priority. Hire a professional equipped to handle such situations.
Failure after multiple DIY attempts: If you’ve tried various methods and the stain persists, it might be time to call in an expert. They have access to specialized equipment and techniques that could finally remove the stain.

Why Some Oil Stains Return and How to Prevent Recurrence
Recurring stains usually come from residual subsurface oil, nearby sources, or capillary wicking through pores and cracks. Each mechanism has its own telltale signs you can spot on site.
Preventive steps address both surface cleanup and subsurface issues, including sealing to block rise and removing nearby oil sources. Regular maintenance and moisture management help reduce future wicking and staining.
Residual oil, capillary action, and hidden reservoirs
Oil stains can return due to residual oil hiding deep within concrete pores. This oil can wick back up over time, especially in humid conditions or when water is present.
Single treatments might fail because they only tackle the surface stain, not the subsurface reservoir. Capillary action, like a wick in an oil lamp, draws the oil back to the surface.
Check for stains that seem to reappear after cleaning or during humid weather. Verify by applying a poultice and checking if it pulls out more oil.
Prevention: sealing, maintenance, and source control
To prevent recurrence, seal the surface after cleaning. Penetrating sealers block capillary rise while still allowing moisture to escape.
Maintain your concrete by re-cleaning and re-sealing every 2-5 years, depending on traffic and weather conditions. Regularly check for new leaks or oil sources nearby.
If you suspect an upstream leak, trace it back to the source and fix it. This could be a car dripping oil, a nearby machine, or even a underground pipe.
Safety, Environmental Impact, and Disposal Best Practices
Know the PPE essentials and ventilation needs to keep the work area safe. Choose lower-toxicity options when possible without compromising results.
Contain and label spent poultices and contaminated rinse water, and plan disposal according to local rules. Consider run-off controls and minimizing secondary contamination to soil or drainage.
Personal protection and safe handling
Safety comes first when dealing with concrete stains. Here’s what you need:
Gloves: Protect your hands from chemicals. Choose ones that fit well and aren’t too thick to handle tools.
Eye protection: Goggles or safety glasses are a must. They should wrap around your eyes and not fog up.
Keep pets and kids away. Follow label instructions to the letter. If it says wear a mask, do it. Don’t take risks with your health.
Environmental considerations and disposal guidance
We all want to protect our environment. Here’s how:
Determine if spent materials are hazardous: If it’s flammable, corrosive, or toxic, it’s likely hazardous. Check labels and MSDS sheets.
Find local disposal options: Contact your city or county waste management department. They can tell you where to take hazardous waste.
Choose biodegradable or lower-toxicity products when possible. It’s better for the environment in the long run.
Tools, Materials Checklist and Cost Considerations
List the essential tools and supplies and describe quick-use considerations. Store materials properly after use to keep the workspace ready for the next step.
When comparing prices, think about bulk versus single-use, rental versus purchase, and the overall workflow. Evaluate poultices, degreasers, and cleaners for compatibility with common finishes and environmental claims.
Visual checkpoints and how to document progress
Use this checklist to track stain reduction, note changes to substrate color/texture, and determine when a treatment is successful.
- Before starting: Photograph the stained area for reference. Mark the edges with chalk or tape.
- After pre-treatment: Check if the stain appears lighter. Note any changes in substrate color/texture.
- During application: Monitor poultice/degreaser action every 15-30 minutes. Reapply as needed.
- After cleanup: Inspect the area for remaining stains. Photograph or mark any persistent spots.
- After sealing: Check if the stain is no longer visible through the sealer. Note any color/texture changes.
- If skipped: You may miss signs of incomplete removal, leading to recurring stains.
Quick rule: Regular visual checks help you adjust your approach and ensure complete stain removal.
DIY vs. professional service: pros and cons
Consider these factors to decide whether to tackle oil stains on concrete yourself or hire a pro.
- Cost: DIY is cheaper upfront, but hidden costs (repeated attempts, damage) can add up. Professionals offer clear quotes.
- Time: DIY takes more time due to learning curve and trial/error. Pros have specialized equipment and experience.
- Control: With DIY, you control the process. With pros, you rely on their expertise but have less input.
- Effectiveness on deep stains: Professionals often guarantee results, especially for deep stains. DIY may require multiple attempts.
- Warranty/guarantees: Pros typically offer warranties. DIY has no such guarantees.
- Environmental impact: Both have impacts, but pros often use eco-friendly products and dispose of waste responsibly.
Quick rule: Weigh the pros and cons based on your budget, time, and confidence in tackling the job yourself.
Troubleshooting and Common Mistakes to Avoid
Identify frequent errors such as overly harsh solvents or skipping patch tests, and note corrective steps for each. Understand when to switch methods if results stall.
Follow a concise troubleshooting flow: prep, test patch, apply cleaner, wait, rinse, and repeat if needed. Document results and adjust for color transfer, surface bloom, or finish sensitivity as you go.
If the stain darkens, spreads, or leaves a ghost
Darkening or spreading indicates that the cleaner is reacting with the oil. Stop immediately to prevent further damage.
Stabilize the area by rinsing thoroughly and drying completely. If it’s a ghost (faint outline), the stain might be embedded. Try a poultice or stronger degreaser, but go slow.
If darkening persists, test for acidity using pH strips. If acidic, dilute with water and neutralize with baking soda before retrying.
When repeated treatments aren’t working
The stain might be deeply embedded, or there’s a barrier preventing absorption. Check for:
- Excessive porosity – try a deeper poultice.
- Previous sealers – they may need to be removed first.
- Contamination sources – ensure the area is clean and dry.
If still no luck, consider:
- Grinding: Remove the top layer of concrete.
- Professional remediation: They have tools for deep stains.
Conclusion
Getting oil and grease stains out of concrete is doable, but it pays to stay steady, follow the steps, and protect the surface and yourself. The result should look cleaner, last longer, and avoid costly fixes down the road.
Start with a simple, clear checklist: test a small area first with a degreaser or poultice appropriate for concrete, apply as directed, gently agitate or work the poultice into the stain, reapply as needed, rinse thoroughly, let dry, and repeat if any stain remains; dispose of waste properly and seal the area once everything is fully cured.
Common mistakes to avoid include mixing cleaners that aren’t designed to work together, over-wetting the concrete or letting liquids pool for long periods, and using harsh scrubbing tools that damage the surface; always test first and wear eye protection and gloves, and keep kids and pets away from the work zone for safety.
If the stain is very deep, the area is large, or you’re unsure about the cleaners or disposal rules, it makes sense to call a professional instead of forcing results; otherwise, stay patient, follow the workflow, and keep the surface protected so you can enjoy a clean, durable floor.
FAQ
How do I choose a poultice cleaner and apply it properly to embedded oil stains?
Start with the product label and manufacturer instructions. Apply a thick layer to the stain, cover with plastic, and let it sit as directed, then remove and rinse. If the stain stays, repeat or switch to a different poultice that targets oil compounds.
What should I look for in degreaser products for concrete, and are some brands more effective?
Check that the degreaser is compatible with concrete and safe for the finish you have. Look for user reviews about real-world results and follow label directions. If unsure, test on a small, inconspicuous area first before treating the whole stain.
Can you summarize the oil-stain removal process from start to finish?
Start with a cleaner or degreaser to loosen the oil. Agitate with a stiff brush or pad, then rinse. If the stain remains, apply a poultice and repeat as needed until it lightens or disappears.
What safety steps should I take when using cleaners and poultices on concrete?
Ventilate the area and wear gloves and eye protection. Read the product label for any required PPE and disposal guidance. If you’re unsure about a chemical, check the manufacturer instructions or local guidelines before use.