
Introduction
Paint not sticking to metal means the surface isn’t ready for paint and needs proper prep. In this DIY guide we’ll cover the basics for cleaning, rust control, and how to prep metal before you paint. Think of it as dirt, loose rust, and dull or smooth spots that need a plan.
Start with a thorough cleaning to remove oil, grime, and oxidation. Address rust with safe, practical methods and rough up glossy spots to give the primer something to grab. If the metal is rough or etched, use the right method to smooth or profile the surface before painting.
Key takeaways
- Degrease and clean metal thoroughly before any rust or paint prep steps.
- Use rust converters or removers according to manufacturer instructions for safe control.
- Sand rough surfaces to create a key, but avoid gouging on thin metal.
- Lightly etch metal per product guidance to improve coating adhesion.
- Prime with compatible epoxy or zinc-rich primer before topcoat for adhesion.
- Wear eye/hand protection and ventilate work area during cleaning and painting.
Table of Contents
- Introduction
- Key takeaways
- Why Paint Fails on Metal: Common Causes and Quick Diagnosis
- Tools and Materials Checklist (Cost-Effective and Pro Options)
- Safety and Workspace Setup
- Step 1 — Cleaning: Techniques and Solvent Selection
- Step 2 — Rust Control and Removal Methods
- Step 3 — Surface Abrasion and Etching
- Step 4 — Priming and Epoxy Basics for Adhesion Promotion
- Step 5 — Painting, Curing Timeline, and Common Mistakes to Avoid
- Conclusion
- FAQ
Why Paint Fails on Metal: Common Causes and Quick Diagnosis
Metal coatings fail mainly from contamination, rust, poor abrasion, incompatible primer or paint systems, and environmental factors. Quick visual checks help confirm which cause is at play: shiny oil residues indicate contamination, dull patches suggest rust, uneven or lighter abrasion shows improper surface prep, and mismatched primer or topcoat types point to compatibility issues. Moisture or blooming on the surface signals environmental conditions that may hinder adhesion.
On site, use a simple solvent wipe to test for contamination, inspect rust spots with a microfiber cloth, perform a light abrasion test to gauge adhesion, verify that the primer and paint are designed to work together, and note ambient conditions before recoat. For each confirmed cause, outline the remediation: degrease and reclean for contamination, remove rust and apply a rust-inhibiting treatment, key the surface properly without gouging, choose a compatible primer/paint pair, and adjust the workspace or wait for proper humidity and temperature. A quick decision flow can help decide whether to repair, re-prime, or replace, while avoiding moisture entrapment and ensuring cure times are respected.
Adhesion failure vs. corrosion-driven lift
When paint peels off metal, it’s not always easy to tell if the problem is poor bonding or underlying rust. Here’s how to distinguish between the two:
If the paint lifts easily with a gentle pull, poor adhesion might be the culprit. This usually happens when the surface wasn’t properly prepared before painting.
On the other hand, if you see blisters or bubbles under the paint, or it’s lifting in large sheets, it’s likely due to underlying rust or moisture. These issues can cause the paint to lose its bond with the metal and lift off.
In either case, you’ll need to remove the failed paint and address the root cause before repainting.
How to perform a quick inspection
Before you start troubleshooting, use this checklist to identify the failure mode. It’s best to do this on a dry day with good lighting.
- Shiny spots: Check for oil or grease residues. If present, contamination might be the cause.
- Dull patches: Look for rusted areas. Rust can prevent paint from adhering properly.
- Uneven surface: Feel for uneven abrasion or sanding. Insufficient or improper abrasion can lead to poor adhesion.
- Flaking paint: Check for large flakes or sheets lifting off. This could indicate underlying rust or moisture.
- Undercutting: Look for edges lifting. This is often a sign of rust or blistering underneath.
- Water behavior: Sprinkle some water on the affected area. If it beads up and doesn’t spread, contamination might be present.
- Pull test: Gently pull at a paint edge with your fingers or a putty knife. If it lifts easily, poor adhesion is likely.
- Moisture or blooming: Check for any signs of visible moisture or a white, powdery substance (bloom). This indicates that the paint was applied in adverse environmental conditions.
Quick rule: If you’re unsure about what’s causing the failure, start by addressing surface contamination and rust. These are often the most common causes.
Tools and Materials Checklist (Cost-Effective and Pro Options)
List core tools and gear you’ll actually use: wire brushes, rust remover or etcher, mild detergent, clean rags, tack cloths, a sanding block or orbital sander, and a compatible primer and topcoat applicator suited for metal. Include PPE and safety gear aligned with consumables, such as respirators, gloves, and address VOC considerations. Have a basic workflow in mind that fits your project size and budget.
Compare consumables and budget-friendly versus pro options by checking metal compatibility, VOC limits, and cure ranges on labels. Confirm the coating is rated for rusted or pre-treated surfaces, and plan a minimal two- to three-coat sequence: degrease/etch, rust-inhibiting primer, then topcoat. Use the same brand line when possible to improve adhesion, and verify exact dry-to-touch and full cure guidance on the product data sheet before starting.
Essential tools and hand equipment
Before you start, make sure you have the right tools to prep your metal surface properly. Here’s a checklist of essentials.
- Wire brushes: For removing loose rust and mill scale. Choose stainless steel for durability.
- Rust remover/etcher: To clean and prepare the surface. Phosphoric acid-based products work well.
- Mild detergent: To remove grease and dirt. Dish soap is a cheap alternative.
- Clean rags: For wiping down surfaces. Old t-shirts work great.
- Tack cloths: To remove dust before painting. Cheap but essential.
- Sanding block or orbital sander: For smoothing rough spots. Orbital sanders are faster but more expensive.
- Inspection lights: To spot hidden rust and imperfections. LED flashlights work well.
- Scrapers: For removing loose paint and rust. Choose a sturdy, sharp one.
Quick rule: Don’t skip any tools. Each plays a crucial role in prep work.
Cleaning solvents, rust removers, and converters
Choose the right cleaning agent based on your metal’s condition. Here’s what you need:
- Water-based degreasers: For light dirt and grease. They’re safer but may not be strong enough for heavy grime.
- Solvents (acetone/lacquer thinner): For tough grease and old paint. Use with proper ventilation.
- Rust converters/removers: To transform rust into a stable, paintable layer. Phosphoric acid-based products work well.
- Phosphoric acid converters: For etching and preparing the surface for primer. They’re strong but can be messy.
Quick rule: Always test your cleaner on a small area first to ensure it doesn’t damage the metal.
Primers and paints for metal
Choose primers and paints that match your project’s needs. Here’s a checklist:
- Etching/self-etching primers: For creating a strong bond on clean, bare metal.
- Epoxy primers: For high-corrosion areas. They’re durable but can be slow to dry.
- Zinc-rich primers: For heavy-duty protection against rust. They’re expensive but effective.
- Oil/alkyd paints: For interior use. They’re cheap but not as durable as other options.
- Enamel paints: For exterior use. They’re more durable but can be harder to apply.
- Specialty metal paints: For unique projects. Always check compatibility with your primer.
Quick rule: Match your primer’s chemistry to your topcoat for the best adhesion and durability.
Safety and Workspace Setup
PPE should cover eye protection, chemical-resistant gloves, a respirator or mask suitable for the work, long sleeves, and non-slip footwear. Explain the rationale for each item and replace or upgrade gear if you feel unsure about the exposure level. Have first aid and spill kit basics on hand as well.
Ventilation matters: use open air or a well‑ventilated space with local exhaust or fans, and avoid stagnant zones around solvents and rust chemicals. Keep ignition sources out of the area and have a fire extinguisher ready and accessible. Store solvents in sealed labeled containers away from heat and organize the workspace to separate clean and contaminated zones, with color coding and tidy housekeeping.
PPE and ventilation
Protecting yourself is the first step. Here’s what you need:
Respiratory protection: Use a respirator or good mask to protect against solvent and rust chemical fumes.
Gloves: Wear chemical-resistant gloves to prevent skin contact with harsh chemicals.
Eye and skin protection: Safety glasses or splash goggles keep your eyes safe, while long sleeves protect your skin from splashes. Non-slip footwear keeps you steady on slippery surfaces.
Adequate fresh-air flow is crucial. If working indoors, use a fan to blow fumes away from you and towards a window or door. Never work in stagnant air.
Waste handling and fire/explosion risks
Proper waste handling prevents fires and explosions:
Solvent-soaked rags: Never leave them lying around. Hang them up to dry, then dispose of in a sealed container away from heat sources.
Used grit: Collect it in a separate container for proper disposal. Don’t let it build up and cause trips or fires.
Leftover chemicals: Store them in their original, tightly sealed containers away from heat and ignition sources. Follow local regulations for disposal.
Flammables: Keep them separate from heat sources and sparks. Never store them near your work area if possible.
Step 1 — Cleaning: Techniques and Solvent Selection
The goal here is a clean, contaminant-free metal surface ready for adhesion, especially on rust-prone substrates. Start with loose debris removal, then move to degreasing and solvent or detergent cleaning, followed by rinsing and drying. End with a tacky‑free feel test before moving on.
Choose solvents and detergents based on the contaminant type and metal, noting safety and ventilation requirements. A solvent wipe test or simple rinse can confirm cleanliness, and timing before priming should be observed. Avoid introducing new contaminants or over-wetting the surface as you hand off to etching or priming in the next step.
Degreasing and Solvent Wipe-Downs
Start by choosing the right degreaser or solvent. Low-residue mineral spirits, kerosene, or specialty metal degreasers work well. For steel, these are safe. For aluminum, stick to mild detergents or low-odor solvents.
Safety first: Wear gloves and eye protection. Ventilate the area. Avoid open flames.
Dip a clean, lint-free rag into the solvent. Wipe the metal surface in long, even strokes. Work from top to bottom. Don’t over-wipe; it can redeposit oils or dissolve fibers onto the surface.
Water-Break Test and Verifying Cleanliness
The water-break test is a quick way to check if your surface is clean. After wiping, lightly mist the surface with water.
If the water forms beads and doesn’t spread evenly, contaminants are present. Re-clean and re-test. If the water spreads evenly, you’re good to go.
Perform a simple wipe test too. Wipe your hand across the surface. It should feel tack-free, with no residue or odor. If not, clean again before moving on.
Step 2 — Rust Control and Removal Methods
Mechanical removal includes wire brushing, sanding, or grinding, while chemical options cover rust removers or rust-converting coatings. Each method has situational pros and cons depending on rust severity and access to the area. Choose a method that keeps the substrate sound and ready for primer.
Safety and prep are crucial: wear PPE, ensure good ventilation, contain debris, and dry and clean the metal before any treatment. After treatment, assess the metal’s soundness for coating and plan any further refinement if needed. Confirm that the chosen rust control method leaves a surface compatible with your primer and topcoat, and note any waiting or conditioning steps required.
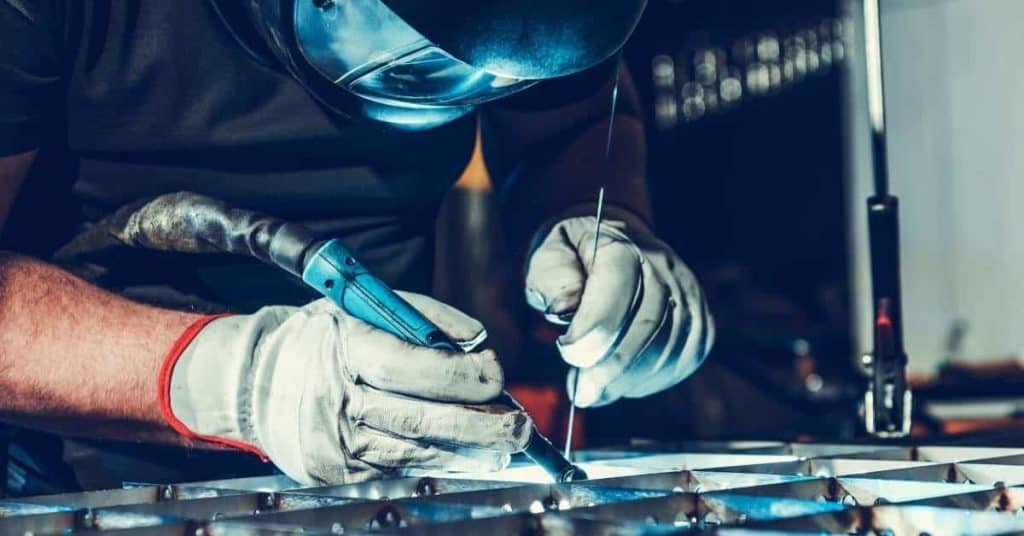
Mechanical removal: sanding, wire brushing, and blasting
Start by assessing the rust severity. Light rust can be tackled with hand tools like wire brushes or sandpaper. For heavier rust, consider media blasting.
Wire Brushing: Use a stiff-bristle wire brush to scrub away loose rust and scale. Go until you see solid metal. Be careful not to gouge the surface.
Sanding: Use sandpaper (80-120 grit) to remove rust and smoothen the surface. Sand with the grain of the metal, then against it for a final finish.
Blasting: For heavy rust or large areas, consider media blasting with sand, glass beads, or other abrasives. This method is fast but requires proper containment and safety measures.
Chemical rust removers and converters
Chemicals can neutralize rust and prepare the surface for painting. Choose based on rust severity and access.
Rust Removers: Acid-based removers (like phosphoric acid) dissolve rust. Use sparingly, following manufacturer’s instructions. Rinse thoroughly afterwards to prevent coating interference.
Converters: These neutralize rust, convert it into a stable layer, and provide a surface for painting. Apply, let dwell as instructed (usually 15-30 minutes), then rinse and dry.
Always wear PPE, use proper ventilation, and contain chemicals to prevent environmental damage. After treatment, ensure the metal is clean, dry, and free of residue before priming.
Visual checkpoints to confirm rust removal
Before painting, inspect the surface to ensure rust is adequately removed or converted. This checklist helps:
- Clean Metallic Surface: The metal should look clean and metallic, not powdery or dull.
- No Powdery Residue: Gently wipe with a damp cloth. No residue means no loose rust left.
- Uniform Appearance: The surface should look even, with no obvious pits, holes, or flakes.
- No Active Rust Spots: Check for any remaining red, orange, or brown spots – these indicate active rust.
- Pitting or Holes: Light pitting is okay. Deep holes may need further refinement before painting.
- Flaking Metal: If the metal flakes off easily, it’s not structurally sound for coating.
- Rust Bleed: Check if rust bleeds through the surface after applying a light coat of primer. If so, re-treat and repeat the checklist.
- Re-rusting Areas: Inspect areas prone to re-rusting (like corners or welds) for any signs of new rust growth.
Quick rule: If in doubt, re-treat and re-check. Inadequate rust removal leads to coating failure.
Step 3 — Surface Abrasion and Etching
A proper abrasion or etching step roughens the surface for mechanical locking and removes surface contaminants that hinder adhesion. It also helps expose a clean metal base for the next coating layer. The goal is uniform dulling without gouging or over-etching.
Metal-specific approaches matter: steel can tolerate more aggressive abrasion, while aluminum needs gentler steps to avoid oxidation or pitting. Start with degreasing and cleaning to verify a true bare surface before sanding or brushing, then choose the abrasive method that matches the metal type. Inspect for consistent dullness and use PPE and ventilation during abrading and etching.
Sanding and creating a bonding profile
Proper sanding is crucial to create a surface that paint can bond with. The goal is to remove old coatings, loose material, and glossy films, while also creating microscopic peaks and valleys for the paint to adhere to.
For steel surfaces, start with coarse grit sandpaper (around 60-80 grit) to aggressively remove old paint and rust. Follow up with a medium grit (120-150) to smooth out the surface and create a suitable bonding profile.
On aluminum, use a gentler touch. Start with a medium grit sandpaper (120-150), then finish with a fine grit (220 or higher) to avoid damaging the soft metal and creating pits.
Acid etching and self-etching primers
Acid etching and self-etching primers work by chemically attacking the metal’s surface, removing a thin layer of oxide or mill scale. This creates a fresh, reactive surface that improves paint adhesion.
Use acid etches on steel when you need to remove heavy rust or mill scale. Follow the product label instructions, ensuring thorough rinsing and neutralization afterwards to prevent flash rusting.
Self-etching primers are convenient for small projects or touch-ups. They combine the etching process with priming in one step. Apply them like any other primer, but remember they work best on clean, bare metal.
Step 4 — Priming and Epoxy Basics for Adhesion Promotion
Select primers compatible with common metal substrates and the chosen topcoat, including rust-inhibitive or epoxy primers. Use a compatibility checklist to confirm suitability. Ensure the metal is clean, dry, and free of rust before applying primer. Specify acceptable cleaners and any rust converters if needed.
Outline mechanical and chemical prep steps: proper sanding, edge feathering, and whether etching or profile creation is needed for epoxy adhesion; consider abrasive blasting if required. Explain the epoxy-prep sequence: cleaning, drying, sanding, moisture control, and solvent compatibility. Share practical tips for application thickness, uniform coating, recoat windows, and a quick tackiness check before topcoat, with safety notes.
Choosing the right primer for metal and environment
Selecting the right primer is crucial to ensure your topcoat adheres well and lasts. Here’s what you need to know:
Corrosion-inhibiting primers are ideal for steel, preventing rust by forming a protective barrier. They’re great under latex or oil-based paints.
Zinc-rich primers work well on steel too, sacrificing themselves to protect the metal. They’re often used with epoxy topcoats.
Always match your primer’s chemistry to your topcoat. If you’re unsure, check the manufacturer’s guidelines or ask at your local hardware store.
Epoxy surface-prep essentials
Prepping surfaces for epoxy is critical to ensure a strong bond. Here’s how:
Remove contaminants. Use the cleaning methods from Step 1 to remove dirt, grease, and other debris.
Ensure surfaces are dry. Epoxy needs a moisture-free surface to adhere properly. Use a moisture meter if you’re unsure.
Abrade non-porous surfaces. Sand or abrade non-porous metals like aluminum to create microscopic peaks and valleys that epoxy can grip onto. This is called ‘profiling’ the surface.
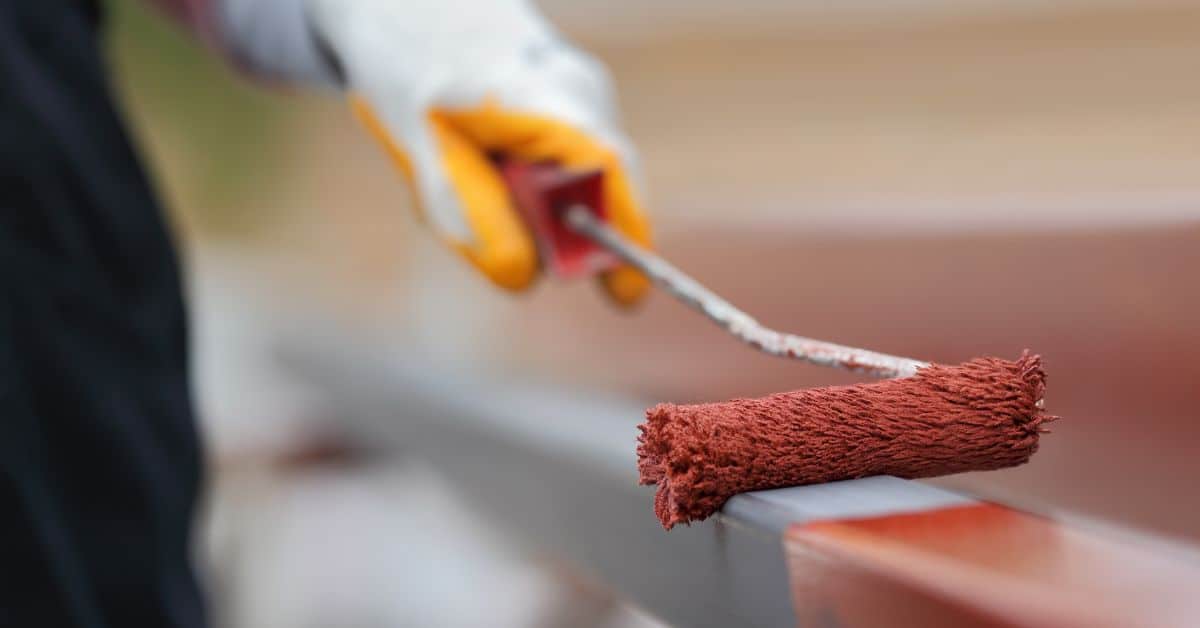
Step 5 — Painting, Curing Timeline, and Common Mistakes to Avoid
Define the environmental window for painting: surface and ambient temperatures, humidity, and dew point considerations to minimize coating failure on metal. Recap surface prep: clean, dry, properly abraded surfaces, rust stabilized, and primer compatibility checked. Consider re-priming needs between coats if required.
Discuss wet-film thickness, application technique, and how to adjust to avoid runs or pinholes. Outline the coat sequence and cure steps between primer, base coats, and topcoats, noting any differences for solvent-based versus waterborne systems. Highlight common mistakes and offer a practical patch-test method to confirm adhesion before full use, with attention to ventilation and cure times.
Application methods and curing considerations
Choose your application method wisely. Brush-on paints are great for small areas, while spray systems cover larger surfaces faster.
Spraying: Use a HVLP (High Volume, Low Pressure) sprayer for best results. Keep the nozzle moving at a steady pace to avoid runs and ensure even coverage.
Drying: Ideal drying conditions are 50-85°F (10-29°C) ambient temperature with low humidity. Avoid painting in direct sunlight or extreme temperatures as it can cause premature curing or poor adhesion.
Plan your recoat and full cure times carefully. Most paints need at least 4 hours of drying time between coats, but check the manufacturer’s guidelines for specifics. Allow the final coat to fully cure before handling – this could take anywhere from 24 hours to a week, depending on paint type and environmental conditions.
Troubleshooting common prep and paint mistakes
Here are some frequent errors that can lead to paint failure. Avoid these pitfalls for a durable, long-lasting finish.
- Painting over rust: Rust must be completely removed or stabilized before painting. Painting over active rust will cause the paint to peel off as the rust continues to expand and corrode the metal.
- Inadequate cleaning: Dirt, grease, or other contaminants can prevent paint from adhering properly. Ensure surfaces are clean using the methods outlined in Step 2 – Rust Control and Removal Methods.
- Incompatible products: Using incompatible primers or topcoats can lead to poor adhesion and premature failure. Always choose products designed to work together.
- Painting in wrong conditions: Extreme temperatures, high humidity, or painting over damp surfaces can cause paint to fail. Follow the guidelines for ideal environmental conditions when painting.
If you’ve made one of these mistakes, don’t panic. Sand off any loose paint, clean the surface again, and start with a fresh coat following the correct procedures. It’s better to take the time to do it right than to keep covering up problems with more layers of paint.
Conclusion
Proper prep and careful steps protect metal from future rust and keep the finish looking good for years, so stay deliberate about safety and follow through to the end. A solid plan now saves you costly rework later.
To move forward, confirm the metal is clean and dry, remove loose rust, abrade or etch as needed, apply the recommended primer or epoxy, then paint and allow full curing time before using the item; start with a small test patch, then complete the job in clear, steady stages.
Common mistakes to avoid include skipping rust removal or using the wrong solvent, skipping primer or epoxy layers, rushing the coat or skipping curing time, and applying thick coats that trap moisture; follow the workflow with proper ventilation, gloves, eye protection, and safe storage away from heat and sparks. If the project involves extensive corrosion, unknown coatings, or structural metal, or you’re unsure about the surface condition, don’t hesitate to call a professional; sticking to the plan and working methodically will give you durable results and pride in the finished job.
FAQ
How should I clean metal before painting to ensure good adhesion?
remove oils, grease, and surface contaminants with a suitable degreaser or detergent. Rinse thoroughly and dry completely before proceeding. Check the product label for any specific dwell times or rinse requirements.
What are solid rust control methods before painting?
mechanically remove loose rust with a hand wire brush or grinder if needed. Use a rust converter or rust-inhibiting primer as directed by the manufacturer. Always finish with a clean, dry surface before priming.
How do I sand or smooth rough surfaces for paint?
rough spots should be scuffed with 180–220 grit paper or a appropriate abrasive pad until smooth. Feather edges around bare metal to prevent sharp edges from showing through the paint. Wipe away dust before priming.
Should I etch metal, and how do I do it safely?
some prep products include an etching step to improve adhesion; follow the label exactly. Rinse thoroughly after etching and allow the surface to dry completely before priming. Do not over-etch; follow timing and compatibility notes on the instructions.
What common contaminants should I remove before painting?
pull off obvious residues like tar, wax, and heavy grease; wipe with a solvent compatible with the paint you’ll use. Finger oils, chalk, and silicone films can ruin adhesion—don’t skip cleaning. After cleaning, ensure the surface is dry and free of dust or fibers.