

Introduction
In shower inside corners, caulk handles movement while grout is best for rigid joints.
The guide explains when to use each, how to assess movement in corners, and practical steps for proper application and sealing.
Key takeaways
- Caulk tolerates movement in vertical corners; grout is rigid and can crack.
- Movement occurs mainly where framing or substrate shifts, not within sealed joints.
- Use caulk for non-pool sides and expansion joints between tiles.
- Use grout where tiles butt against walls with rigid substrates.
- Both materials may be required: caulk at movement joints, grout elsewhere.
- Regular inspection identifies hairline cracks before leaks develop and escalate.
Table of Contents
- Introduction
- Key takeaways
- Why inside corners matter in showers
- What moves: where movement actually happens in a shower corner
- Caulk vs grout: material properties and performance
- When to use caulk, when to use grout, and when to use both
- Tools, materials checklist, and selection tips
- Step-by-step installation and finishing for inside corners
- Repairing failed inside corners: diagnosis and fixes
- Maintenance, monitoring, and lifespan expectations
- Visual checkpoints and troubleshooting guide
- Codes, standards, and best-practice tips for lasting results
- Conclusion
- FAQ
Why inside corners matter in showers
Inside corners in a shower are where water and movement meet. If these corners crack or stay unsealed, leaks and mold follow fast. Small gaps here turn into big problems because tiles and membrane bend with movement.
That’s why you trap water at the corners with proper sealant and a solid waterproof layer. Do it right and you stop leaks before they start and save yourself headaches later. Skimp on corners and you’ll be chasing mold and repairs for years.
Definition and common types of inside corners
An inside corner in a shower is where two planes meet, creating an intersection that needs special attention to ensure water doesn’t seep behind the tiles. Common configurations include tile-to-tile, tile-to-pan, and niche corners.
Tile-to-tile corners are straightforward but require precise cutting for a neat look. Tile-to-pan corners connect the wall to the shower pan, which is crucial for waterproofing. Niche corners add storage space but complicate tiling and sealing.
When dealing with inside corners, always check base compaction before starting any work to avoid future issues with shifting walls or floors.
Consequences of getting it wrong
If inside corners in your shower aren’t done right, you’re looking at water seeping into the walls and causing all sorts of headaches. Grout cracks, failed caulk, and tiles coming loose are just a few issues that pop up when corners aren’t properly sealed or installed.
These problems don’t go away on their own—they get worse over time. You’ll end up spending big bucks to fix them later down the line. It’s not just about the repair costs; it’s also the hassle of tearing out work you already did and redoing it all again.
To avoid these issues, make sure your corners are tight and sealed properly from day one. Check that your base is compacted correctly before laying any tiles to prevent future problems. A little extra care now saves a lot of grief later.
What moves: where movement actually happens in a shower corner
Movement in a shower corner happens where the structure or materials shrink or flex. The real culprits are substrate shrinkage, framing flex, tile expansion, and tile-set mortar shrinkage. When you understand these, you see why gaps and cracks form.
Knowing the sources helps you catch bad work early and plan fixes before moisture leaks. It matters because small shifts add up and show up as cracks, grout loss, or loose tiles in a wet corner. Addressing them at the right time saves future headaches and water damage.
Substrate and framing movement
The studs, backer boards, and the shower pan can all move independently. This is a big deal because it leads to joint stress and cracks if not managed right from the start. When you’re setting up your substrate, make sure the base is compacted and level. Check base compaction before anything else goes in.
The framing needs to be solid and straight. Any wobbles or twists will cause problems later on when you add the backer board and tiles. Use shims and braces where needed to keep everything tight and secure. Don’t rush this part; it’s crucial for preventing future headaches.
Backer boards should fit snugly against each other but not be forced together too tightly. Allow a little space for natural expansion, especially around corners. This helps prevent cracking when the materials shift over time due to moisture or temperature changes. Remember, flexibility here means durability down the road.
Tile and Grout Behavior
Tiles and grout in your shower corner are not immune to the elements. They expand when it’s wet and warm, and contract when it’s dry and cool. This movement can cause cracks if you don’t account for it. The worst spot for this is at corners, where two walls meet.
When laying tiles, make sure your base is solid and compacted properly. If the substrate moves, so will your tiles. Check base compaction before you start tiling to avoid future headaches. Also, use a flexible grout that can handle some give without cracking.
Remember, even with good materials, movement happens. Keep an eye on those corners during and after installation. A little flexibility in your design can save big trouble down the line.
Sealant vs. structural movement distinction
In a shower corner, you’ve got two types of movement to deal with: the kind that needs flexible sealing, and the kind that calls for structural accommodation. Flexible sealing is where caulk comes in—use it around fixtures like drains and corners where small movements happen. But when you’re talking about bigger shifts, like those caused by settling or thermal expansion, you need to address them with structural fixes.
Check base compaction before laying down your substrate. If the ground isn’t solid, it’ll shift over time and cause major issues. For tile and grout, make sure there’s enough room for natural movement without cracking or lifting tiles. This often means using expansion joints in critical areas.
Remember, caulk is great at handling small movements but won’t stop a wall from moving if the framing isn’t right. So, before you grab that caulking gun, ensure your structure and substrate are sound. It’s all about knowing where to apply the right fix for the job.
Caulk vs grout: material properties and performance
Caulk and grout serve different jobs. Silicone or urethane caulks stay flexible and seal gaps as they move, while cementitious and epoxy grouts are hard and very waterproof but can crack if the structure shifts.
Use caulk where joints move, like in bathrooms and along baseboards. Grout is better for tile joints and areas that take abuse, but it can crack with movement and needs proper mixing and sealing.
Caulk materials explained
Picking the right caulk is crucial for sealing gaps and joints without cracking or staining. The wrong choice can lead to leaks, mold growth, and unsightly cracks.
- 100% Silicone: Best for outdoor use where flexibility is key. Look for UV resistance on the label. Avoid if you need paintable sealant.
- Silicone Blend: Combines silicone’s durability with acrylic’s ease of painting. Check for paintability and mildew resistance ratings. Good for bathrooms and kitchens.
- Urethane: Strongest option, great for heavy-duty jobs like boats or industrial settings. Look for high tensile strength on the label. Expensive but worth it if you need extreme durability.
- Hybrid Sealant: Balances flexibility and strength. Ideal for interior use where both paintability and durability are needed. Check for low VOC content if indoor air quality is a concern.
- Aquatic Caulk: Made to withstand water exposure without breaking down. Look for waterproof rating on the label. Avoid using regular silicone in wet areas as it can degrade over time.
- Acrylic Latex: Cheapest option, good for small indoor jobs like painting gaps. Not recommended for exterior use or areas exposed to moisture.
- Elastomeric Caulk: Offers excellent flexibility and UV resistance. Look for high elongation percentage on the label. Good for large joints that need movement.
Pro tip: Always store caulk in a cool, dry place to prevent it from drying out before use. Check expiration dates before starting your project.
Grout types and limits
When it comes to grouting, you’ve got three main choices: sanded, unsanded, and epoxy. Sanded grout is the go-to for tiles larger than a quarter-inch apart because it won’t shrink as much. Unsanded grout works best in tighter spaces where sand would get stuck. Epoxy grout is tough but pricey; use it only if you need something super durable.
Grout is brittle, so don’t expect it to move with the building. If joints are going to shift, caulk is your better bet. Grout will crack and let water in if it’s not meant for movement. So before grouting, check base compaction and make sure everything’s solid.
Remember, once you lay down the grout, it needs time to set up properly. Rushing this step can lead to a weak joint that won’t hold up over time. Take your time, let it cure fully, then seal it if needed for extra protection against stains and moisture.
When to use caulk, when to use grout, and when to use both
Use caulk for movement joints and gaps where surfaces meet. Use grout to seal tile joints that stay put. Use both where edges move or the plane changes.
Inside corners, tile-to-tile runs, and niche edges benefit from a caulk-grout combo. Caulk absorbs movement; grout keeps tiles tight and water resistant. Choose the right mix to avoid cracking, leaks, and failed grout.
Inside corners and changes-of-plane
Avoid grouting inside corners and changes-of-plane. These areas are movement joints where the wall meets a floor, ceiling, or another wall. Caulking is better because it can flex with building movements without cracking like rigid grout would.
Check that your base materials are well-compacted before caulking these spots. Loose material will cause cracks and leaks over time. Use a high-quality silicone caulk for durability and flexibility.
If you see gaps or cracks in existing work, it’s likely the result of using grout instead of caulk. Fix them by cleaning out old material thoroughly and applying fresh caulk to seal properly.
Long straight grout joints and aesthetic considerations
For long, straight grout lines, go with grout. It’s the right choice for wide joints that need to be filled in a way that looks clean and professional. Just make sure you’ve got your base compaction checked out before laying down any tiles.
If you’re dealing with inside corners or changes-of-plane, refer back to earlier sections on when to use caulk. For straight joints, grout will give you a seamless look if it matches the color of your caulk. Mixing colors can be tricky, so get samples and test them out before committing.
Remember, using the right material in long straight joints not only looks better but also prevents water from seeping into gaps where it shouldn’t go. Keep things simple and stick to grout for these areas unless you have a specific reason to use caulk.
Tools, materials checklist, and selection tips
Key point: have a focused tools and materials checklist before you start. Use the right sealants and grouts for the job, and pick backer rod sizes that fit the joint. Prep the surface thoroughly with the right cleaners, primers, and tools so your work sticks and lasts.
Skipping proper prep or using wrong backer rod leads to leaks, cracks, and failed joints. Choosing the right tools and materials saves time, reduces call-backs, and keeps the job from looking half-done.
Choosing the right backer rod and bead size
This checklist helps you pick the correct backer rod and caulk bead for your concrete joints to ensure proper movement and sealant performance.
- Measure joint width: Use a ruler or tape measure. Confirm it’s at least 1/4 inch wide. Skip this, and your sealant won’t work right.
- Select backer rod: Choose diameter that’s slightly smaller than the joint width. Check by inserting rod into joint; it should fit snugly but not block movement.
- Check rod length: Ensure rod is long enough to fill joint depth without gaps. Measure from bottom of joint to top edge.
- Verify bead profile: Caulk bead should be 1/4 inch wider than backer rod diameter. Check by measuring both and comparing.
- Avoid overfilling: Don’t let caulk extend beyond the edges of the joint. Overfilling can cause cracking or sealant failure.
- Test movement: Gently move concrete pieces to see if backer rod allows for proper expansion and contraction without breaking.
- Inspect bead placement: Caulk should sit on top of backer rod, not directly against concrete. Check by looking at joint from different angles.
- Check sealant type: Ensure you’re using the right caulk for your application (e.g., silicone or polyurethane). Refer to earlier materials checklist for guidance.
Quick rule: Backer rod diameter should be 1/8 inch smaller than joint width, and caulk bead should be 1/4 inch wider than the backer rod.
Adhesion and compatibility checks
Before applying any sealant or adhesive, run through this quick checklist to ensure your surface is ready.
- Surface cleanliness: Wipe down the area with a solvent. Confirm no dust or debris remains visible.
- No standing water: Check for moisture and dry completely before proceeding. Skipping this can lead to poor adhesion.
- Alkaline surface test: Apply a small amount of neutralizing agent (like vinegar) and wait 10 minutes. Look for any change in the surface texture or color indicating an alkaline reaction.
- No existing silicone: Remove old silicone completely with a scraper. Leaving it can cause adhesion issues.
- Epoxy compatibility: Check manufacturer’s guidelines for epoxy surfaces and ensure your sealant is compatible. Skipping this step may result in failure of the bond.
- No oil or grease: Clean any oily residue with a degreaser. Oil can prevent proper bonding, leading to leaks.
- Backer rod fit: Ensure backer rods are properly sized and installed as per your earlier checklist. Improper sizing can cause sealant failure.
- No sharp edges: Smooth out any rough or sharp areas with sandpaper. Sharp edges can cut through the sealant, causing leaks.
- Surface temperature: Ensure surface is within recommended application temperatures (usually 40-100°F). Extreme temps can affect curing and adhesion.
Quick rule: Always clean and prep surfaces thoroughly to avoid costly rework later on.
Step-by-step installation and finishing for inside corners
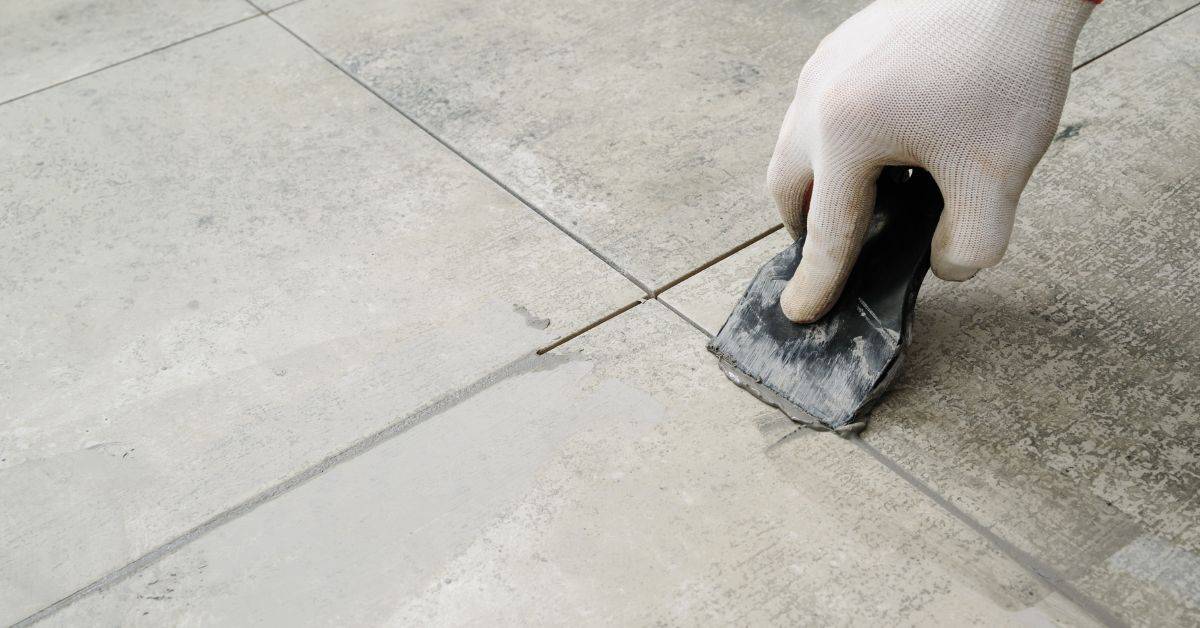
First, remove the old material from the inside corner and clean the joint. Dry it completely and chase any loose debris from the edge. If the gap is wide, drop in backer rod, then tool a neat caulk bead or grout finish.
Backer rod helps control material depth and prevents squeeze-out. A smooth, well-smoothed bead lasts longer and looks professional, reducing future touch-ups.
Step-by-Step Installation Process
This sequence will guide you through installing and finishing inside corners with concrete, ensuring a professional look without unnecessary complications.
- Action: Lay down drop cloths around the corner to protect surfaces.
Reason: Prevents accidental spills from damaging walls or floors.
Check: Ensure no unprotected areas are visible.
Stop and call a pro if: You notice any existing damage that might worsen with concrete application. - Action: Mix the concrete according to package instructions, adding water gradually.
Reason: Proper hydration ensures the mix is neither too wet nor too dry for corner work.
Check: The mixture should hold its shape when squeezed but not be runny.
Stop and call a pro if: You can’t achieve the right consistency despite following instructions. - Action: Apply concrete to the inside corner, using a trowel or float.
Reason: Ensures even coverage and proper adherence to surfaces.
Check: The surface should be smooth with no visible gaps or air bubbles.
Stop and call a pro if: You notice significant cracking or unevenness that can’t be fixed. - Action: Smooth the edges of the concrete to ensure they are flush.
Reason: Prevents water from pooling at the corners, reducing wear over time.
Check: Run your finger along the edge; it should feel smooth and even.
Stop and call a pro if: You can’t achieve a clean line after multiple attempts. - Action: Allow the concrete to cure for at least 24 hours before applying any sealant.
Reason: Ensures the concrete sets properly, preventing premature wear or cracking.
Check: The surface should be dry and hard to the touch.
Stop and call a pro if: You notice significant softness or moisture after 24 hours. - Action: Apply a concrete sealant according to manufacturer instructions.
Reason: Protects the surface from water damage, stains, and wear over time.
Check: The sealant should form an even layer without pooling or streaking.
Stop and call a pro if: You notice any bubbling or uneven application that can’t be fixed. - Action: Clean up tools and excess materials, disposing of them properly.
Reason: Keeps the work area safe and ready for final inspection.
Check: All surfaces should be free from debris and clean.
Pro tip: Always wear gloves and safety glasses during concrete application to protect your hands and eyes.
Preparing the joint and substrate
Clean thoroughly. Start by removing old grout or caulk from inside corners. Use a utility knife to cut through any remaining material, then scrape it out with a putty knife. Make sure no residue is left behind.
Dry the area completely before moving on. Wet surfaces can lead to poor adhesion of new materials. If you have stubborn grout stains or water marks, use a degreaser and scrub until clean.
Prime if necessary. Check with your product specs; some sealants require priming for better bonding. Apply the primer according to manufacturer instructions and let it dry before installing your corner pieces.
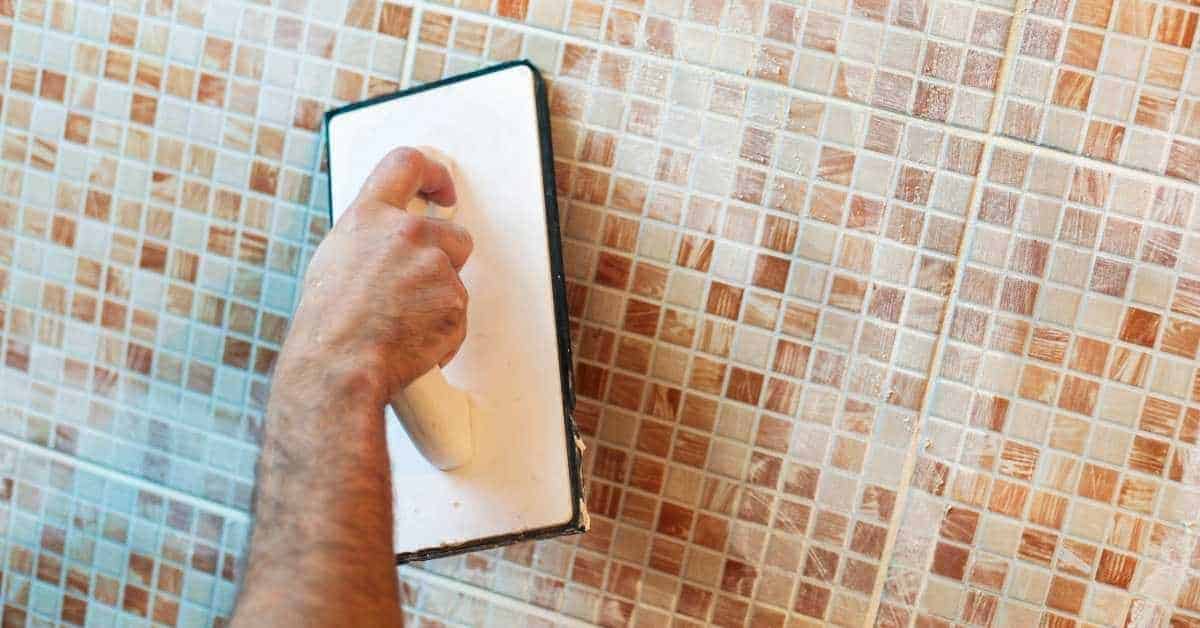
Caulking technique and finishing tips
When it comes to inside corners, the right caulk bead size is crucial. Aim for a 1/8-inch diameter bead to ensure a neat finish without any gaps or overflows. Use your finger dipped in soapy water to tool the joint at a 45-degree angle, which helps prevent cracking and ensures durability.
To smooth out the caulk, wait until it’s just barely set—about 10 minutes—and then gently run your thumb along the bead. This gives you that professional look without overworking the material. Remember to match the color of your caulk as closely as possible to the surrounding concrete for a seamless finish.
Avoid common mistakes like applying too much pressure when tooling, which can cause the caulk to squeeze out and create an uneven surface. Also, don’t forget to clean up any excess material immediately with a damp cloth before it sets.
Repairing failed inside corners: diagnosis and fixes
Inside corners that fail usually come from movement or bad adhesion. First, diagnose: is it adhesion failure, or is the substrate moving? Then choose a targeted repair rather than ripping out everything.
Understanding the cause helps you scope the repair and stay on budget. A well-aimed patch or re-seating where needed keeps work smaller, cleaner, and less disruptive for a DIY jobsite.
Small caulk failures and quick fixes
When you spot a small crack or peel in your inside corner caulk, don’t panic. It’s an easy fix if caught early. First, remove the old caulk. Use a utility knife to cut out the damaged part cleanly. Make sure to get all of it out; leaving bits behind can cause future problems.
Surface prep is key. Clean the area thoroughly with soap and water or a mild cleaner, then let it dry completely. Check for any cracks in the base material and fill them with a matching patch compound before resealing. This prevents moisture from seeping under the new caulk.
Once everything’s clean and dry, apply fresh caulk using a good quality tube. Smooth it out evenly with your finger or a caulk smoothing tool. Press firmly to ensure good adhesion but avoid overworking it as this can cause cracking later on. Let it cure for at least 24 hours before touching the area.
When to remove grout and replace with caulk
If you’ve got a corner where the grout is cracking, crumbling, or just won’t stay put, it’s time to rethink your approach. Grout isn’t made for movement joints; it’s meant to fill gaps between tiles that don’t move. When corners flex and shift due to building settlement or moisture changes, grout fails. It’s like trying to glue two pieces of wood together when they’re constantly moving apart.
The fix here is simple: remove the old grout from the corner area and replace it with a flexible caulk. This isn’t just for looks; it’s about functionality. Caulk can stretch and compress, making it perfect for dealing with movement in corners. Just make sure you check base compaction before applying any new material to avoid future issues.
To do this right, start by cleaning the area thoroughly. Use a grout saw or scraper to remove all old grout from the corner and around 1/4 inch into the adjoining tiles on each side. Once clean, apply your caulk in a thin bead, smoothing it out with your finger dipped in water for a neat finish. Let it cure as per the manufacturer’s instructions.
Maintenance, monitoring, and lifespan expectations
Caulk typically lasts 5-7 years in a shower, while grout may go 10-15 with good care. Regular monitoring helps you spot cracks, gaps, and discoloration before water invades behind the walls. Tackling small fixes now saves big headaches and money later.
Seasonal and usage factors affecting longevity
The lifespan of your shower’s sealant depends a lot on how you use it. Hot water can break down the seal faster, so try to keep temperatures moderate. Also, if you take multiple showers daily, that constant exposure adds up over time.
Cleaning products are another big factor. Harsh chemicals like bleach or strong detergents can eat away at your sealant quicker than normal wear and tear. Stick to mild cleaners and rinse thoroughly after each use.
Lastly, pay attention to the weather. Extreme cold or heat can cause materials to expand and contract, which might lead to cracks over time. Regularly check for any signs of damage during different seasons and address them right away.
Recaulk scheduling and signs it’s time to reseal
Keeping your concrete joints in top shape means knowing when it’s time to recaulk. Look for cracks, gaps, or water seepage around the edges where the caulk meets the concrete. If you see any of these issues, it’s past due.
The general rule is every two to three years, but this can vary based on weather and how much foot traffic your area gets. Pay extra attention after harsh winters or heavy rains; that’s when water damage shows up quickest.
Don’t wait until the caulk is completely gone before you act—fixing small issues early saves a lot of headaches later. And remember, resealing isn’t just about looks; it’s crucial for preventing bigger problems down the road.
Visual checkpoints and troubleshooting guide
Start with quick visual and tactile checks to spot gaps, leaks, or loose fasteners. Use your eyes and touch to flag obvious problems. Then follow a simple decision path to decide whether to fix, redo, or call in help.
This helps you catch problems before they worsen and saves time on the job. It keeps you safe by avoiding risky shortcuts and makes a clear next move easy to choose.
Quick visual checklist before starting work
Use this checklist to ensure your concrete surface is ready for any repairs or new installations. It helps you avoid costly mistakes by catching issues early.
- Mold and mildew: Look for dark spots, especially in corners and under fixtures. Confirm by wiping with a cleaning solution; if it doesn’t come off easily, mold might be present. Skip this and you risk health hazards and structural damage.
- Gaps between joints: Measure gaps to ensure they are consistent and within acceptable limits (typically 1/4 inch). Confirm by comparing with other areas; uneven gaps indicate potential movement or settling issues.
- Adhesion loss: Check for loose pieces of concrete or grout. Tap lightly with a hammer; if it sounds hollow, adhesion is likely compromised. Skip this and you’ll have to redo work later due to failure points.
- Cracked grout lines: Inspect all joints for cracks. Confirm by running your finger along the line; any rough spots indicate a crack. Cracks can lead to water damage if not addressed.
- Substrate movement: Look for uneven surfaces or shifting concrete blocks. Measure with a level to confirm stability. Movement indicates potential structural issues that need addressing before proceeding.
- Surface cleanliness: Ensure the surface is free of dirt, oil, and debris. Confirm by wiping an area with a clean cloth; it should come out relatively clear. Dirty surfaces can hinder adhesion and bonding.
- Proper drainage: Check that water drains away from the concrete surface. Pour some water near the edge to see if it flows correctly. Poor drainage can lead to pooling, which causes damage over time.
- No visible rust or corrosion: Inspect metal components for signs of rust. Confirm by touching; any flaking or discoloration indicates corrosion. Rust can weaken structural integrity and cause further issues.
- Proper slope towards drains: Use a level to check that the surface slopes correctly towards drainage points. Confirm by ensuring water flows naturally without pooling. Incorrect slope leads to standing water, causing damage.
- No loose or missing pieces: Look for any concrete chunks that are not firmly attached. Confirm by gently shaking; if it moves, it’s loose and needs fixing. Loose pieces can fall out during work leading to costly repairs.
Quick rule: If you see something amiss, fix it now before starting your project.
Troubleshooting flow: leak, crack, or delam?
Use this checklist when you spot a problem and need to figure out if it’s a leak, a crack, or something else like delamination.
- Check for water: Look around joints and edges. Confirm by touching the area; wet spots mean leaks.
- Inspect grout lines: Check for cracks or gaps. Confirm with a ruler to see if it’s more than 1/8 inch wide.
- Look for discoloration: Dark patches can indicate moisture. Confirm by checking the underside for dampness.
- Feel for soft spots: Press gently on the surface; spongy areas suggest delamination or voids underneath.
- Check corners and edges: Look for cracks, especially at 90-degree angles. Confirm by measuring crack width with a ruler.
- Inspect expansion joints: Ensure they’re properly filled. Confirm by checking if water is pooling inside the joint.
- Look for hairline cracks: Use a flashlight to spot tiny cracks that might not be visible in daylight.
- Test with a hammer: Tap lightly on the surface; dull thuds can indicate delamination or voids underneath.
- Check around fixtures: Look for gaps or cracks around pipes and drains. Confirm by checking if water is seeping through.
- Inspect for efflorescence: White powder on the surface often indicates moisture issues below. Confirm with a dampness test.
- Look at sealant edges: Check for separation or cracks in the caulk. Confirm by touching to see if it’s dry and brittle.
- Test for movement: Press on the slab; any flexing could indicate delamination or poor bonding underneath.
- Inspect around doors and windows: Look for gaps, cracks, or water stains. Confirm by checking inside for dampness.
- Check for mold growth: Dark spots can indicate moisture issues. Confirm with a visual inspection of the underside.
Quick rule: If you see wet spots or discoloration, it’s likely a leak; if you find cracks or gaps, address them as needed; and if areas feel soft or move when pressed, suspect delamination.
Codes, standards, and best-practice tips for lasting results
Codes and standards set the minimum for safe, lasting work. Follow the correct joint sizes and clearances and use the right fasteners and materials. When you install things to spec, you reduce leaks, failures, and rework.
This matters on a DIY jobsite because rules vary by material and location. Sticking to the specs keeps inspections smooth and your warranty intact, and it gives you predictable service life. Skipping steps can lead to leaks, cracks, and costly fixes later.
Tile industry recommendations and joint size guidelines
When it comes to laying tiles, the key is in the joints. Inside corners should have a 1/8-inch wide by 1/4-inch deep V-shaped groove for expansion and contraction. For straight walls or floors, use movement joints every 20 feet on large areas, and adjust to every 10 feet if you’re dealing with smaller tiles like mosaics.
Remember, the size of your tile dictates how often you need to add a movement joint. If you’re working with a substrate that’s not perfectly flat or stable, make sure to check base compaction and use a thicker mortar bed for better support. This helps prevent cracking down the line.
Avoid cutting corners by skipping joints; they’re there to protect your work from shifting and settling over time. Follow these guidelines closely, and you’ll end up with a job that lasts longer than most.
Professional vs DIY thresholds
When it comes to installing concrete thresholds, knowing when to call a pro is crucial. If you’re dealing with areas where structural movement could affect the threshold’s integrity, such as near doorways connecting different elevation levels or in high-moisture zones like bathrooms and basements, call a professional. These spots often require specialized waterproofing membranes that are tricky for DIYers to install correctly.
For simpler thresholds between rooms with no significant moisture concerns, you can likely handle the job yourself. Just make sure your base is well-compacted and level before pouring concrete. Also, check base compaction regularly during installation to avoid future cracks or uneven surfaces.
If you’re unsure about any aspect of your project, it’s better to err on the side of caution and consult a professional. Remember, proper planning and execution are key to lasting results in concrete work.

Conclusion
Inside corners in showers demand respect: move happens, water travels, and the wrong seal fails fast. Get the right material in the right spot, prep cleanly, and you’ll keep water out and surfaces looking solid for years.
To finish strong, check the corner in this order: confirm any movement is addressed, clean and dry the area, choose caulk or grout (or both) based on where movement occurs, apply with backer if needed, let it cure fully, and then test for leaks. Keep the area well ventilated, wear gloves, and follow manufacturer times exactly for a durable, professional-looking seal.
Avoid these common missteps: using grout where constant movement exists, skipping backer or proper prep, skimping on cleaning and drying, and sealing over dusty or wet surfaces. Always test a small patch first, and never rush curing or overstuff joints. If you’re unsure about movement patterns or the right product, take a conservative path and pause to reassess rather than pushing forward.
If the corner shows major cracks, persistent leaks, or you’re dealing with unusual substrate issues, don’t power through—calling a qualified tradesperson is smart. When you can diagnose movement, choose the right material, and follow proper steps, you’ll end up with a reliable seal and a safer, longer-lasting shower. Stay methodical, stay safe, and you’ll finish with confidence.
FAQ
When should I use caulk instead of grout in shower inside corners?
Use caulk in inside corners where the wall meets the shower pan, or where there is movement. Grout cracks from movement, and water will leak behind it. Caulk stays flexible and seals better in those spots.
What kind of caulk is best for shower corners?
Pick a silicone or hybrid caulk rated for bathrooms. It resists water and mold and stays flexible. Don’t use acrylic caulk here—it dries hard and fails fast.
Where does movement actually happen in a shower?
Movement happens mainly at the joints where walls meet the pan and at the corners. The rest of the tile stays put, but those edges shift with structure and temperature. If you don’t allow for that, you’ll crack grout and leak.
Can I grout inside corners and still prevent leaks?
You can, but you’re playing with water pressure. Grout will crack where there’s movement. If you do use grout, seal it properly and regrout and reseal when you see cracks.