
Introduction
Maintaining stucco means keeping its surface intact, dry, and properly protected to prevent damage. This DIY guide walks you through simple checks, cleaning, and small repairs you can handle without special equipment. Always follow the product label and local rules when you choose cleaners or patch materials.
Start with a visual check for cracks, loose coating, or water staining and note any problem areas. Light cleaning with a stiff brush and mild detergent helps reveal issues, and you should rinse and let it dry before repairs. When patches are needed, choose repair materials that match stucco and follow manufacturer instructions and local requirements.
Key takeaways
- Inspect stucco annually for cracks, moisture staining, and efflorescence around edges.
- Use soft brushes and mild cleaners; avoid pressure washing on delicate surfaces.
- Seal minor cracks with compatible patch material after cleaning and drying.
- Don’t skip safety gear; ladder checks, fall risks, and herbicide-free zones.
- Repaint and reseal after proper surface preparation and moisture check.
- Schedule seasonal inspections and address moisture sources before leaks appear.
Table of Contents
- Introduction
- Key takeaways
- Stucco Types and How They Affect Maintenance
- Tools, Materials, and Material Specs Explained
- Regular Inspection Routine and Visual Checkpoints
- Cleaning Stucco Safely
- DIY Repairs for Hairline and Small Cracks
- Larger Repairs, Structural Concerns, and Clear Stop Points
- Repainting, Sealing, and Finishing Tips
- Seasonal Maintenance Schedule and Long-Term Prevention
- Conclusion
- FAQ
Stucco Types and How They Affect Maintenance
Different stucco systems behave differently under weather and wear. Identify whether you’re dealing with traditional stucco, acrylic EIFS, or a hybrid and plan maintenance accordingly.
Material type changes common failure modes and repair steps. Always confirm the exact system from the label or manufacturer instructions before starting any work.
Traditional three-coat stucco vs. synthetic/EIFS
The first step in maintaining your stucco is understanding what you’ve got. There are two main types: traditional three-coat stucco and synthetic or Exterior Insulation and Finish Systems (EIFS).
Traditional three-coat stucco has a cement base with a hair-like material for strength, topped by a brown coat and a final white finish. It’s tough, breathes well, and can handle impact.
Synthetic/EIFS, on the other hand, is a barrier system that doesn’t breathe as well. It’s made up of foam insulation, a reinforcing layer, and a finish coat. It’s great for insulation but can be more susceptible to moisture damage if not installed correctly.
Substrate, lath, and flashing considerations
Before you start worrying about the stucco itself, check what’s underneath. The substrate (sheathing), lath (support for the stucco), and flashing all play a big role in your wall system’s performance.
Substrate should be solid and stable. If it’s warped or damaged, your stucco will crack. Check for any issues here first.
Lath provides support for the stucco. It needs to be secure and evenly spaced. If it’s loose or too far apart, your stucco won’t stick properly.
Flashing is crucial at corners, windows, and doors. It keeps water out and helps prevent cracks from forming. Make sure it’s in good shape and properly installed.
Tools, Materials, and Material Specs Explained
Keep a basic set of hand tools and a mortar or patch kit on hand for small fixes. Include safety gear like gloves, eye protection, and a dust mask as a minimum.
Check patch materials for compatibility with your stucco type and substrate. Look up the product data sheet or manufacturer recommendations before mixing or applying any patch or sealer.
Tools and equipment checklist
Before you start any DIY stucco work, make sure you have the right tools. Here’s a quick checklist to ensure you’re prepared.
- Tape measure: Essential for accurate measurements. Don’t guess, always measure.
- Level: Keeps your lines straight and even. A 4-foot level is handy for most jobs.
- Utility knife: For cutting back paper or trimming excess material. Keep it sharp.
- Hawk and trowel set: Rent these if you can’t buy. They’re crucial for applying stucco.
- Stucco mixer: Rent this too, unless you plan on doing lots of work. It makes mixing easy.
- Ladder: You’ll need one to reach higher spots. Make sure it’s sturdy and tall enough.
- Safety glasses: Protect your eyes from debris. Don’t skip this.
- Dust mask: Keep your lungs clear of dust when sanding or mixing.
Quick rule: Always check your tools before you start. A broken tool can ruin a job.
Materials, caulks, and patch compounds: compatibility tips
Choosing the right materials is key to successful stucco repair. Here’s what to look for.
- Stucco patch compound: Look for one that matches your existing stucco. Check the label for a close color match and similar composition.
- Sealant/caulk: Choose one that’s flexible and paintable. Silicone-based caulks work well with stucco.
- Paint: Opt for 100% acrylic latex paint. It’s breathable, which is crucial for stucco.
- Avoid: Never use oil-based paints or rigid caulks on stucco. They can crack and peel.
- Check labels: Always check manufacturer recommendations. Some compounds aren’t suitable for exterior use.
Remember, using the wrong material can lead to cracking, staining, and weak bonds that won’t last.
Safety gear and safe-work practices
Safety is paramount when working with stucco. Here’s what you need to protect yourself and do the job right.
- Hard hat: Protects against falling debris. Wear it whenever working above head height.
- Gloves: Keeps your hands clean and protects them from cuts. Choose a pair that’s sturdy but flexible.
- Ear protection: Use earplugs or earmuffs when using power tools to prevent hearing damage.
- Ladder safety: Always secure your ladder at the top and bottom. Don’t stand on the top rungs.
- Protective clothing: Wear long sleeves, long pants, and sturdy boots to protect your skin and feet.
- Respirator (optional): If you’re sanding or mixing large quantities of stucco, consider renting a respirator for extra lung protection.
Safety gear might seem expensive, but it’s worth it. Don’t skimp on protecting yourself.
Regular Inspection Routine and Visual Checkpoints
Set a repeatable inspection routine and walk the walls from top to bottom. Note any cracking, staining, or efflorescence as you go.
Pay attention to corners, ledges, and around openings where water tends to corner in. Use the checklist to decide if a spot needs cleaning, patching, or professional attention.
Exterior surface checklist: cracks, texture, stains, and delamination
Use this checklist every few months or after severe weather to catch potential issues early.
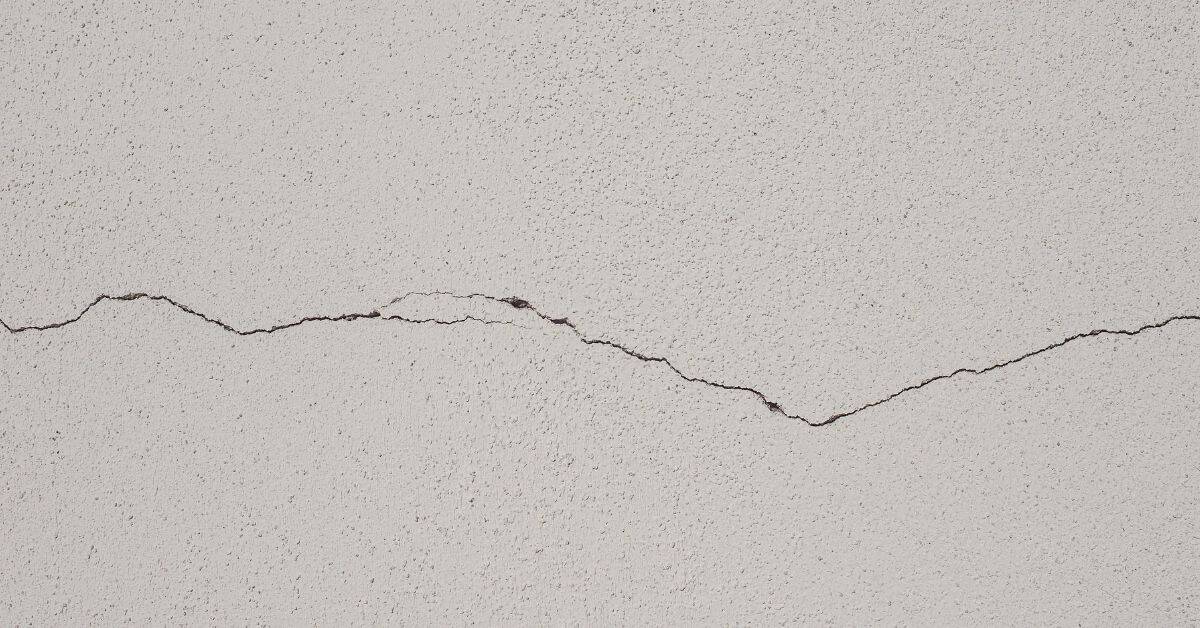
- Check for hairline cracks: These are usually harmless but can widen over time. Use a flashlight to inspect at different angles.
- Inspect wider cracks: Measure width and length. If more than 1/8″ wide or longer than 2″, consider professional help as it may indicate structural issues.
- Look for bulging areas: This could be a sign of moisture buildup behind the concrete. Press gently; if it feels soft, investigate further.
- Check texture changes: Uneven or wavy textures can indicate underlying problems. Run your hand over the surface to feel for differences.
- Inspect stains: Some are harmless, but others (like efflorescence) can indicate moisture issues. Check if they’re persistent or growing.
- Look for delamination: This is when the finish separates from the substrate. Tap with a hammer; a dull sound indicates delamination.
- Check control joints: These are intentional cracks to relieve stress. Ensure they’re still intact and not cracking further.
- Inspect expansion joints: These allow for movement. Check if they’re filled and functioning properly.
Quick rule: If you find any issues, address them promptly to prevent minor problems from becoming expensive rework.
Interior clues and moisture indicators
Regularly inspect the interior of your home for these signs. They can indicate exterior stucco problems that need further investigation.
- Stains on walls or ceilings: Check for discoloration, especially around windows, doors, and where walls meet ceilings. Confirm by gently touching the stain; if it’s damp or feels different from surrounding drywall, investigate further.
- Peeling paint or wallpaper: Inspect areas with peeling or bubbling finishes. If it’s only in one spot, it might be a local issue. But if it’s widespread, there could be a bigger problem outside.
- Musty odors: Sniff around for damp, earthy smells. They can indicate hidden moisture behind walls or ceilings. Confirm by checking these areas with a moisture meter.
- Warped or sagging drywall: Look for any warping, bulging, or sagging in your interior walls and ceilings. This could signal excessive moisture behind the surface.
- Water spots on ceilings: Check for water spots on ceilings, especially near roof edges or where plumbing runs through. These can indicate leaks from above or outside.
- Floors that feel spongy: Walk around your home and check for any areas where the floor feels soft or bouncy. This could mean there’s moisture in the subfloor.
- Mold growth: Inspect for visible mold, especially in corners, behind furniture, or under sinks. Confirm by looking for black, green, or white spots and a musty smell.
- Excessive condensation: Check windows and walls for water droplets or moisture, especially during cold weather. This can indicate poor insulation or ventilation.
Quick rule: If you find any of these signs, don’t just paint over them. They could be symptoms of a bigger problem that needs professional attention.
Recording and scheduling inspections
Use this checklist to document your concrete’s condition and schedule timely inspections. Regular checks help catch issues early, preventing costly repairs.
- Monthly: Visual Surface Check – Inspect exterior for cracks, texture changes, stains, or delamination as mentioned earlier. Use a tape measure to check crack widths.
- Quarterly: Moisture Levels – Check interior moisture levels using a moisture meter. Ideal range is 12-17% (check manufacturer’s instructions for specific products).
- Annually: Expansion Joints – Inspect expansion joints to ensure they’re functioning properly and not allowing water intrusion.
- Spring: Post-Winter Check – After winter, check for freeze-thaw damage. Look for new cracks or increased crack widths.
- Fall: Pre-Winter Preparation – Ensure all cracks are properly sealed to prevent water intrusion during winter.
- Every 3-5 Years: Core Testing – Hire a professional to perform core testing. This checks the concrete’s internal strength and identifies any hidden issues.
- Every 5-10 Years: Dye Testing – Use a non-destructive dye test to check for waterproofing integrity. This helps prevent expensive rework due to undetected leaks.
- Annually: Document Findings – Record all findings, including dates, observations, and any actions taken. This helps track changes over time and prioritize repairs.
Quick rule: Always address cracks promptly. Small cracks can become big problems if left untreated.
Cleaning Stucco Safely
Use low-impact cleaning methods first, such as gentle brushing or rinse water. Avoid aggressive scrubbing that can scar the surface.
Reserve stronger cleaners or specialty products for labeled use and test in a small area first. Be mindful of instructions on the product label and local weather considerations before cleaning.
Gentle cleaning: soft wash and mild detergents
Start by wetting the stucco surface to prevent any detergent from drying out. Use a soft-bristled brush or a long-handled, soft-bristled broom for scrubbing.
Apply a mixture of mild dish soap or a specialized stucco cleaner with warm water. Work in small sections, scrub gently, then rinse thoroughly using a low-pressure nozzle on your garden hose.
Never use abrasive brushes or high-pressure washing as they can damage the stucco finish.
Treating mildew, algae, and efflorescence
Mildew, algae, and efflorescence are common stains on stucco. Mildew is a fungus that thrives in damp conditions, while algae grows where there’s moisture and organic matter. Efflorescence is a white, powdery deposit caused by salt leaching from the stucco.
For mild cases, use a solution of water and bleach (around 1 cup of bleach per gallon of water) or a commercial mildew remover. Apply with a soft-bristled brush, let it sit for 15-30 minutes, then rinse thoroughly.
If stains persist, they may indicate underlying moisture issues. Inspect your stucco and address any cracks or gaps that could be allowing water intrusion. If you’re unsure, consult a professional.
DIY Repairs for Hairline and Small Cracks
Assess cracks to determine if they’re superficial or moving. Clean the crack and remove loose material before patching.
Match texture and let repairs cure according to the product instructions. If you’re unsure about movement or substrate conditions, check the manufacturer guidance before proceeding.
Preparing the crack and surface
Start by cleaning the cracked area thoroughly. Use a soft brush or cloth with mild detergent to remove any dirt, debris, or loose material.
Undercutting might be necessary for wider cracks. This involves widening the crack slightly at an angle using a chisel and hammer. This helps the repair material bond better.
Dry the area completely before applying any repair material. Use a hairdryer or allow it to air dry naturally.
Choosing and applying sealants or patch compounds
For hairline cracks, use an exterior-grade flexible sealant. For wider cracks, opt for a stucco patch compound.
Apply the chosen material according to the manufacturer’s instructions. Use a putty knife or trowel to fill the crack, ensuring it’s level with the surrounding surface.
For sealants, use a damp cloth to wipe away excess material after application. For patch compounds, allow it to dry as per the product guidelines before sanding and finishing.
Texture blending and color touch-up
Once the repair material is dry, use a fine-grit sandpaper to lightly sand the area. This helps blend the repaired section with the surrounding texture.
To match the color, use a small amount of exterior paint in a similar shade. Apply it to the repaired area using a small brush or sponge. Blend it outwards towards the existing finish.
For best results, touch up the repair at least twice, allowing the paint to dry between coats. This ensures a seamless blend with the surrounding stucco.
Larger Repairs, Structural Concerns, and Clear Stop Points
Know the signs that DIY should stop, such as large open cracks, bulging walls, or water intrusion. Document visible damage and symptoms before calling in a pro.
Don’t force repairs that involve structural elements or extensive moisture issues. When in doubt, review local codes and consult a licensed contractor for analysis and repair options.
Red flags: bulging, widespread delamination, active water intrusion
If you notice large separations, soft or rotten sheathing, or persistent interior leaks, stop your DIY repairs immediately. These are signs of significant structural issues.
Bulging stucco indicates a problem behind the surface that’s causing it to push out. This could be due to water damage, termites, or other serious issues.
Widespread delamination means large areas are peeling away from the substrate. This is often caused by moisture getting in and weakening the bond.
Active water intrusion refers to ongoing leaks that you can see or feel. If left untreated, this can cause extensive damage and mold growth.
EIFS- and moisture-specific issues that need specialists
Exterior Insulation and Finish Systems (EIFS) have unique vulnerabilities. If you suspect moisture behind the cladding, do not attempt repairs yourself. This often requires diagnostic testing to find the source.
Moisture can get trapped between the EIFS and the wall, leading to rot and other problems. A professional can determine if the issue is with the flashing, roofing, or something else.
If repairs involve reroofing or extensive work on the exterior walls, it’s best to leave this to experienced contractors. They have the tools and knowledge to do the job safely and effectively.
When to call a pro for structural or warranty-sensitive work
If your repairs involve structural elements, always consult with a professional first. They can assess the damage and ensure your repair plan is safe and effective.
Check your warranties before making any significant repairs. Some warranties require professional repairs to remain valid.
For extensive repairs or those covered by insurance, always follow local code or permit requirements. This may involve hiring a licensed contractor to do the work.
Repainting, Sealing, and Finishing Tips
Prepare the stucco surface by cleaning and roughing up slick areas for good adhesion. Follow a breathable coating approach to allow moisture to escape.
Choose products that specify compatibility with your stucco type and climate. Always verify the label directions and recoat windows with the manufacturer’s guidelines.
Surface Prep and Priming for Stucco
Before you start painting, ensure your stucco surface is clean and ready to receive the new finish. First, clean the area using a soft wash and mild detergent, just like we discussed earlier.
Next, if you’ve made any repairs, make sure they’re completely cured and blended with the existing texture. Don’t rush this step; it’s crucial for a seamless finish.
Now, apply a high-quality, exterior-rated primer. This will improve paint adhesion and help seal the surface. Use a primer that’s compatible with your chosen paint type (latex or oil).
Let the primer dry according to the manufacturer’s instructions before moving on to painting.
Selecting Paints and Sealers: Breathability and Compatibility
When choosing a paint or sealer, always opt for breathable, exterior-rated products. These allow moisture to escape, preventing trapped water from causing damage.
For example, acrylic latex paints are great choices as they’re breathable and durable. They also come in various finishes to suit your needs.
Before applying any new product, verify its compatibility with your existing finish and substrate. Check the manufacturer’s guidelines or consult a professional if you’re unsure.
Remember, we covered sealant selection earlier. If you’re using one, ensure it’s compatible with your paint and allows for proper moisture escape.
Application Tips and Maintenance-Friendly Finishes
Apply paint or sealer on a calm, dry day to ensure the best results. Ideal temperatures are between 50°F and 90°F (10°C and 32°C).
Use high-quality brushes, rollers, or sprayers for even application. Work in small sections at a time to avoid lap marks.
For long-term maintenance ease, consider a satin or semi-gloss finish. These are easier to clean and maintain than flat or high-gloss paints.
Lastly, apply multiple thin coats instead of one thick one. This helps prevent drips and ensures even coverage. Allow each coat to dry according to the manufacturer’s instructions before applying the next.
Seasonal Maintenance Schedule and Long-Term Prevention
Build a seasonal rhythm that includes inspection, minor repairs, and cleaning. Use this cadence to catch issues before they grow.
Adopt preventative measures like addressing moisture sources and detailing protective coatings per product labels. Check local weather patterns and manufacturer instructions to tailor the plan.
Rain-season and gutter/roof interface checks
Stucco’s lifespan depends on how well it’s protected from water. During rain season, keep an eye on your gutters, downspouts, and roof-wall interfaces.
Clogged gutters can cause water to overflow and splash back onto the stucco. This constant exposure weakens the surface and promotes cracking. Make sure you clean them out regularly.
Check your downspouts. Ensure they’re directing water away from the house, not towards it. If they’re too close, consider extending them further away.
At the roof-wall interface, inspect for any gaps or cracks where water could seep in. Seal these with a compatible caulk to prevent penetration.
Winter and freeze-thaw precautions
Snow, ice, and freezing temperatures can wreak havoc on stucco. Here’s how to protect it during winter:
First, remove snow from your roof regularly. Heavy snow can cause the roof to sag, putting pressure on the walls and leading to cracks.
Avoid using rock salt or other de-icers near stucco. They can damage the surface over time. Instead, use sand for traction.
Freeze-thaw cycles can cause hairline cracks to form. While it’s tempting to repair these right away, wait until spring. Temperatures need to be consistently above freezing for repairs to set properly.
Long-term recordkeeping and budgeting for major work
Maintaining stucco over the years involves more than just regular checks. Keep a record of its condition and plan for future projects.
Take photos of your stucco annually. This helps you track changes over time and identify potential issues early.
Start a maintenance log. Note down repairs, when they were done, and what was used. This will help you anticipate future needs.
Create a rough budget plan for major work like repainting or re-coating. Set aside funds each year to ensure you’re ready when the time comes.
Conclusion
Staying on top of stucco maintenance protects safety, keeps water out, and preserves curb appeal. Do the checks, follow the steps, and act quickly when something looks off.
First, perform a dry-day inspection with a flashlight: look for hairline cracks, bulges, moisture staining, or loose coating; confirm the stucco type and relevant material specs, gather the right tools and materials, then clean any dirt or mold in a safe, light approach; proceed with small repairs first, assess larger repairs or potential structural concerns, then repaint, seal, and finish as planned, and finally lock in a seasonal schedule to prevent recurrence, all while following the safety rules and choosing the simplest, most durable fix first.
Common mistakes to avoid include using aggressive cleaners or high-pressure washing on damaged or delicate stucco, attempting large repairs without verifying underlying structure or moisture problems, and skipping proper surface testing or masking. Remember to test any patch in a concealed area first, wear eye and skin protection, work from stable ground or a solid ladder, and never force material into gaps or cracks.
When to call a professional: if you see major cracking, signs of shifting, advanced moisture intrusion, or you can’t safely access the area, it’s time for an expert assessment. Don’t push past a clear stop point. Stay practical, stay safe, and keep the job moving toward a durable, good-looking result. You’ve got this—keep the hammering steady and the plan tight.
FAQ
What are telltale signs stucco needs attention beyond the surface look?
Look for hairline cracks that grew, bubbling paint, or water staining. If you see efflorescence or soft, damp spots, stop and inspect behind the finish. Don’t ignore stained or soft areas; they mean moisture is getting in.
Can I safely power wash stucco to clean it?
Gentle cleaning with a low-pressure setting is usually fine. Avoid blasting at high pressure or close up to the surface. If you’re unsure, test a small area and follow the cleaner’s instructions for stucco use.
How do I decide if a crack is DIY repair material or a professional job?
Hairline, dry cracks in healthy stucco can often be repaired with matching patch material. If cracks keep reappearing, run along a corner seam, or you see movement, call a pro. Structural concerns require professional assessment.
What should I check before repainting or sealing stucco?
Check the substrate and any existing sealants for adhesion. Make sure the surface is clean and dry, and follow the paint or sealer manufacturer’s prep steps. If you can’t confirm compatibility, ask the product label or manufacturer for guidance.