
Introduction
Cleaning stucco safely means removing dirt without damaging the finish. This article breaks down when to use pressure, what detergents fit, and safer techniques. It stays practical and hands-on, not a classroom lesson.
Begin with a gentle approach and test a small, inconspicuous spot first. Use a mild detergent approved for stucco and a broad spray; never scrub or dig at stubborn marks. If you see staining or damage, stop and check manufacturer guidance or local rules before continuing.
Key takeaways
- Test a small area first to detect finish reactions before full cleaning.
- Use soft wash or low-pressure methods on delicate stucco textures only.
- Avoid bleach on acrylic or elastomeric finishes unless manufacturer-approved guidelines.
- Document nozzle angle and pressure settings during initial test patch.
- Wear eye protection and gloves; rinse thoroughly after cleaning to protect skin.
- Seal or repaint after checking for cracks to prevent water intrusion.
Table of Contents
- Introduction
- Key takeaways
- Understanding Stucco Types and Finish Vulnerabilities
- When to Clean Versus Repair or Repaint
- Choosing the Right Cleaning Approach: Soft Wash Vs. Pressure Wash
- Pressure-Washing Specifics: Settings, Nozzles, and Test Patches
- Detergents and Cleaners: Ingredients, Mixes, and Safety
- Tools and Materials Checklist
- Step-by-Step Safe Cleaning Procedure
- Repair, Repainting, and Long-Term Maintenance
- Conclusion
- FAQ
Understanding Stucco Types and Finish Vulnerabilities
Different stucco systems have unique makeup that affects how they respond to cleaning. Traditional cement stucco, EIFS or synthetic stucco, and acrylic finishes each react to moisture and cleaners in their own way. Knowing the system helps you plan a gentler approach that protects the surface texture.
Texture and finish are key risk factors. Sanded or rough textures can trap cleaners, while smoother finishes may scar under aggressive pressure. Use the product label or manufacturer guidance to confirm what your finish can tolerate before you start.
Stucco materials and layers
The material choices for your stucco can greatly affect how it responds to cleaning. Understanding the different components can help you choose the right cleaning method.
- Cement Stucco: Porous, absorbs water quickly. Look for Type N or S cement. Avoid high-pressure washing as it can cause damage.
- Synthetic/EIFS: Non-porous, water-resistant. Spec look for ‘EIFS’ in product name. Use mild detergents only.
- Acrylic Finish: Paint-like finish, vulnerable to harsh chemicals. Look for 100% acrylic content. Avoid acid-based cleaners.
- Base Coats: Thick layers, provide structure. Can tolerate more water but avoid high pressure.
- Finish Coats: Thin layers, give final appearance. Most vulnerable to cleaning methods; use mildest possible.
Texture and finish vulnerabilities
Stucco textures react differently to pressure and agitation. Understanding these differences can help prevent damage.
Smooth finishes: Less likely to crack but may delaminate under high pressure. Use low-pressure washing.
Textured finishes: More resistant to cracking but vulnerable to deep cleaning agents getting trapped in crevices. Use mild detergents and avoid scrubbing.
Sponge finishes: Most susceptible to damage due to their delicate nature. Use only soft-bristle brushes and mild detergents, avoid pressure washing.
When to Clean Versus Repair or Repaint
Assess visible damage before cleaning. Cracks, loose bubbles, and wet or efflorescent patches suggest repairs may be needed first. Cleaning a damaged area can push moisture deeper or widen cracks.
Use decision criteria that reference guidance from labels, data sheets, or local code requirements. If in doubt, treat the area as needing repairs or repainting prior to any cleansing treatment, and verify with the manufacturer instructions or local rules.
Visual checkpoints and damage indicators
Before you grab your cleaning supplies, inspect your stucco for any signs of damage. This checklist helps you decide if repairs are needed before cleaning.
- Cracks: Check for hairline cracks or larger ones. Hairlines can be cleaned but wider ones need repair first to prevent further damage.
- Loose areas: Gently tap the stucco. If it sounds hollow, there might be delamination. Repair before cleaning.
- Efflorescence: White powdery deposits indicate moisture issues. Address the cause (like leaks) before cleaning.
- Staining: Light stains can be cleaned but heavy ones may require repainting after cleaning.
- Mold or mildew: Green, black, or white spots need to be treated with a mold remover before cleaning.
- Dents or holes: These need patching before cleaning to prevent water penetration.
- Peeling paint: This indicates underlying issues. Repaint after addressing the cause and cleaning.
- Discoloration: Uneven color may require repainting after cleaning.
Quick rule: If you find any of these issues, address them first to avoid worsening damage during cleaning.
Risk thresholds for cleaning
Certain conditions can increase the risk of damaging your stucco while cleaning. If you’re unsure, consult a professional before proceeding.
Age: Older stucco may be more fragile. Be extra gentle when cleaning to avoid crumbling or delamination.
Delamination: If your stucco is peeling away from the substrate, it’s too risky to clean. Consult a professional for repair first.
Recent repairs: Wait at least 30 days after repairs before cleaning to allow the materials to cure properly and avoid damaging fresh patches.
Choosing the Right Cleaning Approach: Soft Wash Vs. Pressure Wash
Soft washing uses low-pressure application with cleaners to lift stains without gouging the finish. Pressure washing delivers higher force and is better for loose debris but risks scar on delicate surfaces. Match the method to the stucco type and stain when possible.
Specialty stains or sensitive finishes often respond best to low-pressure chemical methods. Always confirm technique suitability with the cleaner’s instructions and the stucco manufacturer guidance before proceeding.
Soft wash: method and typical uses
The soft wash method is gentle yet effective for cleaning stucco. It’s like giving your walls a mild, soapy bath.
Here’s how it works:
Low pressure: We use a low-pressure spray to apply cleaning solution, usually around 500-600 PSI. This is about as strong as a typical garden hose.
Chemical action: The cleaning solution contains detergents that break down dirt and stains. It’s tough on grime but safe for your stucco finish.
Pressure wash: when and how to use it
Pressure washing can be used on stucco, but it’s important to understand that high pressure can damage the finish.
Low pressure only: When you do need to use a pressure washer, keep the PSI low – around 1200 PSI or less. This is about half the strength of most pressure washers.
Wide-angle nozzle: Use a wide-angle nozzle tip (40° or wider). This spreads out the water stream, reducing the impact on your stucco.
Technique matters: Hold the wand at an angle to the wall, not straight on. Start from the top and work your way down to avoid streaking.
Decision checklist
Before you start cleaning, use this quick checklist to decide which method is right for your situation.
- Stucco type: Check if your stucco is smooth or textured. Smooth finishes are more susceptible to damage from pressure washing.
- Contaminant type: Identify what you’re cleaning – dirt, mold, or something else. Soft wash is great for organic stains like mildew.
- Nearby materials: Consider if there are delicate plants, windows, or other surfaces nearby that could be damaged by pressure washing.
- Quick rule: If in doubt, start with soft wash. It’s safer and can often get the job done.
Pressure-Washing Specifics: Settings, Nozzles, and Test Patches
Set up the equipment according to the machine’s manual and your hose supply. Choose nozzle angles that minimize surface impact; start with the widest safe spray and adjust as needed. Perform a controlled test patch on an inconspicuous area first.
Always confirm nozzle and pressure recommendations with the manufacturers’ specs. Document test results and proceed only if the test patch shows no damage or dye loss.
Safe pressure guidance and verification
The first rule of thumb is: less is more. Start low, then increase if needed.
Check your machine’s PSI (pounds per square inch) and GPM (gallons per minute). Most manufacturers recommend 1200-1900 PSI for stucco. Don’t go above this without testing first.
Always confirm with the manufacturer or installer. They know their product best. Tests are crucial – start low, increase gradually, and monitor results.
Nozzle selection, spray angle, and distance
Wide-angle nozzles (40°) are your friend. They spread the water out, reducing the force on one spot.
Keep your spray angle shallow – around 30-45°. This helps prevent water from getting under the finish and causing damage.
Maintain a distance of at least 12 inches. This gives you control and reduces the risk of scarring.
Test patch protocol
Pick an inconspicuous area for your test. You don’t want to mess up your fancy front entrance!
Start with the lowest pressure and detergent setting. Spray a small section, then let it sit for 5-10 minutes. Rinse off.
Inspect for any finish change or water intrusion. If all looks good, increase the pressure slightly and repeat. Keep testing until you find the sweet spot that cleans without damaging.
Detergents and Cleaners: Ingredients, Mixes, and Safety
Understand the roles of neutral detergents, alkaline cleaners, and oxidizers. Surfactants help lift grime, while bleach or other oxidizers can brighten but may affect certain finishes. Biocides may be used for mold but require careful application.
Consider environmental and landlord safety requirements when selecting cleaners. Check product labels, data sheets, and local regulations to ensure compatibility with your stucco and surroundings before mixing or applying.
Choosing the right chemical by stain type
Stains on your stucco can vary, and so should your cleaning approach. Here’s how to match common stains with appropriate cleaners:
Mildew and Algae: These are organic growths that respond well to alkaline cleaners. They’re safe for stucco but harsh on plants, so keep them off your landscaping.
Rust: Rust stains need an acid-based cleaner to break down the iron oxide. Be careful not to use these on alkaline surfaces like concrete or masonry, as they can damage the finish.
Efflorescence: This is a white, powdery deposit caused by salt leaching from the stucco. It’s best removed with a neutral detergent. Avoid strong oxidizers, which can make it worse.
Mixing guidelines and safety checks
Always follow the product label instructions for mixing your cleaner. A little goes a long way:
For example, if you’re using a concentrated alkaline cleaner, mix 1 part cleaner to 4 parts water. For acid-based cleaners, it’s usually 1:8.
Before applying, do a small test mix on an inconspicuous area to ensure it doesn’t damage the finish. Never combine incompatible chemicals – check with your local hardware store if you’re unsure.
Safety first: Always wear gloves and eye protection when mixing and using cleaners. Ensure proper ventilation, especially in enclosed spaces.
Runoff control and environmental precautions
Containing runoff is crucial to protect your landscaping and the environment:
Use drop cloths or tarps around the area you’re cleaning to catch any runoff. Rinse these off separately after use.
Protect your plants by keeping cleaners away from them. If there’s a risk of runoff, cover them with plastic sheeting.
Check local disposal regulations for chemical waste. Some areas require specific treatment before disposal in sewers or landfills. Always dispose of chemicals responsibly to protect the environment and avoid fines.
Tools and Materials Checklist
Keep a straightforward kit: soft wash brushes, low-pressure sprayer or pump sprayer, hoses, and appropriate nozzles. Have protective gear such as eye protection, gloves, and non-slip footwear on hand. Have cleaning agents, water, and a plan for safe disposal ready.
Include surface protection for nearby plants or openings and extra rags or towels for quick blotting. Verify each item’s compatibility with your stucco type and the cleaner you intend to use by reading the label or manufacturer instructions.
Equipment list for each method
Before you start cleaning, make sure you have the right tools for the job. Here’s a checklist to ensure you’re well-equipped.
- Soft-wash system or pump sprayer: Essential for applying detergents at low pressure. Don’t skip this; it helps prevent damage and ensures even application.
- Pressure washer with adjustable settings: Needed for higher-pressure washing. Adjustable settings let you tailor the power to suit your needs.
- Extension wands: Help reach those hard-to-get-at spots without risking falls from ladders.
- Wide-angle nozzles (25° or 40°): These are gentler on stucco surfaces and help distribute water evenly.
- Adjustable lance: Allows you to control the spray pattern and width, protecting your stucco from excessive pressure.
- Test patches (small areas): Before starting, test your method and detergent on a small, hidden area to check for any adverse reactions.
- Ladder (if needed): For elevated work, use a sturdy ladder with safety features. Don’t risk falls; secure it properly.
- Hose reel: Keeps your hose tidy and prevents tripping hazards on the jobsite.
Quick rule: Always check your equipment before starting. Faulty tools can damage your stucco or cause injuries.
PPE and safety gear
Safety first! Here’s a checklist to protect you from potential hazards during the cleaning process.
- Gloves: Protect your hands from harsh chemicals. Choose rubber or nitrile gloves for better grip and protection.
- Eye protection (safety glasses or goggles): Shield your eyes from debris, detergents, and water spray. Don’t take chances with your vision.
- Respirator (for aerosolized chemicals): Some detergents can create harmful aerosols. A respirator protects you from inhaling these particles.
- Long sleeves and long pants: Protect your skin from detergents, water, and sun exposure. Opt for breathable fabrics to stay comfortable.
- Non-slip shoes: Prevent falls by wearing shoes with good grip, especially when working on ladders or wet surfaces.
- Ladder safety equipment (if needed): Use a ladder with safety features like top platforms and stabilizers. Secure it properly before climbing.
- Fall protection (for elevated work): If you’re working at heights, use harnesses or other fall-protection systems to prevent serious injuries.
- Hearing protection: Long-term exposure to high-pressure washing noise can damage your hearing. Wear earplugs or earmuffs for protection.
Quick rule: Always prioritize safety. The right gear protects you and ensures a successful, injury-free job.
Step-by-Step Safe Cleaning Procedure
Begin with a prep phase: remove loose debris and cover delicate features. Test patch and observe for any adverse reactions before full cleaning. Work methodically from top to bottom to avoid streaks.
Rinse frequently and avoid aggressive scrubbing. Stop if you see color leaching, texture change, or new cracks, and reassess with caution using the manufacturer guidelines or local rules.
Step-by-Step Cleaning Process
Follow this clear, numbered sequence to safely clean your stucco surfaces without damaging the finish.
- Preparation: Put on PPE, cover nearby plants and windows. Shut off power outlets near work area.
- Safety Checks: Verify pressure washer settings, nozzle type, and test patch results from earlier steps.
- Main Work: Apply detergent, let it dwell, agitate if necessary, then rinse with low-pressure technique.
- Inspection: Check for residual stains or surface damage. Address any issues promptly.
- Cleanup: Store equipment properly, dispose of chemicals responsibly, and remove protective covers.
Prep and Protection Steps
Before you start cleaning, take these crucial steps to protect your property and minimize chemical contact.
Masking Windows: Use painter’s tape and plastic sheets to cover windows and prevent detergent from getting inside.
Covering Plants: Protect nearby plants with tarps or drop cloths. Some detergents can harm foliage.
Shutting Off Power Outlets: Turn off power at the main panel for outlets near your work area to prevent electrical hazards.
Pre-wetting Areas: Lightly mist the stucco with water before applying detergent. This reduces chemical absorption and prevents oversaturation.
Cleaning Sequence and Technique
Follow this sequence to ensure effective cleaning without overexposure or oversaturation of the stucco finish.
Application Order: Start from the top and work your way down, ensuring you don’t step on cleaned areas.
Dwell Times: Allow detergent to sit for the recommended time (usually 5-10 minutes) before rinsing. This gives it time to break down stains effectively.
Agitation: If necessary, use a soft-bristle brush or broom to gently agitate the detergent on stubborn stains. Be careful not to scrub too hard and damage the finish.
Rinsing Technique: Use a low-pressure technique (under 1200 PSI) with wide-angle nozzle to avoid oversaturating or damaging the stucco.
Post-Clean Inspection and Remediation
After cleaning, inspect your work for any remaining issues. Address them promptly to prevent further damage or staining.
- Check for Residual Stains: Look for any missed spots or stains that didn’t come off completely. Re-treat if necessary.
- Inspect Surface Damage: Check for any signs of damage, such as cracks or chips, caused by cleaning. Repair promptly to prevent water intrusion.
- Water Intrusion Check: Look for any signs of water penetration into the stucco. If found, address immediately to prevent mold growth and structural issues.
- Spot Repair: If you find small areas of damage or stains that didn’t come off completely, perform spot repairs as needed.
- Second Treatment: If necessary, apply a second gentle treatment to stubborn stains. Always follow up with proper rinsing and drying.
Quick rule: Inspect your work thoroughly after cleaning to ensure no issues go unnoticed or untreated.
Repair, Repainting, and Long-Term Maintenance
Document any repairs discovered during cleaning, including cracks, spalling, or loose material. Align repainting to ensure compatibility with the existing finish and to avoid peeling. Plan any color or texture change with appropriate primers or modifiers as required by the product instructions.
Adopt maintenance practices that reduce the need for frequent deep cleanings. Use weather-aware scheduling, gentle cleaning methods, and regular inspections to catch issues early, following manufacturer and local guidance.
Common post-clean repairs
After cleaning, inspect your stucco for any damage. You might find small cracks, loose finish, or efflorescence – a white, powdery substance that can form on the surface.
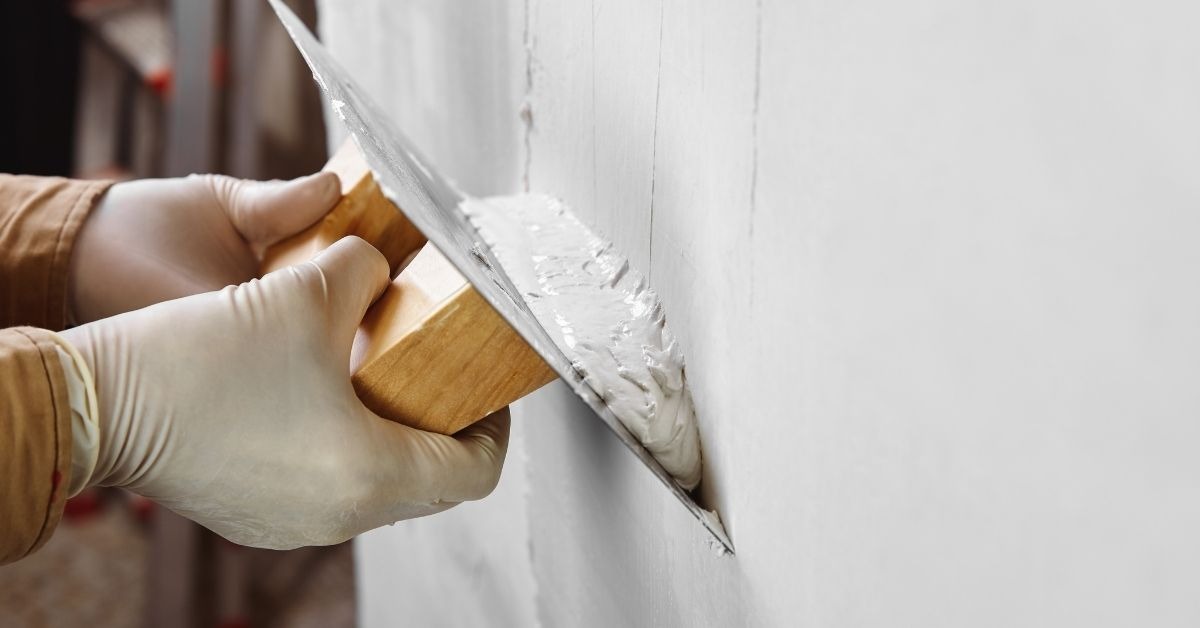
Patching small cracks: Use a stucco patching compound and a putty knife to fill in any minor cracks. Let it dry, then sand smooth.
Reattaching loose finish: If parts of your stucco are coming off, you’ll need to reattach them with a construction adhesive. Apply the adhesive to the back of the loose piece and press it firmly into place.
Efflorescence: This is usually caused by moisture behind the stucco. To fix it, you’ll need to address the source of the moisture. If you can’t find or fix the problem yourself, call a professional.
If you notice any large cracks, significant damage, or structural issues, stop and call a pro immediately. These could be signs of serious problems that require expert attention.
Repainting and coating compatibility
Before you repaint, make sure your stucco is clean, dry, and free of any damage. Any dirt or residue left behind can affect the paint’s adhesion.
Primer: Use a primer designed for masonry surfaces to seal the stucco and improve paint adhesion. This will help your new paint last longer.
If you used strong cleaning chemicals, wait at least 24 hours before painting to ensure they’re fully dry and won’t affect the paint’s color or adhesion. Always follow the manufacturer’s instructions for your specific paint.
If you’re unsure about any aspect of the repainting process, consult with a professional painter. They can provide guidance tailored to your specific situation.
Routine maintenance plan
A little preventative maintenance goes a long way in keeping your stucco looking its best. Here’s a simple routine to follow:
Inspect regularly: Check your stucco every few months for any signs of damage, such as cracks or loose finish. The sooner you catch these issues, the easier and cheaper they are to fix.
Seasonal checks: Stucco can be affected by temperature changes and moisture. Inspect it more frequently during spring and fall, when weather conditions can be unpredictable.
Gentle cleaning: Clean your stucco gently, using a soft-bristled brush or cloth with mild detergent and water. Avoid power washing, as the high pressure can damage the finish.
By following this routine, you’ll prevent heavy contamination and keep your stucco looking great for years to come. If you notice any major issues, don’t hesitate to call a professional for help.
Conclusion
Cleaning stucco safely protects the finish, preserves durability, and keeps the exterior looking right without opening the door to costly repairs. Stay deliberate, test first, and keep the process moving with steady hands.
Begin with a practical check: confirm the stucco type and finish vulnerability, decide between soft wash and pressure wash, run a small test patch, use the mildest effective detergent, set conservative pressure and nozzle, keep the spray moving, rinse completely, and then inspect for any signs of damage or staining before proceeding to repair, repaint, or long-term maintenance.
Avoid common missteps: never blast soft or textured stucco with high pressure, always test patches and keep to the gentlest method that works, and never mix or apply cleaners that could harm the finish or nearby landscaping. Protect plants and furniture, follow safe handling of cleaners, and never let detergents dry on the wall before rinsing. Those simple safety rules save you time, money, and a redo later.
If you see cracks, loose material, extensive discoloration, or you’re working on a tall or expansive surface, call a professional before you push ahead. When in doubt, pause, reassess, and plan your next move like a foreman would—decisive, safe, and focused on a solid, lasting result.
FAQ
Can I use a pressure washer on textured stucco without causing damage?
Yes, but you must use the gentlest approach that gets the job done. Start far enough away and at a low setting, then test on a discreet area. If you see fiber, cracks, or the finish blistering, stop and switch to a softer method.
How do I choose a detergent or cleaner for stucco surfaces?
Look for cleaners labeled safe for stucco or masonry. Read the label for dilution guidance and safety notes. If in doubt, use plain water or a simple, non-caustic cleaner and rinse well.
Should I test a small patch before cleaning the whole wall?
Always do a test patch. Pick a hidden spot and clean it the way you plan to clean the rest. Wait and inspect for any color change, staining, or finish damage before proceeding.
What can I do to prevent future damage after cleaning?
Rinse completely and let the surface dry naturally. Avoid high-pressure jarring sprays near caulking, joints, and loose stucco. Consider protecting nearby plants and trims during cleaning and schedule maintenance to catch problems early.