
Introduction
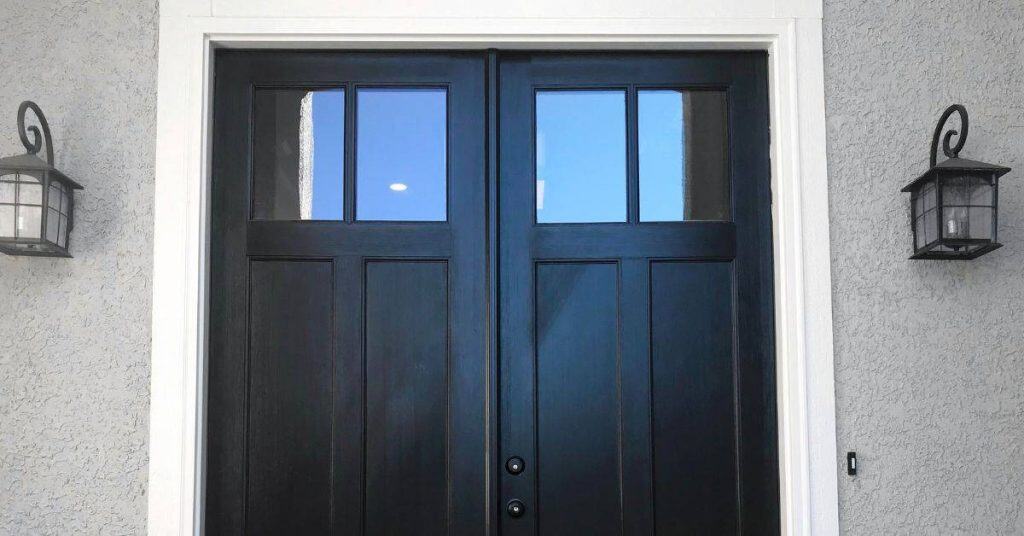
Backwrapping EIFS at windows and doors means wrapping the exterior foam, weather barrier, and flashing around the rough opening to protect and seal it.
It helps prevent water intrusion and wind-driven leaks where the openings meet the wall. DIY patches often fail when the edge around the opening isn’t wrapped and flashed properly. Without backwrapping, patches can trap moisture and fail at adhesion, causing leaks or cracking over time. Check manufacturer instructions and local rules for proper flashing, and make sure to follow safe, step-by-step guidance when planning the wrap.
Key takeaways
- Backwrap is a water-management layer that seals gaps around windows and doors.
- Skipping backwrap invites moisture intrusion, freeze-thaw damage, and EIFS panel detachment.
- Inspect flashing, sealants, and wrap continuity before any patch or wrap repair.
- Use compatible backwrap materials with manufacturer guidance to prevent delamination.
- Safety: wear eye protection and avoid disturbing insulation or vapor barriers.
- Document damaged area and observe for future leaks during and after repair.
Table of Contents
- Introduction
- Key takeaways
- What Backwrapping EIFS Means and Why It Exists
- Why Backwrapping Is Essential at Windows and Doors
- Common Failure Modes of DIY Patches That Skip Backwrapping
- Visual Checkpoints and Diagnosis Before Any Repair
- Tools and Materials Checklist for a Proper Backwrap Repair
- Step-by-Step Backwrapping Technique (Practical Repair Workflow)
- Material Specs, Standards, and Compatibility to Check
- Cost, Time, and Scope: When DIY Is Realistic Versus Hiring a Pro
- Conclusion
- FAQ
What Backwrapping EIFS Means and Why It Exists
Backwrapping is an edge treatment that wraps the EIFS system around openings like windows and doors. It creates a continuous water-resistive layer at the edges. This helps direct moisture away from the fasteners and substrate and reduces gaps where water can penetrate.
In plain terms, backwrapping turns the exterior finish into a seamless shield at the opening interface. It matters because the edges are common leak paths and movement points. Understanding its purpose helps you judge whether a patch will endure rain exposure and movement over time.
Clear definition of backwrapping
Backwrapping EIFS is a technique where the base layer and reinforcing mesh of an Exterior Insulation and Finish System (EIFS) are wrapped around window and door openings. It’s not just about slapping on some finish; it’s about creating a sealed, integrated interface that turns your EIFS system into a continuous water-resistive barrier.
Imagine you’re wrapping a present – the EIFS is like the gift wrap, but instead of paper, it’s a tough, protective layer. And instead of tape, we use reinforcing mesh to secure it all together. Now, that ‘present’ is your window or door opening, and we’re making sure it’s well-protected from the elements.
So, backwrapping isn’t just about looks; it’s about creating a strong, water-resistant seal around your openings to keep moisture out and protect your home’s structure.
How backwrapping differs from surface-only patching
Many DIY homeowners make the mistake of thinking that a quick surface patch is enough to fix EIFS damage around windows and doors. But here’s why that’s like putting a band-aid on a broken bone – it might look better, but it doesn’t solve the problem.
Surface-only patching only covers up the visible finish. It doesn’t address the underlying substrate or the joints where water can sneak in. That means even if your EIFS looks fixed from the outside, moisture can still get behind it and cause damage to your home’s structure over time.
Backwrapping, on the other hand, goes deep. It reinforces the entire area around the opening – not just the surface you see. By wrapping the base layer and mesh around the opening, we’re creating a strong, continuous barrier that keeps moisture out at all levels.
Why Backwrapping Is Essential at Windows and Doors
Windows and doors introduce movement and flashing changes that EIFS alone may not cover well. The transition areas are prone to moisture intrusion if not protected. Backwrapping provides a continuous barrier at these critical edges.
The approach also helps keep water from seeping behind the finish where nails, screws, or sealants join the opening. It reduces the risk of visible stains, rot, or finish failure near those openings. Proper backwrap can extend the life of the EIFS system around entries.
Moisture management and water-shedding function
Backwrapping EIFS at windows and doors isn’t just about slapping on some mesh and base coat. It’s about managing moisture, the silent killer of your walls.
EIFS is like a big, thirsty sponge. Water gets in, it wants to keep it. That’s why we backwrap. We’re giving that water a one-way ticket out.
Backwrapping directs incidental moisture away from the substrate, preventing it from wicking into joints and causing damage. It creates a continuous barrier that sheds water like a well-oiled raincoat.
Movement accommodation and bond integrity
Windows and doors are like the hinges of your house. They move, they flex, and that’s okay. But EIFS doesn’t like to move much. That’s where backwrapping comes in.
By wrapping the mesh and base coat into the jamb, we’re giving the EIFS some flexibility. It can move with the window or door, instead of fighting against it. This reduces stress at the interface, preventing edge delamination – that’s when your EIFS starts to peel off like sunburnt skin.
Think of it like this: You wouldn’t wear a tight suit while dancing, would you? Same goes for your walls. We need to give them room to move.
Common Failure Modes of DIY Patches That Skip Backwrapping
Without backwrapping, patches often fail at the edges where moisture concentrates. You may see recurring leaks that seem to reappear after rain. The quick patch can mask underlying substrate issues until they worsen.
Hidden rot or deterioration behind the patch is another common problem. Finishes can crack or detach when the backwrapping is omitted, leading to premature finish failure. These failures are harder to diagnose once water has moved behind the EIFS.
Water entry pathways after superficial patching
When you skip backwrapping and apply a surface-only patch, water can still find its way in. Here’s how:
Gaps at the window or door jamb let water seep behind your patch. Flashings that aren’t properly integrated also create entry points. And if tape laps aren’t sealed tight, water will wick right through.
Result? Water ends up where it shouldn’t be, causing more damage you can’t see.
Adhesion loss and mesh delamination
Surface-applied skim coats might look good at first, but they won’t last without proper integration. Here’s why:
The underlying mesh and substrate need to bond together like glue. If you skip backwrapping, that bond is weak or non-existent.
Over time, this causes the mesh to delaminate – it peels off like a sticker on wet paint. Once that happens, your patch is as good as gone.
Hidden substrate damage and progressive decay
Without proper backwrapping, you’re not just leaving yourself vulnerable to water entry. You’re also letting hidden damage get worse:
Underneath your patch, the EIFS might be rotting or crumbling. But since you can’t see it, you don’t know it’s happening – until it’s too late.
Progressive decay means the damage keeps spreading. What started as a small issue becomes a big problem that costs more to fix.
Visual Checkpoints and Diagnosis Before Any Repair
Start with a close look at the window or door interface and the surrounding EIFS. Look for peeling, cracks, or gaps near the opening. Note any staining or soft spots that suggest moisture intrusion.
Check for proper flashing transitions and whether the existing coating continues smoothly over the edge. If you see exposed substrate or delamination, backwrapping should be a consideration before patching.
Exterior Visual Signs to Evaluate
Before you start any repair, use this checklist to spot exterior clues that backwrapping might be needed.
- Soft spots: Gently press around windows and doors. Softness indicates potential damage.
- Cracking around reveals: Check where EIFS meets window/door frames. Cracks here need attention.
- Staining: Look for water stains, especially at the bottom of walls near windows and doors.
- Finish anomalies: Peeling paint or loose stucco could hide bigger issues.
- Warping or bowing: Check frames. If they’re not straight, there might be hidden damage.
- Caulking condition: Cracked or missing caulk around openings can let water in.
- Mold or mildew: Spots indicate moisture intrusion and potential decay.
- Window/door operation: Check if they stick, jam, or don’t close properly. This could mean EIFS damage behind them.
Quick rule: If you spot any of these signs, probe further before patching.
Probing and Moisture Verification
Use these techniques to check hidden conditions before you start repairs.
- Non-destructive probing: Gently tap around suspect areas with a soft mallet. Hollow or dull sounds indicate potential damage.
- Moisture meter readings: Use one to check for excess moisture behind EIFS. High readings need further investigation.
- Exploratory openings: Carefully cut small holes in suspect areas to peek inside. Seal them up afterwards.
- Check insulation: Make sure it’s dry and intact. Wet or missing insulation can cause big problems.
- Examine sheathing: Look for warping, delamination, or other signs of damage behind EIFS.
- Inspect framing members: Check they’re straight, sound, and securely fastened.
Quick rule: If you find any hidden issues, backwrap before patching to prevent further decay.
Tools and Materials Checklist for a Proper Backwrap Repair
Gather basic hand tools, a utility knife, and appropriate cutting devices. Have a coated mesh, weather barrier materials, and compatible sealants on hand. Include PPE such as gloves and eye protection for safe handling.
Choose quality levels for mesh, base coats, and finish products by verifying manufacturer instructions. If in doubt, check product labels or datasheets for compatibility with your EIFS system and local requirements.
Materials: meshes, base coats, adhesives, flashing, sealants
Before you start any backwrap repair, ensure you have all the necessary materials. This checklist helps you prepare.
- Stainless steel or fiberglass mesh: Choose a durable, corrosion-resistant mesh to reinforce your patch. Check for proper size (usually 4-6 inches wide) and gauge (thinner is stronger).
- Base coat (scratch coat): This primer promotes adhesion. Ensure it’s compatible with your EIFS system and suitable for exterior use.
- Adhesive: Use a high-quality, flexible adhesive designed for EIFS repairs. Check its weather resistance and bond strength.
- Flashing: For windows and doors, use preformed flashing or custom-cut metal flashing to direct water away from openings.
- Sealant: Choose a paintable, flexible sealant for filling gaps and seams. Ensure it’s compatible with your adhesive and can withstand weathering.
- Backer board (optional): If needed, use a rigid backer board to support large patches or replace damaged substrate.
- Fasteners: Use corrosion-resistant screws or nails to secure mesh and backer board. Check they’re the right size for your application.
- Tape (optional): For small gaps, use a flexible tape to seal before applying base coat.
Quick rule: Always check material compatibility and weather ratings to ensure longevity of your repair.
Tools and safety gear
Having the right tools ensures a safe, efficient backwrap repair. Here’s what you need:
- Tape measure: Accurate measurement prevents errors and waste.
- Utility knife: For cutting mesh, tape, and flashing to size.
- Screwdriver or drill: To secure mesh and backer board. Use a drill with the appropriate screwdriver bit for better control.
- Hammer (optional): If using nails, a hammer is necessary.
- Trowel (4-6 inch): For applying base coat and adhesive. Choose one with a comfortable handle.
- Safety glasses: Protect your eyes from debris during cutting and sanding.
- Work gloves: To protect hands from cuts, scratches, and chemicals.
- Dust mask (optional): If sanding or disturbing old material, wear a dust mask to prevent inhalation of particles.
- Ladder or scaffolding: For high openings, use a sturdy ladder or scaffolding. Ensure it’s secure and level before working.
- Hard hat (optional): If there’s a risk of falling debris from above, wear a hard hat for head protection.
Quick rule: Always prioritize safety when working at heights or with power tools.
Step-by-Step Backwrapping Technique (Practical Repair Workflow)
Plan the workflow in clear phases and prepare the area around the opening. Remove failed material carefully to expose a clean substrate. Inspect for any hidden damage that needs addressing before continuing.
Follow with installing a flashing or weather barrier, then apply backwrap mesh and base coat. Finish with the outer coat and sealants, paying attention to edge integrity and curing guidance from the product instructions.
Step-by-Step Repair Process
Follow this clear, numbered sequence to achieve a successful backwrapping repair.
- Preparation and safety checks: Inspect the area, gather tools, wear safety gear. Why: Safety first, know what you’re up against.
- Remove failed material: Scrape off loose EIFS using a flathead screwdriver or similar tool. Check: Ensure all loose material is gone to prevent future issues.
- Expose substrate: Lightly sand any remaining adhesive, clean the area with water and let it dry. Why: A clean surface ensures better adhesion.
- Install flashing/weather barrier: Apply flashing tape or liquid membrane around windows and doors. Check: Ensure no gaps exist where water could enter.
- Backwrap mesh and base coat: Install mesh, apply base coat for continuous overlap. Why: Mesh reinforces the patch, base coat seals it.
- Finish and seal: Apply finish coat, use appropriate sealant at frame joints. Check: Ensure no gaps or missed spots that could lead to leaks.
- Final visual inspection: Check for any missed areas, ensure adhesion is solid. Why: Catch issues early before they cause bigger problems.
- Cleanup and final checks: Remove debris, double-check your work. Check: Ensure everything is in order before moving on.
Removal and Substrate Prep
Safely remove EIFS finish and mesh to the sound substrate, then inspect and repair it before wrapping.
Safety first: Wear safety glasses and gloves. Use a utility knife or oscillating tool to carefully cut away loose material.
Use a flathead screwdriver or similar tool to scrape off remaining loose EIFS. Tip: Work in small sections at a time.
Lightly sand any remaining adhesive, clean the area with water and let it dry. Why: A clean, dry surface ensures better adhesion of your patch.
Flashing, WRB Integration, and Backwrapping Mesh
Interface flashing and the building’s weather-resistive barrier (WRB), then wrap mesh into jambs and apply base coat for continuous overlap.
Flashing: Apply flashing tape or liquid membrane around windows and doors, extending it onto the WRB. Why: Flashing redirects water away from your patch.
WRB integration: Ensure the WRB is intact and extends behind your patch area. Tip: If damaged, repair or replace before proceeding.
Install mesh into jambs, ensuring it’s well-adhered and continuous. Apply base coat for a seamless overlap. Check: Ensure no gaps exist where water could enter or mesh pull away.
Finishing, Sealant Detailing, and Visual Inspection
Use this checklist after applying your finish coat and appropriate sealants to ensure a successful repair.
- Check for: Any missed spots or gaps in your patch. Why: Gaps can lead to water entry and further damage.
- Ensure: Adhesion is solid, with no signs of delamination. Tip: Gently press on the patch to check.
- Inspect: Sealant joints at frames for proper adhesion and no gaps. Why: Properly sealed joints prevent water intrusion.
- Check: Drip edges are properly installed to direct water away from your patch. Why: Drip edges help prevent water from getting behind your patch.
- Ensure: No visible signs of moisture or mold. Why: Moisture and mold indicate underlying issues.
- Check: Your workmanship meets local building codes. Tip: Consult your local building department if unsure.
- Inspect: Any nearby areas for signs of water damage or further repair needs. Why: Early detection prevents bigger problems down the line.
- Check: All tools and materials are properly cleaned and stored. Why: Proper storage maintains tool life and keeps your workspace tidy.
Quick rule: If in doubt, consult a professional. Some issues may require expert intervention.
Material Specs, Standards, and Compatibility to Check
Note the EIFS system type and ensure backwrap materials are compatible with that system. Review recommended flashing, sealants, and adhesives from the manufacturer. Look for documented performance or testing references on the product label or data sheet.
Ask for documentation that confirms compatibility and installation guidance. If uncertainty exists, compare with the manufacturer instructions or local code considerations before proceeding.
EIFS System Types and What Each Requires
The first step is knowing your EIFS system. There are two main types:
Polymer-based EIFS: These use acrylic or other polymer resins. Backwrapping involves applying a mesh over the entire area, then covering it with base coats.
Silicone-based EIFS: These have a silicone finish for better weathering. Backwrapping is similar but may require different adhesives and sealants.
Flashing and Sealant Compatibility and Ratings
Flashing and sealants are crucial. They must be compatible with your EIFS system and able to handle movement and UV exposure.
Metal Flashing: Use aluminum or galvanized steel. Ensure it’s rated for your climate’s temperature range.
Membrane Flashing: Use self-adhesive membranes designed for EIFS. Check they’re compatible with your system and have good UV resistance.
Sealants: Use silicone or polyurethane sealants. They must be paintable, flexible, and able to handle UV exposure. Always check their compatibility with your specific EIFS system.
Cost, Time, and Scope: When DIY Is Realistic Versus Hiring a Pro
Assess the project scope by identifying hidden damage and the complexity of flashing at openings. Consider working at height and access when deciding on DIY versus hiring a pro. Weigh the risk of moisture intrusion against your ability to perform the job safely.
Check for the extent of required repairs and whether the substrate or framing shows signs of damage. If there is uncertainty, consult the relevant guidelines or a local contractor for an informed decision.
What to check to estimate time and cost
Before you start, use this checklist to get a realistic idea of the time and cost for your backwrapping project.
- Substrate damage: Check for cracks, holes, or soft spots. More damage means longer prep time.
- Number of openings: Count windows and doors. More openings mean more flashing to install.
- Accessibility: Consider if you need ladders or scaffolding. Hard-to-reach areas take longer.
- EIFS system type: Know if it’s barrier, acrylic, or synthetic. Each has different repair needs.
- Flashing condition: Check for gaps, tears, or missing pieces. Bad flashing adds to repair time.
- Sealant condition: Look for cracks, peeling, or discoloration. Poor sealants need replacing.
- Local labor rates: Call around for quotes on materials and labor.
- Weather forecast: Plan around rain or cold, which can slow drying times.
Quick rule: If you’re unsure about any item, it’s better to err on the side of caution and call a pro.
Red flags that mean hire a pro
Some backwrapping jobs are best left to the professionals. Here’s what to look out for:
Widespread substrate decay: If you see extensive damage, it might be a sign of bigger issues that require expert diagnosis.
Multilayer EIFS systems: Dealing with multiple layers can be tricky and may require specialized knowledge.
Extensive flashing failure: Large areas of failed flashing could indicate a systemic problem that needs professional attention.
Warranty/insurance issues: If your work voids warranties or insurance coverage, it’s wise to hire a pro to avoid potential headaches down the line.
Work beyond safe ladder/scaffold use: If you’re uncomfortable working at heights, or if the job requires specialized equipment like scaffolding, consider hiring someone with the right training and gear.
Conclusion
Backwrapping EIFS at windows and doors is the practical way to keep water out, protect the substrate, and keep a clean, durable look. Do it right, and you reduce damage risk and costly patch failures—do it wrong, and problems compound fast.
Start by confirming your patch plan in plain terms: inspect the area for moisture signs, test a small sample patch first, gather only the required tools and materials, follow the step-by-step workflow, and verify compatibility with your EIFS system and flashing details before you commit. Check the work in logical stages: edge seal, backwrap, and surface finish, and avoid skipping any layer that anchors the repair to the wall and window/door openings.
Common mistakes to avoid are rushing the prep or skipping the backwrap entirely, overcomplicating the repair with untested materials, and ignoring flashing or sealant continuity around the opening. Always work in dry, mild conditions, protect adjacent surfaces, and test a small area first to confirm adhesion and finish. If you’re unsure about substrate condition, flashing continuity, or the exact material spec, pause and reassess rather than forcing a patch that could fail later.
If the project grows beyond a simple patch or you uncover persistent leaks, cracks, or framing issues, it’s wiser to bring in a pro rather than push on. A measured, careful approach now saves time, money, and headaches later. Stay steady, follow the checklist in orderly steps, and you’ll end up with a durable, watertight result that lasts.
FAQ
What signals tell me backwrapping is truly needed at a window or door opening?
Look for water intrusion behind the EIFS, soft framing edges, or loose patches around the opening. If you’ve had repeated patch failures in this area, backwrapping is usually the missing piece. Confirm by inspecting the substrate and existing flashing details before patching again.
What are the practical risks if I skip backwrapping and patch directly at openings?
Without backwrap, water can wick under the EIFS and cause rot or mold behind the wall. You’ll likely face recurring patch failures and spot repairs. Always review the manufacturer guidance and local practices for openings.
How do I verify I have the right materials for backwrapping at windows and doors?
Check labels and data sheets for compatibility with EIFS and your substrate. Look for moisture barriers, flashing components, and sealants that are meant to wrap over openings. If unsure, ask the supplier or productmaker for the exact system compatibility instructions.
What’s the simplest way to assess if my backwrap repair is holding after finish?
Do a visual check for gaps and peel near the edges, and inspect for new signs of water staining after a rain. If the surface around the opening stays dry and the patch stays intact, you’re likely in good shape. Recheck after a weather event and during the next seasonal inspection.