
Introduction
Discovering a roof leak can be stressful, but knowing how long the repair process will take can help you plan accordingly. This guide walks you through the step-by-step timeline of fixing a roof leak, from initial inspection to final repairs.
The duration of your roof leak repair project depends on several factors, including the size and complexity of the leak, your chosen repair method (DIY or professional), and weather conditions. Let’s break down the process into manageable stages so you can estimate how long it will take to fix that pesky leak.
Step-by-Step Timeline: How Long Does It Take to Fix a Roof Leak?
The timeline for fixing a roof leak varies depending on the extent of damage, your chosen repair method, and weather conditions. Here’s a detailed step-by-step breakdown to help you estimate how long it will take:
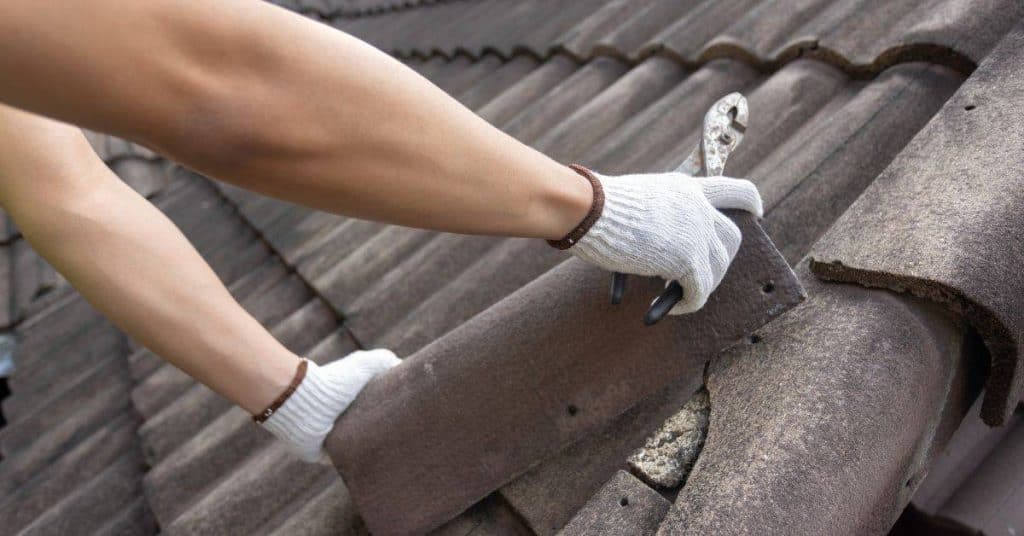
- Inspection (1-3 hours): Inspecting the interior and exterior of your roof helps identify the leak source(s). This step may take longer if multiple leaks are present or if the damage is difficult to locate.
- Preparation (1-4 hours): Gather necessary tools, materials, and safety gear. If hiring a professional, this time also includes scheduling and coordinating with your chosen contractor.
- Repair (2-8 hours per leak): The repair duration depends on the leak’s complexity, roof type, and whether you’re performing the repairs yourself or hiring a pro. Here are some rough estimates:
- DIY: 2-4 hours per leak for simple repairs; up to 8 hours for complex ones.
- Professional: 1-3 hours per leak, including comprehensive damage assessment and cleanup.
- Cleanup (1 hour): Remove any debris, leftover materials, and ensure your roof is clean and safe before the next rain.
- Total estimated duration: For a single leak, expect the repair process to take around 5-12 hours for DIY repairs or 4-8 hours with a professional. More complex leaks or multiple leaks will significantly increase the total time required.
Key takeaways
Proper preparation is crucial and can significantly impact the overall duration of your roof leak repair project. Ensuring you have all necessary tools, materials, and safety gear ready before starting the repair process helps minimize delays and keeps the project on schedule.
- Quick answer: average roof leak repair costs vary by size and location
- Inspection costs typically $150–$300; materials vary $50–$1,000 depending on scope
- DIY repairs save labor but require safety gear, sealants, and flashing replacements
- Pros offer warranties and faster timing, plus comprehensive damage assessment for long-term value
- Roof type and condition dramatically alter quotes: shingles, tiles, and age matter
- Safety, permits, and insurance considerations can add time and cost
Table of Contents
- Introduction
- Key takeaways
- Quick answer — average cost ranges
- Detailed cost breakdown — inspection, materials, labor, and overhead
- DIY roof leak repair costs and required supplies
- Professional repair vs. DIY — time, warranty, and long-term value
- Roof type and condition — how they change repair costs
- Safety, permits, and legal/insurance considerations
- How weather and timing affect repair feasibility and price
- Choosing a contractor and estimating bids
- Conclusion
- FAQ
Quick answer — average cost ranges
This quick answer lays out practical ranges for common roof leak fixes and compares DIY paths to professional work, using low, mid, and high-end brackets plus what tends to drive those costs. You’ll get a sense of when a leak is just a small sealant or flashing tweak versus when it hints at bigger roof damage. No fluff—just what to expect upfront.
Costs shift with roof pitch, accessibility, extent of damage, roof age, material type, weather, and how soon you need the fix. For DIY, plan material costs and what tools you already own; for pros, expect labor, crew size, scheduling, permits, and disposal. Use this as a fast guide to decide if a small weekend repair is doable or if you should bring in a pro, and know when safety or structural concerns mean you must call in help.
Typical low-cost fixes
A typical low-cost fix for a roof leak involves minor repairs like replacing damaged shingles, sealing small gaps with roofing cement, or fixing flashing around vents. These quick fixes usually cost under $100 and can be done in an afternoon.
If you spot a missing or cracked shingle, grab some replacement shingles from the hardware store and seal it up tight. For minor flashing issues, a new vent cap kit might set you back about $25 to $30. Remember, these fixes work best for small leaks that haven’t caused extensive damage.
Before diving in, make sure your roof isn’t too steep or slippery—safety first. If the leak is minor and isolated, a DIY fix can save you money and time. But if it’s more than just a few shingles, consider calling in a pro to avoid bigger issues down the line.
Mid-range repairs
A mid-range repair often involves replacing damaged flashing around chimneys or skylights and re-roofing small sections of your roof. These fixes typically cost between $100 to $500, depending on the extent of damage.
Flashing replacement can be tricky but is crucial for preventing water from seeping into vulnerable areas like valleys and vents. A professional might charge around $200 to replace flashing and seal it properly. If you’re handy with tools, a DIY approach could save you some money.
If the damage spans several feet of your roof, consider re-roofing that section. This can cost upwards of $300 for materials alone. Factor in labor costs if you hire someone to do it—expect an additional $150 to $250 depending on where you live and how much work needs doing.
High-cost scenarios
A high-cost repair usually means extensive damage or structural issues that require replacing large sections of your roof. This can include fixing rotten wood, repairing trusses, and even a full re-roofing job. Costs for these repairs typically range from $500 to over $2,000.
Structural repairs are serious business. If water has damaged the underlying structure of your home, you’ll need professional help to ensure everything is safe and secure. Expect to pay around $1,000 or more for materials and labor if a large section needs replacing.
A full roof replacement can be pricey but necessary if your entire roof is old or severely damaged. This type of repair will likely cost upwards of $2,500 and could go much higher depending on the size of your home and material costs. It’s best to consult with a professional for an accurate estimate.

Detailed cost breakdown — inspection, materials, labor, and overhead
This section breaks out a roof repair project into clear cost blocks: inspection, materials, labor, disposal, permits, plus overhead and a small contingency. You’ll see base diagnostic or inspection fees listed separately from diagnostic work, and each line item shows quantities or scope for small, medium, and large repairs. That helps you compare bids without guessing what’s included.
Understanding these drivers helps you decide DIY vs pro work, and when to push for a written estimate or warranty terms. Expect that inspection covers initial assessment and moisture checks, while the materials row lists patches, flashing, and sealants; labor covers crew size and time on site; disposal and permits add their own line items. With overhead and a small contingency, you get a realistic view of the job’s total and where unknowns might push the price; check the product label/datasheet for numbers and local rules.
Inspection and diagnostic fees
Before diving into materials and labor, you need to know the cost of diagnosing your roof leak. This includes initial assessments and specialized tests like thermal imaging or drone inspections.
- Initial assessment: Check for visible damage; confirm by walking the roof safely. Skip at risk of missing underlying issues.
- Mold testing: Look for signs of moisture damage inside; verify with a mold test kit. Skipping can lead to health risks and hidden costs.
- Thermal imaging: Detect heat patterns indicating leaks; confirm by hiring a professional. Avoid missing hard-to-find leaks.
- Drones: Use for inaccessible areas; ensure proper drone operation. Missing spots can delay repairs.
Quick rule: Always get a detailed inspection before estimating repair costs.
Materials cost breakdown
To estimate your roof repair costs, you need to know the material prices. This includes asphalt shingles, metal panels, underlayment, and sealants.
- Asphalt shingles: Check for price per square foot; confirm by comparing brands. Skipping can lead to poor quality repairs.
- Metal panels: Verify cost per sheet; ensure proper fit with existing roof. Missing this step can cause leaks.
- Underlayment: Confirm roll prices and coverage area; check compatibility with shingles. Omitting underlayment increases risk of future damage.
- Flashing: Check for price per foot or piece; ensure correct installation angles. Skipping can lead to water intrusion.
Quick rule: Always get material quotes from reputable suppliers before starting repairs.
Labor and contractor overhead
Understanding labor costs is crucial for budgeting. This includes hourly rates, flat fees, travel expenses, and markup percentages.
- Hourly rate: Check the crew’s per-hour cost; confirm by asking for a breakdown. Skipping can lead to unexpected bills.
- Flat fee: Verify total project costs upfront; ensure all work is included. Missing details can result in hidden charges.
- Travel fees: Confirm distance and time estimates; check if travel is included in the quote. Omitting this can add unexpected expenses.
- Markup: Understand overhead rates on materials; ensure transparency with quotes. Skipping markup checks can lead to inflated costs.
Quick rule: Always get a detailed labor and overhead breakdown before signing any contract.
DIY roof leak repair costs and required supplies
DIY roof leak repair costs hinge on the issue type: drip or flashing problems, cracked shingles, or gutter-related leaks. For each scenario, feasibility and cost depend on scope—patching holes, resealing flashing, or replacing a few shingles—so check the product labels or local rules for actual numbers.
Plan a safe, weather window and secure ladders with a buddy, plus use PPE and fall protection as needed. If you see significant damage, complex flashing, or aged decking, treat it as a pro job; otherwise, following a clear workflow and cost-conscious material choices can save money without sacrificing safety.
Tools and supplies checklist
Use this list before starting any DIY roof repair to ensure you have everything needed for a safe, effective job.
- Ladder: Ensure it’s sturdy and long enough. Missing this can lead to falls or damage from overreaching.
- Harness system: Check straps are tight and buckles secure. Skipping this is dangerous.
- Pry bar: For removing old flashing or nails. Without it, you’ll waste time and effort.
- Roofing nails: Have extras for securing new shingles or patches. Running out can delay repairs.
- Caulk gun: Essential for applying sealant. Missing this means no way to apply critical sealants.
- Utility knife: For cutting flashing and other materials. Without it, you’ll struggle with precision cuts.
- Tape measure: Accurate measurements are crucial. Guessing can lead to wasted supplies.
- Rope or safety line: To secure yourself while working on steep roofs. Skipping this is a major risk.
Quick rule: Always check your tools and materials before starting any repair work.
Step-by-step typical DIY repair costs
This sequence outlines the costed steps for common repairs, including time estimates.
- Clear area: Remove debris and set up tarps. This prevents damage to your roof or materials.
- Isolate leak: Use a ladder and inspect visually. Missing this step can lead to wasted effort on the wrong spot.
- Apply sealant: Use caulk gun for flashing reseal or patch holes with roofing cement. Confirm by checking no more water enters.
- Re-secure flashing: Pry off old and replace with new, securing it tightly. Check that all nails are in place.
- Monitor repairs: Watch for further leaks after rain or heavy wind. If issues persist, consider professional help.
When DIY is not cost-effective
If the repair involves significant roof damage, complex flashing, or structural concerns, hiring a pro might be more economical. These issues can escalate quickly if mishandled.
Hidden damage risks like rotting wood or compromised underlayment often require professional inspection and repair to prevent further deterioration.
Safety is paramount; working on steep roofs or with complex systems poses high risk for injury, making it wise to call a pro who has the proper equipment and training.
Warranty implications: DIY repairs can void manufacturer warranties if not done correctly. Always check warranty terms before proceeding.
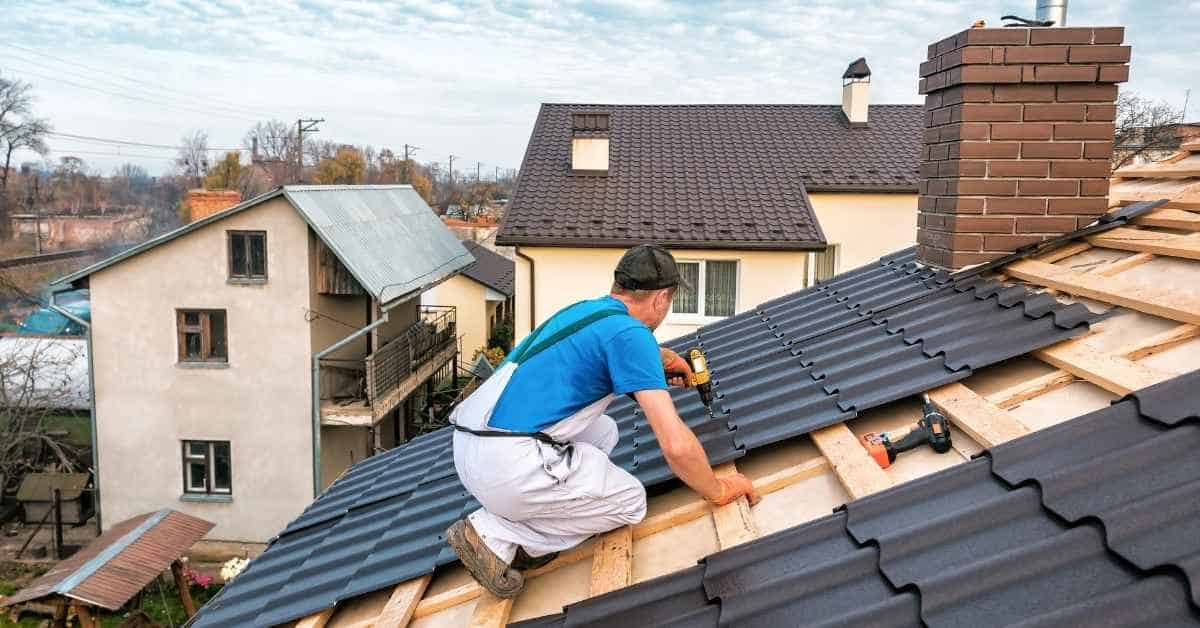
Professional repair vs. DIY — time, warranty, and long-term value
Professional roof-leak repair follows a planned path: diagnosis, material lead times, and coordinated labor, with weather or supply delays considered. A pro’s work often comes with a warranty that covers materials and leak-free performance, usually for a set period and potentially transferable at resale; DIY fixes can complicate or void those protections. In short, timing, warranties, and long‑term value swing toward professionals.
For DIYers, the payoff is lower upfront material cost but hidden risks: patchwork that leaks again, insurance questions, and future repairs piling up. The right choice matters for home value and claims processing because documented, professional fixes tend to be easier to appraise and substantiate, while shoddy work can raise flags. Safety, code compliance, and solid documentation—photos, receipts, and invoices—are the real money protectors, not bravado.
Time required: DIY vs professional
A typical roof leak repair can take a few hours to a full day for a pro, depending on the extent of damage and weather conditions. For a seasoned contractor, it’s about diagnosing the issue, gathering materials, and executing repairs efficiently.
DIY fixes often stretch out over several weekends due to learning curves, material sourcing delays, and safety concerns that slow progress. A homeowner might spend days just setting up scaffolding or ladders safely before tackling the actual repair work.
Professional roofers also factor in weather delays and seasonal constraints when scheduling repairs, ensuring materials dry properly and avoiding rain or snow damage during the process. This planning is crucial for a lasting fix but can extend timelines beyond what DIY homeowners might initially expect.
Warranty, guarantee, and resale impact
A professional repair comes with warranties that cover both materials and labor for a set period, typically 1-5 years. This warranty ensures the roof remains leak-free and provides peace of mind against future issues.
In contrast, DIY repairs often lack formal guarantees or warranties, leaving homeowners responsible for any subsequent leaks or structural damage. Professional documentation also plays a key role in insurance claims and resale disclosures, proving that proper repairs were made by qualified personnel.
When selling your home, having professional repair records can enhance its value and credibility with potential buyers and appraisers, showing due diligence in maintaining the property’s integrity.
Long-term cost comparison
Over 5-10 years, professional repairs often prove more economical despite higher upfront costs. Pros use quality materials and techniques that minimize future leaks and maintenance needs, potentially saving thousands in repeated DIY fixes.
DIY repairs might be cheaper initially but can lead to hidden expenses like frequent replacement of subpar materials or partial fixes that fail over time. These ongoing issues eat into your budget and reduce the overall value of your home investment.
By investing in professional services, homeowners secure long-term savings through efficient use of resources and superior workmanship, ensuring their roof remains reliable for years to come without costly surprises down the line.
Roof type and condition — how they change repair costs
Roof type drives repair complexity and cost. Shingle, metal, tile, flat, and cedar roofs change what gets patched, flashed, and decked, and they push you toward different material choices and labor needs. Pitch and age add heat to the calculation, with steeper slopes and aging components making work harder and costlier without pinpoint numbers on the page.
This matters because it tells you when a quick patch is sensible and when a full reroof or big system overhaul should be on the table, plus how to spot hidden costs. Expect that fasteners, underlayment, and ventilation parts will shape the bill differently by roof type and condition, and that labor time plays a big role as you scale from low slope to high pitch. Consider regional differences and the impact of permits, warranties, and deciding between DIY and pro work to avoid costly missteps.
Common roof materials cost comparison
The type of material you choose for your roof affects both the initial installation and ongoing maintenance costs. Here’s a quick look at common roofing materials:
- Asphalt Shingles: Used in most homes, these shingles are affordable but need frequent replacement due to weathering. Look for high-quality 30-year shingles with good warranties. Avoid using low-grade shingles that crack easily.
- Metal Roofs: Durable and long-lasting, metal roofs can withstand harsh climates better than other materials. Opt for standing seam or corrugated panels rated for your climate’s wind load. Be wary of cheaper metals that rust quickly.
- Tile Roofs: Known for their longevity and aesthetic appeal, tile roofs are more expensive upfront but last longer. Ensure tiles fit securely to prevent water leakage. Avoid using lightweight tiles in areas with heavy snowfall or high winds.
- Flat Membranes (TPO/EPDM): Ideal for commercial buildings, these membranes offer a seamless surface that’s easy to maintain. Choose materials rated for UV resistance and heat. Be cautious of seams that aren’t properly sealed, leading to leaks.
Pitch, accessibility, and roof complexity
A steeper pitch means more time on scaffolding or harnesses, increasing labor costs. Multi-level roofs add layers of difficulty with each level.
Roofs that are hard to access due to trees or building layout require additional safety measures like extra scaffolding and harnesses, driving up the cost.
Complex roof designs with multiple angles and valleys also demand more precise work, leading to higher labor rates as workers need to be highly skilled for such intricate tasks.
Age and maintenance history
An older roof often comes with hidden issues like worn flashing or rotting decking that can escalate repair costs. Poorly maintained roofs may have structural damage unseen from the ground.
Signs of neglect include sagging areas, missing shingles, and water stains inside your home. These indicate a need for more extensive repairs beyond just patching leaks.
When dealing with an older roof, it’s wise to consider a full inspection by a professional to uncover any underlying issues before proceeding with repairs.
Safety, permits, and legal/insurance considerations
Roof work is hazardous, so start with safety basics: fall protection, proper PPE, and solid ladder setup. Check the weather and know when to stop to avoid hazards. Permits are often required for roof repairs—verify the local process and apply if needed. If you hire part of the job, confirm contractor licensing and insurance coverage; for DIY, document your safety plan and keep the area organized. Insurance typically covers leaks and repairs under certain conditions, but every policy is different—check your policy language or call your insurer for specifics.
Assess the roof condition before you start: look for loose shingles, sagging sections, signs of water intrusion, and any electrical risks, and keep the surface dry. Build a simple repair plan with clear scope, budget, and emergency contingencies, and take photos and notes of the leak source for your records. Good planning and thorough documentation help with claims, future maintenance, and showing you followed a safe, responsible process.
Safety precautions for DIY repairs
Before you climb onto your roof, make sure you have the right safety gear. Wear a hard hat and full-body harness with a lanyard attached to an anchor point or a guardrail system. Use sturdy ladders that are set up on stable ground at a 75-degree angle.
Check the weather forecast before starting work. If it’s windy, raining, or snowing, wait until conditions improve. Never attempt repairs when you feel unsafe or if visibility is poor due to low light levels.
If your roof looks structurally compromised—like sagging areas, loose shingles, or water damage—stop and call a pro. DIY work can be risky if the roof isn’t stable enough for foot traffic.
Insurance claims and documentation
Your homeowner’s insurance typically covers roof leaks due to sudden, accidental damage like hail or wind. Document any water stains, missing shingles, or other signs of a leak with photos and notes.
Keep records of all repair costs and receipts for your insurer. This helps prove the extent of the damage and supports your claim. If you file a claim, be aware that it might affect future premiums.
If the deductible is high compared to the cost of repairs, DIY work can save money. But if the leak is extensive or involves structural issues, hiring a pro might be more economical in the long run.
Permits and local code issues
In most cases, small repairs like replacing shingles don’t require permits. However, major work such as adding new roofing material or altering roof structure does need approval from your city or county.
Before you start any significant changes, check with your local building department to see if a permit is needed. Non-compliance can lead to fines and delays in selling your home later on.
If you hire someone for part of the job, verify their licensing and insurance status through official channels. This protects both parties from legal issues down the road.
How weather and timing affect repair feasibility and price
Weather and seasonality drive what you’ll pay for roof leak work and when you can actually get it done. In off‑season you’ll often see slower crews and more flexible schedules, while peak times push rates up and tighten availability, especially for urgent repairs that can’t wait for a dry window. Keep in mind that rain, wind, and snow don’t just slow you down; they reframe what’s safe to do and what kind of temporary containment you’ll need to protect the interior and the roof deck.
Emergency or urgent fixes come with different pressure and pricing than planned jobs, and there’s often a premium for rushes, short notice, or after‑hours work. Weather events limit repair windows and force safety compromises, which can expand scope and cost if tarps shift, leaks move during a rainstorm, or crews need to seal and recheck multiple times. For DIY readers, the practical takeaway is to watch the forecast, stage simple containment, and recognize warning signs that you’re out of your depth and should call a pro to avoid higher costs or more damage.
Emergency repairs vs scheduled maintenance
When a roof leak strikes suddenly, the urgency can drive up costs. Emergency tarping to stop immediate damage might cost $200-$500 extra just for the rush job.
Scheduled maintenance lets you plan ahead and avoid these spikes. A pro booked in advance will charge less than an urgent call-out. Plus, they’ll have more availability and can fit your repair into their regular schedule without overtime fees.
Emergency repairs often mean a contractor has to work around bad weather or rush conditions, which adds safety risks and extra labor costs. If you catch issues early through regular checks, you avoid these pitfalls and save money in the long run.
Weather-related material and labor impacts
The right materials can make or break a roof repair. Extreme heat or moisture can weaken seals and cause cracking, so choosing products that stand up to local weather is key.
- Roofing tar: Use high-temperature asphalt for hot climates; avoid cheap options that melt easily.
- Ventilation systems: Ensure proper airflow to prevent moisture buildup and rot; look for insulated vents rated for cold regions.
- Sealants: Pick waterproof sealants with UV resistance for exposed areas; check ratings for durability in wet conditions.
- Underlayment: Use breathable membranes that allow water vapor to escape but keep rain out; avoid paper-based products prone to rotting.
The wrong materials can lead to long-term issues like staining, weak bonds, and premature failure. Always consult a pro or product spec sheets for local climate recommendations.
Best time of year to repair a roof
The ideal season depends on your location’s weather patterns, but generally spring and early fall offer the best conditions. Avoid winter cold or summer heat extremes that can affect material performance.
In many climates, late spring (April-May) is great for repairs because it’s mild enough to work safely without harsh winds or rain issues. Early fall (September-October) also works well before winter storms hit.
Timing your repair right avoids peak season price hikes and ensures you get a contractor when they’re not swamped with emergency calls. This gives you better rates, more options for skilled crews, and quicker turnaround times.
Choosing a contractor and estimating bids
Get formal, itemized bids that separate materials, labor, permits, disposal, and equipment, and require a site visit to define the exact scope. Make sure the contractor shows licenses, insurance, and solid local references. Create apples-to-apples bids by standardizing the scope, access needs, weather contingencies, and mandatory inclusions like tear-out, decking, flashing, and sealants.
This approach helps you spot red flags, compare like-for-like costs, and avoid scope creep or surprises mid-project. It also gives you a clear set of questions to ask each bidder and a realistic timeline for roof repair or leak fixes, so you can choose the right pro and protect your investment.
Sample contractor questions checklist
Use this list during your site visit to ensure you cover all bases.
- Licensing and insurance: Ask for proof of both. Missing either means no legal protection if things go wrong.
- Experience with roof leaks: Look for specific experience, not just general roofing work.
- Typical failure modes: Understanding common issues helps you spot potential problems early.
- Timelines and weather contingencies: Realistic schedules account for delays due to bad weather or other unforeseen issues.
- Warranty terms: Clear details on what’s covered, how long it lasts, and who handles claims.
- Permit handling: Confirm they’ll handle all necessary permits and inspections.
- Change order procedures: Know the process for additional work or changes mid-project to avoid surprises later.
- Payment terms: Understand upfront deposits, progress payments, and final payment schedules.
Quick rule: Always ask about warranties and change orders to protect your investment.
How to compare and evaluate bids
Start by comparing line items across all bids. Look for consistency in materials, labor hours, and any additional costs like permits or scaffolding.
Verify that each bid includes a detailed breakdown of all work involved, from tear-out to final sealing. Vague descriptions can hide hidden costs or incomplete work.
Be wary of unusually low bids as they may indicate corners being cut. Similarly, high bids might be justified by premium materials but should still offer clear value for the price.
Negotiation and payment tips
Avoid large upfront payments; a deposit of 25-30% is standard. Ensure the remaining balance is tied to project milestones, not just completion.
Discuss payment terms early in negotiations to avoid misunderstandings later. Be clear on what constitutes acceptable progress for each stage.
Negotiate based on value and quality rather than lowest price. A contractor willing to stand behind their work with a solid warranty is worth considering even if they’re not the cheapest option.

Conclusion
Safety, durability, and appearance matter most. Start with a solid plan, verify weather windows, and fix only what you can handle without risking bigger leaks or structural damage.
First, assess the roof and interior at a safe distance, gather the needed supplies, decide whether you’ll DIY or hire a pro, and set a clear budget based on the expected cost ranges. Check the weather, obtain any local permits if required, and document what you see so you can compare bids later. Keep the work small and controlled, and test any fix on a limited area before extending it.
Avoid common mistakes like skipping a proper inspection, using improper materials, or ignoring safety gear. Don’t rush up a repair in wet weather or on a steep pitch. Always wear fall protection, use a sturdy ladder, and never blast through shingles or flashing without knowing what lies beneath. If you’re unsure about warranty, codes, or insurance implications, pause and get a professional opinion before proceeding.
If the job looks beyond your comfort zone or the roof shows extensive damage, call a qualified contractor rather than pushing forward. A professional can provide a reliable estimate, proper flashing work, and a warranty that protects your investment. Stay practical, stay safe, and you’ll protect your home without overpaying.
FAQ
What is the typical cost to fix a roof leak?
Most small roof leaks cost a few hundred dollars to fix. Big leaks or inside damage can push the price toward a thousand or more. Expect to pay more if you need to repair decking or replace shingles.
How does DIY compare to hiring a pro for leak fixes?
DIY saves labor costs and can work for simple leaks. If water is soaking, go pro to avoid missing hidden damage. A pro also tests the system to prevent repeat leaks.
What factors affect the price of a roof leak repair?
Leak location, roof type, and accessibility drive costs. The extent of damage on the decking matters a lot. Materials and whether flashing or vents need replacement also change the bill.
When should I replace the roof instead of repair?
If the roof is old or has widespread damage, replacement is wiser than patching. Replacing a damaged section can still be costly, but it stops ongoing leaks and future repairs. Consider the roof’s remaining life and climate impact when deciding.