
Introduction
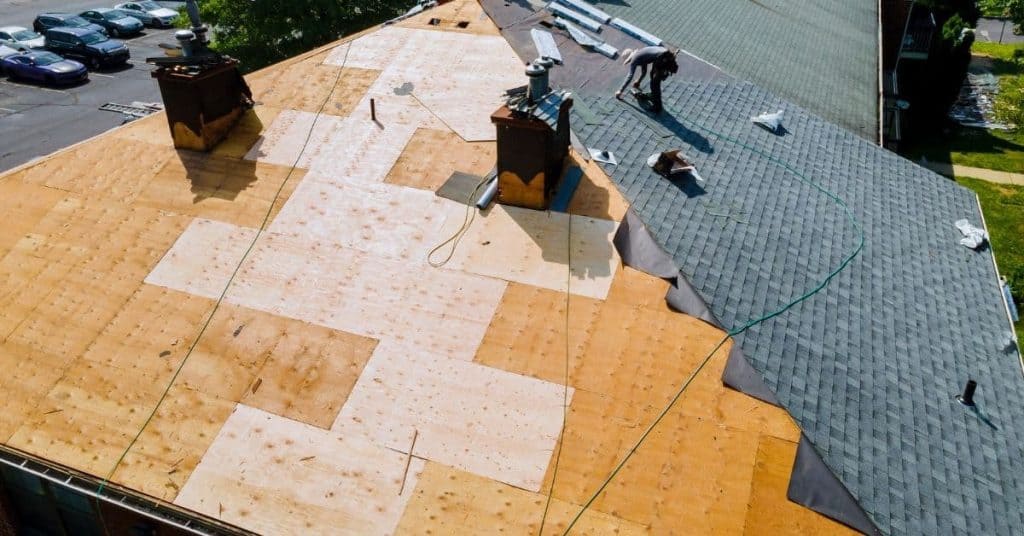
Ice and water shield installation protects your roof and structure from leaks by sealing vulnerable areas under shingles.
You’ll learn where it works, how to choose the right product for your climate, and general installation approaches you can apply in practice.
The guide walks through practical steps, helpful tips, and common pitfalls to help you install it confidently and effectively.
Key takeaways
- Choose compression or self-sealing membrane with ASTM weather barrier ratings.
- Prepare roof deck clean, dry, and free of protrusions before application.
- Overlap sections per manufacturer guidance to ensure continuous waterproof coverage.
- Seal corners and seams with compatible self-adhered tapes for durability.
- Integrate with flashing, underlayment, and drip edge to prevent leaks.
- Inspect for gaps after installation and replace damaged sheets promptly.
Table of Contents
- Introduction
- Key takeaways
- What is Ice and Water Shield?
- Where and when to use it
- Types, brands, and product selection
- Tools, materials, and pre-installation checklist
- Step-by-step DIY installation instructions
- Flashing integration and connections to other roof components
- Common mistakes, troubleshooting, and repairs
- Inspection, maintenance, lifespan, and cost considerations
- Conclusion
- FAQ
What is Ice and Water Shield?
Ice and water shield is a self-adhering underlayment that sticks to the roof deck. It provides an extra layer of protection against leaks by sealing around nails and gaps, unlike standard underlayment.
This stuff matters because it blocks water from getting into the attic and decking, especially in vulnerable areas like eaves and rakes. It helps a DIYer stay ahead of leaks, but you still need proper installation and overlapping per the label.
Materials and composition
The materials used in ice and water shield play a critical role in its performance. Choose wisely to avoid issues like cracking, staining, and weak bonds.
- Rubberized asphalt: Provides flexibility and durability; look for high-quality rubber content; avoid low-grade substitutes that can crack easily.
- Silicone slip-sheet: Enhances adhesion and prevents tearing during installation; ensure it’s thick enough to prevent punctures; thin sheets can lead to weak spots.
- Peel-and-stick backing: Ensures easy application without the need for additional adhesive; check that it adheres well in cold weather conditions; avoid products with poor adhesion ratings.
- Fiberglass reinforcement: Adds strength and stability to the underlayment; look for high tensile strength ratings; weak fibers can cause tearing during installation.
- Vapor barrier: Prevents moisture from penetrating into walls or ceilings; ensure it’s breathable enough to allow drying; non-breathable barriers can lead to mold growth.
How it works (adhesion and sealant properties)
The ice and water shield adheres firmly to the surface, creating a seamless waterproof barrier. Its self-sealing properties ensure that any fasteners or penetrations are sealed automatically.
Adhesion: The rubberized asphalt base bonds tightly with the substrate, providing a strong seal against leaks. This bond is crucial for preventing water from seeping through cracks and gaps.
The shield’s self-sealing nature means that even if nails or screws penetrate it during installation, they are sealed around the fastener to prevent water intrusion. This feature makes it ideal for areas prone to roof penetrations like chimneys or skylights.

Where and when to use it
Use ice and water shield in areas prone to ice dams and leaks. It helps seal the roof deck where shingles alone won’t stop water.
Why it matters: it provides a durable first line of defense at vulnerable spots like eaves, valleys, and roof transitions. If you have ice dam zones or roof features that leak, this shield can save you from costly repairs.
Typical locations on a roof (rakes, eaves, valleys, penetrations)
Ice and water shield is crucial in areas where ice dams commonly form or where water can easily leak into your home. Start with the eaves, which are the lower edges of your roof overhangs. Water tends to pool here during heavy snowfall.
Nearby, the rakes—the vertical edges at the ends of your roof—are also high-risk areas. They often get overlooked but can be entry points for water if not properly sealed. Valleys, where two slopes meet, are another critical spot because they funnel rain and melting snow straight down.
Lastly, around any penetrations like chimneys or vent pipes, you need to apply ice and water shield carefully. These spots are weak points in your roof’s defense against leaks. Make sure the shield extends up and around these areas to create a strong seal.
Building codes, manufacturer requirements, and warranty implications
Local building codes often mandate ice and water shield in regions prone to heavy snow or freezing temperatures. Check with your local authorities for specific regulations.
Manufacturers also have their own guidelines on where and how much of the product should be used. Ignoring these can lead to voided warranties if issues arise later down the line. Always read up on what’s required by the maker before you start.
If installed improperly, your roof warranty could be at risk. This means that any future repairs or replacements might not be covered if there are gaps in your ice and water shield application. Take it seriously to protect both your home and your investment.
Types, brands, and product selection
This section compares common flooring and coating products, highlighting how thickness, slip resistance, and temperature range differ by type and brand. For DIYers, pick a type that fits your job and read the label because not all products are the same.
Knowing the differences helps you avoid problems like slick surfaces or premature wear. Check the label or datasheet for the specific thickness, slip rating, and temperature range to make a smart choice for your project.
Choosing the right product for your roof type
When picking an ice and water shield, start by looking at your roof’s slope. Steep roofs need a thicker, more durable material to handle high winds and heavy snow loads. For flatter roofs, go with something that’s easier to install without sagging or tearing.
If you’ve got shingles, metal, or another type of covering, pick an ice shield that matches up well. Shingle roofs work great with a standard 3-foot-wide roll, but if it’s metal, look for one made specifically for those panels. Metal roofs need something that’s flexible and won’t crack in cold temps.
Don’t forget about the weather where you live. If your area gets really hot or super cold, make sure to pick a product rated for those conditions. Check the temperature range on the label—make sure it covers your local climate from winter lows to summer highs.
Reading product specs and understanding ratings
When you’re shopping around, look for key specs like adhesive strength and temperature limits. Adhesive strength is crucial because it tells you how well the shield will stick to your roof in different weather conditions.
Temperature range is another biggie. You want something that can handle both hot summers and cold winters without breaking down or losing its grip. Check for ASTM standards too—these are industry tests that prove a product’s quality and reliability.
Don’t just grab the first thing you see on the shelf. Take your time, read the labels carefully, and pick something that fits your specific needs. A little extra effort now can save you big headaches later down the road.
Tools, materials, and pre-installation checklist
This section gives you the tools, PPE, and materials you’ll need, plus a simple pre-install checklist. It helps you get ready before you start and avoid surprises on the job.
Having the right gear and doing a quick site check upfront protects you and your project. It helps you work faster, spot issues early, and keep the job safe.
Tools and safety equipment
Before you start, make sure your tools are ready and you have the right gear to stay safe on the roof.
- Utility knife: Keep it sharp for cutting. Dull blades can tear material.
- Roller: Use a paint roller with a long handle to apply adhesive evenly. Skipping this step means poor adhesion.
- Chalk line: Mark straight lines for proper installation. Missing marks lead to misaligned materials.
- Harness: Wear it anytime you’re on the roof. Not wearing one is dangerous and against safety rules.
- Rope: Have a backup anchor point. No rope means no safety if your harness fails.
- Roof boots: Use them to protect both yourself and the roof surface. Regular shoes can damage the shingles or ice shield.
- Ladder: Set it up safely with level ground. A wobbly ladder is a fall risk.
- Safety glasses: Protect your eyes from debris. Without them, you could get hurt by falling nails or other sharp objects.
Quick rule: Always check your gear before starting work to avoid accidents and delays.
Estimating material quantities and ordering tips
Measure accurately to ensure you have enough ice shield for the job without over-ordering.
- Roof area: Measure length and width of each section. Multiply them together. Missing this step means running short on materials.
- Eaves run: Calculate eave lengths to determine how much material you need for the edges. Not doing this can leave gaps at the roof edge.
- Valley runs: Measure valley widths and calculate required ice shield length. Skipping this step leaves valleys unprotected from water damage.
- Overlaps: Account for overlap requirements in your measurements. Overlooking overlaps means poor sealing at joints.
- Waste factor: Add 10-20% to account for cuts and mistakes. Not adding waste can lead to running out of material mid-installation.
- Roof pitch: Adjust measurements based on roof slope. Ignoring the pitch leads to incorrect material amounts.
- Penetrations: Measure around chimneys, vents, and skylights separately. Missing these areas leaves them vulnerable to leaks.
- Brand-specific specs: Check manufacturer guidelines for specific product requirements. Not following brand instructions can void warranties or cause installation issues.
Quick rule: Always measure twice and order once to avoid shortages or excess waste.