

Introduction
MDF can be used as a cheap finished flooring option, but it carries risks and requires careful setup. This article offers practical tests you can run on your subfloor and edges, plus fixes if problems show up. You’ll get plain, hands-on tips about moisture, fasteners, and finishing coats.
We keep it real with a straightforward plan: check moisture compatibility, look for movement under load, and plan for edge protection and trim. If you still decide to try MDF, follow the label directions for adhesives and finishes, and check local rules or guidance from the manufacturer for your area. When in doubt, verify details on the product label and ask at your local hardware or building supply store for safe ranges and options.
Key takeaways
- Inspect MDF for core cracks, veneer delamination, and moisture content before install.
- Seal edges and joints with compatible coatings to slow moisture ingress.
- Run medium humidity tests and uplift checks on sample boards prior to full flooring.
- Use vapor barriers and proper subfloor prep to reduce warping risk.
- Expect softer feel underfoot; plan transitions and thresholds to avoid trips.
- Schedule regular inspections for swelling, edge lift, and fastener loosening.
Table of Contents
- Introduction
- Key takeaways
- What MDF Is and Which Types Exist
- Key Risks and How MDF Fails as Flooring
- Pre-Install Tests to Check MDF Suitability
- Fixes and Mitigation Strategies to Make MDF Work
- Installation Best Practices and DIY Step-by-Step
- Tools and Materials Checklist
- Long-Term Maintenance, Inspection, and When to Replace
- Conclusion
- FAQ
What MDF Is and Which Types Exist
MDF is a dense, uniform panel made from wood fibers bonded with resin under heat and pressure. The resulting material has a smooth surface and predictable thickness, which can help with consistent finishing. Understanding how it is built helps you choose options that resist moisture and wear where floors live.
For flooring decisions, focus on density and moisture-related variants. Look for moisture-resistant or high-density grades and compare the manufacturer’s notes on usage. Always verify the specific product’s data sheet or label to confirm suitability for flooring applications.
MDF vs HDF vs particleboard
When it comes to choosing panels for flooring, you’ll come across MDF, HDF, and particleboard. Let’s break down each:
MDF (Medium Density Fiberboard): Made from wood fibers, it’s strong and dense but can swell when wet.
HDF (High Density Fiberboard): Similar to MDF but denser, offering better stability and moisture resistance. It’s a better choice for flooring.
Particleboard: Made from wood chips and resin, it’s the weakest and least moisture-resistant. Avoid for flooring.
Manufacturing additives and finishes
Understanding what goes into making MDF helps you pick the right panels:
Resins bind the wood fibers. Some are more water-resistant than others. Look for phenol-formaldehyde resins.
Waxes and factory coatings can improve moisture resistance and reduce VOCs (volatile organic compounds).
Finish adhesion is crucial for flooring. Make sure panels have a good, even coat that won’t peel or flake off.
Key Risks and How MDF Fails as Flooring
Moisture swelling is a primary concern, especially in damp environments or where spills are common. MDF absorbs water more readily than traditional plywood or concrete substrates. Over time this leads to gaps, swelling, and uneven floors.
Other failure modes include surface wear that breaks down the coating or finish, delamination at joints, and fastener pull-out as the substrate loses grip. These issues typically develop gradually with humidity swings and sustained use, revealing the limits of MDF as a long-term floor surface.
Moisture-related damage
MDF’s biggest enemy is moisture. It swells up like a sponge when it gets wet, and shrinks when it dries out. This constant expansion and contraction causes the material to break down over time.
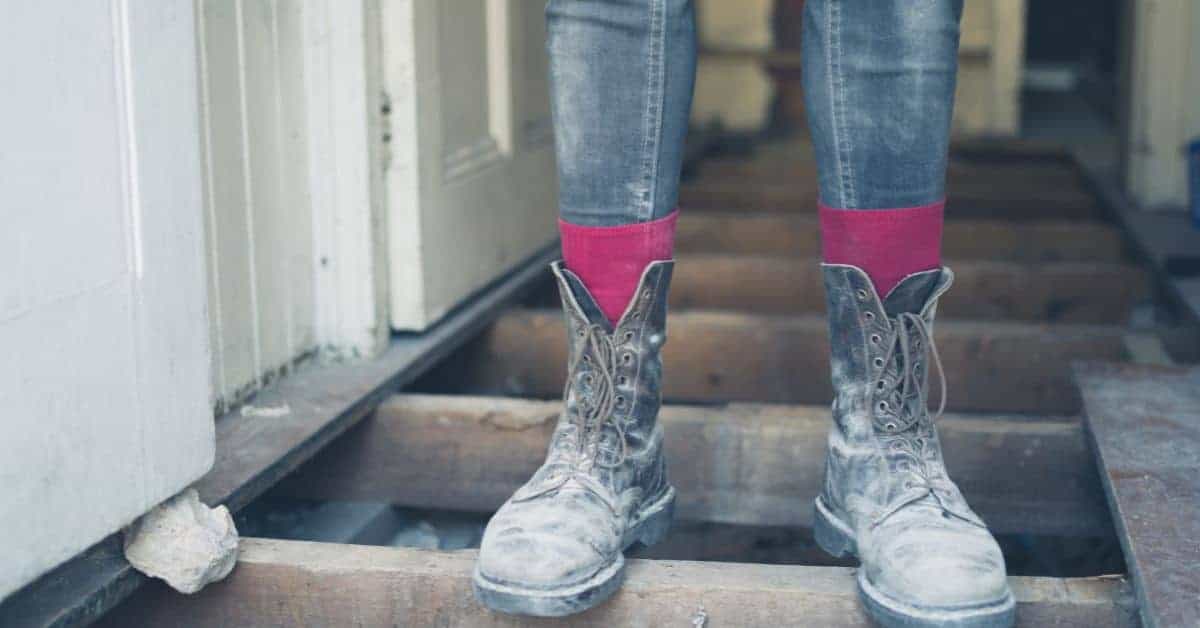
Edges are particularly vulnerable. They can crumble and chip away, leaving your floor looking ragged and unfinished. The swelling also weakens MDF’s structure, making it less stable and more prone to damage.
Humidity is another culprit. Even high humidity levels can cause MDF to swell and warp. So, if you live in a humid climate or have moisture issues in your home, MDF might not be the best choice for flooring.
Wear, abrasion, and UV issues
MDF’s surface isn’t as durable as you might think. Foot traffic can cause it to wear down, exposing the inner layers of the material. This makes your floor look scuffed and worn out over time.
Sunlight also takes a toll on MDF. Prolonged exposure to UV rays can cause the color to fade, making your floor look dull and discolored. Edges can fray and become rough, creating a safety hazard.
To mitigate these issues, it’s crucial to protect your MDF floor with a durable finish that resists wear, abrasion, and UV damage. But even with protection, MDF won’t hold up as well as harder woods or more durable materials like laminate or vinyl.
Structural and load-bearing concerns
MDF isn’t designed to bear heavy loads. It can sag between joists over time, leading to an uneven floor surface. This is especially true in larger rooms or areas with long spans.
Screws don’t hold well in MDF either. They can pull out under stress, causing your floor to come apart at the seams. This is why it’s important to use construction adhesive and other supportive methods when installing MDF flooring.
MDF also doesn’t handle point loads well. Heavy furniture or appliances can cause it to dent and compress, leaving permanent indentations in your floor. So, if you have heavy traffic or equipment in your space, MDF might not be the best choice for your needs.
Pre-Install Tests to Check MDF Suitability
Start with moisture checks on the subfloor and the MDF itself, following the product instructions. Use a moisture meter and compare readings to the guideline ranges provided by the manufacturer. If in doubt, verify the spec on the label or data sheet.
Test surface hardness and adhesive compatibility by performing a small, controlled bond or scratch test where you plan to install. Review the recommended glue or fastener types in the manufacturer instructions and confirm they meet local rules or standards.
Moisture test methods
Before installing MDF as flooring, check both ambient moisture levels and panel moisture content. Here’s how:
Ambient Moisture: Use a simple hygrometer to measure relative humidity (RH). Ideal RH for MDF is 40-60%. If it’s higher or lower, consider dehumidifying/ humidifying the space.
Panel Moisture: Use a moisture meter. Press it firmly on the panel surface. Acceptable readings are typically between 6-12% for flooring applications. If it’s above 15%, consider lab testing or professional assessment.
Surface hardness and abrasion tests
Check MDF surface hardness and resistance to wear before installing. Here’s a simple test:
Scratch the panel with a coin, then try to sand it lightly. If you can’t remove the scratch or if the surface feels too soft, consider adding extra wear layers or using a tougher finish.
Also, drag heavy objects across the panel to simulate foot traffic. If there’s significant damage, reconsider your MDF choice.
Adhesion and edge-sealing trials
Before gluing down MDF panels or applying sealants, test them on scrap pieces to ensure compatibility:
Glue Bond: Apply your chosen adhesive to a small area of the panel. Let it dry according to manufacturer’s instructions. Then try to peel it off. If it doesn’t stick well, consider another adhesive.
Edge-Sealing: Apply proposed sealant to cut edges. Let it dry, then test for durability by scraping or sanding lightly. If the sealant fails, choose a different one.
Fixes and Mitigation Strategies to Make MDF Work
Seal the surface and edges with a compatible coating or sealant to reduce water ingress. Apply multiple coats as directed by the product data sheet, and allow full cure between steps as specified. This helps limit moisture uptake and surface wear.
Consider upgrading to a reinforced subfloor and adding a protective wear layer or underlayment designed for MDF floors. Edge treatment and controlled expansion around the perimeter can also reduce movement-related failures over time.
Edge and surface sealing techniques
Protecting MDF edges and surfaces is crucial. Use flexible, moisture-resistant sealants like polyurethane or acrylic varnish.
Test products first for adhesion and flexibility. Apply two coats on edges, sand lightly between coats. For surfaces, use a foam roller or spray applicator for even coverage.
Don’t forget corners and cut-outs. Seal these areas with a paintbrush to prevent water absorption and swelling.
Reinforcing subfloor and support
A solid subfloor reduces deflection. Consider using denser underlayments like plywood or oriented strand board (OSB) over the existing subfloor.
Extra joist support can also help. Add blocking between joists to distribute weight evenly. This is especially important for wide spans and heavy traffic areas.
Before installing, ensure your subfloor is flat, dry, and clean. Any imperfections will show through your MDF flooring.
Durable topcoats and wear layers
Adding a tough, protective layer extends the life of your MDF floor. Clear varnishes offer good protection but may require professional application for best results.
Epoxy coatings provide excellent durability but can be challenging to apply. Consider hiring a pro if you’re not experienced with epoxy.
Laminate overlays are another option, providing great wear resistance. However, they may not be suitable for all MDF types and require careful installation to avoid delamination.
Installation Best Practices and DIY Step-by-Step
Establish a moisture-control plan before you start, including acclimation of MDF panels in the installation area. Keep HVAC or environmental conditions stable during and after installation as recommended by the manufacturers. Always verify the latest guidance on acceptable ambient conditions in the product instructions.
Pay attention to jointing, expansion gaps, and fastening patterns to prevent buckling or pull-out. Work methodically and document any deviations from the plan so you can address them if issues arise later.
Step-by-Step Installation Process
This section guides you through the installation process, ensuring best practices and maximizing your MDF flooring’s lifespan.
- Preparation: Check safety gear (gloves, goggles), clear work area, ensure proper ventilation. Why: Safety first, clear space for easy work.
- Subfloor Inspection: Verify subfloor is flat (<0.5″ in 10ft), clean, and dry. Check: Use a long straight edge to spot high or low spots.
- Main Installation: Start from the center of the room, lay panels perpendicular to joists. Use spacers for expansion gaps (1/4″ per 8ft).
- Fastening: Secure panels with appropriate fasteners (not too close to edges), use a nail set to recess heads. Tip: If unsure, consult a pro before driving nails.
- Joint Treatment: Apply recommended joint treatment or adhesive to prevent fraying and improve seam strength. Check: Ensure seams are tight and even.
- Finishing Touches: Trim edges with careful cuts, use sandpaper (120-grit) for smooth edges. Tip: Be patient, take your time to avoid tear-outs.
- Final Checks: Inspect entire floor for levelness, check expansion gaps, ensure all fasteners are secure. Why: Catch any issues now before sealing and finishing.
- Cleanup: Remove debris, vacuum thoroughly to prepare for sealant application. Tip: Keep your workspace clean throughout the job.
Site Preparation and Acclimation
Proper site prep and panel acclimation minimize future movement and ensure a successful MDF floor installation.
Acclimate Panels: Store panels in the room where they’ll be installed for at least 72 hours to adjust to the room’s humidity. Why: Prevents expansion/contraction after installation.
Verify Subfloor Flatness: Use a long straight edge and level to check subfloor flatness (<0.5″ in 10ft). Fix: Sand or shim as needed before installing MDF.
Prepare Installation Area: Remove all obstacles, ensure work area is clean and dry. Tip: A tidy workspace makes the job easier and faster.
Cutting, Fastening, and Jointing Tips
Proper cutting, fastening, and jointing techniques ensure a strong, durable MDF floor.
Safe Cutting: Use a sharp blade, cut slowly with even pressure to reduce tear-outs. Tip: Change blades frequently for clean cuts.
Fastener Placement: Secure panels with fasteners 1″ from edges and 6-8″ apart in the field. Why: Proper spacing distributes weight evenly, prevents squeaks.
Joint Treatments: Apply recommended joint treatment or adhesive to prevent fraying, improve seam strength. Check: Ensure seams are tight and even before applying finish.
Finishing and Curing Timelines
Allowing proper cure time for finishes and sealants ensures a durable, long-lasting MDF floor.
General Cure Times: Allow 24-72 hours of light use after applying finish or sealant. Why: Allows product to fully cure, preventing damage from heavy traffic.
Manufacturer Recommendations: Always check specific product cure times in manufacturer’s instructions. Tip: Follow these guidelines for best results.
Final Inspection: After cure time, inspect entire floor for any issues before moving in furniture or heavy objects. Why: Catch and fix any problems now to prevent future damage.
Tools and Materials Checklist
Assemble a focused set of tools for cutting, measuring, and fastening, plus safety gear like eye and respiratory protection. Include a moisture meter, cutters suitable for MDF, and the recommended adhesive and fasteners per the product label or data sheet. Review safety and usage notes on the packaging before mixing or applying materials.
Stock wear layers, sealants, and edge treatments that are compatible with your MDF grade. Keep a small supply of cleaners or finishes recommended by the manufacturer, and have a plan for proper storage to prevent warping or swelling before installation is complete.
Essential power and hand tools
Before you start, make sure you have all the right tools to get the job done efficiently. This checklist will help you ensure you’ve got everything needed for cutting, fastening, and finishing your MDF floor.
- Circular saw: For straight cuts on large sheets of MDF.
- Jigsaw: For curved or irregular cuts. Keep the blade speed low to prevent burning the edges.
- Orbital sander: To smooth out surfaces and prepare for sealing.
- Drill with driver bits: For attaching MDF to the subfloor.
- Clamps: Essential for securing sheets during cutting and gluing.
- Safety glasses: Protect your eyes from debris. Don’t skip this – it’s a common injury area.
- Dust mask: To protect against MDF dust, which can cause respiratory irritation.
- Work gloves: For handling sharp edges and hot tools.
Quick rule: Always wear your safety gear. It’s not just for pros – DIYers need it too.
Recommended sealants, adhesives, and topcoats
Choosing the right sealants, adhesives, and topcoats is crucial for a durable, long-lasting MDF floor. Here’s what to look for and why.
- Edge sealer: Water-based acrylic or polyurethane to prevent edge absorption and swelling.
- Subfloor adhesive: Construction-grade adhesive for securing MDF to the subfloor. Check it’s compatible with your subfloor material.
- Topcoat (finish): Durable, water-resistant finish like polyurethane or varnish for protection and aesthetics.
- Joint filler: For filling gaps between MDF sheets. Make sure it’s paintable and sandable.
- Primer: To improve adhesion of topcoats and seal the surface before finishing.
- VOC (Volatile Organic Compounds) consideration: Choose low or zero VOC products to minimize off-gassing and indoor air pollution.
- Solvent compatibility: Ensure your sealants, adhesives, and topcoats are compatible with each other. Check the manufacturer’s guidelines.
Quick rule: Always check solvent compatibility before mixing products. Incompatibility can cause peeling or bubbling.
Long-Term Maintenance, Inspection, and When to Replace
Establish a routine visual check for signs of moisture damage, wear, delamination, and loose fasteners. Address minor issues promptly to prevent larger problems. Compare observed conditions with the manufacturer guidance and local codes when deciding next steps.
If repairs are impractical or the subfloor remains damp, plan for replacement of affected sections. Use clear criteria from the product instructions and local requirements to determine if partial repair or full sectional replacement is needed.
Routine cleaning and preventative care
Keep your MDF floor looking good and lasting longer by following this routine maintenance checklist.
- Dust regularly: Use a soft, dry mop or broom to remove dust. Never use water alone as it can damage the finish.
- Vacuum gently: Use a vacuum without a beater bar to avoid scratching the surface. Be careful around edges.
- Avoid excess water: Wipe up spills immediately with a damp cloth. Never mop or steam clean MDF floors.
- Control moisture: Keep humidity levels between 30-50%. Use a hygrometer to monitor and maintain this range.
- Use area rugs: Place rugs in high-traffic areas to protect the finish from wear and tear.
- Protect with felt pads: Attach felt pads to furniture legs to prevent scratches when moving heavy objects.
- Keep pets’ nails trimmed: Long nails can scratch the floor’s surface, so keep your pets’ nails trimmed short.
- Avoid direct sunlight: Prolonged exposure to sunlight can cause discoloration. Use curtains or blinds to control light levels.
Quick rule: Regular cleaning and moisture control are key to keeping your MDF floor in top shape.
Trouble signs and repair thresholds
Inspect your MDF floor regularly for these signs of damage. Address minor issues promptly to prevent costly replacements.
- Swelling: Check for puffy or warped areas, which indicate water damage. If found, dry out the area immediately and monitor it closely.
- Delamination: Look for peeling or lifting of the top layer from the core. This is a sign of moisture intrusion or improper installation.
- Gaps: Check for wide gaps between planks, which can indicate structural instability or settling issues.
- Cracks: Inspect for hairline cracks, especially at joints. These can widen over time and require repair.
- Soft spots: Press on the floor with your hand to feel for soft or spongy areas, which indicate water damage beneath the surface.
- Squeaks: Listen for squeaking sounds when walking. This can indicate loose planks or subfloor issues that need attention.
- Warping: Check for cupping (edges higher than the middle) or crowning (middle higher than edges). These are signs of moisture imbalance and require immediate action.
Quick rule: If you notice any of these issues, address them promptly. Small repairs can prevent costly replacements down the line.
Warranties, codes, and safety considerations
Before installing MDF as a finished floor, ensure you’ve covered all these bases to avoid future issues.
- Check warranties: Verify the manufacturer’s warranty for your specific product. Some may not cover finished flooring applications.
- Check local codes: Ensure MDF is allowed as a finished floor in your area and that it meets all building codes and standards.
- Consider VOC emissions: MDF can emit volatile organic compounds (VOCs), which can affect indoor air quality. Choose low-VOC or no-added formaldehyde products if possible.
- Fire resistance: Check the fire rating of your chosen MDF product. Some may not meet local fire safety codes for finished floors.
- Moisture resistance: Ensure your MDF is suitable for the moisture levels in your home, especially in bathrooms or basements.
- Subfloor preparation: Make sure your subfloor is clean, dry, and flat to prevent installation issues that can void warranties.
- Installation methods: Follow the manufacturer’s guidelines for installation. Incorrect installation can also void warranties.
Quick rule: Always check with your manufacturer and local building department before installing MDF as a finished floor to ensure you’re in compliance with all regulations and standards.
Conclusion
MDF flooring can work, but it only stays good if you treat moisture, load, and edge protection as non negotiables. Focus on safe testing, proper installation, and regular checks so you don’t end up with gaps, warping, or costly repairs.
Run your final plan like this: verify the room’s moisture risk in the area you’ll install, do a small-area test fit and observations over a few days, seal and lay per the best practices, and then keep an eye on the floor with a simple maintenance routine. Check moisture, fasteners, seams, and transitions in rough order, and halt if you see swelling, loose edges, or staining.
Common mistakes to avoid are skipping the pre-install tests, ignoring moisture control, and rushing the cut, fit, or fastening. Always wear eye and ear protection, follow dust and VOC safety rules, and work on a clean, level surface. If the MDF shows significant moisture risk, or if you see bending, buckling, or persistent edge lift after a test period, stop and call a pro rather than forcing a DIY fix.
When in doubt, get a professional opinion before proceeding, especially on subfloor prep or long-term maintenance plans. Stay measured, stay safe, and you’ll keep the project on track while protecting your home and wallet.
FAQ
Can MDF flooring be made more durable by coating it or sealing it?
Yes, coatings can slow moisture and wear, but they don’t fix core MDF weaknesses. Look for manufacturer guidance on compatible finishes and follow application instructions. Always test a small area first and check for any changes to expansion or adhesion.
What moisture conditions should I check before using MDF as finished flooring?
Check for relative humidity and moisture exposure in the space. MDF hates water and fast changes in humidity. Use manufacturer-recommended moisture limits and verify with product labels or datasheets before proceeding.
How do I know if MDF is the right choice for a concrete slab?
Confirm the slab is dry, stable, and free of cracks that can telegraph through MDF. Use a trusted moisture test method and follow the flooring product’s guidance on slab preparation. If in doubt, consider a different underlayment or flooring option.
What are practical signs that MDF flooring is failing after installation?
Look for sustained warping, gaps, or curled edges after periods of humidity or moisture. If you see soft spots or delamination, stop using the area and consult the product instructions. Document the issue and check warranty or guidance from the manufacturer.