
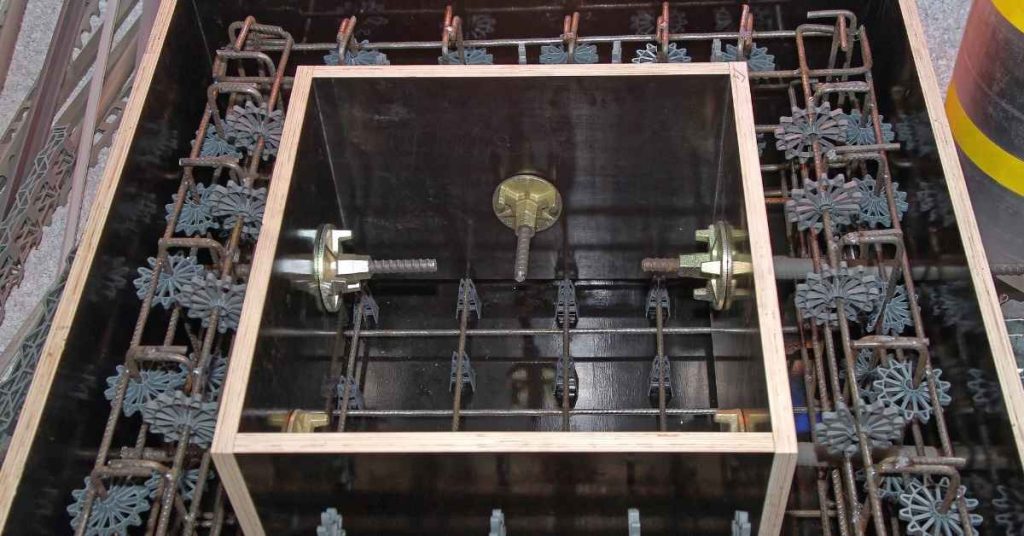
You cannot tell from appearance alone whether concrete honeycombing came from poor vibration, segregation, or leaking forms. Broad voids containing exposed coarse aggregate often suggest inadequate consolidation or aggregate-rich concrete, while localized paste loss, mortar trails, fins, and defects that follow a form seam more strongly suggest a leaking or moving form.
Do not patch first and investigate later. A repair mortar can make the face look solid without showing whether concrete was properly consolidated around reinforcing steel or whether the member retained its intended section and load capacity.
This is a post-strip diagnosis and triage guide for experienced DIY builders, small contractors, and inspectors. It can help you document the condition and ask better questions, but it cannot replace the project engineer, building official, or qualified concrete professional when reinforcement, section loss, or structural adequacy is uncertain.
Key Takeaways
- Honeycombing, rock pockets, fins, and paste loss can occur together in the same placement, so one visible clue rarely proves one cause.
- Void patterns that expose coarse aggregate and continue inward deserve more concern than isolated, shallow surface bugholes.
- Defects tracking form joints, corners, ties, or panel gaps should prompt an inspection for paste leakage and form movement.
- Photograph, map, and record placement and formwork evidence before grinding, parging, waterproofing, or patching the area.
- Exposed reinforcement, uncertain cover, deep or widespread voids, and defects at load-critical locations require prompt professional review.
- Sounding and careful probing are screening tools, not proof that a structural member is adequate.
- A localized repair may restore a sound, nonstructural surface area; it does not automatically restore reinforcement bond or demonstrate capacity.
ToC
- Diagnose Before You Patch: What the Defect Pattern Is Telling You
- Stop-Work Triggers: When a Surface Repair Is Not the Next Step
- Document the Evidence While the Pour Is Still Traceable
- Read the Pattern: Honeycombing, Segregation, Leakage, or Form Movement?
- Inspect Depth and Extent Without Creating a Bigger Problem
- Choose the Response: Monitor, Repair to a Specification, or Escalate
- What to Change on the Next Pour: Prevent the Same Signature
- FAQ: Post-Strip Voids and Formwork Defects
Diagnose Before You Patch: What the Defect Pattern Is Telling You
Use consistent terms when documenting the problem. Honeycombing, sometimes called a rock pocket, describes exposed or poorly surrounded coarse aggregate with insufficient mortar filling the spaces between stones. Surface voids or bugholes are smaller pits at the face and may be shallow. Paste loss means cement paste or mortar escaped, often through a gap in the formwork. A fin is a thin ridge of hardened concrete forced into a form joint or gap. Form-joint leakage is the loss of mortar or paste at a seam; form movement includes shifted panels, opening joints, offsets, bulges, or changed member dimensions.
These terms describe what you see, not necessarily why it happened. A form joint can leak paste while inadequate vibration leaves coarse aggregate behind the face. Congested reinforcement can interfere with concrete flow and vibrator reach, while an opened joint can simultaneously create a fin and a porous band. Treat the cause as a working hypothesis until the visible pattern is compared with formwork and placement evidence.
The first decision is not which patch product to buy. It is whether the defect appears limited to the surface in a noncritical area or whether it could affect load transfer, durability, reinforcement cover, bond, water resistance, or the effective section of the member. A footing, foundation wall base, beam, column, bearing location, connection, anchor area, and heavily reinforced zone all deserve a more conservative response than a small blemish on a lightly loaded, noncritical face.
Before cleaning beyond what is necessary to see the surface, photograph every area and make a simple map. Do not make the defect disappear with grinding, parging, paint, coating, waterproofing, or patch mortar. Those actions can erase evidence needed by the contractor, engineer, insurer, or building official.
Stop-Work Triggers: When a Surface Repair Is Not the Next Step
A small, isolated bughole may be a finish issue. Honeycombing is different when it contains loose aggregate, appears to run inward, occurs in a band, or is close to reinforcing steel. The significance depends on the member design, exposure, reinforcement arrangement, and project requirements. There is no universal visual defect size that can responsibly be accepted or rejected without that context.
Pause work and seek prompt review by the responsible engineer or another qualified professional if any of the following apply:
- Voids are deep, widespread, repeated over a large area, or extend beyond the exposed face.
- Reinforcing steel is visible, loose, poorly surrounded by concrete, or likely to have inadequate cover.
- The defect is at a footing, wall base, beam, column, bearing area, connection, anchor zone, opening, or other load-critical location.
- A porous band follows a lift line or a suspected placement interruption, raising concern about a cold joint or poor bonding between placements.
- The forms visibly shifted, bowed, opened, blew out, or left an offset or dimensional irregularity in the concrete.
- Large aggregate pockets continue into the member, or chipping exposes more unsound material than expected.
- Concrete delivery, batching, placement, consolidation, or formwork records are missing or raise questions about concrete quality.
Do not load, backfill against, waterproof over, or conceal a suspect structural area while the required evaluation is pending. In some cases, the appropriate corrective action may be selective removal and engineered repair; in others, it may involve testing, replacement, or a documented acceptance decision. That decision belongs to the party responsible for the design and construction requirements.
A surface patch can restore profile and may improve local durability when it is part of an approved repair. It does not, by itself, prove that the original concrete consolidated around steel, that reinforcement bond is adequate, or that the member has its intended capacity. Do not remove concrete around structural reinforcement without authorization in an attempt to “see how bad it is.”
Document the Evidence While the Pour Is Still Traceable
Early documentation is often more useful than an aggressive inspection. Crew memories fade quickly, and stripped forms may be dismantled before anyone compares them with the defect pattern.
- Photograph each defect before alteration. Take a wide image showing the member and location, then close images with a tape measure, ruler, or another clear scale reference. Photograph from more than one angle where depth is visible.
- Make a defect map. Sketch each member face and identify the defect’s elevation, distance from corners, joints, openings, and known reinforcement zones. Note whether it follows a horizontal lift line, a vertical form seam, a tie location, or a corner.
- Record what is physically present. Write down loose aggregate, missing mortar, hardened fins, paste streaking, staining, exposed steel, soft material, visible depth, and any change in plane. Keep observations separate from suspected causes.
- Capture placement evidence. Gather delivery tickets or batch information if available. Record placement sequence, discharge points, approximate lift sequence, interruptions, observed workability changes, vibrator access and use, form adjustments, and any grout leakage during the pour.
- Preserve formwork evidence. Photograph failed ties, opened joints, bowing, shifted panels, damaged seals, and hardened paste or mortar on the outside of the forms. Exterior paste deposits can be particularly useful when evaluating a suspected leak.
Clean only loose debris needed to view the condition. Keep the notes factual: write “porous band follows panel seam” rather than “bad vibration caused defect.” A clear record allows the responsible professional to evaluate competing explanations instead of working from an already patched surface.
Read the Pattern: Honeycombing, Segregation, Leakage, or Form Movement?
The table below is a field guide, not a diagnosis by itself. Use it to identify what other evidence should be checked.
| Visible pattern | Possible explanation | Evidence that supports the explanation | When to escalate |
|---|---|---|---|
| Coarse aggregate exposed with little mortar between stones; voids appear to continue inward | Inadequate consolidation, blocked concrete flow, or poor vibrator reach | Congested steel, corners, narrow form zones, deep placement lifts, limited access, or no effective consolidation record | Void depth is uncertain, area is extensive, steel is nearby, or the member is structural |
| Aggregate-rich pocket or uneven mortar distribution away from a seam | Segregation during discharge, rehandling, excessive free fall, or inconsistent placement handling | Observed separation during placement, harsh or changing concrete consistency, or aggregate accumulation at discharge points | Defect is deep, widespread, in a bearing zone, or concrete quality records are uncertain |
| Thin porous band, missing paste, or mortar streak following a joint, corner, tie, or gap | Form leakage | Exterior paste trails, hardened mortar outside forms, unsealed joints, damaged panels, or visible gaps | Porosity extends inward, leakage was heavy, or the defect affects cover, water resistance, or a critical member |
| Fin, offset, bulge, opened seam, or altered face alignment | Form movement or separation | Displaced ties, bowed faces, shifted panels, opened joints, or observed movement during placement | Dimensions changed, a blowout occurred, adjacent concrete is porous, or the member may be out of tolerance |
| Shallow tears, blemishes, or small pits with solid concrete immediately beneath | Surface finishing or face-quality issue | No loose aggregate, no inward continuation, and no associated leakage or movement evidence | It is in a water-retaining, freeze-thaw, architectural, or otherwise specified exposure zone |
Inadequate consolidation often leaves an interconnected stone-and-void pattern because mortar did not fully fill the spaces around the aggregate. It is common where concrete has difficulty moving: behind dense reinforcement, in corners, around embeds, in narrow wall sections, or in areas the vibrator could not reach effectively. Do not assume that exposed aggregate proves poor vibration, however. Aggregate may also be present because the mix separated before it reached that location.
Segregation refers to the separation of aggregate from the mortar portion of the concrete. It can result from handling and discharge practices, but an aggregate-rich pocket after stripping is not enough evidence to establish exactly how it occurred. Compare the location with discharge points, observed concrete consistency, rehandling, and the placement sequence.
Form leakage is usually more localized. Look for a defect aligned closely with a joint, corner, tie penetration, or gap, especially where paste or mortar was found outside the forms. Leakage can leave a thin porous zone immediately inside the face. It is not automatically harmless simply because it follows a seam.
Form movement produces geometry clues: a fin, panel offset, abrupt change in plane, bulge, or opened joint. A fin alone primarily indicates a gap or joint issue; it does not establish that the concrete beside it was well consolidated. Inspect the adjacent face for paste loss and voiding.
Inspect Depth and Extent Without Creating a Bigger Problem
Start with safe access. Remove only loose debris that is already detached, then inspect by sight and touch. Record only observable conditions, such as whether loose aggregate or open voids continue inward; a firm-feeling surface does not by itself confirm that the concrete is sound or that the defect is shallow. Wear eye protection, gloves, sturdy footwear, hearing protection where needed, and respiratory protection appropriate to the dust-producing task. Concrete dust can contain respirable silica, so use suitable dust controls and tools.
Limited sounding can help locate changes in surface condition. A change in sound may identify an area worth closer review, but sounding does not measure strength, confirm reinforcement bond, or map every internal void. The same limitation applies to simple rebound readings: they may be useful to a qualified evaluator as part of a broader investigation, but they are not a DIY pass/fail test for structural adequacy.
Probe only within voids that are already open and only enough to determine whether material is loose and whether the visible condition continues. Do not force a screwdriver, bar, drill, or chisel into sound concrete. Stop immediately if reinforcing steel is encountered, the void deepens unexpectedly, material breaks away beyond a clearly local area, or the defect appears to run along the member.
If a repair is under consideration, removal of unsound concrete should be limited to what is authorized for that member and project. Qualified professionals may call for selective exposure, cores, scanning, or other assessment methods where visual inspection cannot establish the extent. Each method has limits; no single test should be represented as standalone proof that the member is structurally adequate.
Finish the inspection with a written classification: the likely cause or causes, confidence level, exact location, visible and investigated extent, reinforcement status, corroborating formwork or placement evidence, and the next action. A statement such as “likely form-joint leakage, moderate confidence; localized porous strip at west-wall panel seam; no steel visible; extent not verified; professional review requested” is more useful than a vague note saying “minor honeycomb.”
Choose the Response: Monitor, Repair to a Specification, or Escalate
Monitor or accept only confirmed minor face defects
Monitoring or acceptance may be appropriate for a genuinely shallow, isolated face blemish where the substrate is confirmed sound and the area is not structurally, visually, or durability critical. Project specifications may still require a repair for appearance or exposure reasons. Do not label a defect cosmetic just because it is small at the surface.
Use a defined repair approach for local, nonstructural defects
A loc