
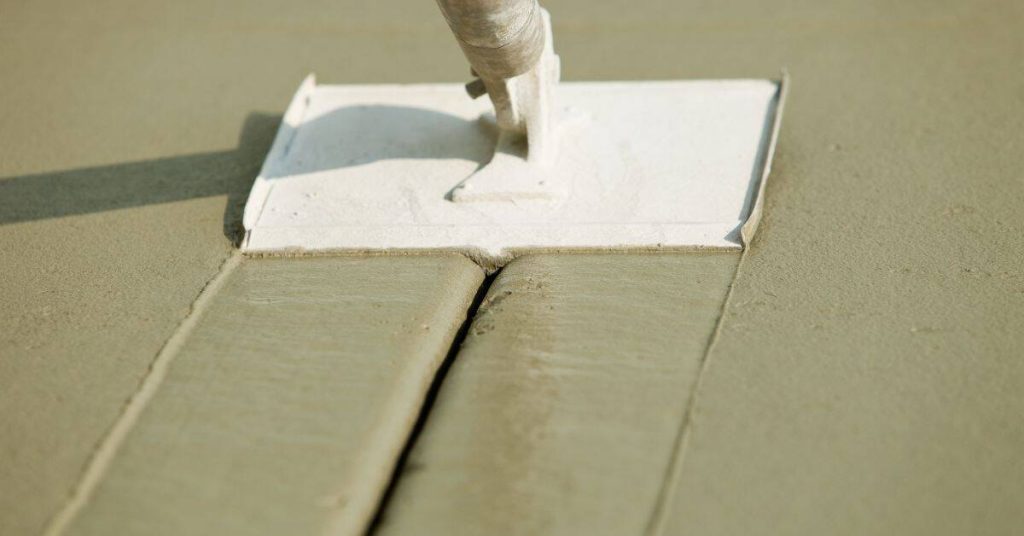
If a concrete pour is interrupted, do not assume the next load can simply be placed on top and vibrated in. Protect the unfinished concrete, document the delay, and decide whether the earlier layer is still plastic enough to integrate, whether the stop line can become an approved construction joint, or whether affected concrete must be removed and recast.
The correct response depends on the concrete’s actual condition, not just the clock. Mix design, concrete temperature, weather, delivery history, member type, reinforcement, and the location of the interruption all matter. A delay in a small nonstructural patio slab is not judged the same way as a delay in a footing, retaining wall, beam, column, elevated slab, or water-retaining structure.
For structural work, an unplanned stop should be reported promptly to the project designer, engineer, inspector, or other party responsible for approving the work. The ready-mix producer can also provide mix-specific information, but producer guidance does not replace the engineered joint detail or project requirements.
Key Takeaways
- Stop in a controlled way, protect the exposed concrete, and record when and where placement stopped.
- Do not use elapsed time as a universal pass/fail rule; concrete can stiffen at very different rates under different conditions.
- Fresh-looking surface paste does not prove that the concrete below can still consolidate with a new lift.
- Continue only when the old and new concrete can genuinely integrate as one placement and the crew can restore continuous work.
- Convert the interruption into a construction joint only when that exact joint location and detail are approved.
- Do not add water, over-vibrate, dust with cement, or aggressively finish the surface to hide a developing cold joint.
- When the joint is unapproved, poorly located, contaminated, segregated, or doubtful, removal and recasting is often the safer route.
ToC
- First Response: Stabilize the Pour and Do Not Hide the Interruption
- Diagnose the Interface Before Choosing a Recovery Method
- Decision Path: Continue, Convert to a Construction Joint, or Remove and Recast
- If You Can Resume While the Concrete Is Still Plastic
- If the Stop Line Must Become a Construction Joint
- If Removal and Recasting Is the Safer Choice
- Failure Points That Turn a Delay Into a Bigger Defect
- Prevent the Next Interruption: A Pre-Pour Contingency Plan
First Response: Stabilize the Pour and Do Not Hide the Interruption
The first few minutes after a pump failure, late truck, blocked access route, or crew shortage matter. The goal is not to make the surface look uninterrupted. The goal is to preserve the work already placed while creating a clear record and a controlled decision point.
- Call the interruption. Tell the crew that placement has stopped. Avoid spreading a small amount of remaining concrete over a wide area in an effort to gain a few more minutes. That often creates a thin, poorly consolidated edge that is harder to evaluate and recover.
- Record the facts. Note the time the last concrete was placed, the location and elevation of the stop line, truck or load information if available, weather conditions, and the reason for the interruption. Take wide photos showing the member and close photos of the exposed interface.
- Protect the concrete without damaging it. Keep rain, runoff, debris, mud, standing water, and unnecessary foot traffic off the exposed placement. In hot, windy, or sunny conditions, use the project-appropriate protection to limit rapid surface drying. Do not drag covers across fresh concrete or trap water against the surface.
- Keep forms, reinforcement, and embeds stable. Check that equipment movement, hose handling, or a hurried crew has not shifted rebar, dowels, anchor bolts, waterstops, keyways, or forms. Do not cut, bend, or move reinforcing steel to create a more convenient stopping line without approval.
- Get the right people involved early. Contact the ready-mix supplier for information about the delivered mix and its condition. For a foundation, wall, structural slab, beam, column, retaining structure, or any unapproved stop location, alert the designer, engineer, or inspector before burying the interface.
Do not add water to the concrete already in place. Do not direct a worker to “wet it up” so it will accept the next load. Likewise, do not add water to a delayed truck merely to make it easier to place unless the producer and project requirements specifically authorize the adjustment. Field water changes can affect the concrete’s performance and may violate the mix design or delivery requirements.
Extra vibration is not a reset button. Internal vibration is used to consolidate workable concrete and help adjacent workable lifts knit together. It cannot reliably restore concrete that has begun setting, and prolonged vibration can cause segregation, disturb forms, or leave a weak interface behind a surface that merely appears blended.
Diagnose the Interface Before Choosing a Recovery Method
A stopped pour creates three separate questions. First, is the earlier concrete still plastic enough to become monolithic with the next placement? Second, if it is not, is a construction joint allowed at this exact location? Third, if a joint is allowed, can it be formed and prepared to the approved detail?
Do not answer the first question by looking only at the top skin. Surface paste may still look damp while concrete lower in the lift has stiffened enough that a new load will sit above it rather than merge with it. Assess several areas of the interface. Watch how the concrete responds to normal placement and consolidation methods, not to forceful manipulation intended to make it cooperate.
| What to check | Why it changes the decision |
|---|---|
| Condition of the earlier placement | Concrete that remains workable may still integrate; stiffened, crusted, torn, or setting concrete may not. |
| Member and stop-line location | A joint in a lightly loaded decorative slab is different from one in a column, beam, retaining wall, or footing. |
| Drawings and specifications | They may identify allowable joint locations, orientation, reinforcement continuity, keyways, waterstops, or required preparation. |
| Mix and environmental conditions | Temperature, admixtures, cement type, sun, wind, placement depth, and truck history affect setting behavior. |
| Quality of the placed concrete | Segregation, contamination, honeycombing, washout, or inadequate consolidation may require removal regardless of delay length. |
Elapsed time is useful documentation, but it is not a universal definition of a cold joint. There is no responsible all-purpose number of minutes or hours that tells every crew to continue or stop. Concrete that is placed on a cool, protected day may remain workable longer than concrete of the same nominal mix placed in heat, wind, direct sun, or after a long delivery sequence. Retarding or accelerating admixtures, concrete temperature, and changes authorized by the producer also affect behavior.
Check the member carefully. An interruption line through a column, beam, heavily loaded wall, critical reinforcement zone, liquid-containing structure, post-tensioned work, or exposed architectural concrete deserves immediate project-specific direction. A convenient point for the pump or crew is not automatically a structurally acceptable point for a joint.
Other red flags include unknown load history, visible segregation, rainwater or mud contamination, a line that crosses a waterstop zone, difficulty consolidating around congested reinforcement, and any interface that would disrupt a required slope, drainage plane, or finish pattern. In these cases, pause rather than trying to make the problem disappear under fresh concrete.
Decision Path: Continue, Convert to a Construction Joint, or Remove and Recast
The practical decision is straightforward in concept, even though the technical judgment can be demanding:
- Continue placement only when the earlier concrete remains sufficiently plastic for proper integration and the crew can restore continuous, controlled placement immediately.
- Convert the stop line to a construction joint when monolithic integration is doubtful but a joint at that location is specifically permitted or approved.
- Remove and recast when the joint is not allowed, the location is unsuitable, the interface cannot receive the required preparation, or the placed concrete is itself defective.
A planned construction joint is not the same thing as an accidental cold joint. A construction joint is selected for the load path and placement sequence. It may require a bulkhead, keyway, continuing reinforcement, dowels, a waterstop, specific surface preparation, or a particular bonding treatment. An accidental cold joint is simply an interface where fresh concrete may have been placed against material that had already stiffened. Its bond and structural role are unverified until the responsible project authority evaluates it.
When there is uncertainty, the default should be to stop and obtain direction—not to bury an unapproved interface because a truck is waiting. The immediate cost and inconvenience of a delay can be significant, but hidden defects in structural or below-grade concrete are harder and more expensive to investigate later.
If You Can Resume While the Concrete Is Still Plastic
Resuming a monolithic placement is the narrowest recovery path. It is appropriate only if the concrete remains workable enough for normal consolidation to integrate the layers and the underlying cause of the delay has been fixed. Do not restart merely because the pump has restarted or a new truck has arrived.
Before resuming, stabilize the operation. Confirm access for the truck and pump, crew assignments, adequate lighting, hose control, finishing coverage, delivery sequence, and backup arrangements. A second interruption can turn a manageable delay into a much larger area of questionable concrete.
- Remove loose debris, puddled rainwater, and foreign material from the exposed area without gouging, raking, or displacing the fresh concrete.
- Place incoming concrete close to its final position. Avoid repeatedly shoving it long distances with rakes or come-alongs, which can separate aggregate and paste.
- Maintain sensible lift placement and consolidation practices for the member. Use internal vibration in a controlled pattern where it is appropriate for the work.
- Where the earlier lift is genuinely workable, normal consolidation may extend into that material enough to integrate the lifts. Do not probe or vibrate aggressively in an attempt to liquefy a set layer.
- Watch the interface continuously. Tearing, a persistent seam, trapped air, honeycombing, or a layer that will not merge are signs to stop and reconsider the joint or removal path.
Resume screeding and finishing only after the placement is truly integrated. Overworking a drying surface can create a weak, dusty layer and may conceal a line temporarily without correcting the interface below. Never sprinkle water on the surface to help the tools move or to disguise a delayed-placement seam.
This distinction is especially important in flatwork. A surface that can still be troweled is not necessarily suitable for accepting a new concrete layer as one continuous slab. Finishing is a surface operation; integration depends on the condition and consolidation of the concrete through the depth of the interface.
If the Stop Line Must Become a Construction Joint
If the earlier concrete has stiffened enough that monolithic placement is doubtful, stop treating the next truck as a continuation of the first one. The question becomes whether the stop line can be converted into a deliberate construction joint.
First obtain confirmation that the location and orientation are acceptable. For engineered work, follow the drawings or written direction from the responsible design professional. Generic online advice cannot tell you where a joint belongs in a particular foundation, wall, beam, suspended slab, or retaining structure.
While access remains practical, establish a controlled and stable stop line. This may involve a bulkhead or other approved form arrangement. Preserve every specified joint component, such as reinforcement continuity, dowels, a keyway, or a waterstop. Do not improvise a key, relocate rebar, or add an adhesive because it seems like it should make the joint stronger.
After the first placement has hardened as required by the approved sequence, prepare the face for the later placement. The approved detail commonly requires removal of weak surface material and laitance, exposure of sound concrete, thorough cleaning, and a specified moisture condition before fresh concrete is placed. The exact surface profile, cleaning method, moisture condition, and bonding product depend on the project detail and the products involved.
A bonding slurry, epoxy, or similar material is not a universal cure for an accidental cold joint. Some products are intended for particular repair systems; others are simply moisture barriers or nonstructural bonding aids. Use only the treatment called for in the design documents or the applicable product data sheet. A sealant that keeps water out of a cosmetic joint does not prove structural load transfer across that joint.
Before restarting, inspect the prepared face, reinforcement, forms, embeds, cleanliness, and placement access. Then document the final joint location, interruption duration, observed concrete condition, preparation completed, materials used, and the person who authorized the decision. That record is valuable if future cracking, leakage, delamination, or appearance concerns arise.
If Removal and Recasting Is the Safer Choice
Removal and recasting is often the correct answer when the interruption is in an unapproved structural location, the concrete cannot be made into an acceptable joint, or the placement shows clear quality problems. It is not a failure to choose this option. It is a controlled correction that avoids leaving an unknown plane in work that may later be hidden by soil, finishes, waterproofing, or additional concrete.
Do not guess at the removal boundary in a structural member. The limits should be based on approved direction identifying where sound, acceptable concrete begins and where the new placement may restart. Demolition can damage reinforcing steel, embeds, formwork, waterproofing, adjacent green concrete, or supporting soil if it is approached casually.
- Mark removal limits only after the responsible party has defined the repair or recast approach.
- Plan the work to control silica dust, flying fragments, noise, and pinch hazards. Use appropriate personal protective equipment and keep workers clear of unstable forms or unsupported material.
- Remove weak, set, segregated, contaminated, or inadequately consolidated concrete until the approved sound substrate and restart boundary are