
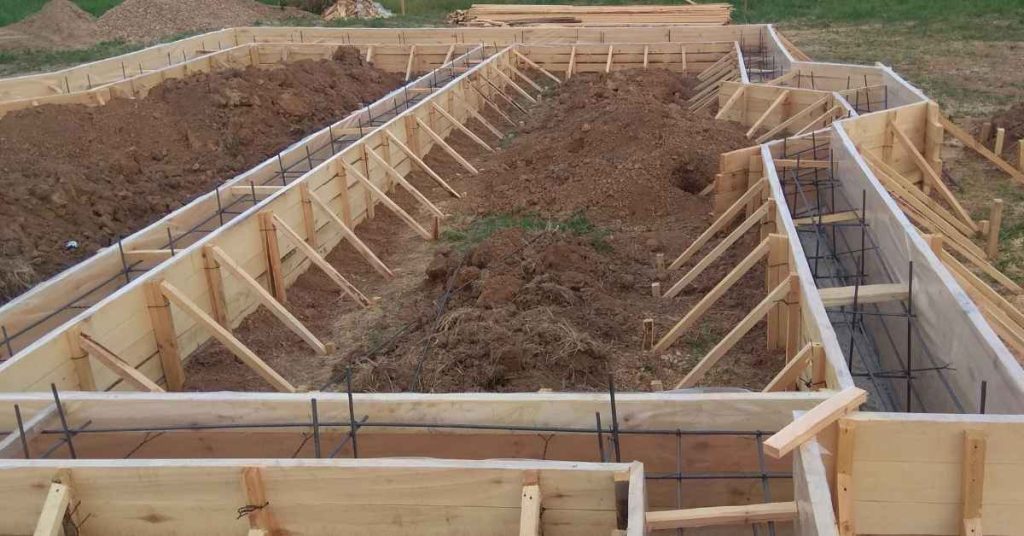
Prevent voids around congested rebar by planning concrete flow and consolidation access before the truck arrives. The concrete must be able to pass through the reinforcing cage, reach every form face and embedded item, and be consolidated without moving the steel or separating the mix.
A form that looks full from the top is not proof that concrete reached the bottom corners, the far side of a bar mat, or the space below anchors and sleeves. Tight reinforcement, long hose drops, poor discharge locations, inaccessible vibrator points, and leaking forms can all produce honeycombing or rock pockets that become visible only after stripping forms.
This is a placement guide for reinforced concrete with crowded bars, ties, penetrations, anchor groups, narrow corners, and other blocked pathways. It does not authorize changing structural reinforcement or mix design in the field. Reinforcement dimensions, cover, bar spacing, concrete properties, and placement requirements must follow the approved drawings, project specifications, applicable code, and the responsible engineer.
Key Takeaways
- Concrete must have a real path through the reinforcement cage and a reachable consolidation path at every high-risk area.
- Do not rely on vibration to overcome an unsuitable mix, blocked access, or reinforcement congestion that was not addressed before the pour.
- Place close to the final location in controlled lifts; do not dump a large mass and expect it to travel laterally through dense steel.
- Use only the approved concrete and approved workability adjustments. Adding water at the site is not a safe fix for difficult flow.
- Slow or stop the pour when aggregate collects, forms leak or move, steel shifts, or a restricted pocket cannot be confirmed full.
- After forms are removed, document defects before patching. Exposed steel, reduced cover, deep voids, or defects near anchors and critical faces need professional evaluation.
ToC
- 1. Make a placement plan before concrete arrives
- 2. Diagnose the access problem before choosing a fix
- 3. Pre-pour preparation: prove the flow paths and access
- 4. Place concrete so it does not trap air or separate aggregate
- 5. Consolidate around reinforcement without making a second defect
- 6. Stop-and-correct triggers during the pour
- 7. Strip, inspect, and diagnose defects before patching
- 8. Final checklist for congestion-related placement quality
1. Make a placement plan before concrete arrives
Congestion is not merely a rebar problem or a finishing problem. It is an access problem. Concrete needs a route from the discharge point to the final location, and the crew needs a way to consolidate it at the form face, around bars, and below embeds. If either route is missing, the chance of a hidden defect is high.
Start with the approved drawings, the specified concrete, and the intended placement method. Then walk the formed and reinforced work as if you were following the concrete itself. Trace where the material will enter, where it must pass through the cage, and where air could become trapped. Identify where a vibrator can be inserted, operated, and withdrawn without catching ties or forcing bars out of position.
High-risk locations commonly include:
- Bottom corners and narrow returns in wall, beam, pier, and footing forms.
- Dense bar intersections, lap zones, closed ties, and multiple reinforcement layers.
- Spaces below anchor groups, plates, sleeves, pipes, conduits, waterstops, and blockouts.
- Form faces behind reinforcement where neither the discharge stream nor vibrator can reach directly.
- Changes in section thickness that create shelves, pockets, or abrupt restrictions.
- Areas where a hose or chute would require a long free fall or would strike reinforcement before the concrete reaches its destination.
Do not move, cut, omit, bend, or re-space rebar, ties, anchors, sleeves, or inserts to make placement easier unless the responsible design authority provides written approval. A field change that improves apparent flow can reduce required cover, alter reinforcement performance, or create a different problem that is harder to detect later.
2. Diagnose the access problem before choosing a fix
Not every rough area after stripping has the same cause. A proper response starts by identifying whether the likely issue is blocked flow, segregation, inadequate consolidation, form leakage, or form movement. The remedy for one can make another worse.
| What you observe | Likely mechanism | What to check before continuing |
|---|---|---|
| Coarse aggregate piles up at a corner or below a restriction. | Blocked flow, impact separation, or excessive travel through the cage. | Discharge location, free fall, mix suitability, and whether a local route can be reached. |
| Voids appear behind bars or around ties after stripping. | Concrete did not reach the face, or the area could not be consolidated. | Vibrator access, lift sequence, and whether the far face was observed during placement. |
| Paste or mortar runs from a form seam. | Leaking or poorly sealed formwork. | Form joints, tie locations, bracing, and the extent of material loss. |
| A localized rock pocket sits beneath a high discharge point. | High-impact placement or segregation from dropping concrete onto steel or forms. | Hose or chute position and whether material is being placed close to final location. |
| One area fills slowly while adjacent areas rise quickly. | A blocked pocket or trapped air route. | Whether the concrete path has been sealed off by earlier placement. |
Before placement, inspect from all accessible sides. Look through the cage rather than only down into it. Can concrete get below the anchor cluster? Can it reach the back form face behind the bars? Is there a dead-end pocket at the base of a sleeve? Can the planned vibrator head enter and leave without being forced between reinforcement?
A high-slump appearance alone does not prove that a concrete mixture can pass through a specific reinforcing arrangement without segregation. Required bar clearances, aggregate limitations, pumping suitability, and workability are project-specific matters. If the specified mix, placement equipment, and actual cage do not appear compatible, pause before the pour and contact the engineer, supplier, or placing contractor as appropriate. An approved change may involve the mixture, delivery method, equipment, placement sequence, or detailing. It is not an invitation to add water or alter steel without authorization.
3. Pre-pour preparation: prove the flow paths and access
A short, specific pre-pour plan is far more valuable than trying to improvise when concrete is setting. Mark the critical locations directly on a simple sketch or on the formwork where practical. The crew should know which areas must be filled first, which faces need observation, and where the vibrator can actually operate.
Build a placement map
Mark the planned truck chute, pump hose, bucket, or wheelbarrow discharge points. Show the intended direction of placement, lift boundaries, narrow zones, embedded items, and the positions where consolidation must occur. If possible, arrange access from more than one side so concrete is not expected to travel an excessive distance sideways through dense reinforcement.
Assign responsibilities before the first load arrives. One person should direct discharge. Another should watch forms for movement, bulging, and leakage. A competent operator should handle consolidation, while another worker watches the opposite face, inserts, and reinforcement for missed areas or displacement. Make it clear who can call for a slowdown or stop.
Check forms, steel, and embedded items
- Remove wood scraps, tie-wire cutoffs, hardened concrete, loose debris, and standing obstructions that can block flow or create voids.
- Confirm that forms are clean, braced, and sealed where needed. Do not assume a small leaking joint will stay small under fresh-concrete pressure.
- Check that chairs, spacers, reinforcement, anchors, sleeves, conduits, and other inserts are fixed in their approved positions.
- Make sure hose handling, worker traffic, and vibration will not knock steel or embeds out of place.
- Confirm that every planned vibrator point is physically reachable with the available equipment.
Stage serviceable consolidation equipment and a backup before placement begins. A large vibrator head that cannot pass through the cage is not a solution; forcing it through can move reinforcement, damage formwork, or leave the very pocket you intended to consolidate. Equipment selection and operating practice should follow the project requirements, supplier guidance, and equipment manufacturer instructions.
Confirm that the delivered concrete matches the approved order and placement constraints. Any admixture, aggregate change, workability adjustment, pumped mix, or specialty concrete should be handled through the responsible parties. Do not add water at the site simply because a congested area looks difficult. That can alter the supplied concrete outside the approved design and may increase segregation, shrinkage, or other performance risks.
4. Place concrete so it does not trap air or separate aggregate

The basic rule is simple: place concrete as close as practical to its final position. In a congested cage, that rule matters even more. Dumping a large amount in one open spot and expecting it to flow around several obstructions invites aggregate hangups, air pockets, and uneven mortar distribution.
Follow the planned sequence. Depending on the form geometry, this often means starting at low or remote areas and advancing in a controlled direction before an upper mass of concrete seals off the route to a lower pocket. The exact sequence depends on the element and approved plan, but the goal is always the same: do not bury an unfilled space behind reinforcement, below an embed, or at a corner.
- Move the hose, chute, bucket, or discharge point as placement advances rather than letting material travel long distances through bars.
- Use manageable lifts selected for the element, the approved mix, vibrator reach, and formwork capacity.
- Place each lift so the crew can consolidate its full area and properly connect it to the preceding lift.
- Keep the discharge stream close to the receiving surface where practical, and avoid striking bars, anchors, forms, or inserts with a forceful stream.
- Watch restricted areas for evidence that mortar and coarse aggregate are arriving together rather than allowing stone to collect at the first obstruction.
Do not use shovels, rods, or a vibrator to pull or force coarse aggregate through a blocked reinforcing cage. Light hand work may sometimes be part of an approved placing operation, but it is not a substitute for a viable concrete path. If a pocket will not fill under controlled placement, treat it as a problem to solve now, not one to conceal with the next lift.
Pump placement deserves particular discipline because the hose can deliver concrete rapidly. Keep the hose under control, avoid letting the stream excavate or pile up in one location, and move it deliberately. Pumpability and the effects of hose delivery on a particular mix are supplier and specification issues, not assumptions to make at the form.
5. Consolidate around reinforcement without making a second defect
Internal vibration helps fresh concrete settle around reinforcement, form faces, and embedded items while releasing entrapped air. It does not turn unsuitable concrete into a mix that can travel indefinitely through inaccessible congestion. Use it as a controlled consolidation tool, not as a way to pump concrete sideways or force it through blocked bars.
Work from the planned insertion points in a methodical pattern. Cover the full placement area and overlap adjacent zones sufficiently that no pocket is skipped. Where the placement plan calls for it, the vibrator should reach into the fresh interface with the preceding lift so the lifts knit together. Avoid random insertion, especially in areas where the opposite face cannot be seen.
- Insert and withdraw the vibrator in a controlled manner.
- Do not drag it sideways through the concrete to move material across the form.
- Do not jam it between bars, ties, or embedded items.
- Do not use it against the reinforcing cage, form ties, anchors, or waterstops.
- Stop when the concrete has settled and become more uniform and obvious large air release has diminished.
Excessive vibration can cause segregation, an overly mortar-rich surface, form leakage, and movement of reinforcement or inserts. Under-vibration can leave honeycombing and voids. There is no reliable universal time, insertion spacing, head size, or lift depth that applies to every mix and element. Follow the approved placement procedure, concrete supplier information, equipment guidance, and engineer direction.
For an area that cannot be reached by a vibrator, do not improvise after the form is filling. Approved options may include revising the placement or mix plan before placement, arranging access through planned openings where the design and formwork al