
Introduction
Waterproof coatings can reduce water intrusion when used correctly. They come in different forms, like paints, membranes, and sealants, and their effectiveness depends on proper surface prep, compatibility, and following the product’s directions. Always check the label and guidance from the manufacturer to know what surfaces and conditions each coating is meant for.
They’re commonly used on foundations, roofs, and concrete surfaces facing moisture, leaks, or dampness. To apply successfully, start with a clean, dry surface, fix any cracks, choose a coating suitable for the substrate, and follow curing and recoat instructions. If in doubt, verify local rules or seek practical advice from the product label or manufacturer instructions before proceeding.
Key takeaways
- Choose coating type by substrate, moisture level, and UV exposure.
- Surface prep is crucial: clean, dry, repair cracks, and remove old coatings.
- Follow manufacturer instructions for cure times, recoat intervals, and ventilation.
- Test for moisture and adhesion before full application to avoid failure.
- Assess long-term performance: drainage, flashing integration, and compatibility with plastics.
- Safety first: wear respirator, gloves, and ensure proper ventilation during coating.
Table of Contents
- Introduction
- Key takeaways
- Quick Answer: Do Waterproof Coatings Work and Why It Matters
- What Are Waterproof Coatings?
- How Waterproof Coatings Work and Common Chemistries
- Effectiveness Under Real-World Conditions
- Planning and Surface Preparation Before You Coat
- How to Apply Waterproof Coatings (Step-by-Step)
- Common Mistakes, Troubleshooting and Maintenance
- Costs, Lifespan, Safety and Environmental Impact
- Conclusion
- FAQ
Quick Answer: Do Waterproof Coatings Work and Why It Matters
Coatings work best when the surface is clean, properly prepared, and the moisture situation is under control. They’re effective for surface water and small hydrostatic pressure on concrete, masonry, or stucco, but they won’t fix a real moisture problem that’s deep or ongoing. Choose the right type—cementitious, epoxy, or acrylic—based on whether you need water resistance, waterproofing, or breathability, and follow the substrate’s needs.
This matters because improper prep, UV or chemical exposure, or using the wrong system leads to failures like cracking or delamination. Do quick checks, test moisture when unsure, and call a pro if you see ongoing dampness, high moisture readings, or coating looseness. Look for clear product data sheets and label guidance to judge quality, and plan maintenance and inspection intervals around the coating’s expected life and reapplication needs.
Short verdict
Waterproof coatings work best when matched to the right substrate and conditions. They’re not miracle cures for severe moisture issues.
They excel in: preventing water ingress through porous surfaces like concrete, masonry, or stucco under normal hydrostatic pressure.
But they struggle with: high hydrostatic pressure, improper substrate preparation, and long-term exposure to UV rays or chemicals.
Who benefits most
Homeowners and builders gain the most from waterproof coatings in these scenarios:
Basements: Protecting interior walls and floors from groundwater seepage.
Roofs & Balconies: Shielding surfaces from rainwater penetration and preventing damage to underlying structures.
Exterior Walls: Preventing water intrusion through porous masonry or stucco, especially in areas with high humidity or frequent rainfall.
What Are Waterproof Coatings?
Waterproof coatings are designed to form an impervious layer on concrete that blocks water from passing through. They differ from sealers, membranes, and DWR finishes in how they work and where they belong on the structure.
Choosing the right coating depends on the substrate and environment, and they come in chemistries like cementitious, epoxy/polyurethane, silane/siloxane, and acrylic, each with strengths and limits. Prep matters: cure state, moisture content, porosity, cracks, and the need for priming or patching before you apply. Follow the label for temperature, humidity, cure times, recoat windows, and how to test coverage and performance.
Definition and purpose
Waterproof coatings are designed to protect concrete surfaces from water intrusion. Unlike sealers, which fill pores to prevent moisture migration, or membranes that create a physical barrier, coatings form a continuous layer that repels or blocks water.
Some coatings allow vapor transfer, making them breathable and preventing trapped moisture from causing damage. This is unlike DWR (Durable Water Repellent) finishes, which only provide surface-level protection without allowing vapor transmission.
Common types at a glance
Waterproof coatings come in various categories, each with its unique properties:
Silicone-based: Flexible and durable, ideal for exterior substrates and wet environments. They offer good UV resistance but may not be suitable for high-traffic areas due to reduced abrasion resistance.
Acrylic: Economical and easy to apply, they provide good waterproofing but have lower durability compared to other options. Suitable for interior basement walls and floors.
Polyurethane/Epoxy: High-performance coatings offering excellent adhesion, chemical resistance, and durability. They excel in harsh environments like industrial settings or exterior concrete surfaces but require proper ventilation during application due to strong solvent emissions.
Material specs and standards explained
Choosing the right waterproof coating depends on understanding its specifications and performance claims:
- Coating Type: Silane/siloxane penetrants, cementitious, epoxy/polyurethane, etc. Each has different application methods and performance characteristics.
- Coverage: Check the coverage rate to ensure you purchase enough product for your project’s square footage.
- Curing Time: Consider how long it takes for the coating to cure before recoating or exposing it to moisture.
- Hydrostatic Pressure Rating: This indicates the maximum water pressure the coating can withstand. Higher ratings are better for wet environments or below-grade applications.
- Breathability/BVTR (Moisture Vapor Transmission Rate): A lower BVTR means less moisture can pass through, which may not be ideal in all situations as it could trap moisture behind the coating.
- ASTM/EN Standards: Check if the product meets relevant ASTM or EN standards for waterproofing systems. This ensures the coating has been tested and approved by recognized industry bodies.
How Waterproof Coatings Work and Common Chemistries
The main mechanisms are film-forming coatings, pore-filling strategies, crystalline waterproofing, and elastomeric membranes, and each approach blocks water differently while affecting breathability. Film-forming systems build a continuous layer, while pore-fillers seal the surface pores, and crystalline or elastomeric options adjust to movement to reduce seepage. Understanding these modes helps match the product to your substrate and climate conditions.
Common chemistries map to performance traits: acrylics and polyurethanes offer flexibility and exterior suitability, epoxies provide chemical resistance and strong adhesion, silanes/siloxanes promote penetration and long-term moisture control, and elastomeric coatings deliver movement tolerance for battered surfaces. Substrate interaction matters, with bonding and porosity driving longevity on concrete versus masonry. Expect trade-offs in vapor permeability, elongation, UV stability, and aging effects; verify application conditions and cure guidance on the data sheet before committing to a coating program.
Silicone-based systems
Silicone coatings work by creating a water-repellent barrier. They shed water like a lotus leaf, preventing it from penetrating the surface.
Typical uses: Exterior masonry, concrete, and basement walls. Great for areas with heavy rain or high humidity.
Limitations: Not ideal for areas with extreme heat or UV exposure as silicone can degrade over time.
Acrylic and polymer coatings
These coatings form a film on the surface, blocking water ingress. They’re breathable, allowing moisture vapor to escape.
Breathability trade-off: While they let out moisture, they can also absorb it if not applied correctly, leading to potential issues in high humidity areas.
Common use-cases: Interior basement walls and concrete surfaces. Not recommended for exterior use due to UV degradation.
Polyurethane, bituminous and cementitious options
Tougher elastomeric systems like polyurethane stretch with the substrate, preventing cracks from leaking. Bituminous coatings are asphaltic, providing a thick, durable barrier. Cementitious waterproofers create a hard, impermeable surface.
Where they fit: Polyurethane for areas with movement or flexing; bituminous for heavy-duty protection against chemicals and abrasion; cementitious for below-grade applications like foundation walls.
Limitations: Some systems can be sensitive to UV, temperature changes, or may require specialized application techniques.
Effectiveness Under Real-World Conditions
Real-world performance hinges on how coatings handle rain, ponding, and hydrostatic pressure in relation to substrate porosity and coating thickness. The material may resist surface moisture but still fail if hydrostatic pressure drives water behind the coating or if the substrate is overly porous or cracked. Consider how these factors interact on your project and set realistic expectations for protection and maintenance.
UV exposure and aging can degrade film integrity, causing color changes, chalking, or hard-to-remove buildup, so plan for top-coats or periodic reapplication as needed based on the product guidance. Freeze-thaw cycles, humidity, and breathability further influence adhesion and long-term performance, especially on exterior or damp interior environments; balance vapor transmission with moisture control to avoid trapping condensation. Finally, DIY prep and application realities—temperature, surface prep, cure times—should be validated with trial patches and aligned with manufacturer recommendations before committing to a full coat.
Rain vs ponding and immersion
Waterproof coatings aren’t all created equal when it comes to handling water exposure. Some are designed for quick, temporary contact like rain or splashes. Others can handle longer periods of standing water, or even immersion.
Temporary ponding: Coatings like acrylics and some polymer-based options can tolerate brief periods of ponding water – think a few days to a week. They’re great for surfaces that might collect water but don’t stay wet long.
Immersion: For longer-term immersion or hydrostatic pressure, you’ll want a coating designed for it, like silicones, urethanes, or bituminous coatings. These can handle weeks to months of constant contact with water.
Substrate porosity and coating thickness also play a role. Thicker coatings and less porous surfaces can better resist water intrusion.
UV, temperature and freeze-thaw durability
Sunlight, heat, cold – they all take a toll on waterproof coatings over time. Understanding how these factors affect longevity helps you choose the right product for your job.
UV exposure: Sunlight can degrade film integrity, cause color shift, and lead to chalking. Opt for UV-stable products in areas with high sunlight exposure. Reapply or top-coat every few years to maintain performance.
Temperature cycling: Extreme heat and cold can stress coatings, leading to cracking or debonding. Choose temperature-resistant coatings for harsh climates. Proper substrate preparation and crack accommodation also help.
Freeze-thaw cycles: These can be tough on coatings, especially in areas with freezing temperatures. Again, choose freeze-thaw resistant products and ensure proper substrate prep to minimize cracking and debonding.
Substrate-specific performance
Different surfaces interact differently with waterproof coatings. Understanding how your chosen coating works with your specific substrate ensures the best results.
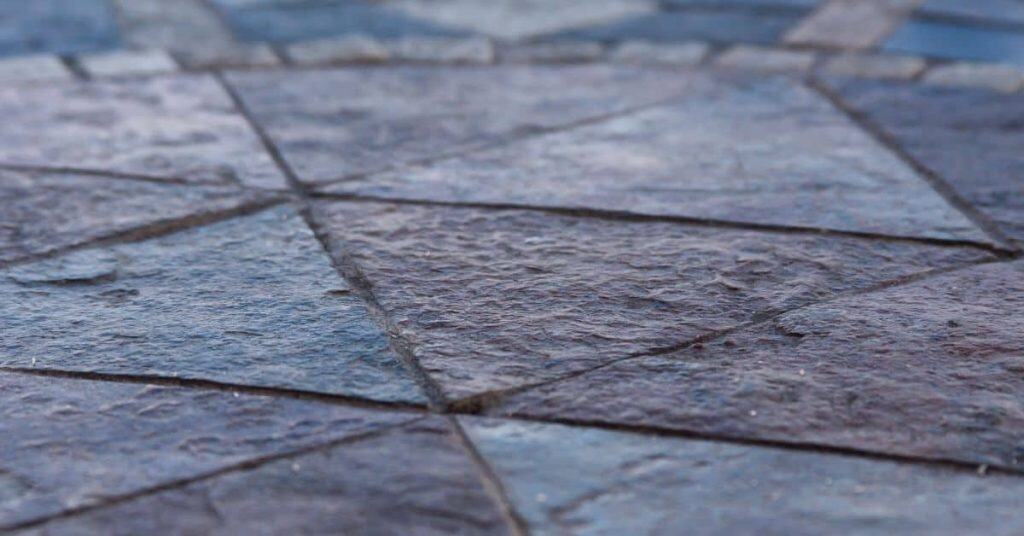
Concrete: Porous and prone to cracking, concrete needs a coating that can bridge hairline cracks and resist water intrusion. Silicone-based systems often work well here.
Wood: Wood expands and contracts with moisture changes. Choose coatings that accommodate movement and are resistant to rot and mildew. Acrylic and polymer coatings are good options.
Metal, masonry, membranes: Each has its own unique challenges. Metal can rust; masonry can crack; membranes need to be compatible with the coating. Always test a small area first to ensure compatibility and adhesion.

Planning and Surface Preparation Before You Coat
Begin with a thorough inspection to identify leaks, damage, and moisture pathways that could undermine coating longevity, and plan repairs or replacements where needed. A clear understanding of the substrate condition helps prevent a misapplied system that fails early due to hidden flaws. Write down a ready-to-coat checklist so you don’t miss steps during the rush of a weekend project.
Moisture assessment should use compatible methods to determine if the substrate is sufficiently dry for coating, and any remedial steps should be documented and completed beforehand. Concrete repairs should address cracks, spalls, and loose material, and the substrate should be clean, dry, and properly profiled. Verify product compatibility and sequencing with primers, bond coats, and top coats, and plan masking and ventilation to protect adjacent surfaces and workers.
Inspection and repairs checklist
Before you apply any coating, use this checklist to inspect your surface and make necessary repairs. This will ensure your coating adheres properly and lasts as long as possible.
- Check for cracks: Inspect the entire surface for hairline or larger cracks. Use a flashlight to check hidden areas. Cracks wider than 1/8″ may need repair before coating.
- Look for efflorescence: Efflorescence is a white, powdery substance that can appear on concrete surfaces due to moisture. Remove it using a wire brush or acid solution (check manufacturer’s instructions).
- Inspect for delamination: Check for any loose or peeling areas. Use a screwdriver or coin to gently scrape the surface and check adhesion.
- Check moisture content: Concrete should be dry before coating. Use a moisture meter (available at hardware stores) to ensure the surface is below 4% moisture.
- Remove any contaminants: Clean the surface of any dirt, oil, or grease using a degreaser or concrete cleaner. Rinse thoroughly and allow to dry.
- Check for spalling: Spalling is when small pieces of concrete break off, leaving holes in the surface. Repair these areas with a concrete patching compound.
- Inspect control joints: Ensure control joints (grooves cut into the concrete to control cracking) are clean and free of debris. If necessary, repair or replace joint material.
- Check for proper curing: Newly poured concrete should have been properly cured. Inspect for signs of inadequate curing such as excessive dusting or a weak surface.
Quick rule: Always repair any defects before applying a coating. Skipping repairs can lead to premature failure of the coating, costly rework, and reduced lifespan of your concrete surface.
Moisture testing and substrate readiness
Before you grab your trowel and mix up that first batch of concrete coating, you need to make sure your surface is dry enough. Moisture can wreck your hard work, so let’s keep it simple:
Check your product label. Each coating has its own moisture tolerance. Some are tougher than others.
Here’s a quick test: Tape a piece of plastic to the floor and leave it for 24 hours. If you see moisture beads or condensation under the plastic, your surface isn’t ready. Wait until it dries out, then retest.
Check base compaction. Loose or unstable substrates can’t support a coating. Give ’em a good whack with a rubber mallet. If it feels solid, you’re good to go. If not, you might need to compact the base better or use a primer designed for porous surfaces.
Permits, codes and warranty implications
Before you start slapping on that new coat, there’s some paperwork and checks to make. Don’t skip ’em, or you might find yourself in a world of hurt.
Check local building codes. You don’t want the city breathing down your neck for not following the rules. Look up what they say about coatings on your specific project. It’s usually online, but if not, call ’em up and ask.
Next, check manufacturer instructions. They know best how their product should be applied. Ignore ’em at your own risk. If you’re using multiple products, make sure they play nice together too.
Warranty implications. Some warranties won’t cover damage if the surface wasn’t prepped right or if you didn’t follow their instructions. Don’t void that warranty by being lazy. Do it right, and don’t be afraid to ask for help if you’re unsure.
How to Apply Waterproof Coatings (Step-by-Step)
Define the scope for each substrate and confirm whether the coating is breathable or non-breathable, elastomeric or cementitious, so you set correct expectations. Identify targets like basement walls, exterior surfaces, or floors, and align the process with the product type and environmental conditions. This helps keep application clean and predictable from start to finish.
Prep starts with addressing cracks, efflorescence, moisture, or existing coatings, then follows with cleaning methods and moisture testing as needed. When choosing products, compare type compatibility, temperature and humidity windows, and curing requirements; plan the sequence from priming through top coats, including coat thickness and recoat intervals. Maintain quality with adhesion checks, manage runs, and troubleshoot curing delays, always leaning toward priming or additives only when supported by the manufacturer instructions.
Step-by-Step Process
The following is a clear, numbered sequence of practical steps for applying waterproof coatings. It starts with preparation and safety checks, then moves on to the main work, and finishes with cleanup or final checks.
- Preparation: Clean the surface using pressure wash, degreasing, or etching as needed. Test moisture levels; if above 15%, wait for it to drop or call a pro.
- Masking: Protect areas you don’t want coated with painter’s tape and plastic sheets.
- Priming (if needed): Apply primer using a brush or roller, following manufacturer’s instructions. This improves adhesion and seals the surface.
- Application: Use a brush, roller, or sprayer to apply the coating evenly. Follow the manufacturer’s recommended coat thickness and recoat window.
- Drying and Curing: Allow each coat to dry according to the manufacturer’s guidelines before applying the next one. After the final coat, let it cure completely before exposing it to moisture.
Tools and materials checklist
Use this list when gathering tools and materials for your waterproof coating project. It ensures you have everything needed for a successful application.
- Pressure washer: To clean the surface thoroughly before applying the coating.
- Degreaser or etching solution: To remove dirt, grease, and efflorescence that can hinder adhesion.
- Moisture meter: To test moisture levels in the substrate. If it’s above 15%, wait for it to drop or call a pro.
- Painter’s tape and plastic sheets: For masking areas you don’t want coated.
- Primer (if needed): To improve adhesion and seal the surface. Follow manufacturer’s instructions.
- Coating of choice: Select based on your substrate, climate, and desired performance.
- Application tools: Brushes, rollers, or sprayers depending on the coating type and surface area.
- Personal Protective Equipment (PPE): Gloves, safety glasses, and a respirator for dust and chemical protection.
Quick rule: Always follow manufacturer’s instructions for specific product usage and safety guidelines.
Application steps and visual checkpoints
Use this checklist to guide you through the application process, ensuring you’re on track with each step and that your work meets quality standards.
- Surface preparation: Inspect for cracks, efflorescence, or moisture. Repair cracks if necessary before applying the coating.
- Priming (if needed): Apply primer evenly using a brush or roller. Look for any missed spots or uneven application.
- First coat: Apply the first coat of waterproofing material using your chosen method. Check for runs, drips, or missed spots.
- Drying time: Allow the first coat to dry according to manufacturer’s guidelines. You should see no visible wetness before applying the next coat.
- Subsequent coats: Apply additional coats as recommended by the manufacturer, checking for proper application and drying between each one.
- Final inspection: Once cured, inspect your work for any signs of failure such as blistering or cracking. Address any issues promptly.
Quick rule: Always follow the manufacturer’s recommended number of coats and drying/curing times to ensure optimal performance.
How much product do you need?
To calculate the quantity of waterproof coating needed, follow these steps:
1. Measure the surface area to be coated in square feet (length x width).
2. Check the manufacturer’s coverage rate on the product label. This is usually expressed as square footage per gallon or liter.
3. Divide the total surface area by the coverage rate to find out how many gallons or liters you need.
Example: If your surface area is 200 sq ft and the coverage rate is 100 sq ft per gallon, you would need 2 gallons of product.
Always round up to ensure you have enough. It’s better to have a little extra than not enough.
Common Mistakes, Troubleshooting and Maintenance
Common installation mistakes to flag include inadequate surface prep, lingering moisture, wrong product for the substrate, improper application conditions, and coat thickness issues, plus skipping cure times or mismanaging pot life. These missteps often show up as blistering, edge peeling, or early wear, so catch them early with a simple post-application inspection routine. Always cross-check the product’s labeling and instructions when you suspect a misfit.
Early failure indicators to watch for include blistering, peeling, or staining, plus moisture-related signs like efflorescence or rapid chalking; use quick diagnostic steps to confirm adhesion and moisture issues. Troubleshooting should reassess substrate readiness, re-test moisture, re-abrade if needed, and re-prime or recoat in the correct sequence. A documented maintenance plan with inspections, non-abrasive cleaning, joint and penetration upkeep, and a declared recoat schedule helps extend life and clarity for future projects.
Visual checkpoints for quality control
Use this checklist during and after application to ensure your waterproof coating is performing as expected.
- Bridging cracks: Check if the coating spans hairline cracks without breaking. If not, it may delaminate over time.
- Holiday testing: Perform a simple water test to find any missed spots or thin areas that didn’t cure properly.
- Adhesion issues: Gently pull on the coating with tape. If it peels off, you have adhesion problems.
- Cracking: Look for fine cracks, which could indicate improper curing or substrate movement.
- Blistering: Check for raised areas that may indicate trapped moisture or inadequate surface preparation.
- Streaking/Transparency: Ensure the coating has no visible streaks and is fully opaque. Streaks could indicate application errors.
- Efflorescence/Water stains: Check for white salt deposits or water marks, which may signal moisture issues beneath the surface.
- Rapid chalking: Look for excessive powdering, which could indicate UV degradation or improper product selection.
- Mold growth: Inspect for any signs of mold, indicating trapped moisture and potential health risks.
- Delamination at edges/joints: Check corners and joints for peeling, which may signal inadequate surface preparation or application errors.
Quick rule: Regular visual checks help catch problems early, saving you time and money in the long run.
Common application mistakes and fixes
Here are common errors to avoid during waterproof coating application:
- Inadequate surface preparation: Dust, oils, or laitance can prevent proper adhesion. Ensure the substrate is clean and free of contaminants.
- Moisture in the substrate: Excess moisture can cause blistering and delamination. Test and dry the substrate before application.
- Incorrect product selection: Using the wrong product for your substrate type can lead to failure. Always choose a suitable product for your surface.
- Improper temperature/humidity: Apply coatings within their recommended temperature and humidity ranges for optimal curing.
- Incorrect coat thickness: Too-thin coats may not provide adequate protection, while too-thick coats can crack or peel. Follow manufacturer guidelines.
- Skipping cure times: Allowing insufficient cure time between coats or before traffic can cause adhesion issues and premature failure.
By avoiding these common mistakes, you’ll achieve a durable, long-lasting waterproof coating.
Maintenance, inspection schedule and recoat triggers
Follow this maintenance plan to extend the life of your waterproof coating:
- Regular visual inspections: Inspect your coating annually for any signs of wear or damage.
- Cleaning: Use non-abrasive, pH-neutral cleaners to remove dirt and stains. Harsh chemicals can degrade the coating.
- Seal joints/penetrations: Re-seal joints and penetrations every 2-3 years to prevent water intrusion.
- Crack repair: Fix small cracks promptly to prevent moisture ingress and further damage.
- UV exposure: Inspect areas with high UV exposure for chalking or fading. Recoat if necessary.
- Traffic wear: Check high-traffic areas for signs of wear. Recoat if the surface becomes porous or shows signs of damage.
- Moisture testing: Periodically test for moisture beneath the coating to ensure it’s still protecting the substrate.
- Document recoat intervals: Keep a log of when you applied the coating, any touch-ups, and when you plan to recoat based on wear and exposure.
Quick rule: Regular maintenance and timely recoating extend your waterproof coating’s service life significantly.
Costs, Lifespan, Safety and Environmental Impact
Cost drivers include material type, surface prep, labor, equipment, and whether the project is DIY or professional; the mix can vary by substrate and local conditions. Plan a practical budget using upfront material costs, anticipated labor hours, and a contingency for repairs, noting that regional differences may apply. Use manufacturer guidance to gauge what you should expect in terms of investment and coverage.
Outline expected lifespan and maintenance cycles, and understand how substrate condition, moisture, temperature, and UV exposure influence longevity. Safety considerations cover PPE, ventilation, fumes, and slip hazards, with attention to moisture-prone areas and proper disposal of waste. Environmental impact considerations include VOC content, eco-friendly formulations, and appropriate certifications or regulations for residential work; verify these aspects on product data sheets and local rules before proceeding.
Cost considerations and budgeting
Waterproof coatings vary in price based on several factors. First, consider the material type. Epoxy coatings are typically cheaper than polyurethane or acrylic, but they may not offer the same level of protection.
Surface preparation also affects cost. Cleaning, crack repair, and moisture testing can add to your budget, but they’re crucial for a successful application.
Labor costs differ by region and experience level. Expect to pay more for professional application. DIY can save money, but it requires time and careful following of instructions.
Don’t forget to factor in equipment rental, which can range from $50 to $200 per day depending on the tool. Also, add a 10-15% contingency for unexpected repairs or material overages.
Safety precautions and PPE
Safety is paramount when applying waterproof coatings. Start by ensuring proper ventilation. Open windows, use fans, or consider a ventilation system to reduce fume exposure.
Wear appropriate PPE: gloves, safety glasses, and a respirator for solvent-based or reactive chemistries. Long sleeves and pants protect against skin contact.
Be aware of slip hazards. Wet surfaces can be dangerous, so use caution when walking on treated areas. If you’re working in moisture- or mold-prone areas, consider wearing a protective suit to prevent contamination.
Always follow the manufacturer’s safety guidelines and keep materials away from heat sources or open flames to prevent chemical reactions.
Environmental impacts and disposal
Waterproof coatings can have environmental impacts. Many contain VOCs, which contribute to smog formation and ozone depletion. Some also include hazardous ingredients that require special disposal.
To minimize impact, choose low- or zero-VOC alternatives when possible. These are typically labeled as such on the product packaging.
Always follow local disposal rules. Some areas require hazardous waste to be taken to a specific facility. Never pour old coatings down drains or into regular trash.
Consider the coating’s lifecycle, too. While waterproofing can extend your structure’s life, it also means more material will eventually need disposal. Opt for eco-friendly formulations when you can.
Conclusion
Coatings can protect against water damage when you follow the plan, prep the surface, and choose the right product for the job. Do not rush it—durability, appearance, and safety all hinge on doing it correctly.
First, inspect the area and plan the work in simple steps: clean and repair the surface, dry it thoroughly, select a coating compatible with the material, test a small area first, apply per the product instructions, and let it cure fully before exposing it to water or traffic; finish with maintenance checks to extend life. If any step looks uncertain, pause and verify before proceeding.
Common mistakes to avoid are skipping or skimping on surface preparation, choosing a coating that isn’t compatible with the surface or climate, and applying in poor conditions or without proper ventilation and PPE; always test first and respect manufacturer drying times and safety rules to prevent irreversible damage.
If the project is large, complex, or involves active leaks, or you’re unsure about surface compatibility, call a professional. Stay focused on safety and it will pay off with a durable, professional-looking job that keeps water out and your project dale intact.
FAQ
What is a waterproof coating, and what are the main types I should know about?
A waterproof coating is a thin layer applied to a surface to block water from seeping in. Types you’ll encounter include liquid-applied coatings, cementitious options, and rubberized or membrane-like coatings. Check the label or manufacturer instructions to see which surfaces they’re designed for and how they cure.
Where are waterproof coatings commonly used, and what problems do they solve?
You’ll see them on foundations, basement walls, concrete balconies, and roof decks. They stop water infiltration, reduce damp, and can help with freeze-thaw damage when used correctly. Always verify suitability for your surface and climate with the product specs.
What are the pros and cons of different coating technologies?
Liquid-applied ones are easy to coat irregular shapes but may require multiple coats. Cementitious products are durable and compatible with concrete but can be less flexible. Membrane-like systems can be very effective but often need careful surface prep and moisture control. Follow the label for pros/cons and limitations.
How can I test a coating’s effectiveness and stay safe during application?
Test methods vary by product—look for surface prep, cure time, and water exposure guidelines in the datasheet. For safety, use appropriate PPE, ventilate well, and avoid applying in extreme heat, cold, or rain. If unsure, check the manufacturer instructions and local rules for acceptable practices.