

Introduction
A curbless shower slope is the gradually sloped floor that drains toward the drain without a raised curb. This intro shows how to check that slope and spot birdbaths before you tile. You’ll use simple tools like a level and straightedge to judge the surface as you work.
To fix an incorrect slope, identify low areas and rework them with proper feathering toward the drain. Make sure any patches are smooth and consistent, and recheck with a straightedge as you go. Always confirm your plan aligns with local rules and the tile installer or product instructions before you tile.
Key takeaways
- Check slope visually and with a level across multiple points before tiling.
- Fix birdbaths by re-screeding or adjusting substrate to create uniform fall.
- Ensure drainage plane routed correctly toward the drain with proper slope.
- Test the slope with water pooling tests to reveal low spots.
- Wear eye protection and non-slip footwear during slope checks to prevent accidents.
- Inspect for consistency across transitions and curbless edges before tile.
Table of Contents
- Introduction
- Key takeaways
- Why Proper Slope Matters in Curbless Showers
- Slope Requirements and How to Measure Them
- Identifying “Birdbaths” and Other Drainage Problem Areas
- Common Causes of Improper Slope in Curbless Showers
- Fixing Birdbaths Before Tiling: Methods and When to Use Them
- Waterproofing and Flood Testing Best Practices
- Planning and Inspection Checklist to Avoid Slope Problems
- Preventive Tips for New Curbless Shower Builds
- Conclusion
- FAQ
Why Proper Slope Matters in Curbless Showers
In a curbless shower, every surface must slope toward the drain so water moves to the drain and away from the walls. That keeps the surface from pooling, reduces slip risk, and helps protect the waterproofing and substrate. If water can stand or run in the wrong direction, you’re inviting mold, tile failure, and possible warranty issues down the line.
Keep the slope consistent toward the drain across the shower area. Many codes and manufacturer guidelines emphasize proper drainage placement and a continuous slope, and improper work can affect warranties. Practical checks include visual review, quick slope checks toward the drain, and a flood test to verify waterproofing alignment before tiling.
Consequences of Incorrect Slope
Incorrect slope in curbless showers leads to standing water, often called ‘birdbaths’. This water can’t drain properly, creating a breeding ground for mold and mildew. Over time, it weakens grout, causing deterioration.
Improper drainage stresses the waterproofing membrane. It may delaminate or crack under pressure, leading to leaks that could cause structural damage. Early detection prevents these costly repairs.
How Curbless Layout Changes the Stakes
In curbless showers, there’s no curb to contain water. Every surface – entry, threshold, and floor – must slope precisely towards the drain for complete drainage.
The absence of a curb means even slight errors in gradient can lead to pooling water at the threshold or elsewhere on the shower floor. This increases slip risk and promotes mold growth.
Precise gradients are crucial across the entire shower area, not just around the drain. This ensures no ‘low spots’ where water can collect and cause problems later.

Slope Requirements and How to Measure Them
For curbless showers, a practical starting point is a gentle slope around a quarter inch per foot toward the drain, though this can vary with tile size, substrate, and drainage type. Consider how the substrate and membrane respond to wet conditions and adjust accordingly. Always check product data sheets or manufacturer guidance when planning your measurements.
Measure slope across the floor using the chosen tools, such as a story pole, laser level, or straightedge. Take multiple readings from the drain outward in different directions to catch high spots or hollows. Also verify transitions to adjacent floors provide a smooth ramp without edges that trap water, and confirm the finished slope through water tests before tiling proceeds.
Tools and Materials Checklist for Measuring Slope
Before you start measuring, ensure you have all necessary tools to get accurate readings.
- Straightedge: To check levelness across the shower floor. A 10′ straightedge works well for most showers.
- Level with 1/8″ or better gradations: To measure slope precisely. A 4′ level is usually sufficient.
- Digital level/inclinometer: For more precise readings and to check multiple axes.
- Tape measure: To record measurements accurately.
- Water level: As a backup or for checking large areas. Fill a clear tube with water and mark the levels.
- Safety glasses: Protect your eyes from debris when using tools.
- Kneepads: For comfort while working on hard surfaces.
- Flashlight or bright work light: To see clearly in poorly lit areas.
Quick rule: Always double-check your tools before starting. A bad reading can lead to a wrong slope and wasted effort.
Step-by-Step: Measuring Slope Before Tiling
Measuring the shower floor’s slope ensures water drains properly. Here’s how to do it right.
- Establish reference points: Mark two points on either side of the drain, about 12″ away. These will be your starting and ending points for measuring slope.
- Use a straightedge and level or digital inclinometer: Place the straightedge between your marks. Use the level or inclinometer to measure the rise from one mark to the other. Divide this by the distance (run) between your marks to find the slope.
- Measure across multiple axes: Check the slope in at least two directions – lengthwise and widthwise – to ensure a consistent, even slope towards the drain.
- Document results: Record your measurements. The ideal slope is around 1/4″ per foot, but this can vary based on tile size and substrate.
- Check transitions: Ensure adjacent floors have a smooth transition with no pronounced edges that could trap water.
- Inspect the substrate: Check for any high spots or hollows in the concrete or plywood that could affect your measurements. If found, address them before proceeding.
- Confirm with a flood test: After measuring, perform a simple flood test to confirm your slope is within spec and water drains as expected.
Identifying “Birdbaths” and Other Drainage Problem Areas
Birdbaths are depressions or misdirected slopes where water collects rather than drains. The minimum slope target toward the drain gives a clear benchmark to aim for. Visual assessment should be paired with measurement to set expectations for readers.
Use a straightedge or level to spot low areas and irregular patterns around the drain. Practical tests include a small pour to reveal standing water, a tactile check to feel slope changes, and a formal flood test to expose subtle depressions and seal issues. Document findings with photos and measurements to guide corrections before tiling.
Quick Visual and Tactile Checks
First, look for obvious low spots. Common trouble areas are around the drain, perimeter, niches, and thresholds.
Use a straightedge or level to quickly spot high/low points. Place it on the floor and see where it wobbles or gaps.
Perform a simple tactile check by running your finger or a tool across the surface. Feel for changes in slope.
Pour some water onto the shower floor, especially around suspected low spots. Watch how it flows and pools. Standing water indicates a ‘birdbath’.
Using a Flood Test to Reveal Low Spots
A flood test is the most reliable way to find subtle depressions. It’s like giving your shower floor a stress test.
Safety first: plug the drain, mark the water level at 1-2 inches deep, and keep an eye on it. Don’t let water sit too long as it can damage underlayment.
If water lingers in certain areas after 15-30 minutes, you’ve found a ‘birdbath’. If it drains evenly, your slope is good. Common objections include fear of damaging the shower or underestimating the test’s importance.
Remember, this test is temporary and won’t harm your shower if done correctly. It’s crucial to address any issues before tiling to prevent waterproofing failures and mold growth.
Common Causes of Improper Slope in Curbless Showers
Root causes include poor subfloor prep, incorrectly built mortar beds or pre-slopes, uneven shower pans, misplaced liners or screeds, and installer shortcuts. Each issue has clear on-site indicators that you can verify with measurements and visual cues. Understanding these causes helps you prevent repeated failures.
Develop a diagnostic checklist to spot each cause, including slope measurements, flatness checks, and cues like pooling or edge voids. Outline the proper sequence for subfloor prep and pre-slope installation, and explain how improper beds impact tile performance. Identify shortcuts such as skipping flood tests and rushing a bed, and note how to correct them before tiling.
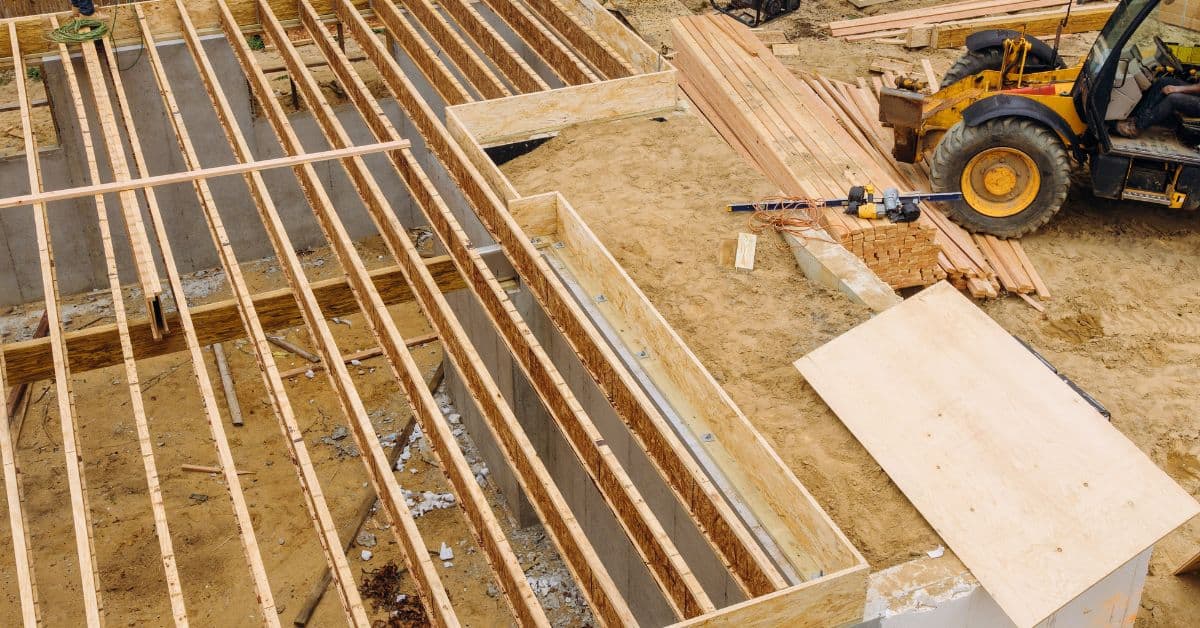
Mistakes During Rough Carpentry and Framing
Before you start tiling, ensure your framing is solid. Here are common mistakes to avoid:
- Joist deflection: Check for sagging joists under load. Use sister joists or add support if necessary.
- Uneven substrate: Inspect the subfloor for high and low spots. Level it with self-leveling compound if needed.
- Improperly spaced blocking: Ensure blocking is evenly spaced to provide consistent support.
- Inadequate framing around the drain: Make sure the drain area is properly framed and reinforced.
Proper framing ensures a solid base for your shower pan and tile.
Errors in Mortar Bed or Pan Construction
Mistakes during mortar bed construction can lead to birdbaths. Here’s what to avoid:
- Incorrect mix: Ensure your mortar mix is correct for a smooth, level bed.
- Improper troweling technique: Use the right size trowels and make sure you’re not leaving voids or overworking the mortar.
- Screeding errors: Check your screed line is straight and use a straight edge to ensure a level bed.
- Inadequate compaction: Use a grout float to compact the mortar, removing air pockets that can cause high spots.
A well-constructed mortar bed provides a solid base for your tile and helps prevent birdbaths.
Fixing Birdbaths Before Tiling: Methods and When to Use Them
Start with a decision framework: assess pooling extent, waterproofing condition, and tile-raise requirements to choose localized feathering, full re-slope, or pan replacement. This keeps repairs targeted and minimizes downtime. Consider whether the current membrane or liner can be reused without compromising performance.
For localized feathering, describe feathering techniques using polymer-modified mortar and skim coats, plus bonding considerations. For a full mortar-bed re-slope, outline removal of tile and bed, re-slope toward the drain, and proper compaction. If pre-slope or liner needs correction, explain how access or replacement affects the overall rebuild, and compare pan replacement options with their implications for warranty and compatibility.
Localized Repairs: Patching and Feathering
Feathering is a quick, localized fix for minor ‘birdbaths’ where water pools but doesn’t cover the entire shower floor. It’s best when the pooling area is less than 12 inches in diameter.
First, clean the surface. Then, mix polymer-modified mortar or sloping compound. Apply it to high spots around the drain, building up a smooth, sloped layer. Use a straight edge to ensure a uniform slope of 1/4 inch per foot.
Note: Feathered repairs won’t fix major issues or replace proper waterproofing. They’re only suitable when the membrane and liner are intact and the pooling isn’t severe.
Partial or Full Re-slope: Rebuild Options
If feathering doesn’t cut it, you might need to re-slope the mortar bed. Start by removing tile and mud bed in the affected area. Inspect the structure below – if it’s sound, proceed.
Re-slope with fresh mortar, ensuring a uniform 1/4 inch per foot drop towards the drain. Compact and finish the surface. If the pooling covers more than half the shower floor or you find waterproofing damage, consider a full rebuild.
Full Rebuild: Remove tile, mud bed, and pan/liner. Inspect and replace damaged components. Re-slope with fresh materials, ensuring proper waterproofing. This is the safer choice when pooling is extensive or waterproofing is compromised.
Waterproofing and Flood Testing Best Practices
Explain the correct sequence: surface prep, install waterproofing membrane, allow curing if required, then flood test before final finishes. Include safety precautions and timing considerations to protect people and materials. This sequence helps catch leaks early and avoids costly tile repairs later.
Describe a flood testing plan that reflects typical shower use and membrane guidelines. Include test duration, water depth, and what to observe around seams and penetrations. Also cover safety, ventilation, and protection for surrounding surfaces, plus how to document results for records and warranty purposes.
Performing a Proper Flood Test
Before you start, ensure your basement is clean and free of debris. Now, let’s plug that floor drain.
Use a rubber plug or a tightly rolled towel. Don’t rely on rags or loose materials that can shift. Once plugged, mark the water level on the wall with a pencil or tape measure.
Now, fill your basement with water. Use a pump or a hose at a slow, steady rate. Keep an eye on that water level. When it reaches your mark, note down the time and start monitoring.
Leave the test running for 24 to 72 hours. Check for leaks every few hours initially, then once or twice a day. Remember, evaporation can lower the water level, but absorption into concrete might be happening too. Document any changes in water level and time.
What to Do If a Flood Test Fails
So, you’ve done your flood test and water’s seeping in where it shouldn’t. Don’t panic, let’s troubleshoot.
First, inspect every seam and penetration. Check all the places where things come through or meet – like pipes, wires, windows, doors. Make sure they’re properly sealed and sloped to drain water away from your structure.
Next, recheck your slope. Ensure that the ground around your foundation slopes away at a minimum of 1 inch per foot for the first 6 feet. If it’s not, you might need to regrade or install drainage systems.
Now, locate those wet areas. Follow the water trail and mark where it’s coming in. Once you’ve found them all, decide what needs repairing or replacing. It could be a membrane issue, poor compaction at the base, or something else entirely. Check product labels and manufacturer instructions to determine the best course of action.
Planning and Inspection Checklist to Avoid Slope Problems
Provide a pre-tile plan that covers substrate flatness tolerances and how to correct deviations before tiling. Include lippage checks and how to control transitions in a curbless design. This helps prevent surprises during tile installation.
Outline a clear slope verification method with target and measurement points, and suggest tools like a laser level or straightedge. Add waterproofing inspection items, such as drain flange height and seam details, and finish with an inspector-friendly documentation template that includes photos, elevations, product data, and required corrections.
Visual Checkpoints and Measurement Log
Before tiling, use this checklist to visually inspect and measure your curbless shower’s slope at key points.
- Drain center: Start here. Ensure it’s the lowest point.
- Corners: Check all four corners for levelness. Any high spots need attention.
- Entry threshold: Slope should start here, leading to the drain.
- Benches: If present, ensure they’re level and part of the overall slope.
- Wall-to-floor transition: Check for lippage (uneven edges) that could cause tripping hazards or tiling issues.
- Drain distance: Measure from each wall to the drain. Inconsistencies may indicate a problem.
- Slope consistency: Use a straightedge or screed ruler across the shower floor, checking for consistent fall towards the drain.
- Membrane inspection: Look for any tears, punctures, or poor adhesion of the waterproofing membrane.
Quick rule: If you find high spots, low spots, or inconsistent slope, address them before tiling to avoid ‘birdbaths’ and other drainage issues.
When to Call a Pro and Cost Considerations
Know when to hire a professional to ensure your curbless shower is waterproofed correctly and within budget.
- Complex re-slope: If the substrate needs significant re-leveling or re-sloping, consider hiring a pro.
- Unknown membrane condition: If you’re unsure about the existing waterproofing membrane’s integrity, have it inspected by a professional.
- Certifications: Check if potential hires are certified by organizations like NTCA or ASTM International for quality assurance.
- Materials cost: The type and quality of materials used can significantly impact the final cost. Get quotes with detailed breakdowns.
- Labor cost: Different contractors charge different rates. Obtain multiple quotes to compare.
- Warranty considerations: Some professionals offer warranties on their work. Consider these when comparing quotes.
Quick rule: If in doubt, consult a professional. It’s better to spend more upfront for quality work than risk costly repairs later.
Preventive Tips for New Curbless Shower Builds
Plan slope targets during framing by locating the drain accurately and establishing a consistent fall toward the drain. Document measurements to guide trades and avoid drift in the final install. Setting expectations early saves rework later.
Drain strategy matters: choose prefabricated linear drains or well-centered traditional drains, ensuring flange height matches your membrane and tile system. Map transitions and coordinate with trades to prevent standing-water pockets and ensure proper membrane overlap and coverage.
Coordinating with Plumbers and Tile Installers
The key to a successful curbless shower lies in smooth handoffs between trades. Here’s what you need to communicate:
Drain location and height: Ensure plumbers install the drain at the exact spot agreed upon during planning. The drain cover height should match your tile system.
Waterproofing approach: Discuss the waterproofing membrane type and application process with both plumbers and tile setters to avoid conflicts.
Acceptance criteria for slope: Make sure everyone’s on the same page regarding the acceptable slope range. This reduces rework and ensures a smooth tiling process.
Design Choices That Make Proper Drainage Easier
Certain design choices can simplify achieving the correct slope and minimize birdbath risks. Consider these options:
Linear drains: Prefabricated linear drains allow for a consistent, predictable fall towards them. They’re easier to integrate into your design and ensure proper drainage.
Narrow thresholds: Minimize the height difference between the shower area and adjacent rooms. This reduces the risk of standing water and makes maintaining slope easier.
Consistent plane transitions: Plan for smooth, consistent transitions from floor to shower area. Avoid abrupt changes in elevation that can trap water and create birdbaths.

Conclusion
Getting the slope right in a curbless shower isn’t decorative; it protects the floor, the waterproofing, and your tile from failure. Do the work with a plan, test early, and don’t rush the bed or the drain area.
Start by confirming the slope toward the drain is within the practical range, then check for any birdbath hollows or low spots, dry-fit the membrane where needed, apply waterproofing per plan, and run a controlled flood test before tiling. Keep the flow predictable: check in small sections, recheck after any patch, and document what you find so you don’t guess later. If you’re unsure about the slope or the test results, double-check with the reference guidelines, rework only the affected area, and re-test until it passes.
A few common mistakes to avoid are creating a noticeable step or high spot that traps water, assuming a traditional shower slope is enough for a curbless layout, and skipping waterproofing or flood testing until after tile is installed. Use a simple safety rule: confirm there is a clear, continuous path to the drain, verify the surface is dry and sound before any bonding, and never tile over an area you know is not properly sloped or waterproofed. For a small project, start with a test patch and a controlled flood on a noncritical area to practice the process safely.
If the slope questions linger after you’ve tested and patched, or if the math doesn’t add up on the drain side, call a professional. A seasoned pro can confirm drainage concepts, verify waterproofing integrity, and prevent costly mistakes. Stay practical, stay careful, and you’ll end with a durable, clean, safe curbless shower you can be proud of.
FAQ
How do I check the slope of a shower floor before tiling?
Use a straight edge and a level to verify the slope toward the drain. Run the level from the far wall to the drain in several directions to spot low spots. If you see flat spots or water pooling, that’s a birdbath you need to fix.
What should I do if there are birdbaths or low spots?
Mark the high and low areas, then remove and re-slope those sections. Build up with a proper substrate and re-tile once you confirm a consistent, unobstructed drain path. Don’t skip the mud bed or ditch the slope, or you’ll just repeat the problem.
Why is water drainage critical in a curbless shower?
Water must flow freely to the drain without pooling. Poor drainage leads to long dry times and potential water damage behind tiles. Check the slope direction and confirm the drain is unobstructed before tiling.
What steps should I take to ensure proper slope before tiling?
Plan the slope toward the drain from all sides. Correct any low spots, then re-check with a level and straight edge. Do a quick test with water near the drain to see if it drains away cleanly; adjust as needed before you tile.