
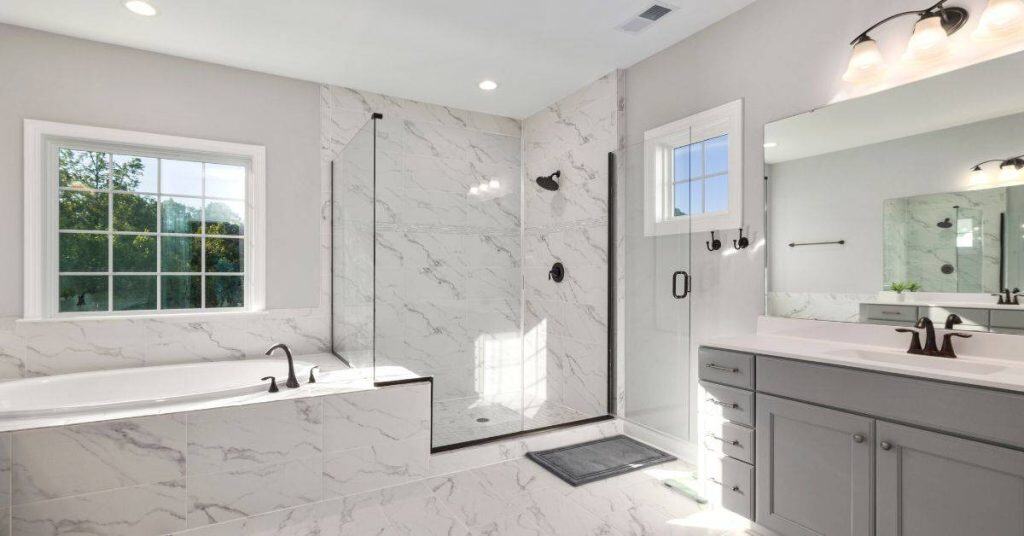
Introduction
Shower curb waterproofing is the process of sealing the edges and top of the curb to keep water from entering walls and floors. Common failure points include gaps at corners, improper flashing, and neglecting the top edge where shower water can splash. In this article, we’ll cover how to build it right with basic, hands-on steps you can follow.
Focus on proper installation techniques for around the curb, using the right waterproofing membrane and overlapping seams. Pay close attention to corner sealing and transitions where the curb meets the pan and walls, and check manufacturer instructions for compatibility. If in doubt about a detail, verify requirements with local rules and the product label before proceeding.
Key takeaways
- Inspect curb seating and substrate flatness before applying any waterproofing membrane.
- Seal corners and transitions thoroughly to prevent water migration at curb edges.
- Use backer rod and compatible sealant at joints to avoid cracks.
- Plan penetrations with flashing and proper clamping to stop leaks.
- Wear PPE and follow manufacturer ventilation guidance when applying membranes.
- Document, photograph, and date the curb waterproofing work for warranty proof.
Table of Contents
- Introduction
- Key takeaways
- Why Shower Curb Waterproofing Matters
- Planning and Pre-Installation: What to Check Before You Start
- Common Failure Points Around the Shower Curb
- Step-by-Step Waterproofing for a Durable Shower Curb
- Handling Pipes, Penetrations, Corners, and Windows
- Material Specs, Tools, and Visual Checkpoints
- Repairing Failures and Retrofitting Existing Curbs
- Maintenance, Warranty, and Documentation Best Practices
- Conclusion
- FAQ
Why Shower Curb Waterproofing Matters
The curb is more than a edge; it guides water toward the drain and blocks leaks at the shower boundary. It acts as the barrier that keeps moisture from seeping into the surrounding structure. A solid curb setup is the first line of defense against water intrusion.
Common failure patterns include poor slope, missing or incompatible waterproofing at the curb, gaps in flashings, and movement or cracking over time. When the curb fails, water can wick into the subfloor, cause substrate rot, and invite mold growth. You’ll also see damage to nearby walls and costly remediation down the road.
Cost and long-term savings
Proper shower curb waterproofing might seem like an extra cost upfront, but it’s a wise investment. Skimping on this step can lead to costly repairs down the line.
Water damage from failed curb waterproofing can wick into your subfloor, causing rot and mold growth. This could set you back hundreds or even thousands in remediation costs.
Rule of thumb: Spend around 5-10% more on initial waterproofing to save on future repairs. Consult local pros for accurate estimates.
Safety and health implications
Failed shower curb waterproofing isn’t just about leaks; it’s a safety and health hazard. Water damage can lead to mold growth, which can cause allergic reactions and respiratory issues.
Structurally, a failed curb can weaken the surrounding walls, posing a risk of collapse or cracks. Additionally, standing water on the shower floor creates slip hazards.
Proper detailing reduces these risks by directing water out and preventing leaks, keeping your shower safe and healthy.
Planning and Pre-Installation: What to Check Before You Start
Start with a clear plan for layout, slope toward the drain, and supports for the curb. Verify that framing can handle the curb height and any adjacent walls. A solid pre-installation assessment saves backtracking later.
Assess the substrate readiness, including concrete, backer boards, moisture levels, and surface flatness. Identify repairs or grinding needs now. Decide on the curb design, membrane type, and how the pan liner will overlap with walls.
Assessing substrate and slope
Before you start waterproofing, check your subfloor’s condition to ensure a solid base for your shower curb.
- Subfloor flatness: Use a level or laser level to check. Uneven surfaces can cause leaks and structural issues later on.
- Curb pitch: Ensure the subfloor slopes gently towards the drain. A 1/4 inch per foot slope is ideal. Too little or too much can lead to water pooling or leaks.
- Drain location: Verify the drain is centered and at the lowest point. Off-center drains can cause improper water flow and leaks.
- Moisture levels: Check for excess moisture using a moisture meter. High readings may indicate previous leaks or poor ventilation.
- Existing concrete: Inspect for cracks, chips, or other damage. Repair as needed to prevent water intrusion.
- Backer boards: Ensure they’re securely fastened and level. Warped or loose boards can cause leaks and structural issues.
- Flooring transitions: Check where the shower floor meets adjacent rooms. Uneven surfaces can trap water and cause mold growth.
- Wall-to-floor transition: Ensure it’s properly sloped to direct water into the shower, not under walls or cabinets.
Quick rule: If in doubt, consult a professional. Poor substrate preparation can lead to costly repairs down the line.
Selecting materials and methods
Choosing the right waterproofing method is crucial for a durable, long-lasting shower curb.
- Membrane type: Consider liquid-applied membranes for seamless protection. Sheet membranes offer quick installation but may require seaming. Preformed liners are easy to install but can be expensive. Mortar and pan systems provide robust protection but require skilled labor.
- Manufacturer guidelines: Always follow the manufacturer’s instructions for application, overlap, and curing times.
- Curb design: Choose between preformed curbs (easy to install) or poured concrete (customizable but requires more skill).
- Membrane overlap: Ensure membranes overlap properly with the shower pan liner and walls to prevent leaks.
- Fasteners and sealants: Choose compatible fasteners and sealants for your chosen membrane type. Incompatible materials can cause delamination or leaks.
- Primers: Use fast-acting primers to prepare surfaces and improve adhesion of membranes.
- Accessibility needs: Consider using low-profile curbs or no curb at all for wheelchair accessibility or ease of entry.
- Code compliance: Ensure your chosen materials and methods comply with local building codes and standards.
Quick rule: Always test a small, hidden area first to ensure compatibility and proper application before proceeding with the entire project.
Common Failure Points Around the Shower Curb
List the top leakage targets around the curb: the top seam, curb-to-pan junction, all corners, penetrations, and transitions to walls. Mark where membrane coverage may fall short or laps may be misaligned. Note where fasteners can puncture or disrupt the barrier.
Explain how each location typically fails: tears at corners, incomplete sealing at curb-to-pan joints, and poor flashing at wall transitions. Use proven strategies like continuous membrane over the curb and proper lap details. Keep an inspection focus on joints, overlaps, and substrate prep at these points.
Curb-top and tile bond failures
The top of the shower curb is a common failure point due to poor bonding between the mortar and tiles. This can happen if you use incorrect mortar or don’t allow it to cure properly.
Inadequate slope towards the drain at the curb top also causes water to pool, leading to leaks. Always ensure your curb has a 1/4 inch per foot slope.
Inspect the curb top during installation for proper sloping and mortar bonding. Use a level to check slope and visually inspect the bond between mortar and tiles.
Curb-to-pan and threshold breaches
The junction between the shower curb and pan is another common leak point. This happens when the liner or membrane isn’t tied into the curb properly, leaving gaps for water to seep through.
Damage during tile work can also compromise this area. To prevent this, ensure your membrane extends over the curb and onto the pan, and protect it during tiling.
Check this junction during installation by running a bead of caulk along the seam between the curb and pan after applying the membrane. This will help you spot any gaps or tears.
Corner and junction weaknesses
Sharp angles and compound joints at corners concentrate stress, making them prone to leaks if not properly sealed. Improper sealing here can lead to membrane tears or gaps.
To prevent this, use corner-specific detailing when applying your membrane. This involves creating a tight, reinforced corner that can withstand movement and pressure.
Inspect corners during installation by checking for proper membrane overlap and reinforcement. Also, test these areas for leaks using a garden hose or spray bottle to simulate water pressure.
Step-by-Step Waterproofing for a Durable Shower Curb
Outline a clear sequence: substrate prep, curb construction, waterproofing integration, and finish detailing. Provide notes that apply to both DIY and professional workflows. This keeps the project organized from start to finish.
Prepare the substrate by cleaning, drying, and repairing cracks as needed. Build the curb with proper radii and a built-in drip edge. Then integrate the waterproofing system with careful attention to joints, overlaps, and transitions into walls.
Step-by-Step Process
Follow these practical steps to waterproof your shower curb for a durable, long-lasting result.
- Preparation: Check the substrate, ensure it’s clean, dry, and compatible with your chosen waterproofing system. Repair any cracks.
- Safety first: Wear gloves and eye protection when handling materials. Keep the work area clear of debris.
- Curb construction: Build the curb using recommended dimensions and create a consistent slope towards the drain.
- Waterproofing integration: Install your chosen membrane or liquid system, sealing joints, overlaps, and fasteners correctly.
- Final checks: Perform an on-site water test after installation to ensure there are no leaks. Allow sealant to cure before tiling.
Building the curb (structure and slope)
The shower curb structure is crucial for proper waterproofing. Here’s how to build it right:
For stud curbs, use 2x4s or 2x6s depending on your desired height. Ensure they’re level and plumb.
Create a consistent slope of about 1/4 inch per foot towards the drain using shims or a laser level.
Pro tip: Use rigid foam insulation between studs for added rigidity and to prevent condensation.
Installing membranes and tying into the pan
Correctly installing waterproofing membranes is key to preventing leaks:
Overlap sheets by at least 2 inches. Seal overlaps with manufacturer-recommended tape or sealant.
At corners, wrap membranes onto walls and into the curb, creating a tight seal. Fasten membranes with appropriate fasteners, keeping them away from joints and seams.
Pro tip: Ensure your membrane is compatible with your chosen waterproofing system and substrate.
Tiling and grout best practices
Follow these guidelines to protect your waterproofing layer during tiling:
Use a suitable tile backer board for added strength. Apply thinset mortar according to manufacturer’s instructions, allowing it to cure before tiling.
Install movement joints every 6-8 feet to accommodate substrate expansion and contraction. Use a flexible grout or sealant to fill these joints and prevent cracking.
Pro tip: Avoid applying excessive pressure when installing tiles to prevent damaging the waterproofing membrane.

Handling Pipes, Penetrations, Corners, and Windows
Identify the most common failure points around the curb: around pipes and penetrations, transitions to walls, corners, and any nearby window or niche. Map targeted flashing strategies for each area. Plan ahead to keep through-wall penetrations continuous with the curb waterproofing.
Detail flashing sequences for penetrations: proper flange placement, continuous membrane coverage, and compatible sealants. Address curb-to-wall transitions and window proximities to prevent capillary action. Layer membranes carefully with proper overlaps and sealant detailing at all edges.
Sealing around drains and drains-to-curb transitions
The drain is the most critical penetration in your shower curb. Here’s how to seal it right:
Mechanical vs. Bonded Drains: Mechanical drains have a lip that sits on top of the curb, while bonded drains are adhered directly to the curb. Both need proper sealing.
For mechanical drains, use a drain-specific flashing membrane. Apply it before setting the drain, ensuring it’s sealed tightly around the drain body and overlaps the curb membrane. For bonded drains, apply the membrane first, then adhere the drain, filling any gaps with silicone sealant.
Penetrations (valves, accessories) and flashing details
Shower valves, grab bars, and other accessories need careful flashing to prevent leaks. Here’s how:
Valve Flashing: Use a valve-specific flashing kit. Apply the membrane first, then install the valve, ensuring the flashing is tight against the curb and overlaps the membrane.
Grab Bars and Accessories: For grab bars and other accessories, use a backer rod and silicone sealant. First, apply the membrane. Then, before tiling, insert the backer rod into any gaps around the accessory, fill with silicone, and let it cure.
Corners and window sills near showers
Proper corner treatment and window flashing are crucial to prevent leaks. Here’s how:
Corners: Use preformed corner pieces or coving for a watertight seal. Apply the membrane first, then install the corner piece, ensuring it’s sealed tightly against the curb and wall membranes.
Windows: Flash windows using a window-specific flashing kit. Apply the membrane first, then install the flashing, ensuring it’s tight against the curb and overlaps the membrane. Seal any gaps with silicone.
Material Specs, Tools, and Visual Checkpoints
List approved waterproofing membranes (sheet, liquid, or hybrid), primers, crack-isolation products, and fillers. Note substrate compatibility and cure times, plus any heat or stain resistance requirements. Verify the system directions on the product label or data sheet before starting.
Outline a tools-and-materials checklist by phase, and include visual checkpoints for each stage. Emphasize substrate readiness, curb edge treatment, laps and joints, and proper sealant alignment. Use a final water-test protocol to confirm coverage before tiling.
Tools and materials checklist
Use this checklist before starting your concrete pour to ensure you have everything needed and that each item is in good working condition.
- Concrete Mix: Verify the mix design on the bag label matches your project requirements. Check for proper storage and handling to maintain quality.
- Water: Ensure water source is clean, free of contaminants, and within safe pH range (6-8). Test with pH strips if unsure.
- Concrete Mixer: Inspect mixer for proper functioning. Check blades for wear and replace if necessary.
- Wheelbarrow: Ensure wheelbarrow is in good condition, wheels spin freely, and tires are properly inflated.
- Shovel: Check shovel for a sturdy handle and sharp edge. Replace if damaged.
- Concrete Finishing Tools (Float, Trowel, Edger): Inspect tools for straight edges and proper functioning. Sharpen or replace as needed.
- Forms: Verify forms are level, square, and properly braced. Check for any cracks or damage that could compromise the pour.
- Reinforcement (Rebar, Wire Mesh): Ensure reinforcement is within safe exposure limits (typically 2-3 inches from surface). Check for proper spacing and alignment.
- Concrete Curing Compound: Verify product label for correct application method and safety guidelines. Check expiration date and storage conditions.
Quick rule: Always double-check your tools and materials before starting a pour to avoid costly mistakes and rework.
Material compatibility and standards to check
Before you start mixing or pouring, use this checklist to ensure your concrete materials are compatible and meet required standards. This will help prevent costly mistakes.
- Check cement type: Ensure you’re using the correct type of cement (e.g., Type I, II, III) for your project’s needs. Check product labels or manufacturer instructions to confirm.
- Verify aggregate size: Measure and ensure aggregates (sand, gravel) are within the required size range (usually 3/8″ to 1-1/2″) for your mix design. A quick visual check should suffice.
- Check water-cement ratio: Ensure you’re using the correct water-to-cement ratio (typically between 0.45 and 0.6) for your mix. This affects concrete strength and durability.
- Verify admixtures: If using admixtures, check they are compatible with your cement type and other materials. Follow manufacturer instructions for proper usage.
- Check temperature limits: Ensure the concrete temperature is within acceptable ranges (usually 50°F to 90°F) before mixing and placing. Check local standards or ANSI/ASTM guidelines.
- Verify curing methods: Plan your curing method (e.g., wet curing, membrane curing) and ensure you have the necessary materials ready. Curing is crucial for concrete strength development.
- Check local codes: Ensure your mix design complies with local building codes and standards. Check with your local building department if unsure.
- Confirm mix design: If using a pre-made mix, ensure it matches the required strength (e.g., 3000 psi, 4000 psi) for your project. Check product labels or manufacturer literature.
Quick rule: Always follow manufacturer instructions and local standards to avoid common mistakes that can lead to weak, damaged, or non-compliant concrete.
Visual checkpoints and testing before tiling
Before you start laying your tiles, use this checklist to ensure your surface is ready. Perform these checks after preparing the substrate but before applying thinset mortar or other adhesives.
- Check for level: Use a 4′ or 6′ level to ensure the surface is flat and within acceptable tolerances (usually 1/8″ in 10′).
- Inspect for cracks: Look for hairline cracks, which can indicate movement. If found, check manufacturer’s instructions on how to address them before tiling.
- Perform flood test: Wet the surface completely and observe for 24 hours. Check for any water penetration or signs of weakness.
- Check bond strength: Apply a small amount of thinset to an inconspicuous area, embed a piece of scrap tile, let it cure according to manufacturer’s instructions, then pull the tile to check adhesion.
- Verify substrate temperature: Ensure the surface is within acceptable temperature ranges (usually 50°F – 90°F) for proper adhesive curing.
- Check for contaminants: Wipe the surface with a damp cloth to remove any dust, dirt, or other contaminants that could compromise adhesion.
- Inspect backing material: If using a cement board or other backing material, check for any damage, warping, or delamination before installing.
- Check tile condition: Inspect your tiles for cracks, chips, or other defects. Replace any damaged tiles before starting.
Quick rule: Always perform these checks in a well-lit area to ensure you catch any issues before they cause expensive rework.
Repairing Failures and Retrofitting Existing Curbs
Begin with a diagnostic workflow to identify likely leak sources using visual checks and moisture tests. Consider dye tests or flood tests if needed. Document findings before proposing fixes.
Explain when partial repairs are acceptable and when full curb replacement is required. Outline retrofit options like adding a new membrane, re-flashing, and sealing around tile penetrations. Include notes on substrate condition and compatibility with chosen waterproofing system.
Diagnosing leak locations
Start by visually inspecting the curb for cracks, gaps, or other obvious signs of damage. Use a flashlight to check corners and hidden areas.
Next, use a moisture meter. Scan the curb, walls, and floor for elevated moisture levels. Mark any suspicious areas.
For precise leak tracing, apply moisture-triggered dye tests or perform water tests around suspected areas. These will reveal exact leak paths.
Repair techniques and temporary fixes
For minor cracks, clean and seal with a flexible, waterproof caulk. Apply a membrane patch if necessary.
If tile is intact, try reapplying membrane over the damaged area. Remove any loose or damaged tile first.
For temporary fixes, use waterproof tape to seal cracks or gaps until a permanent repair can be made. Remember, these are only short-term solutions.
When to call a professional
If leaks persist after attempts at repair, call a pro. They have specialized tools and training for tough cases.
Also, if you suspect structural issues, like movement in the curb or walls, leave it to the experts. They can assess safety and code compliance.
Lastly, if your shower is under warranty, contact the installer. They may cover repair costs.
Maintenance, Warranty, and Documentation Best Practices
Establish a routine inspection checklist focusing on membrane integrity, seams, caulking, grout, and tile condition. Look for signs of moisture intrusion or staining during checks. Use the checklist to catch issues early.
Explain warranty basics, required documentation, and common transferability pitfalls. Recommend maintaining a centralized file with product specs, batch numbers, dates, contractor contacts, and photos. Create a maintenance schedule with clear actions for re-caulking, resealing, or calling a pro when needed.
Routine maintenance checklist
Use this checklist every 6 to 12 months to keep your shower curb waterproofing in top shape.
- Membrane integrity: Inspect for any cracks, punctures, or delamination. Use a flashlight to check hidden areas.
- Seam/connection points at the curb: Ensure all seams are intact and properly bonded. Look for any signs of separation or peeling.
- Caulking life: Check caulking around tiles, joints, and drains. Replace if it’s cracked, brittle, or pulling away from surfaces.
- Grout condition: Inspect grout for cracks, missing pieces, or discoloration. Repair as needed to prevent water intrusion.
- Tile lippage: Ensure tiles are level and not protruding or recessing too much. Uneven tiles can trap water and cause leaks.
- Staining or signs of water intrusion: Look for water spots, mold, or mildew on walls, ceiling, or floor near the shower curb. These could indicate a leak.
- Moisture readings (optional): Use a moisture meter to check for hidden water damage behind walls or under tiles. This step is not always necessary but can help catch problems early.
Quick rule: Address any issues found during the inspection promptly to prevent minor problems from turning into major repairs.
Warranty, labeling, and handover documentation
Proper documentation ensures you’re covered under warranty and helps future owners maintain the waterproofing system.
Collect the following from manufacturers/contractors: product data sheets, labels with batch/lot numbers, cure times, installer license numbers, and warranty terms. Keep these documents in a safe place.
Take photos or videos of the shower curb before, during, and after installation. These visual records can help diagnose problems if they arise in the future and serve as evidence for warranty claims.
When selling your home: provide all collected documentation to the new owners. This helps them understand the waterproofing system, maintain warranties, and make informed decisions about repairs or modifications. It’s also a good idea to include any maintenance records and notes on specific issues you’ve addressed.

Conclusion
Shower curb waterproofing is about creating a durable, leak-free edge that protects your bathroom and looks right for years. Do it right, and you won’t deal with hidden drips or costly damage down the line.
First, confirm your plan and materials, check all penetrations and corners for proper detail, set up the curb and drain correctly, apply the waterproofing in the right sequence, and test the system before the tile goes in. Do a final visual check, cure as required, and document what you did for warranty and future maintenance.
Common mistakes to avoid include skipping a proper slope or fail-safe drain test, skimping on sealant at corners and penetrations, and rushing through curing times. Use clean work surfaces, follow the product directions, and test small areas first before committing to the full curb. If anything feels uncertain or you encounter active leaks, stop and reassess—the safety and durability depend on taking careful, deliberate steps rather than forcing a quick fix.
If the project reveals complex penetrations or large water exposure that you’re unsure about, don’t push on alone—call a qualified pro. Stay alert, follow the steps, and you’ll finish with a curb that stays dry, lasts longer, and keeps your bathroom looking sharp.
FAQ
What’s the right way to waterproof the curb around a shower stall?
Seal the top and sides of the curb with a waterproofing membrane, then embed it in a layer of deck mud or a compatible substrate. Start at the curb corners and work toward the center so there are no gaps where water can sit. Check the manufacturer’s instructions for minimum coverage and overlap requirements.
What are the common mistakes I should avoid with curb waterproofing?
Don’t skip sealing corners and transitions. Don’t rely on paint-on products alone without a proper membrane underneath. Don’t forget to protect penetrations and joints from movement with proper flashing or sealant rated for wet areas.
How should I handle corners and penetrations to prevent leaks?
Seal all inside corners with a compatible sealant or pre-formed corner bead that matches the membrane. For pipes and penetrations, use approved sealants and flashing that maintain the waterproofing layer around the opening. Ensure smooth, continuous membrane coverage up to the wall surface without gaps.
What should I do to mitigate water risk if something isn’t perfect during install?
Add redundant protection where practical, such as a secondary membrane or reinforced patch over high-stress areas. Keep a close eye on joints and transitions after setup and before tiling. If you’re unsure about any step, check the product label, manufacturer instructions, or local rules for acceptable methods.