
Introduction
A tile ledger board is a horizontal support mounted to the shower wall to hold tile while it sets, without puncturing the waterproofing. Before you start, locate studs and check the waterproofing membrane behind the tile area. This guide walks you through a practical, hands-on approach you can do with common tools.
Plan your fasteners and placement to avoid drilling through the waterproof layer. Choose fasteners that are suitable for bathroom use and align the ledger at a solid backing. If you’re unsure, verify everything on the label and follow manufacturer instructions and local rules, or consider mounting methods that keep penetrations to a minimum.
Key takeaways
- Verify substrate and waterproofing compatibility before selecting a non-penetrating ledger method.
- Use a solid mounting surface and appropriate adhesive or mechanical sleeves per manufacturer.
- Protect waterproofing with a continuous membrane up the wall and behind ledger.
- Plan for load distribution and avoid puncturing existing waterproofing layers.
- Always follow manufacturer instructions to prevent substrate damage and leaks.
- Retrofit cases require careful detour or alternative methods to preserve waterproofing.
Table of Contents
- Introduction
- Key takeaways
- Why Ledger Boards Are Used in Showers and the Waterproofing Risk
- Non-Penetrating Attachment Methods Overview
- Tools and Materials Checklist for a no-Puncture Installation
- Pre-Installation Planning: Substrate, Load, and Waterproofing Compatibility
- Step-by-Step Installation: a Reliable Non-Penetrating Method
- Variations and Special Cases (Heavy Stone, Niche Shelves, Retrofit Situations)
- Alternatives to Ledger Boards That Preserve Waterproofing
- Testing, Visual Checkpoints, and Quality Assurance
- Conclusion
- FAQ
Why Ledger Boards Are Used in Showers and the Waterproofing Risk
Ledger boards hold tile edges, benches, and shelves level while you set the finish materials, so first check what the ledger will support and how it attaches before you start. Inspect the waterproofing type on your wall and identify any seams or membranes that could get pierced by fasteners.
If you mount a ledger the wrong way you can create a leak path that wrecks a wall assembly and wastes materials and labor. A realistic warning: fasteners through many common membranes can fail the system, so confirm compatibility with product instructions or your waterproofing installer.
Structural versus aesthetic functions
Ledger boards serve two main purposes in showers: structural support and aesthetics.
Structural: They provide a solid base for tile edges, preventing them from cracking or breaking off. Ledgers also support heavy items like shower seats or shelves without putting extra strain on the walls.
Aesthetic: Ledger boards create clean lines and define spaces in your shower. They can add a touch of style with different materials or finishes.
How punctures compromise waterproofing
Waterproofing is crucial to prevent mold, rot, and structural damage. Here’s how punctures can breach it:
Fasteners: Nails or screws driven into ledger boards can create tiny holes that let water seep through, especially over time as they rust or corrode.
Gaps: If not properly sealed, gaps between the ledger board and the wall allow water to sneak behind the tile and compromise the waterproof membrane.
Improper transitions: Incorrect installation methods can lead to poor transitions at corners or where the ledger meets other surfaces. These weak points are prime spots for leaks to start.
Non-Penetrating Attachment Methods Overview
There are a few ways to support a ledger without drilling through a membrane: mechanical clamps to the framing, adhesive bonding to substrate surfaces, and continuous support ledgers that bear on framing below the waterproof layer. Pick the method that matches your wall build-up and load because each has trade-offs in strength and ease of removal.
Choosing the wrong strategy costs you durability or forces a redo; clamps can be very strong but need access to framing, while adhesives depend on surface prep and product selection. Before committing, compare manufacturer instructions or product data sheets so you don’t exceed the adhesive’s intended loads or void a warranty.
Adhesive-based systems and compatibility
For non-penetrating ledger attachment, adhesives are your friend. You’ve got two main types: construction adhesives and mastics.
Construction Adhesives: These are like super glue for building materials. They bond to backer boards, membranes, and even concrete or studs. Look for ones that work with your specific membrane type.
Mastics: Mastics are thick, rubbery adhesives designed for waterproofing applications. They stick well to most surfaces and can be used to attach ledgers without puncturing the membrane.
Always check compatibility before you buy. Manufacturers’ websites or tech sheets should list what they work with. If in doubt, ask at your local hardware store.
Mechanical clamp and clip solutions
Clamps and clips are great for attaching ledgers without piercing the membrane. They work by gripping the substrate from outside, like a vice.
External Clamping: These clamps squeeze the ledger against the wall or studs. They’re easy to install but might not be as strong as other methods.
Channel Clips: Channel clips slide onto the ledger and snap into place around the substrate. They provide good support but can be a bit tricky to install.
Under-sill Clamps: These clamps go under the ledger, gripping it from below. They’re useful when you need extra support or have limited space above the ledger.
Hinter-blocking and hidden supports behind the membrane
These methods involve placing support behind your waterproof layer. It’s like having a secret ledger helper.
Hinter-blocking: During rough framing, install blocking (small pieces of wood) behind where your ledger will go. When you apply the membrane, it’ll stick to this hidden support. No punctures needed!
Continuous Ledgers: If you’re building from scratch, consider incorporating a continuous ledger into your substrate design. This provides solid support without compromising waterproofing.
Both methods require planning ahead. But they offer strong, non-penetrating support for your tile ledgers.
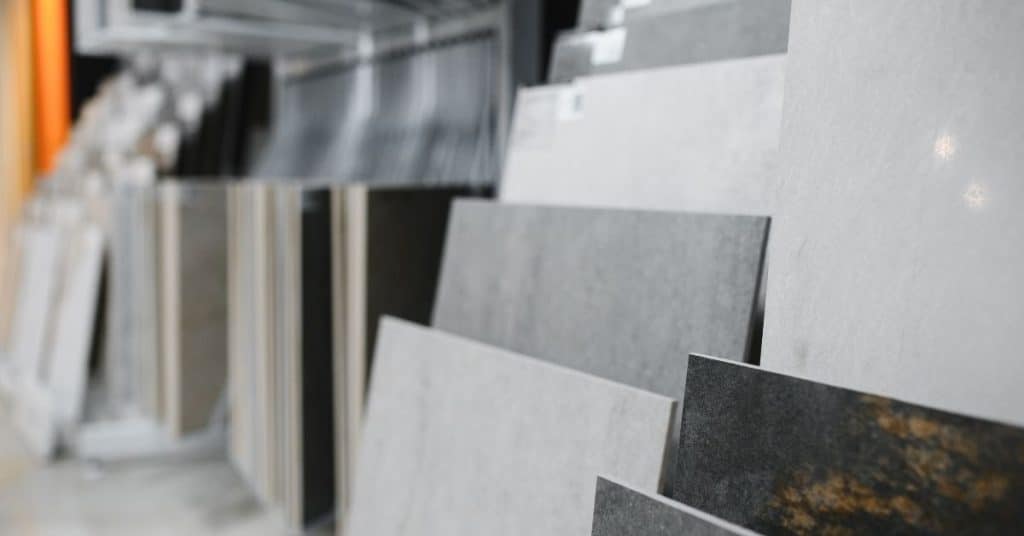
Tools and Materials Checklist for a no-Puncture Installation
Gather the basic hand and power tools, plus specialized items like low-VOC construction adhesive rated for wet areas, non-penetrating clamps or brackets, and compatible backerboard or tile underlayment. Verify each product’s suitability for wet locations by reading the label or technical sheet and test adhesion on a scrap piece of your actual substrate where practical.
Using the wrong materials leads to bond failure or damaged waterproofing and more repairs later. A practical tip: pack extra consumables—adhesive, caulk, and mechanical hardware—because dry runs and adjustments are normal on site.
Adhesives, sealants, and membrane-compatible tapes
Before you start, make sure you’ve got the right adhesives, sealants, and tapes to ensure a watertight installation.
- Structural adhesive: Check it’s compatible with your ledger board material. Incompatibility can lead to bond failure.
- Elastomeric sealant: Ensure it’s suitable for shower environments and can bridge substrate movements.
- Waterproofing tape: Confirm it’s compatible with your membrane and can withstand high humidity.
- Manufacturer charts: Always check compatibility charts to avoid issues down the line.
- Adhesive type: Choose a thinset mortar or mastic adhesive for better bond strength.
- Sealant type: Opt for a silicone-based sealant for flexibility and water resistance.
- Tape width: Ensure it’s wide enough to cover the ledger board and membrane seam.
- Adhesive pot life: Consider how long you have to work with the adhesive before it sets.
Quick rule: Always test a small area first to ensure compatibility and performance.
Clamps, stainless steel supports, and load-bearing options
To secure your ledger boards without puncturing the waterproofing membrane, use these durable, corrosion-resistant options.
- Stainless steel clamps: Check they’re rated for the load you’ll be applying. Underestimating can lead to failures.
- Clamp size: Ensure they fit your ledger board and wall thickness. Too small, they won’t grip; too large, they won’t tighten.
- Support material: Stainless steel is best for corrosion resistance in wet environments.
- Load-bearing capacity: Confirm the support can handle the weight of tiles and grout.
- Clamp spacing: Follow manufacturer guidelines to ensure even distribution of load.
- Clamp type: Consider using adjustable clamps for easy installation and removal if needed.
- Mockup test: Before final install, test fit and grip on a mockup to avoid surprises.
Quick rule: Always overestimate the load to ensure your supports can handle it.
Pre-Installation Planning: Substrate, Load, and Waterproofing Compatibility
Measure and note the substrate type, locate framing, and estimate the tile or stone weight the ledger must carry so you can choose the proper support method. Cross-check those findings with the waterproofing system in place to see whether it accepts clamps, adhesives, or needs a sacrificial stop behind it.
Good planning keeps the ledger from sagging and prevents leaks that show up months later. If you aren’t sure about framing spacing or membrane properties, verify with the waterproofing product instructions or consult the original installer before making holes or bonding permanent fixtures.
Measuring, slope, and load calculations
Before you start, measure your shower space. Mark out where your ledger boards will go. They should run perpendicular to the drain, following the slope.
Tile weight varies. Heavy stone can be a real load. If in doubt, consult an engineer. They’ll help calculate if your substrate’s strong enough.
Remember, ledgers support the weight of tiles and any force from use – like leaning on them while showering. So, plan ahead to avoid issues later.
Matching methods to waterproofing types (membrane, liner, liquid)
Different waterproofing systems need different ledger attachment methods. Here’s a quick guide:
Membranes: Use adhesive-based systems or mechanical clamps. These won’t puncture the membrane.
Sheet Liners: Similar to membranes, use non-penetrating methods. But ensure your ledger boards are compatible with the liner’s material and temperature range.
Liquid-applied Systems: These can be trickier. Some allow mechanical fasteners, others don’t. Always check the manufacturer’s guidelines.
Step-by-Step Installation: a Reliable Non-Penetrating Method
Follow a clear sequence: prepare and rough-level the substrate, temporarily support the ledger, bond or clamp the ledger per the chosen method, and then check alignment before setting tile. Use temporary props and a straight edge to keep the ledger true while adhesives cure or clamps are tightened.
Doing steps out of order or rushing the setup invites misalignment and failed bonds that show up once tile is installed. Remember to confirm cure times and clamp torque with the product documentation so the support is secure before loading it with tile or stone.
Step-by-Step Installation Process
This section walks you through a reliable non-penetrating method to install tile ledger boards in showers, ensuring no punctures compromise waterproofing.
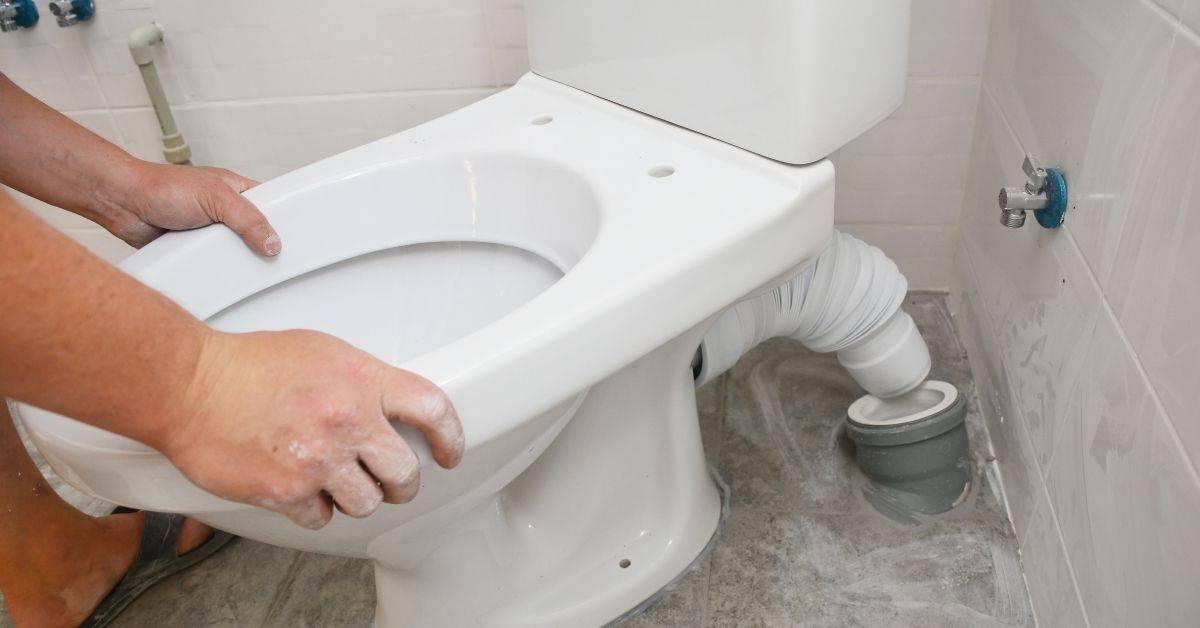
- Inspect the substrate and ensure it’s clean, dry, and structurally sound. Safety first – wear gloves and eye protection.
- Measure and cut your ledger board to size using a circular saw or jigsaw with a fine-tooth blade.
- Dry-fit the ledger board on the wall, ensuring full contact with the substrate. Make any necessary adjustments before applying adhesive.
- Apply construction adhesive evenly across the back of the ledger board, following the manufacturer’s guidelines for application patterns and cure times.
- Press the ledger board firmly against the wall, using temporary supports like clamps or wedges to maintain pressure during curing. Check for level and plumb before leaving it to set.
- Allow the adhesive to cure as per the manufacturer’s instructions. Verify bond strength by gently pulling on the ledger board with a pry bar – if it feels solid, you’re good to go.
- Before tiling, apply a thin layer of thinset mortar over the ledger board and wall junction to create a strong bond between the tile and substrate.
- Clean up any excess adhesive or debris from the jobsite before starting on your next task.
Surface preparation and mock-fit
Proper surface preparation is key to a strong bond between your ledger board and wall. Here’s how to prep your substrate and ensure full contact.
Start by cleaning the wall thoroughly with a degreasing cleaner or muriatic acid to remove any dirt, grease, or efflorescence. Allow it to dry completely.
If required, apply a primer to improve adhesion and seal the surface. Follow the manufacturer’s instructions for application and drying times.
Dry-fitting your ledger board ensures it fits perfectly before applying adhesive. Make any necessary adjustments during this stage to avoid issues later on.
Setting the ledger, clamping, and cure times
Once your surface is prepped, it’s time to set your ledger board in place. Here’s how to apply adhesive, maintain pressure during curing, and verify bond strength.
Apply construction adhesive evenly across the back of the ledger board using a notched trowel or caulking gun. Follow the manufacturer’s guidelines for application patterns – typically this involves applying adhesive in vertical stripes or a ‘stipple’ pattern.
Press the ledger board firmly against the wall, using clamps or temporary supports to maintain pressure during curing. Place clamps every 12-16 inches along the length of the ledger board, ensuring even distribution of force.
Allow the adhesive to cure as per the manufacturer’s instructions. Before tiling, verify bond strength by gently pulling on the ledger board with a pry bar – if it feels solid, you’re ready for the next step.
Tiling over the ledger and sealing transitions
Now that your ledger board is securely in place, it’s time to tile over it. Here’s how to choose grout/caulk and create a continuous waterproof transition.
When selecting grout or caulk for the ledger-tile junction, opt for a flexible, waterproof option compatible with your chosen membrane or liner system. This ensures a tight seal that won’t crack or peel over time.
Apply a thin layer of thinset mortar over the ledger board and wall junction before tiling to create a strong bond between the tile and substrate. Allow it to set according to manufacturer’s instructions.
When tiling, ensure the first row sits flush against the ledger board, creating a smooth transition from wall to floor. After tiling, apply your chosen grout or caulk along the ledger-tile junction, using a damp sponge or float to create a smooth, even bead. Allow it to cure as per the manufacturer’s instructions before exposing it to water.
Variations and Special Cases (Heavy Stone, Niche Shelves, Retrofit Situations)
For heavy stone, plan on more robust support—either deeper bearing onto framing or multiple non-penetrating clamps—and for niches or retrofit walls, look for ways to distribute load across multiple points. In retrofits where you can’t reach framing, consider surface-mounted support systems or a reduced-profile shelf design that limits weight.
Underestimating load or substrate limits leads to sagging, tile failures, or worse. When dealing with heavy materials or odd wall conditions, double-check manufacturer load ratings and, if needed, get a pro opinion rather than guessing.
Supporting heavy stone without penetrating membrane
Heavy natural stone tiles need robust support. Don’t risk puncturing your waterproofing membrane.
Use full-width bearing ledgers. They span the entire wall, supporting tile weight evenly. Ideal for large format stones.
Consider continuous shelf pans for heavy tiles at the top of walls or around niches. They provide extra support without piercing the membrane.
For some installations, you might need engineered clamp systems. These distribute weight across a wider area. If additional internal support is required, consult with a structural engineer.
Retrofit options when framing access is limited
In finished showers or where you can’t access the framing, use surface-mounted systems to support your ledger.
Install bracket sets directly onto the wall. They provide a solid base for your ledger without needing access behind the wall.
For a more seamless look, try adhesive channel systems. These stick to the wall and hold your ledger in place.
If you need to remove supports later, consider removable support trims. They clip onto the ledger and can be taken off when needed.
Alternatives to Ledger Boards That Preserve Waterproofing
You can avoid ledgers by using built-in curbs, recessed shelves, or by extending a shelf support back to framing under the waterproof layer so you don’t penetrate the membrane at the visible face. Choose an alternate that meets the same functional need—support or edge control—without compromising the waterproof layer.
Alternatives often save time and reduce long-term leak risk, but they may change the look or construction sequence of the shower. Check compatibility of any alternative with your waterproofing system and tile substrate before changing the plan.
Integrated bench, continuous curb, and prefabricated shelf pans
Instead of ledger boards, consider these built-in alternatives to support tiles without puncturing waterproofing.
An integrated bench is a continuous curb that runs along the shower’s perimeter. It distributes weight evenly across the entire length, reducing stress on any single point. No membrane penetration needed.
A continuous curb serves a similar purpose but sits flush with the floor. It prevents water from spilling onto the surrounding area and supports tiles without compromising waterproofing.
Prefabricated shelf pans are another option for niches or shelves. They’re designed to fit seamlessly into the shower recess, supporting tiles while keeping waterproofing intact.
Tile edge trims and L-beads that minimize intrusion
For finishing edges without creating new leak paths, use metal or PVC trim systems. They provide a clean look while preserving waterproofing.
Tile edge trims are narrow strips that cover the raw edges of tiles. They’re applied after tiling and sealed to prevent water intrusion.
L-beads are similar but have an L-shaped profile, providing extra support for tiles at corners or where walls meet floors. Again, seal them properly to maintain a watertight barrier.
Both options require careful measurement and installation to ensure they don’t create gaps that could allow water to seep through. Follow manufacturer guidelines for best results.
Testing, Visual Checkpoints, and Quality Assurance
Plan simple checks: visual inspection of bond lines, a gentle load test on the ledger after curing, and close examination of adjacent waterproof seams for gaps or distortion. Keep a checklist and document which products and batches you used so you can trace issues if something fails later.
Skipping tests is how small mistakes become big repairs down the road. If something looks off—loose clamp, uneven adhesive bead, or membrane puckering—stop and address it now rather than covering it with tile.
Flood testing and leak-detection best practices
Perform a flood test after tiling and before grouting to ensure your shower is watertight.
- Prepare the area: Clear any debris, close drains, and turn off ventilation fans.
- Fill the shower: Use a garden hose with a spray nozzle to fill the shower slowly and evenly.
- Monitor water level: Keep an eye on the water level. It should rise steadily and smoothly.
- Check for leaks: Inspect all seams, corners, and around fixtures for any signs of water leakage.
- Observe for 15-30 minutes: Allow enough time for any potential leaks to become apparent.
- Drain the shower: Once satisfied, open the drain and let the water out.
- Re-inspect after draining: Check again for any signs of moisture or leaks once the shower is empty.
- Repeat if necessary: If you find any issues, address them promptly and repeat the test.
Quick rule: Always perform a flood test before using your shower to ensure its waterproof integrity.
Visual checkpoints during tiling and after grout/seal
Regular visual inspections throughout the tiling process help ensure a successful, watertight installation.
- Adhesive contact: Check that thinset or mastic adheres fully to both ledger board and wall/ floor surfaces. Incomplete adhesion can lead to water intrusion.
- Clamp placement: Ensure clamps are correctly positioned, applying even pressure along the ledger’s length. Incorrect placement may cause warping or cracking.
- Sealed seams: Inspect all tile seams and edges for proper sealing with a flexible sealant. Skipping this step can result in water penetration.
- Tile alignment: Verify that tiles are level, plumb, and square to ensure proper drainage and prevent cracking.
- Grout lines: Check grout lines for consistent width and depth. Inconsistencies can trap moisture and cause efflorescence or mold growth.
- Sealed transitions: Inspect all transition areas, like where the ledger meets walls or floors, to ensure they are properly sealed.
- Grout cure time: Allow grout to cure according to manufacturer’s instructions before exposing it to water. Premature exposure can damage the grout and compromise its seal.
- Final inspection: Once everything is cured, perform a final walkthrough to ensure all surfaces are clean, level, and free of defects.
Quick rule: Regular visual checks help catch potential issues early, saving you time and money in the long run.
Conclusion
Getting it right means a ledger that stays put, protects the waterproofing, and keeps your shower looking clean and professional. When you mount without puncturing the membrane, you reduce the risk of leaks and expensive repairs down the line, so plan and execute carefully.
Make your plan into a simple, stepwise rhythm: confirm the substrate and load path, choose a true no-penetration method that matches your shower type, gather the listed tools and materials, mark the ledger location and level, dry-fit and test fit without fasteners, install with the non-penetrating method, seal when required, then run a water test and visually inspect for gaps or movement before grout or tile goes in.
Common mistakes to avoid include penetrating the waterproofing with fasteners, ignoring substrate movement or uneven surfaces, and skipping a proper water test or leaving distracted edges unsealed. A plain safety rule: verify every fastener path, respect load limits, and test in a small area first to catch issues before they become costly fixes.
If you’re tiling heavy stone, adding niche shelves, or retrofitting in an older shower, know when to call a professional rather than pushing through. When in doubt about substrate compatibility, waterproofing integrity, or complex corners, get a pro to review. Stay steady, follow the steps, and you’ll finish with a durable, watertight result you can trust.
FAQ
Can I mount a ledger board using only adhesive or non-penetrating fasteners without ever contacting waterproofing?
Yes, but you must follow the product instructions and local rules. Check the label on the fasteners and adhesive for load limits and waterproofing compatibility.
What should I look for in fasteners and brackets to avoid puncturing waterproofing?
Use non-penetrating or surface-fastening options that are rated for wet areas. Look for manufacturer guidance on load ratings and suitability for shower walls; if in doubt, choose a method labeled specifically for waterproofed showers.
How do I verify the substrate is suitable before using a non-penetrating ledger system?
Inspect the substrate for a solid, continuous backing and verify it won’t crumble or flex. If you’re unsure about substrate integrity, consult the manufacturer instructions or a local pro before proceeding.
What simple checks should I perform after installation to ensure waterproofing is not compromised?
Re-check sealing around any joints and confirm there are no gaps where water could wick behind the board. Do a basic water test per the waterproofing system’s guidance and look for changes in substrate or fastener movement over time.