
Introduction
An isolated loose or broken waterline tile can be a practical DIY repair if the exposed substrate is sound and there is no active leak, shell crack, failed plaster/render, or damaged waterproofing. The reliable approach is to lower the water only enough to expose the work, remove the tile, inspect the actual failure plane, rebuild any weak substrate, then install a compatible pool-rated tile system with verified mortar coverage.
Do not treat every hollow sound as proof of a void or every loose tile as a leak. A different tap sound is only a screening clue: tile type, mortar-bed construction, membranes, and surrounding conditions can all change the sound. Use it to identify tiles for closer inspection, then confirm the condition when a representative tile is removed. Tile-industry guidance on hollow-sounding tile similarly cautions that sound alone does not diagnose the assembly.
Key takeaways
- Spot-repair only tiles over a stable, clean, compatible substrate with no evidence of movement or water entry.
- Lower the pool in a controlled way; do not rapidly empty it or assume a full drain is safe.
- Use one manufacturer-approved system for the tile, mortar, grout, primer, membrane if required, and sealant.
- Control dust with wet methods or HEPA extraction. Do not dry sweep grinding or cutting debris.
- Prevent hollow areas by keying in mortar, combing it in one direction, pressing the tile in with a sliding motion, and lifting test tiles to check coverage.
- Follow the exact product-system cure and refill schedule. Dry-to-the-touch is not a readiness test for immersion.
Table of Contents
- Introduction
- Key takeaways
- When to Repair Vs Replace the Waterline Band
- Safety, Dust Control, and Jobsite Preparation
- Evaluation, Testing, and Documentation Process
- Tools, Materials Checklist and Material Specs Explained
- Preparing Old Substrates for Reliable Bonding
- Setting Techniques to Avoid Hollow Spots
- Detecting and Repairing Hollow Spots — Practical Remediation Steps
- Cost Factors, Scheduling, Common Mistakes, and Warranty Documentation
- Conclusion
- FAQ
When to Repair Vs Replace the Waterline Band
Start by identifying what failed. Tile-only failure means the tile or grout has detached while the underlying render, shell, and any waterproofing remain sound. A weak render or plaster layer must be removed and repaired before retiling. A shell, membrane, movement-joint, or active-leak problem is a larger pool-system repair; adding mortar over it will not correct the cause.
Repairable conditions
A spot repair is reasonable when damage is isolated, adjacent tiles are stable, the exposed substrate is hard and well attached, and you can match the original tile thickness and joint layout. Record the tile type and take a few photos before removal so you can identify the failure plane and find a replacement that fits.
Stop and call a pool or tile professional
Stop if you find a structural crack, active seepage, widespread loose or different-sounding areas, crumbling plaster/render, exposed or damaged membrane, movement at a transition, repeated grout cracking, or uncertain shell condition. Also stop if lowering the water raises hydrostatic or drainage concerns. Those conditions need diagnosis before cosmetic tile work.
In freeze/thaw climates, treat cracks and water entry behind the band as urgent: trapped water can worsen damage during freezing. Skimmer leaks or coping/detail failures may be nearby sources, but do not assume they are caused by the tile bond.
Safety, Dust Control, and Jobsite Preparation
Confirm local rules for pool lowering, draining, and disposal before starting. Lower the water only enough to uncover the repair when possible. Secure the pool from unauthorized access, isolate pool chemicals, protect nearby finishes, and use stable ladders or work platforms. Do not rapidly drain a pool: water pressure conditions can affect the shell, tile, or mortar bed.
Silica and dust-control methods
Tile, grout, mortar, and concrete debris can contain respirable silica. Control dust first with wet cutting, wet removal where appropriate, or HEPA extraction at the tool. Keep slurry and debris out of the pool and drains. Do not dry sweep, dry brush, or use uncontrolled compressed air for dusty debris; OSHA identifies those practices as exposure concerns and prioritizes engineering controls. OSHA’s silica-control guidance explains these control priorities.
PPE, access, and cleanup
Wear eye protection, gloves, hearing protection for powered tools, protective clothing, and slip-resistant footwear. If respiratory protection is needed, select a NIOSH-approved respirator appropriate to the exposure and use it as required by the applicable rules and instructions. A cloth covering or loose dust mask is not equivalent protection. If you cannot control dust safely, do not dry grind, cut, or sand.
Collect broken tile, cured mortar, grout debris, and slurry rather than washing them into the pool, storm drain, or yard. Let solids settle where permitted, containerize them, and follow local disposal requirements for debris and contaminated water. Clean tools before mortar or grout hardens.
Evaluation, Testing, and Documentation Process
Map visible cracks, missing grout, staining, loose tiles, and areas with a noticeably different tap sound. Press only gently on suspect tile; do not pry at edges or probe aggressively through grout joints. A tap test can help you choose a representative tile to remove, but it cannot establish whether the problem is a mortar void, weak render, membrane separation, or shell movement.
Inspection steps and non-destructive testing
- Identify the assembly: Note the tile type, approximate thickness, grout, prior repairs, and any known plaster or membrane work.
- Map the extent: Mark loose, cracked, stained, and different-sounding tiles; photograph the band and close-ups.
- Look for stop signs: Check for active water entry, expanding cracks, spalling, movement at joints, or widespread loss of bond.
- Remove one failed tile carefully: Inspect whether failure occurred at the tile/mortar interface, mortar/substrate interface, within the render, or at a membrane.
- Check direct conditions: The exposed surface must be stable, non-friable, and free of dust, salts, algae, oil, paint, old adhesive, curing compounds, and loose material.
- Use product-specific acceptance criteria: A moisture-meter reading or surface-hardness number is useful only when the selected product gives a test method and limit for that exact substrate. Neither reading proves bond readiness on its own.
- Test compatibility when uncertain: Use a small manufacturer-approved test bond or contact the system manufacturer before committing to the repair.
Scope the repair from what is exposed
Replace only the failed tiles if the substrate is sound after cleaning. Remove and rebuild the affected area if the render or plaster is weak. Do not specify a new waterproofing membrane automatically: it may be required if the original system calls for it or existing waterproofing is damaged, but it adds its own substrate, detailing, compatibility, and cure requirements. Related guidance: Patching Plaster After Plumbing Access Holes: How to Keep the Patch from “Drumming”.
Tools, Materials Checklist and Material Specs Explained
Buy materials only after exposing and diagnosing the substrate. “Suitable for wet areas” is not enough for a pool repair. Every component must be approved for continuous immersion, the exact tile, the actual substrate or existing membrane, expected pool chemicals, intended thickness, and the application method.
Tools and materials
- Safety glasses, gloves, hearing protection, protective clothing, and task-appropriate respiratory protection.
- Plastic protection, wet-cutting equipment or a HEPA-equipped dust-collection setup, HEPA vacuum, sponges, clean buckets, and disposal containers.
- Grout-removal tool, small cold chisel, hammer, margin trowel, mixing paddle, mixing bucket, tile nippers or saw, spacers, level/straightedge, and grout float.
- Replacement tile of matching thickness and pool-use approval; avoid assuming a natural stone or any tile category is suitable without the manufacturer’s approval for this location.
- Compatible repair mortar if needed; immersion-rated setting mortar or adhesive; specified grout; and sealant for movement joints or penetrations where the system requires it.
- Primer or membrane only when the selected complete system and the diagnosed assembly require it.
Choose a complete compatible system
Use the current technical data sheets, not generic advice, to select the notch, mortar thickness, mixing water, open time, grout timing, and immersion cure. Avoid mixing brands or technologies unless the manufacturers expressly allow it. Pool systems have widely different refill schedules: published guidance from MAPEI shows immersion waits that vary substantially by mortar and grout system. Check the pool-mortar system guidance for the reason a fixed cure period is not reliable.
Preparing Old Substrates for Reliable Bonding
Remove grout around the failed tile first so adjacent tiles are less likely to chip. Break the tile inward and lift it carefully; do not lever against a membrane, coping detail, or sound neighboring tile. Remove all loose mortar and weak render until the remaining surface is solid.
Clean and repair the exposed area
- Remove dust with a HEPA vacuum and clean off algae, salts, oil, old adhesive, paint, and loose coatings by a method approved for the substrate and selected system.
- Use mechanical preparation only as needed to create the surface profile specified by the repair mortar or setting material. Control dust and avoid thinning or weakening the shell/render.
- Do not default to acid for efflorescence or haze. Start with clean water, a neutral cleaner, or a manufacturer-approved remover. Use acid only when both the tile/stone and product manufacturer permit it; test a small area, protect metals, rinse as directed, and never mix acids with chlorine products.
- Patch voids, cracks, or missing render with a compatible repair mortar. Restore the original plane and let it cure as specified before tiling.
Confirm bond readiness
The repair area must meet the selected product’s requirements for cleanliness, surface profile, moisture condition, and cure. Do not cover a powdery, cracked, wet-from-active-seepage, or delaminated surface with primer or mortar in hopes of stabilizing it. If cleaning and removal expose a failed membrane or questionable shell, stop.
Setting Techniques to Avoid Hollow Spots
Use the trowel notch, mortar thickness, mixing procedure, and coverage requirement specified for the selected tile and pool-rated mortar. Tile size alone does not determine the notch: tile-back profile, tile flatness, substrate flatness, and mortar limits matter too. Related guidance: How to Choose Trowel Notch Size Based on Tile Size and Flatness.
Full-coverage bedding and back-buttering
- Mix only the amount of mortar you can place within its stated pot life. Do not retemper material unless its instructions allow it.
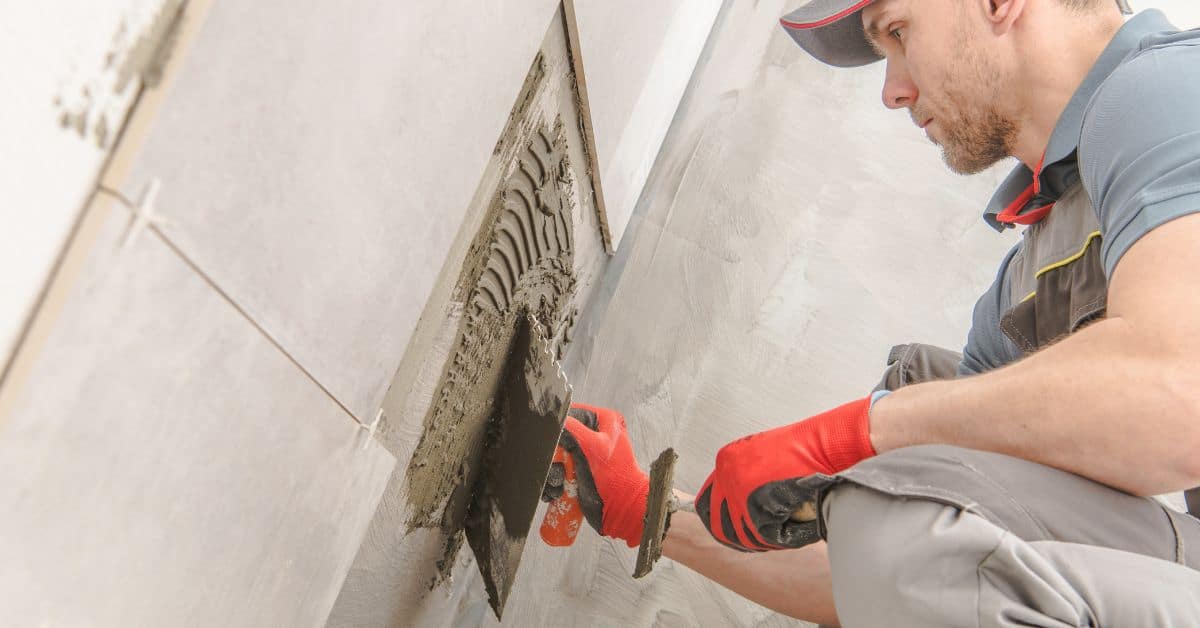
- Key mortar firmly into the prepared substrate with the flat side of the trowel, then comb it in one direction with the specified notch.
- Back-butter the tile when the system requires it or when needed to achieve the specified wet-area coverage. For mosaic sheets, follow the sheet and mortar manufacturer’s setting method.
- Set the tile while the mortar is workable, press it into the ridges, and slide it perpendicular to the ridges to collapse them. Keep the existing joint width and plane.
- Periodically lift a freshly set tile and inspect the transfer. There should be the coverage required by the system and no large voids. Reset immediately if coverage is inadequate; do not try to correct it by tapping after the mortar begins to set.
Grouting, sealing, and curing
Wait the mortar’s required time before grouting. Keep grout out of movement joints and use the specified pool-compatible sealant at joints, transitions, and penetrations where the assembly calls for it. Clean mortar and grout residue promptly with clean water and the manufacturer’s approved method.
Protect the repair from rain, contamination, temperature extremes, and disturbance during every cure stage. Do not use a universal 72-hour or one-week refill rule. Follow the longest applicable immersion cure in the exact system’s current instructions, including temperature and humidity conditions; refill gradually if the system manufacturer directs it. Restore and monitor pool chemistry according to the pool-equipment and finish requirements.
Detecting and Repairing Hollow Spots — Practical Remediation Steps
After the repair has cured, inspect for a stable tile, consistent plane, clean joint, and no visible cracking, movement, grout washout, or water entry. A different tap sound after installation should prompt closer observation, but it is not by itself a reason to drill or inject through the tile.
What to do with a suspect area
For one loose or cracked tile, remove it and inspect the bond directly. If the substrate is sound, clean it and reset a replacement tile using the full-coverage method. If the mortar releases with weak render, crumbling plaster, salts, or moisture behind it, remove enough material to determine the extent; do not simply re-bond the face tile.
Do not use generic injection repairs
Do not drill through waterline tile and inject epoxy or polyurethane as a general DIY hollow-spot repair. Drilling can breach tile, mortar, a membrane, or the shell; create a water path; trap contamination; and conflict with manufacturer requirements. Use injection only when the pool-system manufacturer or a qualified pool/tile professional approves the exact defect, product, drilling detail, and repair method in writing.
Recurring or widespread hollows
Mark the affected area and obtain a professional diagnosis when multiple tiles sound different, tiles continue to release, grout repeatedly cracks, or leakage is suspected. Widespread conditions are not reliably corrected one tile at a time because the underlying failure may extend beyond what is visible.
Cost Factors, Scheduling, Common Mistakes, and Warranty Documentation
The main cost drivers are the amount of failed tile, whether the substrate needs rebuilding, access, tile matching, and the cure time that keeps the pool out of service. A larger cost change usually signals a different failure plane—such as failed render or waterproofing—not merely a few extra tiles.
Plan the schedule around the system
Choose a weather window that stays within the products’ installation limits. Read every product data sheet before starting and allow for removal, substrate repair, mortar cure, grout cure, sealant cure, and the final immersion wait. Keep receipts, product names, and a few photos for your own future reference, especially when matching repairs later.
Common mistakes to avoid
- Bonding over weak material: Remove loose mortar, friable render, salts, and contamination rather than trying to hide them with primer.
- Assuming every repair needs a membrane: Install one only when the diagnosed assembly and compatible system require it.
- Using ordinary tile adhesive: Confirm continuous-immersion, tile, substrate, and chemical compatibility.
- Spot-dabbing mortar: Use the selected full-coverage setting method and verify it by lifting test tiles.
- Refilling by calendar alone: Follow the exact system’s immersion cure and site-condition requirements.
- Ignoring recurring symptoms: Repeated hollow areas, movement, or leakage call for a broader diagnosis.
Conclusion
A durable waterline repair starts with the exposed substrate, not with a tap sound or a tube of adhesive. For an isolated failure, lower the water safely, remove the tile, clean and repair only sound material, install a complete immersion-rated system at verified coverage, grout after the specified set time, and wait for the stated immersion cure before refilling. Related guidance: How to Set Glass Mosaic Tile Without Seeing Trowel Lines (Trowel + Backing Tricks).
Stop rather than patch over active leakage, shell cracks, weak plaster/render, membrane damage, widespread delamination, or any uncertain drainage or hydrostatic condition. Those are pool-system problems that need a qualified diagnosis.
FAQ
How do I know whether a hollow-sounding tile needs replacement?
Use the sound difference only to identify a tile for closer inspection. Replace a tile that moves, is cracked, or releases when removed for repair. If several tiles sound different or the exposed substrate is weak, stop and assess the broader area rather than assuming each tile has an isolated void.
What should I verify before buying mortar and grout?
Verify that the tile, setting mortar or adhesive, repair mortar, grout, sealant, primer, and any membrane are compatible as a system and approved for continuous pool immersion, the tile type, the actual substrate, expected pool chemistry, and the intended application thickness. Follow the current data sheet for cure and refill timing.
Can I refill the pool as soon as the grout feels dry?
No. Surface dryness does not establish immersion readiness. Mortar, grout, sealant, and any membrane can have different cure periods, and temperature and humidity can change them. Follow the longest applicable immersion cure period in the selected system’s instructions.
Should I drill a loose tile and inject epoxy behind it?
Not as a standard DIY repair. Drilling can damage a membrane or shell and create another water path. Remove an isolated failed tile and inspect the bond; use injection only with written approval for the exact pool assembly and defect.