
Introduction
Cutting tiny tile slivers safely means trimming small tile offcuts with stable guides to avoid breakage. This article covers practical jigs and simple alternatives that help you keep the edge clean. It stays hands-on and avoids guessing, with tips you can verify on the job.
You’ll find options that pair a steady fence with a basic saw and careful scoring. Always check manufacturer instructions and local rules for blade height, dust control, and cutting technique. If a method isn’t clear from the tool label, choose a safer alternative and test on scrap first.
Key takeaways
- Prioritize design-first thinking to plan sliver sizes and consistent rip directions.
- Wear PPE, control dust, and set up a dedicated workstation for micro cuts.
- Use purpose-built jigs to repeat safe micro-rips with predictable results.
- Validate blade/bit choice and verify substrate compatibility before cutting tiny slivers.
- Prefer precision marking and slow, controlled feed to avoid chipping or wandering.
- When results look off, recheck measurements, alignment, and jig setup before recutting.
Table of Contents
- Introduction
- Key takeaways
- When Tiny Slivers Happen and Design-First Thinking
- Safety Essentials: PPE, Dust Control, and Workstation Setup
- Tools and Materials Checklist for Precision Slivers
- Jigs That Produce Repeatable, Safe Micro-Rips
- Alternative Methods That Produce Better-Looking Results
- Step-by-Step Technique: Measuring, Marking, and Cutting Tiny Slivers
- Material Specs, Blade/Bit Matching, and What to Verify
- Troubleshooting, Visual Checkpoints, and When to Rework
- Conclusion
- FAQ
When Tiny Slivers Happen and Design-First Thinking
Thin tile slivers most often come from the layout, cuts at the room edge, or squeezing too many tiles into a run; check your layout and grout joint plan before you cut. Plan a few full-size mockups or dry-lay runs to decide where joints fall and whether a narrow piece will be required.
Getting the layout right up front saves material and keeps the job looking intentional rather than patched. If you skip this step you’ll end up with fragile slivers that chip, look amateur, or require extra trim to hide them.
Typical layout mistakes that create slivers
Before you start cutting, spot these common layout errors to avoid tiny tile slivers.
- Not accounting for grout spacing: Grout takes up space. Ignoring it can lead to narrow cuts at the end of rows.
- Starting with a small cut: Beginning a row or wall with a tiny piece means you’ll have slivers throughout.
- Not checking diagonal measurements: Uneven walls or floors can cause tiles to fit poorly when measured only straight on.
- Using whole tiles only: Sticking to full tiles might leave you with narrow cuts at the end of rows. Mix in half or quarter tiles where needed.
Review your layout carefully and adjust measurements or tile placement as necessary to avoid these mistakes.
Design choices that make slivers look intentional
Instead of fighting tiny tile slivers, embrace them with these design strategies. They can add charm and character to your space.
Use border tiles: Frame narrow cuts with decorative border tiles to draw attention away from the size of the inner tiles.
Create color or pattern transitions: Change tile colors or patterns at narrow cuts. This can create a striking visual effect and make slivers seem like part of the design.
When planning your layout, consider where these aesthetic choices could work best to turn potential slivers into deliberate features.
Safety Essentials: PPE, Dust Control, and Workstation Setup
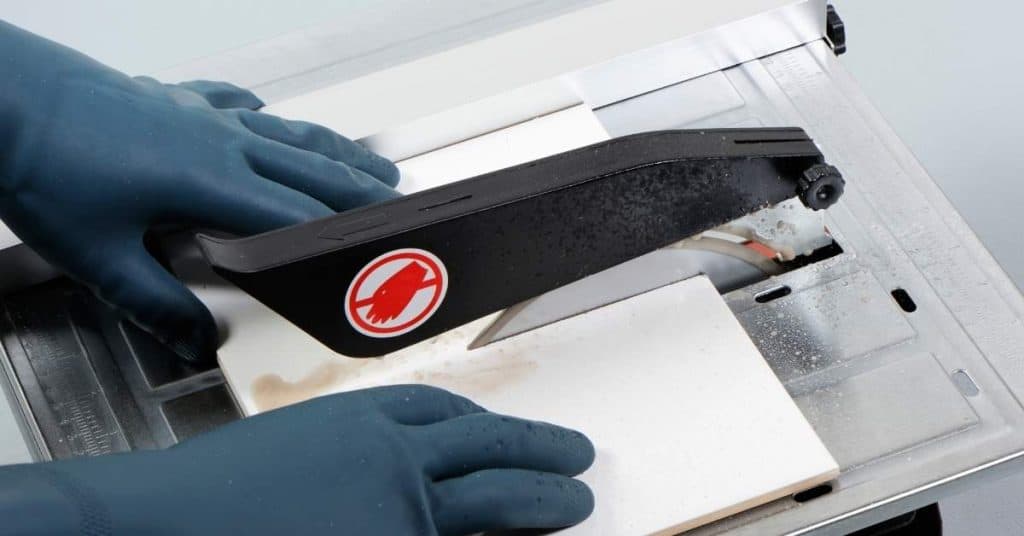
Use eye protection, hearing protection, respirators rated for silica, and durable gloves; set up a well-ventilated station and a stable surface to cut on. Employ wet cutting or HEPA vacuum extraction and clamp tiles so pieces don’t shift while you’re cutting tiny strips.
Good PPE and dust control protect your lungs and reduce clean-up, and a stable, restrained tile reduces breakage and kickback. Poor ventilation or loose tiles increases the chance of dangerous silica exposure and ruined cuts.
PPE and safe handling practices
Wear a full-face shield to protect your eyes, face, and neck from debris. Use heavy-duty gloves for grip and protection.
Positioning matters: Keep hands behind the blade’s cutting line. Rest feet firmly on the ground, not on the tool or work surface.
Always start and stop tools with a two-handed grip. Regularly inspect and maintain your PPE to ensure it’s in good condition.
Dust control and wet cutting strategies
Wet cutting reduces dust by up to 90%. Use a simple water spray or mist near the blade. Collect water runoff in a tray.
Pros of wet cutting: Reduced silica exposure, cleaner cuts, quieter operation.
Ventilation tips: Use a shop vac with HEPA filter for dry cutting. Ensure your workspace is well-ventilated, but avoid drafts that could disrupt the cut.
Secure clamping and stable work surface
Use clamps to secure tiles firmly. Apply even pressure across the piece. Non-slip mats prevent slippage on the work surface.
Support off-cuts: Place scrap pieces under and alongside the tile being cut. This stabilizes it, preventing movement or shattering during cutting.
Ensure your workstation is level and sturdy. A wobbly table can ruin a cut and cause injury.
Tools and Materials Checklist for Precision Slivers
Gather the right saws, small jigs, clamps, scoring tools, blades or bits matched to the tile, and finishing trim before you start. If you don’t own a specialized tool, check rental options for a wet saw, tile nippers, or a small rail saw to get cleaner micro-cuts.
Preparing tools and consumables in advance speeds work and reduces one-off mistakes that waste tiles. Trying to improvise mid-job often leads to chip-outs or uneven widths that are hard to fix.
Cutting tools and their ideal uses
Before you start cutting, make sure you have the right tool for the job. Here’s a quick checklist to help you choose.
- Wet saw: Ideal for straight cuts on ceramic, porcelain, and natural stone tiles up to 12″ wide.
- Snap cutter: Great for scoring and breaking small ceramic and porcelain tiles. Not suitable for thick or hard materials.
- Tile nippers: Handheld tool for making curved cuts and trimming small pieces on ceramic and porcelain tiles.
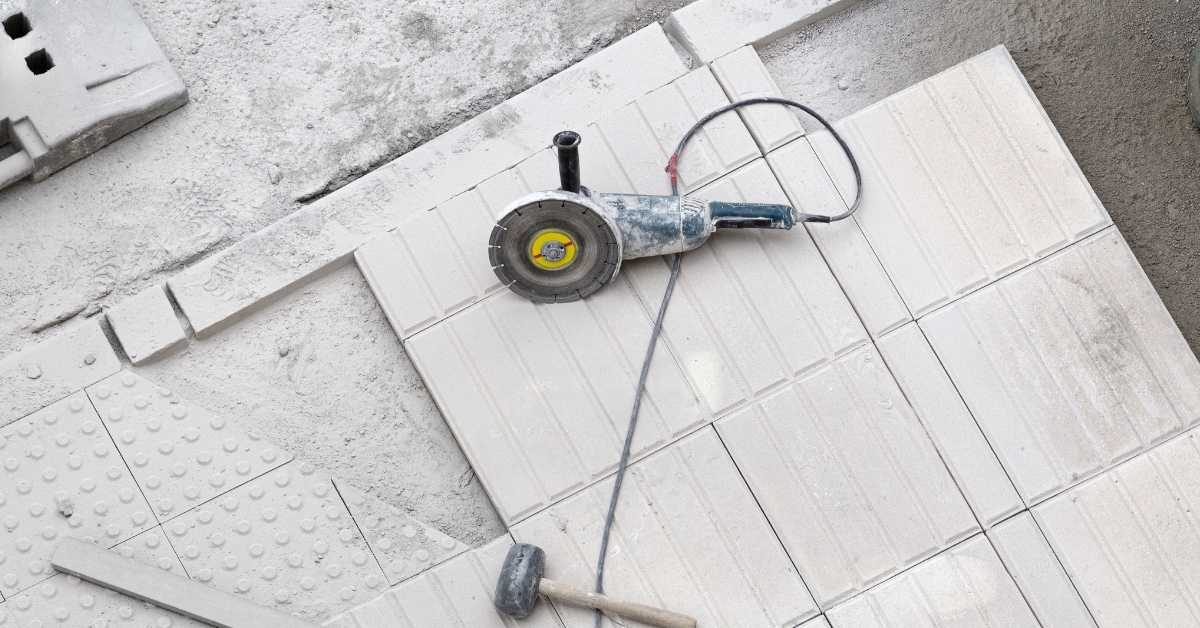
- Angle grinder with diamond wheel: Versatile for cutting metal backer boards, mesh reinforcement, and even concrete. Use water to control dust.
- Rotary tool with diamond blade: Perfect for intricate cuts and trimming small pieces on all tile materials. Slower but precise.
Quick rule: Always use the right tool for your material and cut width. Using a snap cutter on thick stone can cause breakage.
Jigs, guides, and clamping gear
Accurate cuts require the right support. Here’s what you need to ensure repeatability and safety.
- Straight fence: Essential for consistent straight cuts. Ensure it’s secure and aligned with your tile’s edge.
- Zero-clearance support: Prevents tear-out on the back of the tile. Use with wet saws and angle grinders.
- Tapered guide: Helps make consistent angled cuts. Ensure it’s secure and matches your desired angle.
- Clamps: Secure tiles to your work surface to prevent movement during cutting. Use at least two clamps per tile.
Quick rule: Never cut a tile that’s not securely clamped. Movement can cause inaccurate cuts and injury.
Finishing materials and trim options
Narrow edges can look unfinished without the right trim. Here are some options to make your slivers look intentional.
- Edge trims: Metal or plastic trims that snap onto narrow edges, hiding raw cuts and providing a finished look.
- Caulks: Flexible sealants for filling gaps between tiles and trims. Choose one that matches your grout color.
- Epoxies: Two-part adhesives for bonding metal or plastic trims to narrow edges. Follow manufacturer’s instructions for best results.
- Grout tips: For very narrow gaps, use sanded grout to fill and hide raw edges. Wipe away excess with a damp sponge.
Quick rule: Always finish your narrow edges to prevent moisture intrusion and maintain a polished look.
Jigs That Produce Repeatable, Safe Micro-Rips
Use adjustable fences, a simple scored snap guide, or a wet-saw sled to hold small cuts square and repeatable; test the jig on scrap tile first. Build jigs from plywood, aluminum angle, or hardwood and add sacrificial rails and clamping points to keep the tile steady while cutting.
Reliable jigs reduce handling and improve edge quality, which lowers the chance of chipping and rework. A flimsy or poorly aligned guide will produce inconsistent slivers and cost you material and time.
Adjustable straight-edge rip jig
A simple, adjustable fence is key for accurate, repeatable rips. Here’s how:
1. Base and Fence: Use a sturdy base (like plywood) and attach a straight edge (aluminum or wood) as the fence.
2. Adjustability: Add adjustable supports (like screws with wing nuts) to move the fence for narrow cuts.
3. Locking: Tighten the supports once you’ve set your cut width to keep it steady during cutting.
Wet-saw micro-rip sled
A sled or fence accessory for your wet saw helps support small pieces and reduces kick and vibration when cutting slivers:
1. Design: A simple platform with a slot for the blade, supported by adjustable legs to fit your saw.
2. Material: Use non-slip material (like rubber) on top to keep tiles in place.
3. Adjustment: Fine-tune the sled’s position to match your cut line and secure it before cutting.
Low-profile scoring and snap guides
A scoring guide for softer tiles lets you use a controlled score-and-snap approach, avoiding kerf loss and chipping:
1. Scoring Wheel: Attach a small, sharp wheel (like a router bit) to score the tile’s surface.
2. Guide: Create a low-profile guide that keeps the scoring wheel at a consistent depth and position.
3. Snapping: After scoring, apply even pressure along the scored line to snap the tile cleanly.
Alternative Methods That Produce Better-Looking Results
Consider trim pieces, reveal strips, mosaic inserts, or moving a grout line to hide or eliminate slivers instead of forcing micro-cuts. Lay out these options against the room’s look and transition points to see which treatment reads as intentional.
Alternatives often give a cleaner, more durable outcome and can upgrade the final appearance without delicate cutting. Forcing very thin tiles into place risks breakage and can make the installation look like an afterthought.
Using trim, metal or PVC reveals, and expansion profiles
When dealing with tiny tile slivers, sometimes the best solution is to hide them altogether. This is where trim, metal or PVC reveals, and expansion profiles come in handy.
Trim pieces can be installed along edges to cover up thin cuts. They not only mask these narrow pieces but also add a decorative touch to your tiling job. Choose from various materials like wood, metal, or PVC depending on your project’s aesthetic.
Expansion profiles are another great way to hide slivers while adding durability at the edges. These strips expand and contract with temperature changes, preventing cracks from forming in your tiles over time. They’re particularly useful around doors, windows, and other areas prone to movement.
Designing a mosaic or accent border instead of a sliver
Rather than trying to hide thin cuts, why not turn them into a design feature? By creating a mosaic or accent border with your leftover tiles, you can avoid awkward narrow pieces and add visual interest to your project.
For a mosaic border, use small tile pieces in various colors and patterns. You can create intricate designs or keep it simple – either way, it’s an effective way to repurpose those tiny slivers.
An accent border is another option. Choose a contrasting color or material for the last row of tiles. This creates a bold, intentional transition that draws attention away from any thin cuts and adds a stylish touch to your tiling job.
Filling and finishing techniques to hide imperfect slivers
Even with careful planning, sometimes thin cuts can still look awkward. In these cases, filling and finishing techniques can help smooth out tiny discrepancies and produce a professional appearance.
Epoxy fills are particularly useful for hiding imperfections in grout lines. Apply the epoxy to the grout line, let it cure, then sand and seal it for a seamless finish. You can even color the epoxy to match your grout for an extra touch of customization.
Colored grout is another option. By using a colored grout instead of standard white, you can help blend any thin cuts into the overall design. Additionally, caulk blends can be used to fill small gaps and create a smooth transition between tiles and other surfaces.
Step-by-Step Technique: Measuring, Marking, and Cutting Tiny Slivers
Measure twice, mark clearly, make a test cut on scrap, then clamp and cut the actual piece with steady feed and light pressure. After the cut, check the fit dry on the floor or wall before you spread any adhesive or mortar.
Following a repeatable sequence prevents wasted pieces and surface damage, and gives you a chance to adjust before committing. Rushing the order or skipping a test fit commonly leads to chipped edges and wasted tiles.
Step-by-Step Process
This section guides you through the practical steps of measuring, marking, and cutting tiny tile slivers safely and efficiently.
- Preparation: Gather tools, wear safety gear (gloves, goggles), clear workspace. Why: Safety first, clear space for precision work.
- Dry-fit tiles: Check fit before committing to adhesive. Why: Ensures slivers fit perfectly, prevents costly mistakes.
- Main cut: Use chosen tool (wet saw, snap cutter) following specific steps below. Why: Different tools require different techniques for best results.
- Edge finishing: Sand, hone, or trim cut edges as per instructions below. Why: Prevents chipping, ensures a smooth finish.
- Cleanup and final check: Wipe workspace, inspect slivers for any damage. Why: Keeps workspace tidy, ensures all slivers are usable.
Precise measuring and marking for repeatability
Accurate measurement and marking ensure consistent sliver widths across multiple tiles. Here’s how:
Use a tile cutter or wet saw to create a template piece with the desired sliver width. Why: Ensures all slivers are identical.
Mark each tile using the template, a straight edge, and a pencil. Why: Provides a clear guide for cutting.
Use spacers to maintain consistent grout lines between tiles. Why: Ensures even spacing, professional-looking finish.
Cutting steps for each tool category
Different tools require different cutting techniques to minimize breakage. Here’s how:
- Wet saws: Secure tile, use appropriate blade, feed slowly away from you. Tip: Keep water flowing to prevent overheating.
- Snap cutters: Score both sides, apply even pressure, snap along score line. Tip: Use a straight edge for accurate scoring.
- Grinders: Use a diamond blade, secure tile, feed slowly. Warning: Sparks may fly; wear safety gear.
- Rotary tools: Use a cutting wheel, secure tile, feed slowly. Tip: Start with lower speed, increase as needed.
Edge finishing and blending into the installation
Finishing cut edges ensures a smooth, professional look. Here’s how:
Sand or hone edges using fine-grit sandpaper or a honing stone. Why: Removes sharp edges, prevents chipping.
Seal edges with a tile sealant to prevent moisture absorption. Why: Prevents staining, maintains appearance.
Check visual alignment: Ensure slivers fit perfectly with adjacent tiles and grout lines. Tip: Use a level or straight edge for reference.
Material Specs, Blade/Bit Matching, and What to Verify
Match the blade or bit type to the tile material; verify compatibility with the tile maker’s recommendations, the blade label, or the tool manufacturer’s data sheet. Confirm whether you should use wet cutting, a continuous-rim blade, or a segmented wheel for the material you have.
Using the right cutting media keeps edges clean and prolongs blade life, and it reduces the risk of edge fractures. Guessing at blade choice increases chipping and can damage both tile and tool.
Matching Blade Type to Tile Composition
Choosing the right blade for your tiles is crucial. It’s all about matching the blade’s strength and design to your tile’s material and fragility.
Brittle tiles: Go for continuous-rim blades. They’re gentler on fragile edges, reducing chipping. For these, a low bond level (e.g., 3/16″ or 1/4″) works best as it provides more cutting points.
Softer substrates: Here, you can use segmented blades. They’re tougher and can handle the extra pressure. A higher bond level (e.g., 1/2″ or 5/8″) is suitable for these.
What to Check on Specs and Equipment Compatibility
Before you start cutting, make sure your blade, bit, and tool are all compatible. Here’s a quick checklist.
- Blade/bit fit: Ensure the arbor hole matches your tool’s spindle size. Wrong size = wobbling, poor cuts.
- Tool RPM suitability: Check if your tool’s speed (RPM) suits your blade/bit. Too slow/fast = poor cuts, blade damage.
- Wet/dry rating: Ensure your blade is rated for wet cutting if you’re using a wet saw. Wrong rating = blade failure, safety hazard.
- Max material thickness: Confirm your tool can handle your tile’s thickness. Too thick = tool strain, poor cuts.
- Blade teeth count: More teeth (e.g., 54T) for fine cuts; fewer teeth (e.g., 18T) for rougher materials.
- Bit size: Ensure it matches your tile’s thickness. Wrong size = poor fit, installation issues.
- Tool power: Check if it’s enough for your job. Underpowered tool = poor cuts, tool strain.
- Blade/bit material: Match to your tile. Carbide-tipped for ceramics; diamond for stone/glass.
Quick rule: Always consult tool and blade documentation when unsure. It’s your best guide.
Troubleshooting, Visual Checkpoints, and When to Rework
Watch for common signs: feathered edges, binding, variable widths, and hairline fractures; compare the tile to a scrap sample and measure seam widths as you go. If a sliver has uneven thickness or chips that won’t be hidden by grout or trim, plan to re-cut or substitute a trim solution.
Quick checks during installation let you catch problems before adhesive sets and save tiles. Ignoring visible defects or marginal fits almost always leads to rework and a poorer final appearance.
Common problems and quick fixes
Use this checklist when you’re facing issues while cutting tiny tile slivers.
- Chip-outs: Reduce feed pressure, use a slower speed, or switch to a sharper blade.
- Rough edges: Sand the edge gently with fine-grit sandpaper after cutting.
- Sliver breakage: Support the cut better using clamps or a backing board.
- Uneven widths: Double-check your measuring and marking. Re-measure if necessary.
- Binding blade: Clean the blade, check for debris, and ensure proper lubrication.
- Wobbling cut: Ensure your tool is properly calibrated and adjusted.
- Cracked tile: Check for internal cracks or weaknesses before cutting. Discard if necessary.
- Edge fractures: Use a scoring tool to create a weak line before cutting, then apply gentle pressure.
Quick rule: Address these issues promptly to prevent further damage and maintain cut quality.
On-site visual checkpoints before setting tile
Before applying adhesive, use this checklist to ensure your tiles are acceptable.
- Gap uniformity: Check gaps between tiles with a spacing tool. Ensure they’re even and consistent.
- Edge smoothness: Inspect tile edges for rough spots or chips. Sand if necessary.
- Alignment with grout lines: Ensure tiles align properly with adjacent ones and any existing grout lines.
- Trim fit: Check that trim pieces fit snugly against the wall and tile edges.
- Color variation: Inspect for color inconsistencies. Rearrange if necessary to balance variations.
- Broken tiles: Look for any cracks or breaks. Replace if found.
- Proper spacing: Ensure tiles are spaced correctly from walls and other obstacles.
Quick rule: A thorough visual check ensures a professional-looking finished product.
Deciding when to scrap a piece or change the approach
Use this checklist to determine if a sliver should be re-cut, replaced, or turned into a design element.
- Severe chipping: If a tile chips severely during cutting, it’s best to replace it.
- Irregular shape: Consider using this piece as an accent or border instead of trying to match others.
- Inconsistent thickness: Re-cut the sliver if possible. If not, consider replacing it.
- Obvious defects: Inspect tiles for visible defects before cutting. Replace if necessary.
- Difficult to cut: If a tile is hard to cut due to composition or wear, replace it.
- Wasted material: If re-cutting wastes too much material, consider using this piece as a design element.
- Time-consuming cuts: If cutting takes significantly longer than others, reassess your approach.
Quick rule: Knowing when to scrap a piece or change the approach saves time and maintains aesthetic quality.
Conclusion
Tiny slivers look easy to chase, but they punish quickly if you skip the right jig, the right setup, or the right safety checks. Keep the focus on precise cuts, safe handling, and a finish that lasts—that’s what keeps the project durable and looking clean.
Before you cut, verify your jig is set, confirm blade or bit depth matches the material, mark the line clearly, clamp the work solidly, and wear your PPE. Test a scrap piece first, check for square and consistency, then cut slowly with full control and dust control in place.
Avoid rushing, mis aligning the blade, or skipping setup steps. Do not cut without securing the work, without eye and hand protection, or without unplugging power when you adjust hardware. Keep a tidy work area, verify the blade/bit match to the material, and recheck the visual checkpoints before every pass.
If you’re dealing with odd materials, large runs, or the joint or substrate looks compromised, call a pro rather than forcing it. When you stay deliberate, you’ll finish with safe work, fewer mistakes, and results that last. Stick with the basics, and you’ll get there with less stress and more pride.
FAQ
What causes tiny tile slivers and how can I prevent them?
Toulines and brittle tiles can leave tiny slivers if the blade or bit isn’t aligned, or if the tile isn’t supported well. Always verify board support and blade guidance before cutting. Check the manufacturer instructions for recommended setup and what to avoid in your tile type.
Which jigs produce repeatable, safe micro-rips and how should I set them up?
Use a jig that guides the cut consistently and keeps the tile flat. Follow the jig’s instructions for fence alignment, clamping pressure, and blade exposure. If unsure, consult the label or manufacturer guidance and confirm local rules or recommendations.
What alternative methods give better-looking results without risking safety?
Consider scoring and snapping for straight, small cuts or using a dry-cutting approach with proper dust control. Always wear PPE and use appropriate dust containment. If you’re unsure about a method, compare with the tile’s documentation or ask at the supplier for safe options.
How do I judge a cut and know when to rework it?
Look for clean edges and no loosened glaze or chipping near the cut. If the line is rough or the tile shows micro-fractures, recheck alignment, support, and blade condition. When in doubt, verify with the tile’s manufacturer instructions or product label before proceeding.