
Introduction
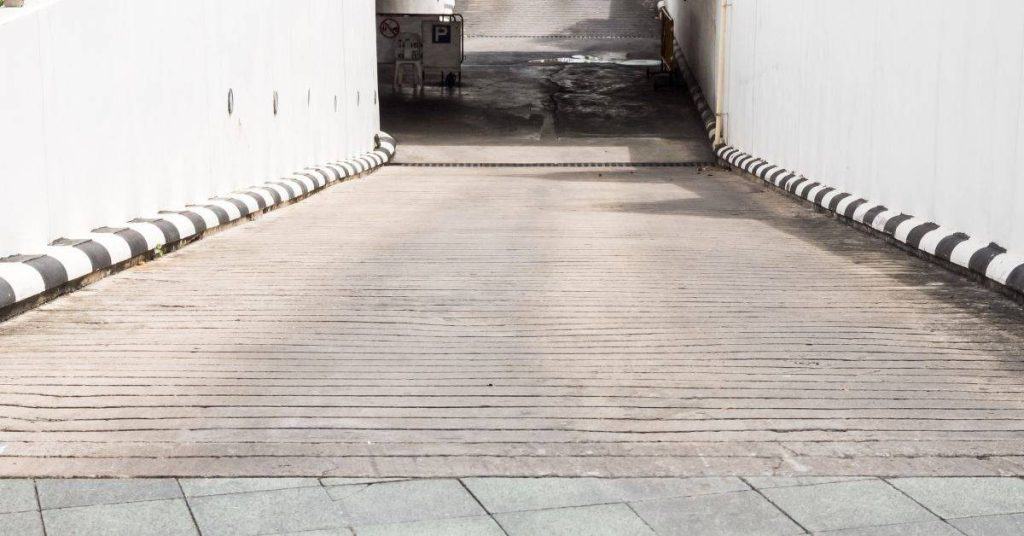
A concrete curb ramp is a sloped transition that lets you roll or walk from the sidewalk down to the street grade with fewer tripping hazards. This DIY intro helps you plan and build a simple ramp safely, without specialized equipment. Check your local requirements and ADA guidance to understand what’s expected for accessibility and safety before you pour.
Think about the slope, cross slope, and how wide the path needs to be, and plan for landings and doorway clearances. Use that as a checklist while you measure, form, and pour, and verify conditions with product labels and manufacturer instructions before committing. If you’re unsure about exact numbers, stay within safe ranges and ask a pro or your local building authority what to check.
Key takeaways
- Verify ADA and local codes before starting; curb ramps require compliant slope and width.
- Plan for proper cross slope to drain water and reduce tripping hazards.
- Ensure clear width matches accessibility guidelines, including doorways at landings.
- Use staged construction with good formwork, checks for level and drainage.
- Maintain safety: wear PPE, avoid loose debris, and secure work area.
- Budget time realistically; consider permits, inspections, and weather delays.
Table of Contents
- Introduction
- Key takeaways
- Overview — When and Why You Need a Curb Ramp
- Planning, Permitting, and Site Assessment
- ADA and Code Dimensions — Slope, Cross Slope, Clear Width, and Landings
- Tools and Materials Checklist — Material Specs and Standards Explained
- Step-by-Step Construction Process (DIY)
- Safety, Common Mistakes, and a Quick ADA Compliance Checklist
- Costs, Timeframe, and When to Hire a Professional
- Maintenance, Troubleshooting, and Wet-Weather Concerns
- Conclusion
- FAQ
Overview — When and Why You Need a Curb Ramp
A curb ramp is triggered by situations that put pedestrians at risk or slow people with mobility aids. These include new sidewalk installations, major repairs, or alterations in the public right-of-way. Your local rules may shape whether a ramp is recommended or required.
Ramps matter for accessibility, safety, and liability. They help people with wheelchairs, strollers, or limited mobility move smoothly and reduce tripping hazards. Verify what the law and guidelines require in your area and note any public-right-of-way approvals or utility coordination that may apply.
Where curb ramps are typically required
Curb ramps are usually needed at specific locations to ensure accessibility and safety. Here’s where you’ll typically find them:
Crosswalks: These are the most common places for curb ramps. They allow pedestrians, wheelchair users, and those with strollers to cross streets safely.
Bus Stops: Curb ramps at bus stops ensure that everyone can board and exit public transportation easily.
Entrances: If your property has an entrance from a sidewalk, you’ll likely need a curb ramp. This includes businesses, schools, and residential properties with accessible entrances.
Public vs. private responsibilities
Understanding who’s responsible for installing and maintaining curb ramps is crucial. Here’s a breakdown:
Homeowners & Businesses: If the sidewalk abuts your property, you’re typically responsible for maintaining the curb ramp. This includes private driveways and entrances.
City Agencies: Municipalities are usually responsible for public sidewalks and crosswalks. They’ll maintain or require homeowners/businesses to maintain these areas according to local rules and ADA standards.
Before starting any work, contact your local authorities to confirm responsibilities and obtain necessary permits. This can help avoid potential liability issues down the line.
Planning, Permitting, and Site Assessment
Define the curb ramp scope and objectives before you start. Focus on location relative to sidewalk edges, driveway clearance, and pedestrian pathways. Identify potential conflicts with landscaping or utilities early.
A solid site survey sets the stage. Measure sidewalk width, curb height, ramp length and rise, and slope targets. Map nearby obstructions and plan a safe work zone that protects pedestrians and services.
How to assess your existing sidewalk and curb
Before you start, measure your current sidewalk and curb. This helps ensure your new ramp fits perfectly.
Sidewalk width: Measure from edge to edge at the widest point.
Curb height: Measure from the ground level to the top of the curb. Be sure to account for any variations due to settling or damage.
Slope of street: Check if your sidewalk slopes towards or away from the street. This affects how you’ll build your ramp.
Permits, approvals, and notifications
Check with your local municipality for permits before starting any work. Here’s what to expect:
1. Call 311 or your public works department. They’ll guide you through the process and tell you which forms to fill out.
2. Gather necessary documents. This might include a site plan, plot map, or other paperwork showing where your ramp will go.
3. Submit your application. Follow their instructions for submission and payment. Approval can take several weeks, so plan accordingly.
ADA and Code Dimensions — Slope, Cross Slope, Clear Width, and Landings
key dimensional targets to verify include ramp run slope, surface cross slope, clear width, and landing sizes. Use practical ranges to plan while you check the actual codes. Always verify against the applicable standards in your area.
Consult the ADA Standards for Accessible Design and any local amendments. Local codes can modify requirements, so field verification is essential. Check with the building or transportation authority for the exact wording that applies to your project.
Running Slope and Cross Slope Requirements
When planning your curb ramp, two key slopes come into play: running slope and cross slope. Let’s break down each:
Running Slope: This is the steepness of the ramp as you move along it. ADA standards cap this at 1:12, which is around an 8-8.5% grade. Use a level or a digital angle finder to measure and maintain this gentle slope.
Cross Slope: This is the side-to-side tilt of the ramp surface. ADA limits this to no steeper than 1:50, about a 2% grade. A long, straight level or laser level will help you keep this within spec.
Clear Width, Flares, and Edge Protection
The clear width of your ramp is crucial for accessibility. ADA recommends a minimum of 36 inches, but 42-48 inches is better if space allows for two-way traffic.
Curb flares help guide pedestrians onto the ramp safely. They should be at least 12 inches wide and extend beyond the ramp’s running slope.
Edge protection and detectable warnings are vital safety features. Edges prevent tripping, while detectable warnings alert visually impaired individuals to the ramp’s presence using textured surfaces or contrasting colors.
Landings and Doorways at Landings
Landings are flat areas at the top and bottom of your ramp, providing a safe transition space. ADA recommends minimums of 60×60 inches, but larger landings may be necessary based on door swings or other obstructions.
If your ramp leads to a doorway, ensure the landing is at least 48 inches deep from the face of the door. This allows for clear door swing and user safety. If space is tight, consider an offset or staggered ramp design.
Always measure in context, accounting for transitions and any grade changes. A few inches here or there can make a big difference in safety and usability.
Tools and Materials Checklist — Material Specs and Standards Explained
Gather essential hand tools, a mixer or wheelbarrow, screed, trowels, float, broom, level, measuring tape, rebar or mesh, and PPE. Plan setup to minimize trip hazards during installation. Keep the workspace tidy as you go.
Know the material specs you will check. Concrete strength, air entrainment, cement type, aggregate size, and curing conditions all matter. Note any color or density preferences and how moisture affects curing outdoors.
Concrete mix, reinforcement, and detectable warnings
Use this checklist before mixing concrete, installing reinforcement, or applying finishes to ensure your project is strong, safe, and compliant.
- Check concrete mix design: Verify it suits your project’s needs (e.g., M25 for driveways, C30/37 for foundations).
- Inspect aggregates: Ensure they’re clean, dry, and within size limits (e.g., 10-20mm for most projects).
- Check cement type: Use the right type (e.g., OPC for general use, PPC for economy).
- Verify water-cement ratio: Aim for 0.5-0.6 to balance strength and workability.
- Check reinforcement options: Choose between rebar (for high loads) or wire mesh (for slabs).
- Inspect rebar/mesh: Ensure it’s the right size (e.g., 10mm for most rebar, 6-8mm for mesh), and check for bends/cuts.
- Check spacing of reinforcement: Follow design specs or use standard spacers (e.g., 200mm centers for mesh).
- Inspect detectable warning surfaces: Ensure they comply with ADA guidelines (e.e., 2″ domes, contrasting color).
- Check slip-resistant finish: Apply if needed (e.g., exposed aggregate for driveways) to prevent slips.
Quick rule: Always follow mix designs and reinforcement spacing as per your project’s engineer or local building codes. Skipping these can lead to weak, unsafe structures that may need expensive rework.
Tools and equipment for a DIY install
Before you start mixing concrete, make sure you have all the necessary tools and equipment. This checklist will help you verify everything is on site and in working order.
- Tape measure: Check it against a known length to ensure accuracy. A miscalculated measurement can lead to insufficient concrete or costly rework.
- Level: Verify it’s functioning by checking on a flat surface. A wonky level can result in an uneven slab, causing tripping hazards and aesthetic issues.
- Shovel: Inspect for any damage or dull edges. A good shovel is essential for mixing and placing concrete efficiently.
- Wheelbarrow: Ensure it’s sturdy and the wheel spins freely. A wobbly wheelbarrow can cause spills, wasting material and creating a mess.
- Concrete mixer (optional): If renting, check it works before starting. A faulty mixer can lead to improperly mixed concrete, reducing its strength and durability.
- Formwork: Verify it’s sturdy and the right size for your project. Poor formwork can result in a misshapen slab or even collapse during pouring.
- Vibrating screed (optional): If using, ensure it’s in good working order. A vibrating screed helps eliminate air pockets and ensures a smooth surface, improving the final finish.
- Finishing trowel: Check for nicks or dull edges. A quality trowel is crucial for achieving a smooth, professional-looking finish.
Quick rule: Always check your tools and equipment before starting any task. A few minutes of inspection can save hours of rework and prevent costly mistakes.
Step-by-Step Construction Process (DIY)
Start with prep and site assessment to confirm curb location, slope, and utility considerations. Plan for smooth, ADA-compliant transitions at every grade change. Identify critical tripping-hazard transitions early.
Then move through materials, tools, and a dimensional plan. Set stakes, install forms, prepare the subgrade, and maintain a proper slope. Pour in layers if needed and finish to minimize trip hazards at connections to sidewalk and street.
Step-by-Step Process
The following is a clear, numbered sequence of practical steps for adding a concrete curb ramp at the sidewalk. This guide will help you prepare, construct, and finalize your project safely.
- Preparation: Verify curb location, slope, grade breaks, existing utilities, drainage, and required permits or approvals. Identify critical tripping-hazard transitions and plan for smooth, ADA-compliant transitions at every change in grade.
- Materials and Tools: Choose a concrete mix with appropriate strength, set ramp width and thickness, plan controlled joints and expansion gaps, prepare form boards, rebar or wire mesh, beveling edges, and curing methods suitable for outdoor exposure. Gather all necessary tools as listed in the materials checklist.
- Excavation and Forming: Remove existing curb safely, excavate to the required depth considering subgrade strength, and compact the base thoroughly. Build stable forms with proper slope (max 1:12 ADA limit where applicable) using prepared form boards.
- Pouring Concrete: Mix concrete according to manufacturer’s instructions, pour in layers if needed, strike off and finish to avoid trip hazards. Ensure smooth transitions at sidewalk, ramp, and street connections.
- Finishing Touches: Create flush, beveled transitions between ramp, sidewalk, and driveway; implement control joints; broom or trowel finish that reduces slip; address edge and lip hazards with appropriate chamfers. Inspect your work for any imperfections or trip hazards before moving on to curing.
- Curing Plan: Follow curing timelines to prevent cracks and trip hazards. Keep the concrete moist and protected from extreme temperatures during the initial curing period as specified by the concrete mix manufacturer.
Demolition, excavation, and forming the ramp
Safely remove existing curb using a sledgehammer or sawzall, ensuring no live utilities are damaged. Excavate to a depth of at least 6 inches below the finished grade, considering subgrade strength and compaction requirements.
Compact the subgrade thoroughly using a plate compactor to ensure stability and prevent settling over time. Pro tip: Moisten the subgrade slightly before compacting for better results.
Build stable forms using prepared form boards, ensuring they are level, square, and properly braced. Set the forms at the desired slope (max 1:12 ADA limit where applicable) and secure them in place with stakes or screws. Ensure proper drainage is considered during excavation and forming to prevent water buildup behind the ramp.
Pouring, finishing, and curing concrete
Mix concrete according to manufacturer’s instructions, using a mixing ratio of one part water to two parts cement. Pour the concrete in layers, not exceeding 4 inches thick, to ensure proper consolidation and avoid segregation.
Strike off and finish the concrete surface using a magnesium float or bullfloat, ensuring smooth transitions at sidewalk, ramp, and street connections. Bevel edges and corners to prevent trip hazards and create a non-slip surface by brooming or troweling the finish.
Cure the concrete properly to prevent cracks and trip hazards. Keep the concrete moist using plastic sheeting or sprinklers for the first 7 days, followed by a gradual exposure to air over the next few weeks as specified by the concrete mix manufacturer. Pro tip: Avoid walking on the ramp during the initial curing period to minimize damage.
Transition details to avoid tripping hazards
Blending ramp edges into the sidewalk and roadway smoothly is crucial for preventing trip hazards. Here are some mistakes to avoid:
- Avoid abrupt level changes: Ensure smooth transitions between the ramp, sidewalk, and driveway by creating flush, beveled edges.
- Use chamfers or fillets where needed: Bevel corners and edges to prevent tripping hazards. A 45-degree angle is typically sufficient for most applications.
- Check for trip hazards: Inspect your work for any imperfections, such as high spots, low spots, or rough edges that could cause someone to trip.
- Avoid excessive slope: Ensure the ramp’s slope does not exceed 1:12 (ADA limit) to maintain accessibility and prevent tripping hazards.
By following these guidelines, you can create a safe, accessible curb ramp that minimizes the risk of tripping hazards for all users.
Safety, Common Mistakes, and a Quick ADA Compliance Checklist
Prioritize on-site safety with proper PPE, secure work areas, edge protection, and weather awareness. Prevent slips during formwork and pour by planning safe transitions. Keep the site organized to avoid trips.
Avoid typical DIY missteps such as incorrect slope or width, inadequate form support, poor drainage, and skipping curing. Use the quick ADA checklist to verify width, slope, landings, and non-slip surfaces before opening the ramp to the public.
On-site safety precautions and traffic control
Before you start, ensure the site is safe for both workers and pedestrians. Use this checklist to protect everyone.
- PPE: Hard hat, safety glasses, gloves, and steel-toed boots.
- Shoring/form safety: Inspect forms and shores before pouring. Replace or reinforce if needed.
- Edge protection: Install edge protection to prevent falls.
- Fall prevention: Use fall arrest systems for heights over 6 feet.
- Traffic control: Set up barriers and signs to redirect pedestrian traffic.
- Weather check: Avoid pouring in rain or extreme temperatures. Concrete won’t set properly, leading to cracks and weak spots.
- Tool inspection: Check tools for damage before use. Replace if necessary.
- Emergency plan: Have a first aid kit on-site and know emergency contact numbers.
Quick rule: Always prioritize safety over speed. A safe job is a good job.
Common DIY mistakes and how to avoid them
Knowing what to look out for can save you time, money, and headaches. Here’s a checklist of common mistakes and their fixes.
- Improper slope: Ensure ramp has a gentle slope (1:12 max). Too steep causes tripping hazards.
- Inadequate width: Minimum 36 inches clear. Narrower ramps cause congestion and accidents.
- Poor drainage: Slope ramp slightly away from buildings to prevent water pooling, which can freeze or erode the concrete.
- Rough transitions: Ensure smooth transitions between sidewalk, landing, and ramp. Sudden changes in level cause trips.
- Weak finish: Use a broom finish or non-slip surface treatment to prevent slips.
- Inadequate curing: Allow concrete to cure properly (7 days minimum) for strength and durability.
- Skipping jointing: Cut control joints every 10 feet to prevent random cracking.
Quick rule: Take your time. Rushing leads to mistakes that cost more in the long run.
Quick ADA and quality checklist to verify
Before opening the ramp, ensure it meets ADA standards and is of high quality. Use this checklist as a final check.
- Slope: Maximum 1:12 slope. Too steep violates ADA guidelines.
- Cross-slope: Maximum 1:48 cross-slope. Excessive cross-slope causes instability.
- Clear width: Minimum 36 inches clear. Narrower ramps violate ADA standards.
- Landing size: Landings should be at least as wide and as long as the ramp they serve.
- Detectable warnings: Install detectable warnings at ramp edges to alert visually impaired users.
- Surface condition: Check for cracks, voids, or other defects. These can cause trips or falls.
- Handrails/guardrails: If needed, ensure they’re secure and meet ADA height requirements (34-38 inches).
Quick rule: Always double-check your work. A final inspection ensures a quality job.
Costs, Timeframe, and When to Hire a Professional
Understand the main cost drivers such as ramp dimensions, curb integration, subgrade prep, drainage, material choices, and permit fees. Expect scheduling impacts from planning, approvals, and weather. Build in some flexibility for delays.
Decide which tasks you can manage as a DIY and which require a licensed contractor. Consider professional help for significant changes, complex grading, drainage issues, or when inspectors require licensed work.
Cost factors and budgeting tips
The cost of adding a concrete curb ramp varies depending on several factors. Here’s what to consider when budgeting:
Permits: Check if you need permits. Some areas require them, and fees can range from $50 to $200.
Demolition and Excavation: Removing old concrete or asphalt and digging for the ramp base can add costs, especially if you hire help.
Materials: Concrete mix, reinforcement, and detectable warnings are key materials. Expect to spend around $100 – $200 per cubic yard of concrete, plus $5 – $15 per linear foot for detectable warnings.
Labor: If you hire help for pouring or forming, budget $30 – $60 per hour. Also, consider contingencies (10-25%) for unexpected issues and staged payments tied to inspections.
When the job is beyond DIY
While many aspects of adding a curb ramp can be done by a confident homeowner, there are red flags indicating you should hire a professional:
Complex Grading or Soil Conditions: If your site has significant grading issues, unstable soil, or requires heavy equipment for excavation, it’s best to call in the pros.
Utilities and Drainage: If there are underground utilities near your project area or you need to address drainage issues, hire a professional to avoid damages and ensure safety.
ADA Compliance Risk: Ensuring your ramp meets ADA guidelines can be complex. If you’re unsure about slope, width, or other requirements, consult with an expert.
Required Permits or Heavy Equipment Needs: If local regulations require permits and inspections, or if you need heavy equipment like a concrete pump, it’s time to hire a licensed contractor.
Maintenance, Troubleshooting, and Wet-Weather Concerns
Set up a routine inspection plan to catch wear, cracks, or joint movement early. Note any settlement signs and address them before they widen. Keep a simple maintenance log for follow-up actions.
Address cracking, spalling, and drainage issues with sealing, patching, or resurfacing as needed. Ensure proper cross-slope and plan for non-slip finishes or treatments, especially after rain, to prevent slips.
Inspecting and maintaining curb ramps
Regular inspection is key to keeping your concrete curb ramp safe and functional. Here’s a simple schedule and some steps to help you catch any issues early:
Monthly Checks: Quickly inspect the ramp for any obvious signs of wear, like uneven surfaces or displaced detectable warnings.
Quarterly Inspections: Get up close with a flashlight. Look for hairline cracks, settlement signs (like dips or raised edges), and uneven joints. Check that the curb faces are still properly aligned.
If you spot any issues, address them promptly to prevent further damage. Keep a simple log of your inspections and actions taken.
Drainage, ice, and wet-condition mitigation
Proper drainage is crucial to prevent water from pooling on the ramp. Here’s how to maintain it:
Regularly check that gutters are clear of debris and that surface drainage is working as intended. If water pools near the curb, plan for fixes like regrading or installing drains.
For icy conditions, consider these strategies:
Prevention: Apply sand or salt to melt ice before it forms. You can also use anti-icing liquids that prevent ice from bonding to the surface.
Maintenance: Keep the ramp clear of snow and ice throughout winter.
Conclusion
Clear, durable curb ramps come down to careful planning, solid form work, and strict adherence to slope and width requirements so people don’t trip or slip and you don’t end up with costly rework. Stay focused on safety, proper Drainage, and a clean finish that looks like it belongs.
First, lock in a simple checklist as you go: confirm permits and site rules, measure and flag the correct slope and cross slope, verify clear width and landing areas, assemble tools and materials, set up forms, pour or place concrete, cure properly, and test the finished ramp for smooth, non-tripping transitions and ADA-friendly dimensions. Do the work in small, daylight sessions, protect the work area, and keep the surface free of debris during curing.
Two to three common mistakes to avoid are skipping proper slope or cross slope, ignoring clear width and landing dimensions, and rushing the cure or skipping a test after set. A simple safety rule is to acclimate materials to shade or cool temps, keep everyone off the forms until they’re set, and use PPE at all times. Do not cut corners on form stability, edge support, or drainage, and never pour in bad weather or on unstable ground.
If the job involves uncertain soil conditions, poor access, complex permitting, or signficant slope changes, call in a professional rather than pushing ahead. When in doubt, err on the side of caution and get a second pair of eyes on the plan. Stay disciplined, work steady, and you’ll finish with a ramp that is safe, solid, and ready for years of use.
FAQ
What defines ADA compliance for a curb ramp, and where do I start checking?
ADA requirements vary by location, so start by checking local rules and the curb ramp manufacturer instructions. Look for how the ramp meets surface conditions, accessibility paths, and any posting requirements. If in doubt, rely on the labels and datasheets on the products you choose and confirm with local authorities.
How do I ensure proper slope and cross-slope without guessing?
Don’t guess the angles. Compare your planned ramp against the product specs and any local guidance. If you’re unsure, ask the supplier for slope guidance and verify against the site measurements and intended use before pouring.
What about clear width and landings at doors or transitions?
Clear width is not just about the ramp itself; account for any door swings or doorway thresholds. Check the door and landing dimensions in the product docs and confirm that your layout leaves a safe, unobstructed path. When in doubt, measure and re-check with the installation instructions.
Should I add handrails or edge protection, and where do I start?
Handrails and edge protection depend on how people move through the area and the ramp length. Review the manufacturer recommendations and local guidance for handrail height, grip, and edge guards. If you’re unsure, plan for protective edges and consult the instructions before installing.