
Introduction
Air sealing drywall under rockwool batt insulation means closing gaps around the drywall so air can’t slip through the wall assembly.
It’s about finding where warm air leaks and sealing them before finishing the wall; you want a tight, continuous barrier that reduces drafts and keeps conditioned air in the room. Note: work safely and check what to seal with your materials and local guidelines, since different products behave differently in voids and against insulation.
Key takeaways
- Poor air sealing behind Rockwool batt assemblies increases drafts and heat loss.
- Test for leaks with smoke pens or simple visual checks at outlets.
- Seal gaps around electrical boxes, penetrations, and seams with compatible caulk.
- Use compatible membranes or tapes when sealing drywall to Rockwool interfaces.
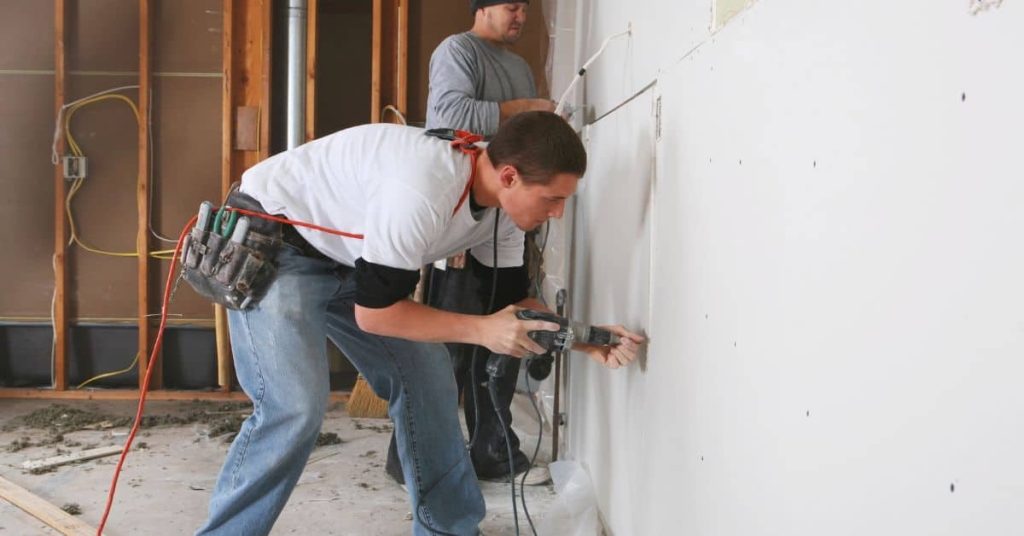
- Maintain clean work surfaces and avoid crushing rockwool during drywall installation.
- Safety reminder: shut off power when opening walls and wear PPE.
Table of Contents
- Introduction
- Key takeaways
- Why Air Sealing Under Rockwool Batts Matters
- Typical Causes of Air Leakage Behind Drywall with Rockwool
- How to Test and Diagnose Air Leakage Behind Drywall
- Materials and Methods to Seal Drywall-to-Rockwool Assemblies
- Step-by-Step Fixes for Common Problem Scenarios
- Best Practices for Installing Rockwool and Drywall to Maintain Air Control
- Safety, Code, and Cost Considerations
- Visual Checkpoints, Checklists, and Testing After Fixes
- Conclusion
- FAQ
Why Air Sealing Under Rockwool Batts Matters
Air barriers play a key role in how rockwool behind drywall behaves. They help limit convective heat loss and curb moisture migration on the warm side. Tight sealing also helps preserve the practical R-values you expect from the batt installation.
Leaks tend to form at perimeter gaps, around outlets, through stud penetrations, and at rough openings for windows and doors. Address these without compressing the rockwool to maintain thickness and drainage. Use interior sealing methods that work with rockwool, such as tapes, caulk, and gaskets, and detail joints that stay accessible for future maintenance.
How air movement defeats rockwool’s performance
Rockwool batts are great insulators, but they can’t stop convective air movement. When air flows through gaps in your drywall, it bypasses the insulation and carries heat with it.
This reduces the effective R-value of your rockwool, making your home less efficient and comfortable.
Air moving through cavities also picks up moisture from warm surfaces. This can lead to condensation and mold growth behind your drywall.
Common installation contexts and where problems arise
Air sealing issues under rockwool batts often happen in retrofits, new builds, or remodels. Here’s where to watch out:
Perimeter gaps between drywall and framing are common in all scenarios. In new builds, these can be minimized with careful installation.
In retrofits and remodels, existing structures may have irregular framing or obstacles that make sealing challenging. Outlets, fixtures, and penetrations through studs are also common trouble spots.
Typical Causes of Air Leakage Behind Drywall with Rockwool
Root leakage paths include incomplete air barrier continuity and gaps at framing transitions. Look for misaligned corners and joints where the barrier may have thin spots. Ensure batts sit fully with no crushing along these critical edges.
Service penetrations such as electrical and plumbing openings frequently falter if not sealed properly. Top and bottom plates must be sealed to prevent vertical drafts, and batts should not be compressed to fill voids. Plan fixes that create a continuous barrier before the drywall goes up.
Framing and Drywall Attachment Faults
Misaligned studs can create gaps where air can leak. Make sure your studs are straight and properly spaced.
Recessed drywall is another common culprit. Ensure your drywall is flush with the framing to avoid gaps.
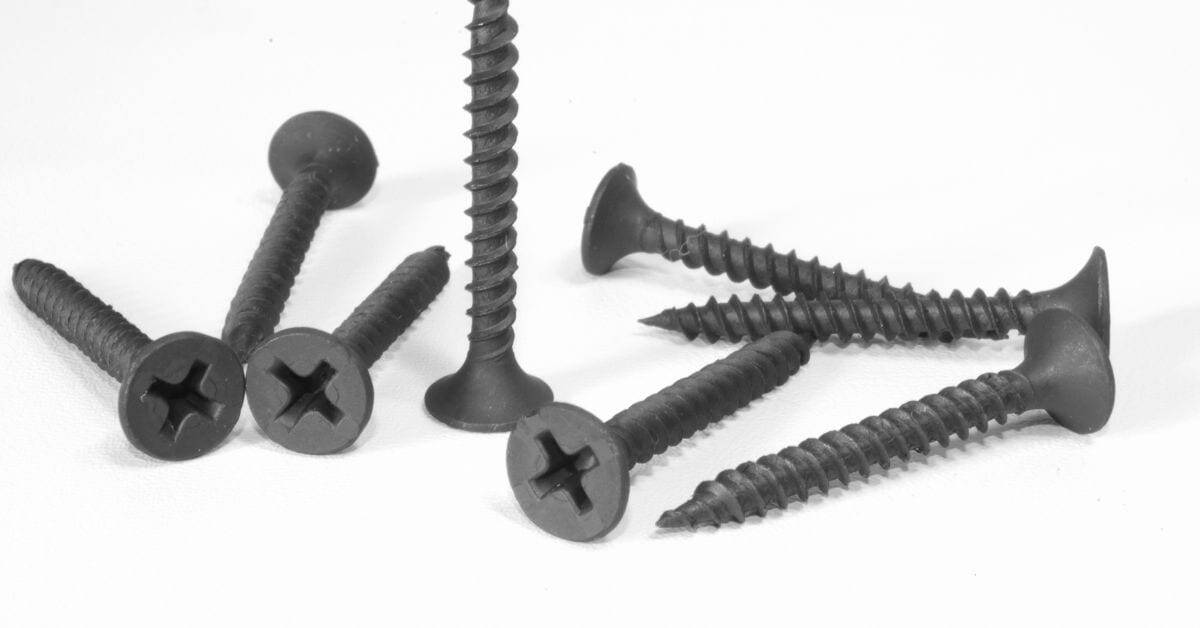
Fastener patterns also play a role. Use fasteners that allow for proper drywall attachment without creating voids or damaging the rockwool.
Service Penetrations and Junctions
Electrical boxes, plumbing, HVAC ducts, and recessed lights are all potential leakage points. Ensure they’re properly sealed with appropriate materials.
Use intumescent caulk around electrical boxes to seal gaps without compromising fire safety.
For ducts, use mastic or similar sealants to fill any voids at junctions and penetrations.
Recessed lights need careful sealing. Use foam or other appropriate materials to block air leaks around them.
How to Test and Diagnose Air Leakage Behind Drywall
Start with a visual inspection and gentle tactile checks around seams and interfaces. Look for compression, gaps, or moisture staining that signals an air path. Note any areas that feel cooler or show dew on interior surfaces.
Use a blower-door style approach to locate larger leaks behind the wall. Infrared imaging or a smoke pencil can reveal active leakage around outlets, penetrations, and rim joists. Document findings to guide targeted sealing.
Step-by-Step Process
Follow these practical steps to test and diagnose air leakage behind your drywall, ensuring a thorough inspection and accurate results.
- Preparation: Safety first! Turn off power at the main panel. Gather tools – blower door, smoke pencil, infrared camera (if available), tape measure, flashlight, and notepad.
- Visual Inspection: Start by checking drywall-rockwool interfaces for gaps, voids, moisture staining, or compression using a flashlight and tactile checks.
- Blower Door Setup: Set up the blower door according to manufacturer’s instructions. Establish baseline house pressure at 50 Pascals (Pa).
- Isolate Cavity: Seal off other openings in the house to isolate the cavity with the batt layer behind the wall/ceiling you’re testing.
- Quantify Leakage: Measure and document leakage rates (CFM50, ACH50) specific to the behind-wall region. Identify high-flow areas and prioritize fixes based on severity and ease of access.
- Smoke Pencil/Infrared: Use a smoke pencil or infrared camera to pinpoint active leakage sites around electrical outlets, penetrations, rim joists, and openings in drywall or framing.
- Pressurization Checks: Compare interior vs. exterior pressure responses while closing interior leakage paths (doors, windows, cabinets) to identify high-flow areas and their relative severity.
- Document Findings: Keep a record of locations with measured flow, leakage contribution, and ease of access for air-sealing or detailing.
Using a blower door and infrared together
Combine the power of a blower door test with an infrared camera to effectively spot air leaks behind your drywall.
First, depressurize your house using the blower door. This forces air out through any gaps or voids in the insulation, making them easier to detect.
Next, use your infrared camera to scan the walls and ceilings. Look for thermal anomalies – areas that are cooler or warmer than their surroundings. These could indicate air movement and thus, leaks.
Remember: Correlate the thermal images with the blower door readings to accurately identify and quantify air leakage sites.
Low-tech checks: smoke, hand-feel, and localized depressurization
When professional tools aren’t available, use these low-tech methods to confirm air paths behind your drywall.
Smoke Pencil: Light a smoke pencil and pass it over suspected leak areas. Watch for changes in the smoke pattern that indicate airflow.
Hand-Feel: Use your hands to feel for drafts or temperature differences along drywall-rockwool interfaces. This can help you locate gaps or voids.
Localized Depressurization: Tape a plastic sheet over an opening (like a door or window) and use a small fan to blow air into the room. Watch for the plastic to pull tight against any leaks, indicating airflow.
Materials and Methods to Seal Drywall-to-Rockwool Assemblies
Seal joints, seams, and penetrations while protecting rockwool’s performance. Focus on perimeter edges, around outlets, and at key transitions where leaks start. Avoid traps that trap moisture behind the wall.
Compare sealants, tapes, gaskets, and ADA methods that suit rockwool. Choose options that stay durable and breathable while preventing wicking of moisture. Plan application steps to keep batt thickness intact.
Sealant selection and performance
Choosing the right sealant is crucial for a successful air-sealing job. Here’s what you need to know:
Acrylic Latex Caulk: Pros – Easy to apply, dries quickly, paintable. Cons – Not suitable for high-moisture areas, may crack over time.
Urethane Sealants: Pros – Excellent adhesion, good elasticity, can be used in high-moisture areas. Cons – Slower drying time, not paintable until fully cured.
Canned Spray Foam: Pros – Expands to fill gaps, dries quickly. Cons – Can be messy, may shrink over time, not suitable for all applications due to high expansion.
Intumescent Sealants: Pros – Expand when exposed to heat, ideal for fire-resistant assemblies. Cons – More expensive, may not be necessary in all cases.
Assembly-level fixes: where to seal first
Sealing the right areas first ensures maximum air-sealing effectiveness. Here’s your priority list:
Top Plates and Rim Joists: These are common air-leak culprits. Seal them first with a suitable caulk or foam.
Electrical Boxes and Plumbing Chases: Next, focus on these penetrations. Use gaskets for electrical boxes and seal around plumbing chases with caulk or foam.
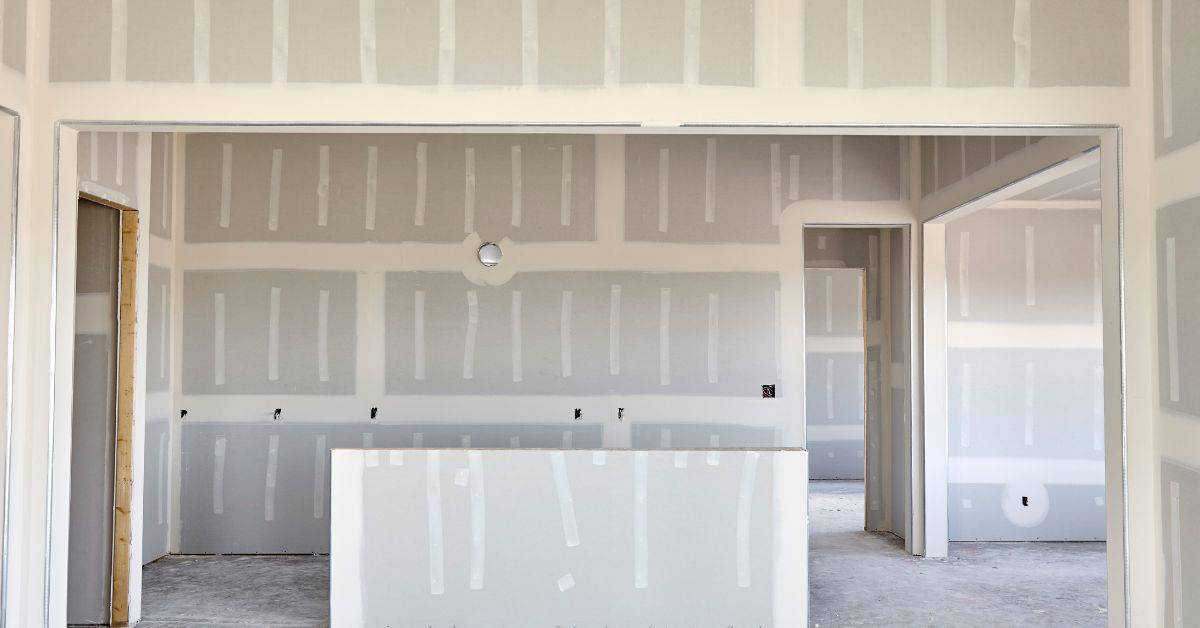
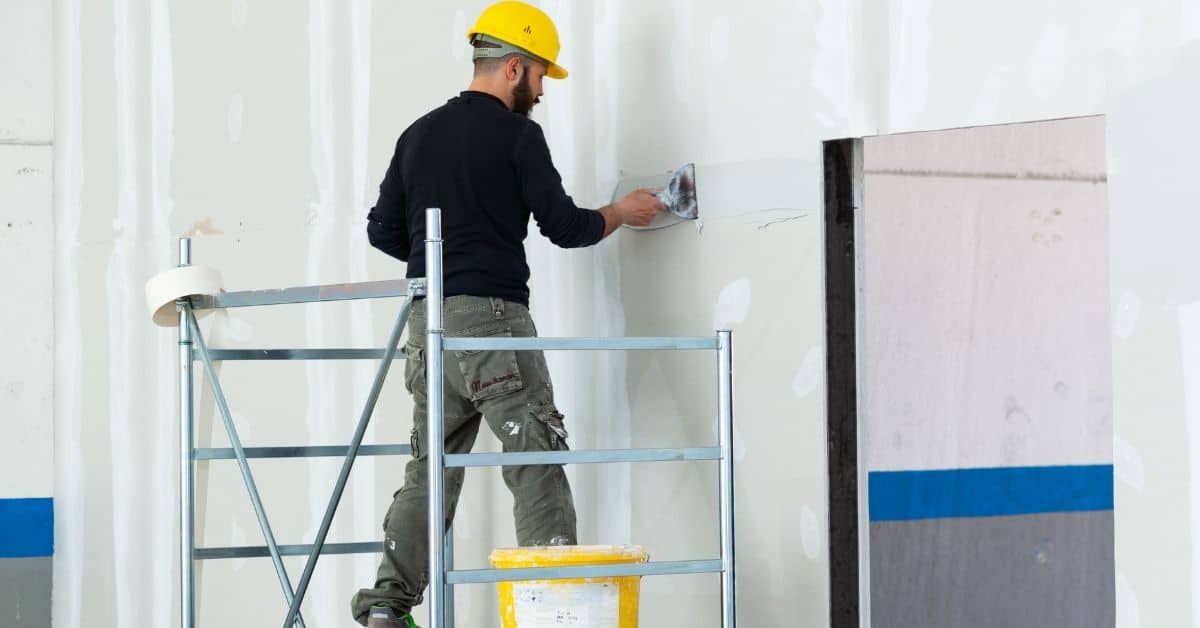
Drywall Seams and Framing Gaps: Finally, seal drywall seams with tape and joint compound, then apply a bead of caulk in framing gaps.
Step-by-Step Fixes for Common Problem Scenarios
Retrofit sealing behind existing drywall by identifying interior cavities where leaks occur and selecting methods that avoid compressing insulation. Sequence the work to keep batts intact and accessible for future fixes.
When sealing around electrical boxes, use backer material and compatible caulk or gasket systems without compromising box fill. Address continuous gaps at plates or sheathing with airtight tape and selective blocking where needed.
Step-by-Step Repair Process
Follow this clear, numbered sequence to effectively fix common air sealing problems behind your existing drywall and Rockwool batts.
- Preparation: Gather tools (caulk, foam, tape), ensure safety by turning off power at electrical boxes.
- Detection: Use smoke pencil or blower door to locate leaks. Mark them for reference.
- Seal gaps at plates/sheathing: Apply airtight tape, use foam backer where needed, block as required.
- Seal electrical boxes: Use backer material, thin-firestop caulk, or gasket systems suitable for retrofit. Avoid compromising box fill or fire ratings.
- Seal behind drywall (retrofit): Use low-expansion foam, caulk, or gasket tape. Avoid compressing insulation.
- Final checks: Re-test sealed areas with smoke pencil or blower door. Ensure leaks are fixed.
- Cleanup: Remove excess sealant, dispose of materials properly.
Retrofit approach without removing drywall
Seal air leaks behind existing drywall and Rockwool batts without tearing into walls. Here’s how:
Inspect: Drill small holes (1/4″ to 1/2″) in suspected leak areas. Use a bore scope or camera for visibility.
Seal: Use long-reach sealant tubes, blown-in air sealing foam, or low-expansion foam to reach and fill gaps. Be careful not to compress insulation.
Remediate: If holes are too large or leaks persist, consider removing drywall for better access. Always test after sealing to ensure leaks are fixed.
Rework during open-wall construction
When walls are open, follow these best practices to create a continuous air barrier with Rockwool batts:
Install air barrier: Apply airtight tape along studs and plates. Use foam backer where needed for better adhesion.
Gasket boxes: Install gaskets around electrical boxes during drywall installation to seal gaps.
Seal top/bottom plates: Apply caulk or foam at top and bottom plates, ensuring a continuous air barrier along the entire wall.
Fit Rockwool: Insert batts without compressing them. Maintain vapor-permeance balance and avoid bridging air leaks with mineral wool gaps.
Best Practices for Installing Rockwool and Drywall to Maintain Air Control
Keep the air barrier continuous by coordinating rockwool with continuity at sheathing, tapes, and interior barriers. Identify transitions that require special attention around windows, doors, and penetrations. Ensure the barrier remains intact as drywall goes up.
Avoid compressing batts and gaps that create cold spots. Drywall installation should support sealing rather than hinder it, with appropriate perimeters sealed before finishing. Coordinate trades to minimize unnecessary penetrations through the barrier.
Detailing at transitions and interfaces
Rockwool batts need continuous contact with adjacent materials to maintain air control. Here’s how to detail common transitions:
Wall-to-ceiling junctions: Ensure batts extend into the ceiling cavity, then use a foam sealant or tape at the junction to prevent gaps.
Window and door rough openings: Install flashing and housewrap at the exterior, then apply an air barrier tape around the opening’s perimeter before installing batts. Seal any gaps between batt edges and framing with caulk.
Intersections with exterior sheathing or interior vapor control layers: Use a compatible sealant or tape to bridge transitions, maintaining continuity of the air barrier.
Trade coordination and inspection checkpoints
Timing is crucial for effective air sealing. Use this checklist to ensure trades work together:
- Before MEP rough-ins: Verify air barrier continuity, seal any gaps, and inspect for penetrations.
- After MEP rough-ins: Check for new penetrations, seal around chases, and verify firewall assemblies.
- Before drywall installation: Inspect all seams, edges, and transitions; ensure sealants are cured.
- At sign-off: Perform a final walkthrough to confirm all seals are intact and no new penetrations exist.
- If leaks detected: Identify and correct issues before proceeding.
- For chase walls: Ensure they’re properly sealed at top, bottom, and sides; use fire-rated caulk if necessary.
- For soffits: Verify air barrier continuity between exterior and interior; seal any gaps.
- For firewall assemblies: Check for proper installation of fire-rated materials and seals.
Quick rule: Always inspect before proceeding to the next step. A little extra time upfront prevents costly rework later.
Safety, Code, and Cost Considerations
Establish ventilation and use PPE to manage drywall dust, mineral wool fibers, and expanding foams. Keep the work area well-ventilated during sealant curing and foam application. Follow site safety procedures at all times.
Understand how fireblocking, vapor control, and interior barriers interact with rockwool and drywall assemblies. Compare material compatibility and review any ratings that affect fire safety and moisture management. Consider how air sealing choices influence overall project cost and potential energy savings.
Fireblocking and acoustic requirements
Air sealing isn’t just about stopping air leaks. It’s also crucial for fire safety and sound control.
Fireblocking: Use fire-rated caulk or foam to seal around electrical boxes, pipes, and other penetrations. This stops flames from spreading through walls.
Sound transmission: To reduce noise transfer, use acoustic caulks and sealants at drywall seams and around openings. For high-performance sound control, consider using a dedicated soundproofing membrane or batt insulation.
Cost vs. performance trade-offs and budgeting
Sealing drywall under rockwool batts doesn’t have to break the bank, but some methods are more expensive than others.
Low-cost: Using caulk, tape, and foam sealant can be affordable. It’s a good choice for simple air sealing needs or when budget is tight.
Mid-range: Continuous foam membranes or spray foam can provide better performance but come at a higher cost. They’re great for homes in extreme climates or where code requires enhanced insulation.
High-end: Advanced air barrier systems, like fluid-applied membranes, offer top-notch performance but are the most expensive option. Consider these when energy efficiency is paramount, or you need to meet specific code requirements.
Visual Checkpoints, Checklists, and Testing After Fixes
Separate pre-drywall considerations from post-drywall checks. Pre-drywall focuses on sealing strategies around Rockwool batts, while post-drywall verifies joints and penetrations are fully sealed. Plan both stages to avoid backtracking.
Create clear visual checkpoints and concise checklists for before and after drywall. Use smoke pencils or infrared tools to confirm gaps are sealed and perform a simple pressure check if possible. Record findings with photos and assign follow-up actions to the responsible trades.
Tools and materials checklist
Before you start sealing, make sure you have all the necessary tools and materials. This will save you time and ensure a thorough job.
- Sealants: Choose appropriate sealants for your project (e.g., caulk, foam, or spray foam).
- Backer rod: Use this to create a base for your sealant and ensure an even bead.
- Gaskets: Pre-cut gaskets can save time when sealing around penetrations.
- Aerosols: Aerosol sealants are great for touch-up work and small gaps.
- IR camera or smoke pencil: These tools help you find air leaks and verify your seals.
- Tape measure: Essential for measuring gaps and ensuring even sealant application.
- Utility knife: Use this to cut backer rod, gaskets, and open tubes of sealant.
- Caulk gun: For applying caulk and other tube-based sealants.
Quick rule: Always have your tools and materials ready before you start. This will help prevent mistakes and ensure a thorough job.
Acceptance criteria and measurable targets
To ensure your air sealing efforts are effective, set clear performance targets and test them. Here’s what to aim for:
- Blower door test: Aim for a reduction in air leakage of at least 50% compared to the initial test.
- Smoke pencil or incense test: No smoke movement should be visible along seams and junctions when testing with a smoke pencil or incense stick.
- Infrared (IR) camera or visual daylight check: No gaps or air leaks should be visible using these methods.
- Pressure test: If resources allow, conduct a simple blower-door style pressure test to verify improvements.
Quick rule: If you’re not seeing the desired results, consider consulting a professional. They can provide expert advice and help troubleshoot any issues.
Conclusion
Sealing the drywall to the rockwool batt layer matters for durability, energy use, and a clean finish. Do this carefully and you protect the structure, reduce drafts, and prevent moisture mischief that can show up as cold spots or staining.
Make the next moves with a simple, practical check when you work: inspect for gaps behind the drywall, verify that the rockwool batt is snug and properly pressed, follow the testing plan you used earlier to confirm air control, apply the sealing method in the right order from back to front, and then recheck with a test to verify you’ve closed the leaks before you finish any touchups. Use the right materials for the job, work in small sections, wear a mask and eye protection, and stay off ladders when installing overhead seals.
Common mistakes to avoid include skipping the initial diagnosis and jumping straight to sealing, using improper sealants in contact with insulation, and rushing repairs without rechecking for new leaks after each fix. Always keep safety top of mind: seal from the backside, avoid tearing rockwool, and test small areas first to confirm you don’t trap moisture or create new gaps. If you feel uncertain about seam quality, or your tests show persistent drafts after multiple fixes, pause and reassess rather than forcing a quick cover-up.
If the gaps or moisture concerns seem too large, or if you encounter wiring, plumbing, or structural constraints, call a professional to review the assembly. When you proceed, stay methodical, document what you did, and finish with a final test to confirm air control is stable. Stay practical, stay safe, and you’ll end with a tight, durable wall that looks good and performs well.
FAQ
What are the most common causes of air leakage around drywall when rockwool batts are installed?
Small gaps around electrical boxes, plumbing pass-throughs, and at seams between drywall sheets often let air move behind the wall. Poorly seated batt edges, compressed rockwool, and misaligned or missing sealing at top plates and corners also create paths for air to travel. Inattentive gaps near windows, doors, and attic access can contribute as well.
How can I test for air leaks behind drywall with rockwool?
Use a smoke pencil, incense, or a tiny handheld blower to look for visible drafts along seams and outlets. A simple clean-out test with a lit candle or lighter held near suspected joints can reveal drafts when the flame flickers. For a more thorough check, seal one area at a time and recheck with your eye and your nose for changes in airflow and odor.
What are reliable ways to seal gaps and holes without hurting the rockwool or drywall?
Seal small gaps with a compressible foam or caulk that stays flexible after curing. For larger spaces, use backer rod and fill with an appropriate sealant, then smooth it out. Avoid dense, rigid products that can trap moisture or damage the rockwool; always follow the product label.
What tools and sealants should I have for good air sealing work?
Keep a utility knife, caulking gun, foam backer rod, and a compatible sealant on hand. A spray bottle of soapy water helps you spot leaks after sealing. Check the sealant label for indoor dry time and compatibility with gypsum drywall and mineral wool.