
Introduction
Embarking on a white wall painting project? Before you grab your brushes and rollers, it’s crucial to understand the timeline involved. Painting walls white isn’t just about slapping on a coat of paint; it requires careful planning, preparation, and execution.
To help you stay on track and achieve flawless results, we’ve created this comprehensive step-by-step timeline guide. From start to finish, we’ll walk you through the entire process, ensuring you allocate enough time for each stage and avoid common pitfalls.
The Perfect White Wall Painting Timeline
Painting walls white in a timely manner involves careful planning and efficient execution. Here’s a detailed timeline to help you complete your project smoothly:
- Week 1-2: Planning and Preparation
- Choose the right white paint, considering color, undertones, and finishes (3 days)
- Gather tools and materials (1 day)
- Clean, patch, and prime walls (3-5 days)
- Week 3: Painting
- Apply the first coat (2-4 hours per room)
- Allow drying time (at least 24 hours)
- Apply second and third coats, if needed (2-4 hours per room)
- Week 4: Final Touches
- Inspect for touch-ups (1-2 days)
- Clean tools and dispose of materials responsibly (1 day)
Note: The timeline can vary depending on the size of your rooms, the condition of your walls, and how much time you can dedicate each day. Always allow extra time for unexpected issues or touch-ups.
Key takeaways
The planning and preparation stage significantly impacts the overall timeline. Proper cleaning, patching, and priming ensure a smooth painting process and better results in the long run.
- Choose warm or cool undertones to suit room lighting and fixtures.
- Lightly test swatches on multiple walls before committing to finish.
- Clean surfaces, patch holes, and prime lightly for even base coat.
- Use quality rollers and blades to avoid streaks and fuzz.
- Allow ample drying time between coats in low-humidity conditions for best results.
- Consider cost-smart alternatives like washable flat finishes and labeled kits.
Table of Contents
- Introduction
- Key takeaways
- Pick the Right White: color, undertones, and finishes
- Prep like a pro: cleaning, patching, and priming
- Tools and materials checklist
- Application techniques for a flawless white finish
- Common mistakes and troubleshooting
- Alternatives and cost-smart options
- Longevity, maintenance, and environmental considerations
- Conclusion
- FAQ
Pick the Right White: color, undertones, and finishes
Whites aren’t all the same. Warm whites lean yellow or cream, cool whites have gray or blue undertones, and neutral whites sit in between; they read differently under daylight, incandescent, and LED. Test several chips on the actual wall and adjacent surfaces, at eye level, and compare matte, eggshell, and satin finishes to see what reads best.
The read depends on the substrate and finish, so expect glossy tile, matte plaster, or aging drywall to shift the undertone. Primer choice and stain-blocking matter for keeping undertones true, and the sheen affects washability and glare. Do a simple, repeatable sampling plan and narrow to 2–3 finalists with side-by-side comparisons.
Testing whites in your space
To pick the right white, start by testing paint samples on your walls. Grab a few swatches and apply them to different areas of your room—try both sunny spots and darker corners.
Leave these test patches up for at least three days. Observe how they look in morning light, midday sun, and evening shadows. Take photos from various angles and lighting conditions so you can compare later.
When testing, also consider the existing finishes around your walls—like tile or wood floors. These will affect how your white reads against them. If there’s a lot of contrast, go for a neutral white to balance things out.
Remember, picking the right white is all about trial and error. Don’t rush it; take your time and make sure you’re happy with what you see in real life before committing to a full paint job.
Making whites match trim, cabinets, and flooring
When choosing your white, think about how it will look next to other elements in the room. You want a good balance—neither too similar nor too different.
A safe bet is to pick a neutral white that sits between warm and cool tones. This way, you can match or contrast with wood floors or cabinets without clashing.
For trim work, go for a slightly warmer white than your walls if the room feels cold. A cooler white works well in rooms with lots of natural light to keep things bright and airy.
Avoid matching everything too closely; it can make the space feel dull and uninteresting. Aim for subtle contrasts that add depth without being jarring.
Picking finishes based on wear and tear
The finish you choose matters as much as the color itself. Matte is great for hiding imperfections but isn’t very washable. Eggshell works well in bedrooms and living rooms where it’s easy to clean.
Satin finish is more durable, making it ideal for kitchens and bathrooms where spills happen often. It also holds up better against scrubbing and wear-and-tear.
For high-traffic areas like hallways or entryways, go with a satin or semi-gloss finish. These are tougher but can still look elegant if you choose the right shade of white.
The key is to balance durability with aesthetics. You want your walls to last and stay looking good over time without showing every little mark.

Prep like a pro: cleaning, patching, and priming
Prep like a pro starts with a honest surface assessment, then cleaning, filling holes or cracks, light sanding, and picking the right primer for stains or color changes. Identify oil/grease, efflorescence, moisture, and any loose coatings. Use the correct patching filler (epoxy or Portland cement-based) and feather edges.
That prep matters because it sets how well the primer will stick and how long the finish lasts. You’ll get fewer failures, more even color, and fewer touch-ups if you do it right; check moisture, run a simple adhesion test, ventilate, and wear PPE.
Cleaning and degreasing surfaces
Start by assessing the wall for grease, fingerprints, mildew, and other contaminants. Use a strong detergent or TSP (trisodium phosphate) to tackle tough grime. Avoid harsh chemicals like ammonia unless you’re dealing with oil-based stains.
For greasy spots, apply a degreaser and scrub thoroughly before rinsing clean. Mildew can be removed using a solution of water and bleach. Make sure the surface is completely dry before moving on to patching and sanding.
Avoid over-wetting the concrete as this can lead to efflorescence or other moisture issues down the line. Use a squeegee for large areas, then wipe with a clean cloth to ensure no residue remains.
Repairing surface damage and sanding tips
Identify any cracks or holes in the concrete wall. Use an epoxy-based filler for deep cracks, while a Portland cement patch works well for smaller imperfections. Ensure the repair material is compatible with your paint.
Sand the patched areas lightly to feather the edges and smooth out any rough spots. This helps create a uniform surface that adheres better to primer and paint. Sanding also removes any raised grain or dust left behind from patching.
Check for consistency in texture across the wall before proceeding. Any uneven patches should be sanded down until they match the surrounding area. Use fine-grit sandpaper (220-320 grit) to avoid damaging the concrete surface.
Primer types and when to use them
Select a primer based on your wall’s condition. For bare or porous concrete, an adhesion-promoting primer is essential for better paint adherence.
If you have stains from tannins, smoke, or previous dark colors, choose a stain-blocking primer to prevent bleed-through. This ensures the white paint will look clean and uniform after application.
Tinted primers can be used if you’re covering very dark surfaces; they provide better coverage and hide imperfections more effectively than clear primers.
Tools and materials checklist
Here’s the essentials: you want solid tools that keep you moving and give you a clean look without fuss. Core tools include good brushes for cutting in, a roller frame with a nap in the ⅜–½ inch range for smooth walls, a sturdy paint tray, and optional extension poles to cut down ladder use. Surface prep is simple but important—putty knife and a lightweight spackling or patching compound for small repairs, plus a fine sanding block or sandpaper and a sanding sponge to nail a smooth finish before priming. For masking and protection, have painter’s tape, drop cloths or plastic sheeting, and a dust mask or respirator suitable for the paints you’ll use, plus basic cleaning supplies for splatters.
Priming and paint should be chosen with the job in mind—stain-blocking or sealer-primer if needed, plus interior latex or acrylic paint in the white shade you want, and consider a primer geared for new drywall or concrete if that’s your surface. Upgrades that speed work and boost quality include a paint sprayer or edger, extra roller covers (foam or microfiber), a quality trim pad or angled brush for neat edges, and a stable step ladder or extendable ladder for safer reach. Cleanup and organization—keep a damp cloth for wipe-downs, designate an area for used brushes and rollers, and have storage solutions to keep leftover paint and tools in good shape.
Why it matters: with the right mix of core tools and smart upgrades, you’ll finish faster and reduce rework from streaks or missed spots. This setup helps you tackle surface prep and masking cleanly, protect floors and furniture, and keep tools in good condition so they last longer. Always check labels and manufacturer instructions for compatibility, and tailor your selection to the room, paint type, and pressure you’ll be using; if in doubt, check the product label or datasheet for recommended use, safety guidance, and coverage expectations.
Rollers, brushes, and extension tools — what to buy
This checklist helps you pick the right painting tools for your job.
- Nap length: ⅜–½ inch nap roller covers for smooth walls; check wall texture before buying. Use wrong nap: streaks or missed spots.
- Brush type: angled brush for corners and edges, flat brush for large areas; test on a small section first. Wrong brush: uneven paint coverage.
- Roller frame: sturdy roller tray with deep well to hold enough paint; check it holds without leaking. Poor quality: frequent messes and wasted paint.
- Extension pole: telescoping pole for high ceilings or hard-to-reach spots; test reach before painting. No pole: ladder accidents or missed areas.
Quick rule: Choose tools based on wall texture and height, ensuring smooth coverage without streaks.
Safety and cleanup supplies
This checklist ensures you have everything needed for safe painting and proper cleanup.
- Dust mask: respirator rated for paint fumes; wear during prep and painting. No mask: inhale harmful particles.
- Goggles: safety glasses to protect eyes from splatters; wear while sanding or priming. No goggles: eye injuries possible.
- Gloves: nitrile gloves for handling paint and solvents; use during cleanup too. No gloves: skin irritation or chemical burns.
- Ventilation: open windows, run fans to circulate air; check before starting work. Poor ventilation: health risks from fumes.
Quick rule: Always wear PPE and ensure good airflow for a safe painting environment.
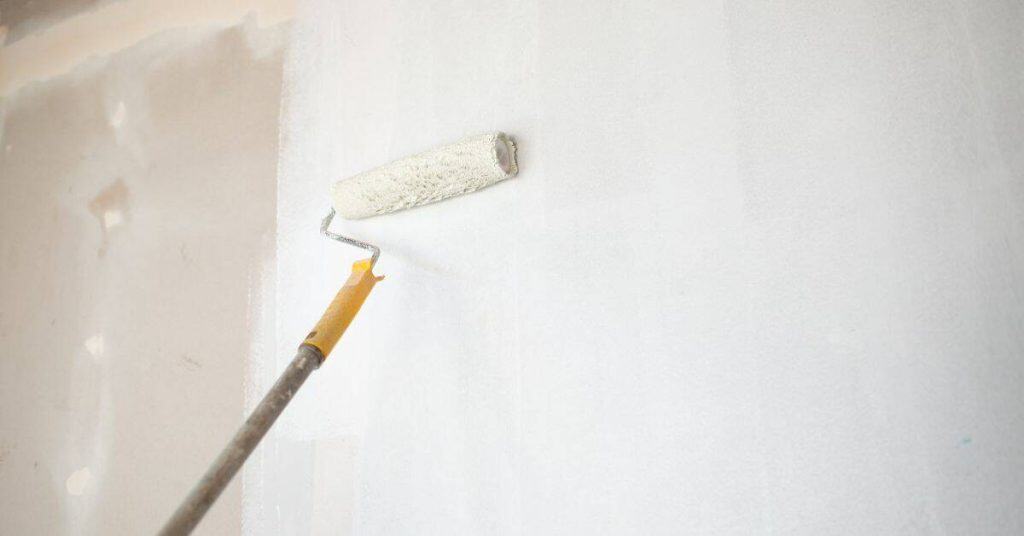
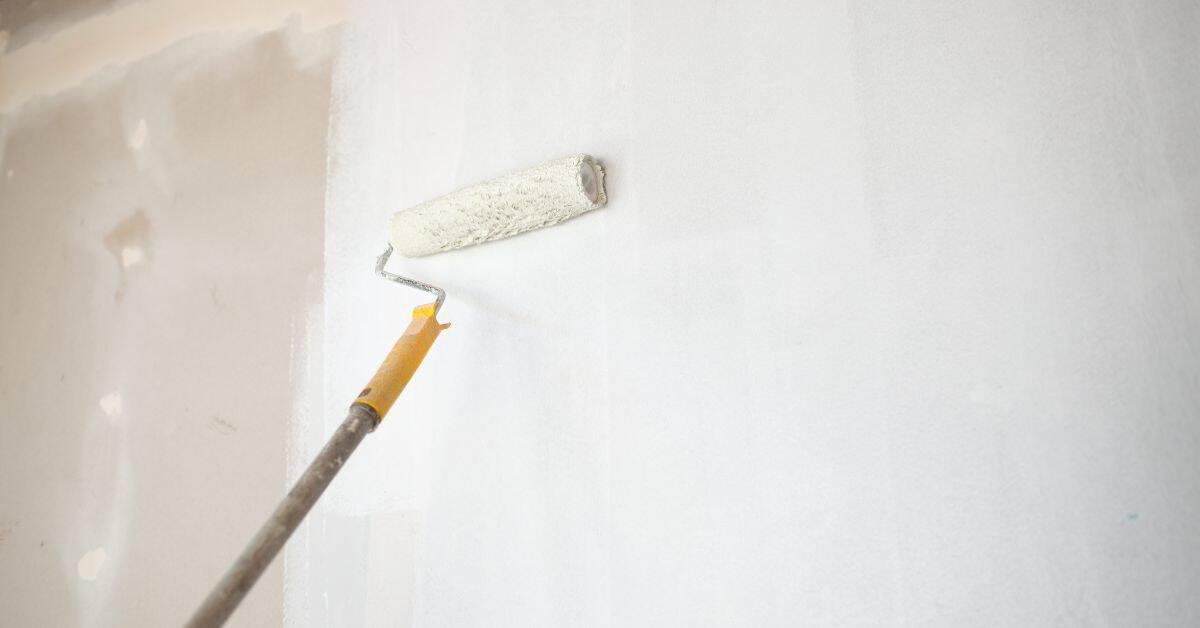
Application techniques for a flawless white finish
White finishes show every flaw, so the goal is crisp edges, a smooth base, and a consistent wet edge while you cut in and roll. Start with clean edges, use an angled sash brush for cutting in, and work in small sections to keep a wet edge and avoid lap marks. Keep a steady paint load on the brush and roller, and back-roll to blend visible edges.
Proper surface prep matters first, including priming when needed and repairing patches. Use the right tools and a low-sheen or satin white to hide imperfections, and mind how temperature and humidity affect drying. Finish with a quick inspection and targeted touch-ups to keep a uniform look.
Cutting in and blending with rollers
Start by cutting in around the edges of your walls, especially where they meet the ceiling, corners, or any fixtures. Use a quality angled sash brush to get into tight spots and maintain straight lines. Load the brush evenly but not too heavily—just enough paint to cover without dripping.
Once you’ve cut in, move on to rolling. Keep your roller close to where you’ve just brushed for seamless blending. Roll over the edges of the cut-in areas with a light touch to avoid lifting or smearing the wet edge. This technique helps create a smooth transition between brush and roller work.
For tricky corners, use a small foam roller or a corner brush designed specifically for these tight spots. These tools help you maintain neat lines without leaving visible marks from your brush strokes.
Managing problem areas (corners, textured walls, high ceilings)
Corners can be tricky. Use a corner roller or a small foam roller to get into these tight spots without leaving brush marks. For caulked seams and corners, apply painter’s tape first for clean lines.
Textured walls require special attention. Instead of rolling over the texture, use a stippling technique with a textured roller. This helps maintain the wall’s original look while ensuring even coverage. If you need to touch up spots, match the existing texture carefully.
High ceilings are best tackled with an extension pole and a large roller for efficiency. Work in sections from top to bottom, using ladders safely and moving them as needed. Keep your paint bucket within easy reach but out of the way to avoid spills or drips.
Two-coat strategy and how to judge coverage
A second coat is usually necessary for white walls to ensure full coverage and a smooth, uniform finish. The first coat often shows imperfections in the surface or slight color variations that need correction.
To decide if you need another coat, step back and look at your work from a distance. If you can still see patches of the base layer or any unevenness, it’s time for a second pass. This ensures the final result is flawless and consistent across the entire wall.
Allow each coat to dry completely before applying the next one. Check the paint manufacturer’s recommendations for drying times based on temperature and humidity levels in your space. Rushing can lead to streaks or lap marks, so patience pays off here.

Common mistakes and troubleshooting
Common DIY mistakes include using the wrong primer or paint for the substrate, skipping thorough surface prep, and painting in poor conditions. Insufficient prep leads to visible seams and poor adhesion. Moisture issues, flashing, and color shifts show up quickly and need quick fixes.
Take time to clean, degrease, repair holes, and sand glossy areas before priming. Make sure dust is gone and surfaces are ready to prevent lap marks and uneven color. When you see dampness or mineral deposits, address the source and use the right stain-blocking primer or sealer as advised by the label.
Dealing with streaks, drips, and lap marks
If you notice streaks, drips, or lap marks after painting your walls white, don’t panic. These issues can often be fixed without starting over.
To address lap marks, wait for the first coat to dry completely before applying a second one. Use a slightly damp roller to blend edges and reduce visible lines. If you catch it early enough, you might just need an extra pass with your brush or roller along the seam area.
For drips, scrape off excess paint while still wet using a putty knife. Smooth out any rough spots left behind by lightly sanding them down after drying. Then touch up those areas with another coat of white paint to blend it in.
If you’ve already noticed these issues once the paint has dried, consider applying a thin skim coat over problem areas. This can help even out the surface and hide imperfections without needing to strip everything back to bare walls.
When white looks yellowish or gray — causes and fixes
If your freshly painted white walls appear yellowish or gray, it could be due to several factors. Poor lighting can make colors look different than expected. Check the light bulbs in the room; switch them out for brighter options if needed.
Another common issue is undertones from previous paint layers showing through. A good primer can help seal these underlying tones and provide a clean base for your white topcoat. If you’re still seeing issues, consider repainting with a higher quality white paint that has better coverage.
If the problem persists, it might be due to contamination like smoke or dirt seeping into the new coat. In this case, you’ll need to strip back to bare walls and start over, ensuring thorough cleaning before priming again.
For trim work specifically, sometimes a mismatch in paint sheen can cause color shifts. Make sure your baseboards and crown molding are painted with the same type of white paint as the walls for consistency.
Alternatives and cost-smart options
There are budget-friendly routes that avoid a full repaint: primer-only touch-ups, whitewash, peel-and-stick white wallpaper or panels, and pre-finished white wall panels plus high-coverage paints like semi-gloss or satin to reduce future maintenance.
DIY time and material costs vary, and some jobs justify hiring a pro—large surfaces, tricky ceilings, historic walls, or moisture-prone rooms. Plan your prep and finish choices with the room’s lighting and color warmth in mind, and use a simple decision workflow and warning signs to know when to call a pro.
Peel-and-stick panels, washable wall coverings, and solid-surface accents
For those looking for a quick fix or renters who can’t make permanent changes, peel-and-stick panels offer an easy solution. These panels come in various sizes and designs, allowing you to create a fresh look without the hassle of painting. They’re great for small spaces like bathrooms or kitchens where moisture might be an issue.
Washable wall coverings are another option that can add texture and interest to your walls. They’re durable and easy to clean, making them ideal for high-traffic areas. Solid-surface accents such as white tiles or laminate panels can also provide a modern look while being highly resistant to wear and tear.
While these alternatives offer convenience and flexibility, they do come with their own set of pros and cons. For instance, peel-and-stick panels might not last as long in high-moisture environments, and washable wall coverings may show more dirt over time compared to a freshly painted surface. Solid-surface accents require proper installation but can be a great investment for areas that see heavy use.
Partial updates and feature approaches
If you’re looking to refresh your space without the full commitment of painting every wall, consider accent walls or two-tone wainscoting. An accent wall can bring a focal point into any room, drawing attention away from less desirable areas like cracks or uneven surfaces.
Two-tone wainscoting is another cost-effective way to add depth and character. By painting the lower half of your walls in one color and the upper half in white, you create visual interest without breaking the bank. This approach also works well for rooms with high ceilings where a full paint job might be overwhelming.
High-traffic zones like entryways or hallways can benefit from washable paints that resist scuffs and marks. These areas often see more wear than others, so choosing a durable finish will save you time in the long run. By focusing on these key spots, you can achieve a fresh look without spending too much.
Budgeting and labor time estimates
To estimate your budget for painting or applying alternatives, consider the size of the room, the condition of the walls, and the quality of materials you choose. For instance, a small bedroom with minimal damage will require fewer supplies than a large living room that needs extensive repairs.
The cost of labor can vary widely depending on whether you do it yourself or hire professionals. DIY projects save money but take more time and effort. Professionals might charge higher rates but offer quicker turnaround times and better quality work, especially for complex surfaces like textured walls or ceilings.
When budgeting, also factor in the type of paint you use. High-coverage paints can be pricier upfront but may reduce future maintenance costs by requiring fewer touch-ups over time. For a rough estimate, plan on spending around $1 to $3 per square foot for materials and an additional $20 to $50 per hour for labor if hiring pros.
Longevity, maintenance, and environmental considerations
White walls stay bright longer when you clean them correctly and choose paint with low or zero VOCs. Use gentle cleaners, microfiber, and targeted stain removal for crayons, scuffs, and grease to prevent yellowing. Also plan for eco-friendly disposal of extra paint and cans according to local rules.
Primer, finish, and sheen affect durability and odor. Choose low-VOC options and ventilate during cleaning or touch-ups. Proper prep and selective touch-ups help prevent color mismatch and reduce maintenance over time.
Cleaning and touch-up best practices
To keep your white walls looking fresh, start with a microfiber cloth for daily dusting. For tougher stains like crayon marks or grease, use a gentle cleaner specifically designed for paint. Avoid harsh chemicals that can strip the finish.
For scuffs and minor damage, touch up with a small brush and matching paint. Always test on an inconspicuous area first to ensure color match. Use a primer if necessary to seal any imperfections before painting over them.
Maintain your walls by addressing stains promptly. Grease can be treated with a mixture of baking soda and water, while crayon marks respond well to rubbing alcohol or a specialized crayon remover spray.
Choosing low-VOC and durable formulations
Low-VOC paints are better for indoor air quality but might not be as tough. Look for labels that specify durability and stain resistance, especially if you have kids or pets.
Durable finishes like eggshell or satin offer more protection against scuffs and marks compared to flat paint. However, they can show brush strokes more easily. Choose a finish based on your wall’s traffic level.
Check the manufacturer’s data sheets for specific VOC levels and durability ratings. This information is crucial in making an informed decision that balances environmental impact with practical needs.
Proper disposal and leftover paint storage
To dispose of small amounts of leftover paint, check local recycling centers or hazardous waste collection events. Many communities have specific programs for safe disposal.
If you plan to use the paint later, store it in a cool, dry place away from direct sunlight. Seal cans tightly and label them with the date and contents to avoid confusion.
For larger quantities, consider donating unused paint to community centers or schools where it can be used for projects. This not only reduces waste but also supports local initiatives.
Conclusion
Painting walls white well comes down to a clean start, careful preparation, and steady first steps. When you safeguard against drips, patch the flaws, and choose a finish that fits the room, you protect durability and save time down the line.
To move from plan to paint, start by testing a small patch to confirm the undertone and sheen you want, then clean and patch any holes, prime the patched areas, and finally apply in even coats with compatible tools and the right technique for your chosen finish. Check that you have the correct white for your light, confirm the surface is dry and dust-free, and keep a damp cloth handy to catch drips as you go. Work from top to bottom, overlap strokes to blend, and let each coat cure before weighing a second pass or a final touch-up. Remember to ventilate, wear a mask if needed, and store rags safely to prevent heat buildup.
Common mistakes to avoid are skipping the patch or primer, rushing through edges, and skimping on ventilation. Don’t skip cleaning the surface or testing a small area first, and never apply heavy coats in one go. Keep safety rules simple: use proper ladders and stable footing, wear eye protection and a mask when sanding or priming, and stop if you notice bubbling, cracking, or color shifts that don’t match the sample. These checks save you from costly re-dos and stubborn touch-ups.
If the project grows beyond a simple room refresh, or you’re unsure about moisture, structural flaws, or a large color shift, it makes sense to call a professional. A quick consult can prevent bigger repairs later. Stay steady, follow the plan, and you’ll finish with a clean, durable white that looks right and lasts.
FAQ
What finish should you choose for white walls?
Go with a washable finish like eggshell or satin. It holds up to cleaning and looks less flat than a matte. Steer clear of shiny overkill on living walls.
How do you prevent stain bleed and yellowing?
Prime the walls first, especially if they were dark or show knots. Use a quality primer and then two coats of white paint. This stops bleed and keeps the color true.
Should you repaint whole walls or just touch up?
If large areas look different, repaint the whole wall for a uniform finish. Tiny touchups near edges often show over time. Plan for full coverage when color is critical.
Is it better to use warm or cool white?
Test a few swatches on the wall before committing. Warm whites feel cozy; cool whites read crisper. Pick what matches the room lighting and your trim.