
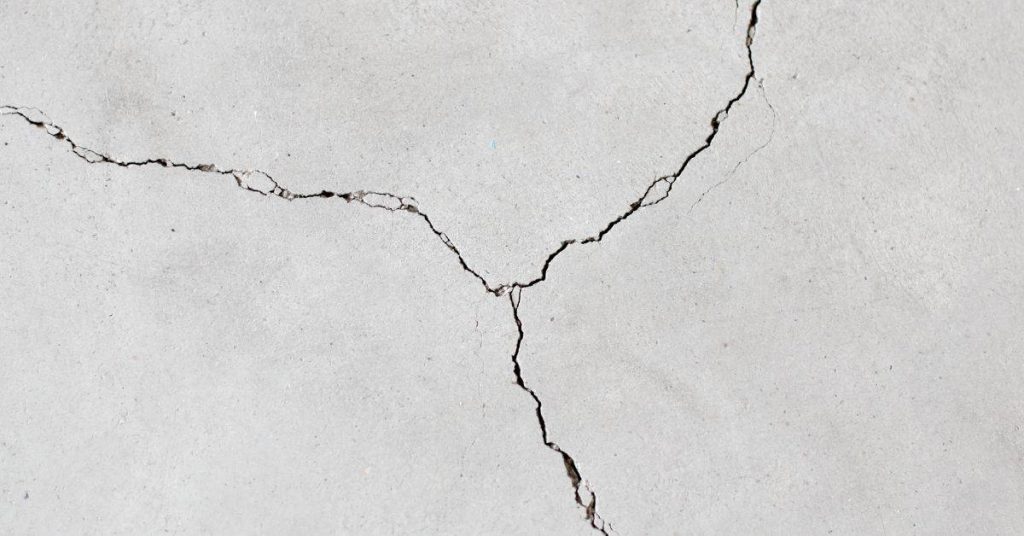
Concrete cracks can occur around pipe openings, window openings, and inside corners because these interruptions can redirect forces through a smaller area of concrete and concentrate stress at their edges.
That does not mean every crack at an opening is a structural failure. Concrete can crack from drying shrinkage, temperature change, restraint, settlement, moisture, corrosion, loading, or a combination of conditions. But when a crack starts at an opening, reopens after filling, leaks, or shows displacement, its location is useful evidence—not something to cover immediately.
This guide is about reading the pattern before choosing a response. It will help you document what is happening, look for likely drivers such as water or movement, and separate a potentially cosmetic crack from a condition that needs a qualified assessment. It is not a guide to redesigning reinforcement or selecting one universal repair product.
Key Takeaways
- Pipe sleeves, conduit penetrations, window openings, blockouts, and sharp inside corners interrupt the concrete and can become stress-concentration zones.
- A crack beginning at an opening is a clue, not proof of settlement, missing reinforcement, or structural damage.
- Document the crack before filling it: photograph the full area, map its direction, and record moisture, branches, and any offset.
- Repeated failure of a rigid patch can indicate continuing movement or incompatible repair behavior, but it does not identify the source by itself.
- Drainage defects, leaking plumbing, erosion, unsupported pipe movement, and differential support can all keep a crack active.
- Visible displacement, bowing, active leakage, spalling, exposed steel, or rapid change calls for prompt professional evaluation rather than cosmetic repair.
ToC
- Why Cracks Gather at Openings and Corners
- First, Make the Area Safe and Preserve the Evidence
- Map the Pattern: What Crack Direction Can Suggest
- Inspect the Opening and Its Surroundings for the Likely Driver
- Classify the Finding: Monitor, Correct the Condition, Seal, or Escalate
- If a Limited Seal Is Appropriate, Prepare Without Erasing the Clues
- Failure Points That Make These Cracks Recur
- When to Call a Professional—and What to Bring
Why Cracks Gather at Openings and Corners
A solid, uninterrupted concrete wall or slab spreads loads and dimensional changes across a broad area. An opening changes that path. A pipe sleeve removes material from a wall; a window opening interrupts the wall panel; and a re-entrant corner creates a sharp inside angle. As the concrete shrinks, expands, settles, or carries load, stress tends to gather near those changes in shape.
This localized increase in stress is called a stress concentration. It is a geometric effect, not a diagnosis. Concrete is relatively strong in compression but much less tolerant of tension. Where stress concentrates, a small amount of tensile strain may show itself as a crack, often at a sharp corner or at the edge of a penetration.
A hairline finish crack that happens to run near a pipe is different from a crack that visibly begins at the pipe sleeve and radiates outward. Likewise, a random surface craze near a window is not the same as a defined diagonal line emerging from the opening corner. The origin, route, condition, and change over time matter more than location alone.
Do not assume that reinforcement was omitted because a crack begins at an opening. Reinforcement may be present but not visible, and surface inspection cannot confirm its placement or adequacy. Similarly, a diagonal crack is not automatically structural. It may be associated with shrinkage or restraint, but it can also be related to support movement, moisture, loading, or construction details that cannot be identified from one visual symptom.
First, Make the Area Safe and Preserve the Evidence
Pause painting, coating, or filling until you have recorded the crack, unless there is an immediate need to temporarily limit water entry. Filling first can hide the crack’s true origin, its wetness, and evidence of continued movement.
Use eye protection and gloves for basic inspection. If you gently brush away dirt, control dust and use stable access equipment. Do not grind, chip, drill, or deliberately enlarge a suspicious crack simply to get a closer look. Those actions can remove useful evidence and may worsen deteriorated concrete.
Use extra caution when the crack is in a foundation wall, retaining wall, elevated slab, beam, or another element carrying building, vehicle, masonry, or soil loads. A crack in a lightly loaded exterior pad and a crack in a below-grade wall may look similar but have very different consequences.
Make a simple inspection record
- Take a wide photograph showing the complete wall or slab, nearby grade, and the opening.
- Take closer images of both crack ends, branches, and the pipe or opening edge. Include a dated reference in the image or file record.
- Mark the visible ends and branch points lightly beside the crack, not over it, if the surface allows.
- Write down whether it is dry, damp, actively leaking, stained, rusty, powdery with efflorescence, or associated with loose concrete.
- Note recent rain, freeze-thaw weather, excavation, landscaping, plumbing work, unusual loads, or changes in drainage.
Do not work around energized electrical conduit, suspected gas piping, or unknown utilities. If a pipe-adjacent crack may involve a utility or a leak, use the appropriate utility process or a qualified trade professional rather than probing around it.
Arrange prompt assessment if you see a lip or step across the crack, wall bowing, widening or sudden new cracking, active water flow, eroded soil or a void, spalling, exposed reinforcement, or cracking in a loaded structural member. These are not conditions to solve by applying more filler.
Map the Pattern: What Crack Direction Can Suggest
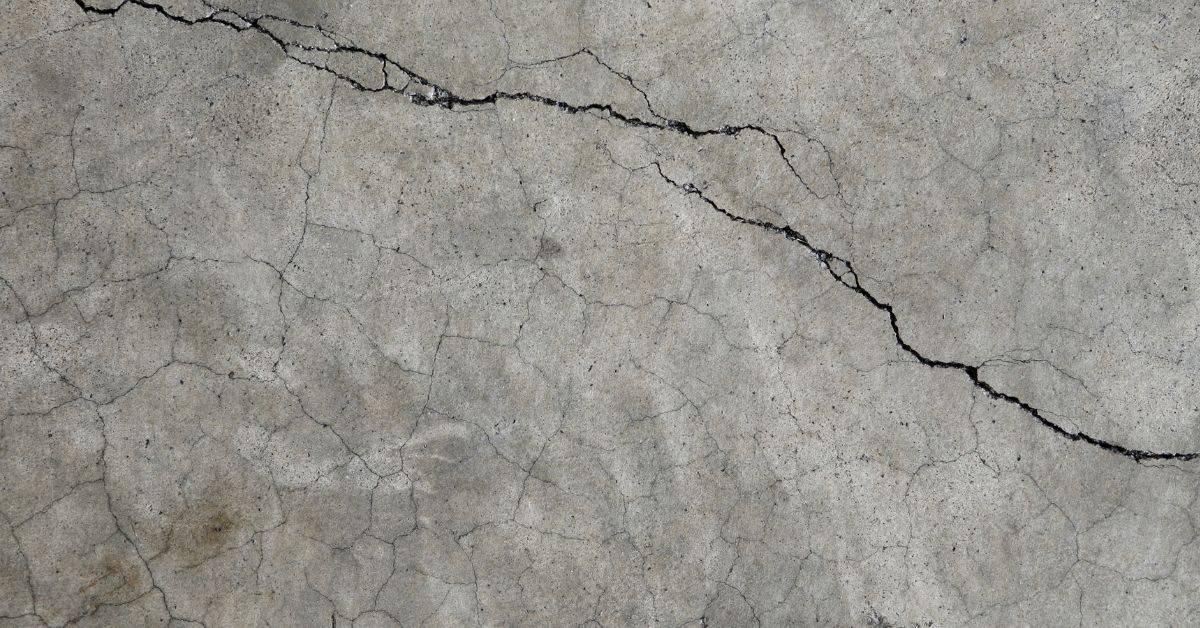
A short sketch is often more useful than a close-up photo alone. Draw the opening, its corners, the pipe or sleeve, nearby control or construction joints, grade or soil level, and each crack line. Add arrows showing where the crack appears to start and where it ends. This gives you a baseline for later comparison and makes a professional visit more efficient if one becomes necessary.
Where accessible, inspect both faces of a wall. For a slab, inspect connected surfaces, the slab edge, and the underside only where it can be viewed safely. A crack that continues through an element deserves more attention than shallow finish cracking or surface crazing, although its cause still cannot be determined by depth or direction alone.
| Observed pattern | What to inspect next | What not to assume |
|---|---|---|
| Diagonal line from a square window or blockout corner | Look at the opening corners, nearby support, adjacent openings, water paths, and changes in wall thickness. | Do not assume it proves a foundation problem or inadequate reinforcement. |
| Crack following the edge of a pipe or sleeve | Check for clearance, a split perimeter seal, pipe contact with concrete, vibration, movement, and plumbing leakage. | Do not assume the pipe itself caused the crack without checking water and support conditions. |
| Vertical or horizontal crack beside an opening | Inspect joints, wall ends, nearby restraints, soil level, and whether the crack continues beyond the opening. | Do not assign a cause solely from its orientation. |
| Crack connecting two nearby penetrations | Look for closely spaced interruptions, shared moisture exposure, movement of services, and overall panel cracking. | Do not treat each crack as an isolated surface defect. |
| Irregular cracking at an inside corner | Check for restraint, slab or wall movement, nearby loading, drainage, and differential support. | Do not dismiss it as ordinary shrinkage without observing whether it changes. |
Check for relative displacement by looking along the surface at a low angle in good side light. You may gently run a gloved finger across the crack to detect a step, but do not force the edges together or probe aggressively. Record a lip, separated edges, or an area that seems out of plane. Offset is generally more important than a simple narrow line because it indicates relative movement.
Keep a basic crack log. Record the date, dry or wet conditions, recent weather, apparent width category such as hairline or clearly open, and changes to nearby doors, windows, drains, or finished surfaces. A pencil mark beside a crack and repeat photographs from the same position can reveal change without pretending to be a precise structural measuring method.
If a rigid patch repeatedly breaks or detaches, treat that as evidence that the repair and the movement are not compatible. The movement might be thermal, moisture-related, settlement-related, or transmitted by a pipe or frame. Reopening alone does not tell you which one.
Inspect the Opening and Its Surroundings for the Likely Driver
Once the pattern is mapped, inspect outward from the crack. The opening may be where stress became visible, not the original source of the movement.
Pipe, conduit, and sleeve movement
Look for a pipe that appears to bear against the concrete edge, a damaged or split seal at the perimeter, or a sleeve with no apparent clearance around the service. Pipes can move with temperature, vibration, building movement, or service work. A pipe that is unsupported, tightly restrained, or leaking can load or wet the area repeatedly.
Also distinguish a crack in the concrete from a failed seal at the pipe-to-concrete interface. The interface is often intended to accommodate different materials moving differently. Bridging a moving pipe and fixed concrete with a rigid material can simply transfer stress back to the edge. Where a penetration is designed or behaving as a movement interface, its seal must suit that purpose and the specific system requirements.
Window and wall-opening conditions
At a window or similar opening, look closely at sharp corners, the area above the opening, nearby openings, transitions in wall thickness, and signs that the frame or adjacent assembly is moving independently of the concrete. Check whether cracking extends into the wall above or beside the opening, or whether it aligns with cracks on another face.
Inspect the support below the opening as well. Soil loss, differential settlement, water at a wall base, or movement in an adjacent slab can place stress in a wall panel. Do not infer the condition of a lintel, header, reinforcement, or concealed support from surface cracking alone. Available construction photos, plans, and renovation records may provide useful context, but incomplete records do not prove missing details.
Support, settlement, and drainage clues
Walk the surrounding area after rain and during dry weather. Look for downspout discharge near the wall or slab, soil sloping toward the structure, washed-out material, erosion, settled fill, puddling, or a gap where soil has pulled away. Check for a rocking slab edge or cracking that runs away from the opening toward an edge or support point.
Water stains need context. Rain-related wetting around an exterior window or penetration can point to a flashing, seal, or drainage issue. Persistent dampness in dry weather may suggest plumbing leakage, groundwater moisture, or another concealed path. Efflorescence shows that water has moved through or across the concrete at some point, but it does not identify the source or prove hydrostatic pressure.
For routine inspection and water-shedding basics, see concrete maintenance basics. If the cracking is in a foundation element, it can also help to understand the context of different concrete foundation types, while recognizing that diagnosis still depends on the specific structure and site.
Classify the Finding: Monitor, Correct the Condition, Seal, or Escalate
The sensible next step is based on the whole set of observations: the concrete element, crack pattern, displacement, moisture, change over time, and surrounding conditions. Avoid universal crack-width rules. A small crack in a critical retaining or foundation wall may deserve more concern than a larger stable crack in a nonstructural pad.
Monitoring can be reasonable
Monitoring may be reasonable for a dry, fine crack that appears stable, has no offset, no loose or spalled concrete, no leakage, and no evidence of ongoing change. This is most appropriate in a low-consequence, nonstructural setting. Continue the log through rain, seasonal temperature changes, and normal use before treating it as merely cosmetic.
Correct an identifiable condition first
Address the surrounding driver before repairing the visible line when inspection points to concentrated runoff, poor surface drainage, leaking plumbing, soil erosion, a moving pipe, or a failed penetration seal. A crack repair is unlikely to stay intact while water keeps washing out support or a service line keeps pressing against the concrete.
That may mean redirecting obvious discharge, correcting a plumbing defect through a qualified professional, restoring a damaged perimeter seal as specified for the penetration, or arranging evaluation of support and drainage conditions. These are condition-correction steps, not proof that the crack mechanism has been fully solved.
A limited seal may be appropriate
A compatible crack or joint seal can be considered after documentation and after the crack is judged stable enough for that approach. The goal in this limited situation is generally to manage surface water entry or appearance, not to stop settlement, water pressure, or structural movement.
For a separate step-by-step process for minor surface crack repair and preparation, refer to how to repair cracks in a concrete driveway. That repair process should not substitute for investigation when a crack originates at an opening, is wet, or is changing.
Escalate before cosmetic work
Seek qualified assessment before repair when the crack is active, displaced, spreading, persistently wet, leaking under pressure, associated with erosion or settlement, or located in a foundation, retaining wall, beam, elevated slab, or another load-bearing element. The opening may simply be the point where a broader problem became visible.
Do not treat epoxy injection, routing and sealing, structural stitching, added reinforcement, or underpinning as universal DIY fixes. Whether any of those methods is appropriate depends on the member, the cause, the crack condition, design intent, and local requirements.
If a Limited Seal Is Appropriate, Prepare Without Erasing the Clues
Use this limited process only after the crack has been photographed and logged, shows no meaningful movement or offset, and does not need professional assessment. If you are uncertain, preserve the evidence and obtain advice before altering the area.
- Gently remove loose dirt and debris using a method suitable for the concrete and chosen material. Do not cut a narrow crack into a wide groove merely to make filler easier to apply.
- Check that the concrete is sound and that the crack condition—dry or damp, clean, and free of incompatible coatings—matches the manufacturer’s stated requirements.
- At a penetration, keep the distinction clear between a concrete crack and the pipe-to-concrete perimeter. Do not rigidly bridge a moving pipe and fixed concrete unless the system specification specifically calls for it.
- Apply, protect, and return the area to service exactly as directed in the selected product data sheet. Product suitability, preparation, installation conditions, and cure requirements vary.
- Continue the crack log. Inspect after rain, temperature changes, and ordinary service use. Reopening, fresh branches, recurring moisture, or displacement means reassessment, not repeated overfilling.
Avoid sealing an active water path in a way that conceals continued deterioration or traps water behind a wall. If water pressure is suspected, the water source and drainage path need evaluation rather than a surface-only response.
Failure Points That Make These Cracks Recur
- Filling before documenting: This removes evidence of the crack’s origin, moisture condition, and rate of change.
- Using location as a verdict: Not every corner crack is normal shrinkage, and not every corner crack proves foundation failure.
- Ignoring the penetration: Unsupported piping, a failed perimeter seal, thermal movement, vibration, or a plumbing leak may continue to load or wet the area.
- Ignoring runoff and soil: Sending roof or surface water toward a wall, slab edge, window well, or penetration can undermine any cosmetic repair.
- Using the wrong type of repair for the behavior: A rigid patch will not accommodate an active movement location, while a flexible seal does not make a structural crack safe.
- Hiding the evidence: Paint, coatings, landscaping, insulation, and interior finishes can make future inspection harder if used before the condition is understood.
- Guessing at concealed construction: Visual inspection cannot establish reinforcement location, soil bearing capacity, or structural capacity.
When to Call a Professional—and What to Bring
Arrange a prompt professional review for visible offset, bowing, widening or rapidly changing cracks, active leakage, recurring wetness, soil erosion or voids, spalling or exposed steel, cracks crossing structural members, or related symptoms in several parts of the building.
For a crack next to a pipe, the first call may be to a plumber or utility-qualified professional if a leak, gas line, electrical conduit, or service-line movement is suspected. If the concern involves a foundation, retaining wall, elevated slab, or load-bearing concrete, contact an appropriately qualified building or structural professional. Licensing, titles, permits, and scopes of work vary by location, so verify local requirements.
Bring dated wide and close photographs, your crack map, monitoring notes, details of rain and drainage changes, construction or renovation history, available drawings or photos, and information on previous patch attempts. Useful questions include:
- Does the crack appear active, and is there measurable displacement?
- Is water the likely cause, a contributing condition, or a consequence of the crack?
- Could the opening, penetration, or adjacent support need a movement or detailing review?
- What must be corrected before any crack repair is attempted?
- Which repair, if any, is suitable for this specific concrete element and crack condition?
The practical sequence is straightforward: document the location and pattern, check for movement and water, correct identifiable drivers, then choose a compatible cosmetic repair or obtain a qualified assessment. That sequence is more likely to prevent recurrence than treating every crack around an opening as an ordinary surface gap.