
Introduction
The timeline of your tile installation project is crucial to ensure a successful and durable finish. Understanding how long each step takes, from preparation to grouting, helps you plan effectively and avoid common mistakes.
In this guide, we’ll walk you through the process of selecting the right trowel notch size based on tile and flatness, with a focus on the time it takes for each task. By following our step-by-step timeline, you can complete your project efficiently and achieve professional results.
Timeline: Trowel Notch Size Selection to Grouting
The total duration of your tile installation project depends on various factors such as the size of the area, the type of tiles, and the notch size you choose. Here’s a detailed timeline to help you plan effectively:
- Preparation (1-3 days): This includes substrate preparation, gathering tools and materials, and selecting the appropriate trowel notch size based on tile size and surface flatness.
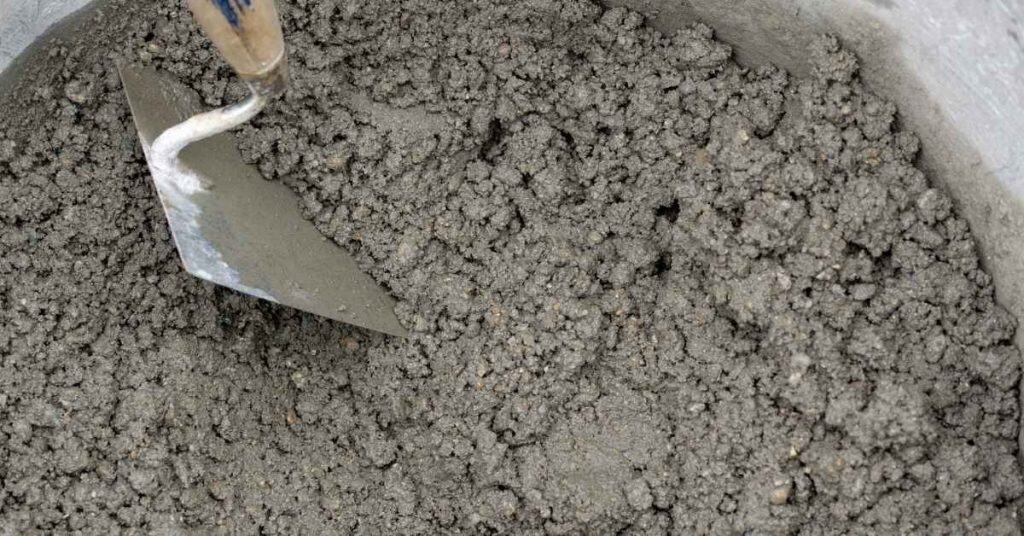
- Mortar Mixing (0.5-2 hours): The time required depends on the quantity of mortar needed for your project.
- Tile Installation (1-3 days per 100 sq ft): Larger tiles and a 1/2″ notch may take longer to install due to increased adhesive coverage. Smaller tiles with a 1/4″ notch can be installed more quickly.
- Grout Application (1-2 days per 100 sq ft): Allow additional time for grout to cure before sealing and performing the final visual check.
By following this timeline, you can estimate the total duration of your tile installation project more accurately. Keep in mind that these are rough estimates, and actual times may vary based on your specific project requirements.
Key takeaways
The time spent on substrate preparation directly impacts the overall schedule of your tile installation project. Ensuring a flat and clean surface before starting will save you time and effort during the installation process.
- Choose 1/4″ notch for small-format or ultra-flat substrates to minimize lippage.
- Use 1/2″ notch for large-format tiles on uneven or underlayment-rough surfaces.
- Always back-butter tiles on problematic substrates to improve coverage.
- Do a dry layout and comb twice on substrate to check flatness.
- Stop mortaring if ridges collapse or adhesive pockets appear.
- Inspect grout joint consistency before sealing, ensure uniform depth.
Table of Contents
- Introduction
- Key takeaways
- Why Trowel Notch Size Matters
- Surface Flatness, Substrate Prep, and Notch Choice
- Tools and Materials Checklist (including trowel selection)
- Step-by-Step Installation with Notch Guidance
- Grout, Sealing, and Finishing Considerations
- Safety, Common Mistakes, and Troubleshooting
- Cost, Time, and Advanced Planning Tips
- Visual Checkpoints and Quality Acceptance Criteria
- Conclusion
- FAQ
Why Trowel Notch Size Matters
The notch size on your trowel sets how much mortar is transferred to the back of each tile, which directly controls bed thickness, tile coverage, and the chance of incomplete bonding or lippage. For most DIY jobs, 1/4″ and 1/2″ notches are the common choices, with the 1/4″ suited to smaller tiles and shallow beds, and the 1/2″ better for large format tiles or a tougher substrate. In short, pick the notch that gives you even contact and enough mortar without squeeze-out or ridges that stay behind when you set the tile.
Your substrate flatness and tile size drive the right notch choice, because uneven or rigid surfaces demand more mortar and often a larger notch to achieve full coverage. This matters because proper bonding strength and a level surface prevent rocking and grout misalignment, saving you headaches down the line; a quick test on a sample board, back-buttering if needed, and confirming full ridge transfer before setting is worth the effort. Don’t switch notch sizes mid-job unless the substrate and tile size are compatible and you’ve rechecked manufacturer guidelines to avoid voids or weak spots.
How notch depth affects mortar bed and tile adhesion
The depth of the trowel notches is crucial because it controls how thick your mortar bed will be. A deeper notch means a thicker layer of mortar, which gives you more open time. But remember, too much mortar can weaken the bond if it’s not spread evenly.
Mortar coverage also depends on the depth: shallower notches give less mortar but still need to cover at least 50% of your surface for good adhesion. If you see large gaps between the trowel marks, you’re risking tile movement. Make sure to check that your base is well-compacted before laying tiles.
The right notch depth ensures a strong bond and proper spacing for grout lines. Get it wrong, and you’ll end up with loose tiles or uneven surfaces. Take the time to measure and test different notches on a small area first.
Consequences of wrong notch selection
Picking the wrong trowel notch size can lead to some serious issues. If you go too small, you might end up with insufficient mortar coverage, leaving gaps where tiles won’t stick properly. This often shows up when you’re trying to lay down a thin layer and don’t give yourself enough material.
On the flip side, if your notch is too big for the job, you’ll likely see hollow spots under your tiles as the mortar doesn’t fill in correctly. These voids can cause grout cracking later on and make your floor look uneven. It’s a common mistake when folks try to speed up work by using oversized notches.
Tiles rocking back and forth after setting is another sign you picked the wrong notch size. This happens because there’s either too little or too much mortar, making it hard for tiles to stay put firmly on your base. Always check base compaction before starting to avoid this problem.
Surface Flatness, Substrate Prep, and Notch Choice
Flatness tolerances matter because tile and thinset need a solid, level base to avoid lippage and hollow spots, and they guide which notch size you can safely use. Define a max variation over a long run, such as 1/8″ over 10 feet or 1/4″ over 6 feet, and link that to notch choice: usually 1/4″ for smaller variances, 1/2″ if the surface is noticeably uneven. Measure with straightedge, stringline, or laser level; these methods set a threshold where you switch from 1/4″ to 1/2″ notches and prevent lippage before tiling begins.
Checklist: clean the substrate, level high spots, patch where needed, and install moisture or vapor barriers as required by the tile spec. Document measurements, mark high and low spots, and recheck after patching so the decision about notch size stays consistent during the job. Bad prep or skipping checks is where you get surprised by uneven joints and weak adhesion—fix flatness now, not after you buy thinset.
Measuring flatness and locating highs/lows
To start, grab a 24-inch straightedge and lay it across your substrate. Move it around to find any high spots or dips. If you see gaps bigger than 1/8 inch, mark them for attention. This quick check tells you if the surface is ready or needs more prep.
If you spot uneven areas, use a level to double-check your straightedge findings. A bubble that’s off-center means there’s too much slope in that area. Remember, flatness matters; it affects how well your concrete will set and cure.
Your notch choice depends on what you find. For surfaces that are mostly flat with only minor high spots or small dips, use a 1/4-inch notch for solid coverage without excessive mortar. If the surface shows more pronounced unevenness or you’re installing large-format tiles, switch to a 1/2-inch notch to help fill gaps and ensure adequate transfer. Avoid using a 5/8-inch notch except for very specific tile types or substrates that truly require heavy mortar build-up; that size can waste material and create voids.
Fixes for uneven substrates (skim coats, backer board, self-leveling)
If your substrate is uneven, you have a few options to level it out. First, consider skim coating. This involves applying a thin layer of mortar over the entire surface to smooth out minor imperfections. It’s quick but only works for small dips and bumps.
For bigger issues, use backer board. Cut it to fit around obstacles like pipes or corners, then secure it firmly to your substrate. This is a solid fix if you have larger areas that need leveling.
The best option for severe unevenness is self-leveling compound. Pour it on and let it find its own level. It’s more expensive but worth it for big problems. Once the surface is flat, you can decide whether to reduce your trowel notch size or stick with a larger one if you’re laying heavy tiles.
When to back-butter vs. larger notch trowel
Back-buttering is a must when dealing with large tiles or warped ones that need extra adhesive under the edges for stability and even coverage. Even if you’re using a larger notch trowel, back-buttering ensures no gaps or voids form during installation.
Check base compaction before deciding on your tools. If your substrate is uneven, start with skim coats or self-leveling compounds to smooth it out first. A flat surface will make your job easier and the tiles look better in the end.
Remember, back-buttering isn’t just for tricky substrates; it’s a pro move that ensures quality work every time. Don’t skip this step if you’re working with challenging materials or conditions.
Tools and Materials Checklist (including trowel selection)
This section covers a comprehensive Tools and Materials Checklist, with clear guidance on trowel selection, thinsets, spacers, levelers, a wet saw, PPE, and measurement gear. Use 1/4″ or 1/2″ notch trowels based on tile size, substrate flatness, and the thinset you choose, and know when to upgrade to larger notches or switch to notched rubber or armor-plate metal trowels. We’ll also list essential trowels (v-notched, U-notched, flat), spacers, leveling systems, a wet saw with blades, a mixing paddle and drill, a trowel-notches chart, and grout floats, so you’ve got the right kit before you start.
Beyond tools, you’ll compare premixed versus powder thinsets, and polymer-modified options with additives for porcelain, glass, or natural stone. You’ll learn substrate prep and measurement essentials like laser or inline levels, long spirit levels, straightedges, and pre-checks for flatness to ensure uniform coverage. Finally, you’ll see how PPE—eye protection, gloves, dust masks, knee pads, ventilation—plus cleanup supplies, fit into a safe, efficient workflow from unloading materials to final inspection, including batching ratios, open time, and aligning with the tile layout to minimize rework.
Notched trowels: profiles and how to read them
This checklist helps you pick the right notched profile for your concrete work. Use it before starting any new project.
- V vs Square Notches: Check if your job needs V or square notches. Measure the depth of the notch with a ruler to confirm. Gotcha: Using the wrong shape can lead to poor bond and finish issues.
- 1/4″ Profile Depth: Verify that the 1/4″ profile is deep enough for your mix ratio by measuring it against a standard ruler. Confirm fit with a quick test pour. Gotcha: Shallow notches won’t spread enough mortar.
- 1/2″ Profile Depth: Measure the depth of 1/2″ profile to ensure it matches your concrete mix thickness needs. Test by spreading a small amount of mortar. Gotcha: Too shallow can cause weak spots in the bond.
- V Notch Width: Confirm that V notches are wide enough for your application, typically around 1/4″ to 3/8″. Measure with calipers or a ruler. Gotcha: Narrow notches won’t spread mortar evenly.
- Square Notch Width: Check the width of square notches is correct, usually between 1/2″ and 5/8″. Use a ruler to measure accurately. Gotcha: Too narrow can cause thin lines in your finish.
- Mortar Spread Test: Spread mortar with each profile type to see if it spreads evenly across the surface. Confirm by observing smoothness and even coverage. Gotcha: Uneven spread means rework later on.
- Bond Pattern Check: Ensure that the bond pattern left by your trowel matches what’s required for your project type. Look for consistent patterns without gaps or overlaps. Gotcha: Inconsistent bonding can lead to cracking and failure.
- Trowel Cleanliness: Inspect your notched trowels for debris before use. Clean any dirt or old mortar off thoroughly. Gotcha: Dirty tools leave marks on the finish.
- Mortar Consistency: Adjust mortar consistency to match the profile depth of your chosen trowel. Too thick or thin can affect spread and bond quality. Gotcha: Incorrect consistency leads to poor finishes.
Quick rule: Always measure notches before use and test spread on a small area first.
Mortars and additives: match to notch and tile
Use this checklist when selecting mortars and additives that work best with your notched trowel profile and the size of tiles you’re working with.
- Select polymer-modified thinset: Choose a polymer-modified thinset over mastic for better adhesion, flexibility, and water resistance. Confirm by checking the product label or data sheet.
What goes wrong: Skipping this can lead to poor bonding and tile movement. - Check pot life: Ensure your mortar mix has enough open time before it starts to set up too quickly. Test by applying a small amount of thinset and observing if you have ample time to work with it.
What goes wrong: Thinset setting too fast can cause uneven application. - Additives for coverage: Use additives that increase the spreadability and open time, allowing more coverage per bag. Confirm by checking manufacturer’s recommendations on packaging.
What goes wrong: Not using these can lead to higher material costs due to increased usage. - Mortar type matches tile size: Ensure your mortar is suitable for the size of tiles you are installing. For smaller tiles, use a finer mix; larger tiles may require a thicker bed.
What goes wrong: Incorrect mortar can cause uneven installation and grout lines. - Notch depth aligns with tile thickness: Verify that your notched trowel’s profile matches the thickness of your tiles. Check by comparing the notch depth to the tile edge.
What goes wrong: Mismatched profiles lead to inconsistent mortar beds and potential grout cracking. - Mortar consistency: Ensure the mortar is neither too wet nor too dry for proper application. Test by squeezing a small amount in your hand; it should hold together without being overly sticky.
What goes wrong: Incorrect consistency can lead to poor adhesion and excessive waste. - Additives for water resistance: Use additives that enhance the mortar’s waterproofing properties, especially in bathrooms or wet areas. Confirm by checking product labels for specific benefits.
What goes wrong: Lack of proper additives can cause moisture damage over time. - Mortar coverage per bag: Calculate how much area one bag covers based on your trowel profile and tile size. Check this against the manufacturer’s specifications.
What goes wrong: Overestimating or underestimating coverage leads to wasted material or insufficient supply.
Quick rule: Always match mortar type, additives, and consistency to both your notched trowel profile and tile size for a perfect fit every time.
Step-by-Step Installation with Notch Guidance
Step-by-step installation hinges on choosing the right notch size at each stage and sticking to clear rules: use 1/4″ or 1/2″ notches based on tile size, grout line, and how flat the substrate is, with quick reference criteria for base mortar, setting mortar, and any skin coat. Plan substrate prep and layout first, checking surface tolerance and leveling, then mark chalk lines or a grid to keep mortar capture even and tile alignment consistent before you mortar, back-butter, set, and cure in sequence. Also plan for movement joints and long-term maintenance—design expansion joints at control points and around features like corners or doorways to prevent cracks as the structure settles or moisture changes.
This matters because the notch decisions directly affect bonding, open time, and how the tile will behave as it cures, and getting it wrong leads to lippage, hollow tiles, or misaligned grout joints. Following a deliberate, step-by-step notching plan helps you avoid bad habits, save time on the job, and deliver a durable, professional-looking floor or wall. It also clarifies when to use a skin coat versus full-bed, how to pace your work across back-buttering, initial placement, tapping, and final alignment, and what to protect during cure to keep your grout schedule on track. Include explicit moisture management steps and note where moisture-sensitive substrates require longer cure times or primer steps, and plan for post-install maintenance to reduce long-term cracking or tile failures.
Step-by-Step Installation Process
This sequence will guide you through installing your concrete with notch guidance, ensuring a professional finish. It now includes essential long-term considerations such as movement joints, crack prevention, and moisture control to reduce maintenance needs after cure.
- Action: Start by setting up your notches and marking the placement on the surface. Reason: This ensures accurate alignment for pouring. Check: Double-check that all marks are clear and consistent. Stop and call a pro if: You’re unsure about notch spacing or alignment. Cure time: No wait needed.
- Action: Begin mixing your concrete according to the manufacturer’s instructions. Reason: Proper mix ensures durability and workability. Check: Test with a trowel; it should hold its shape without being too wet or dry. Stop and call a pro if: You notice clumps or uneven consistency.
- Action: Pour the concrete into place, filling notches first to ensure proper depth. Reason: This prevents air pockets and ensures even distribution. Check: Use a straight edge to level the surface; it should be smooth and free of gaps. Note: Plan for expansion or movement joints as indicated by the project plan, and place them at located intervals or structural offsets to minimize crack propagation.
- Action: Trowel the concrete, starting from the edges towards the center. Reason: This helps remove air bubbles and creates a uniform finish. Check: The surface should feel even under your trowel; no rough spots or high points. Safety: Wear eye protection and gloves; be mindful of dust and debris during finishing.
- Action: Once the concrete is set, apply a curing compound to prevent cracking. Reason: This keeps moisture in and allows proper hardening over time. Check: The surface should be visibly wet after application; if it’s dry, reapply. Long-term: Implement a curing schedule and moisture management plan to minimize shrinkage cracks, and verify that the substrate remains stable before proceeding with tile work.
Pro tip: Always check the weather forecast before starting your project to avoid pouring concrete during extreme temperatures or rain. Conservatively plan for longer cure times in high humidity or cold conditions to reduce future cracking.
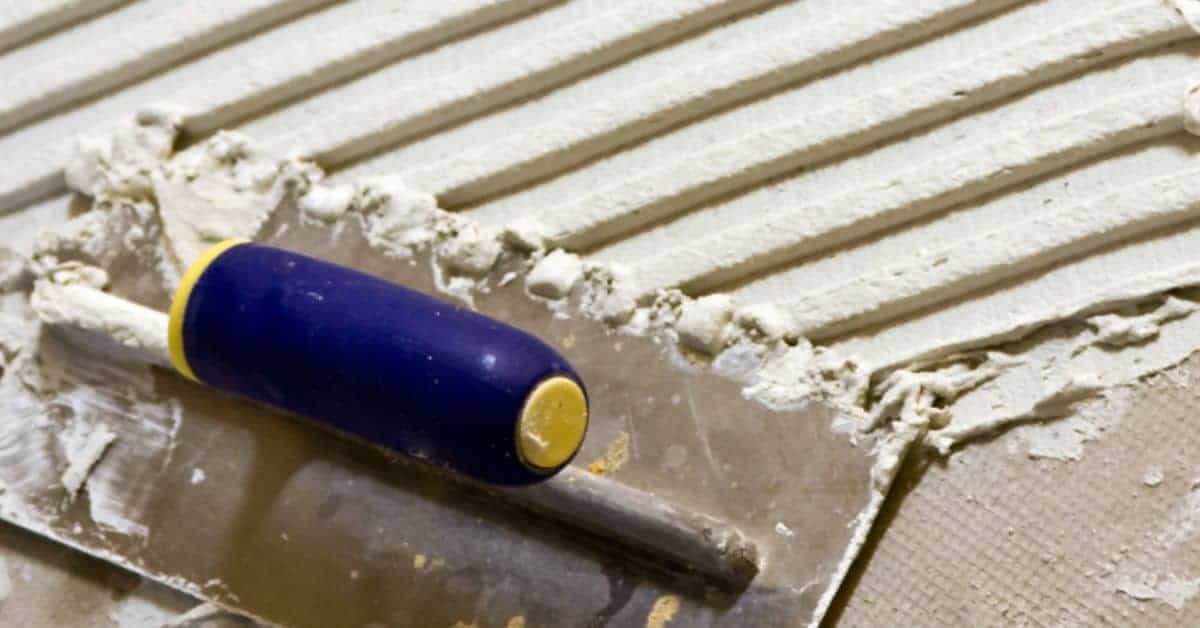
Applying thinset with the correct trowel technique
When you’re laying down thinset, start by mixing it up good and getting your notched trowel ready. Hold that trowel at a 45-degree angle to the surface as you spread it out. Move in straight lines or circles depending on what fits best for your space. Consider substrate porosity and anticipate longer open times on highly absorbent surfaces by adjusting a notch size or using a primer as needed.
The key is to go over the area twice: first, comb through with the notches deep and then smooth it out by running the flat side of the trowel across. This double pass helps you get a good even layer without leaving any gaps or high spots. As you work, keep an eye on how the ribs collapse when you go over them again; if they don’t flatten out enough, your thinset is too thick. If you notice rebound or excessive dust, stop and re-mix a fresh batch to maintain consistent bonding.
Before moving onto the next section, check base compaction. Make sure everything feels solid and there’s no shifting or soft spots. This step is crucial for a lasting job. If you see any issues, fix them right away before laying more tiles. Also verify that the substrate has adequate moisture management and is protected from rapid drying after application to prevent bond failure.
Leveling, tapping, and coverage checks
After you’ve laid your tiles with the notch trowel technique, it’s time to make sure everything is level and secure. Start by doing a lift test: gently lift each tile to check if there’s proper bond between the thinset and the substrate. If any tile lifts easily, reapply thinset and press it back down firmly.
Next up, use your tile leveler to ensure all tiles are perfectly flat with no gaps or high spots. Tap around each tile with a rubber mallet if needed—this helps settle them into place without cracking the grout lines later on. Remember, tapping isn’t about hammering; it’s about gentle pressure. Ensure you leave appropriate expansion joints at the edges of large floor or wall areas to accommodate movement.
Finally, check your coverage by looking at how much thinset is under each tile. You should see 90%+ coverage. If you spot any areas with less than this, add more thinset and reseat the tiles to ensure they’re properly adhered. This step prevents future issues like cracking or lifting. After installation, seal or treat grout joints as recommended for the tile system and regional moisture exposure to further protect against water infiltration and movement-related cracking.
Grout, Sealing, and Finishing Considerations
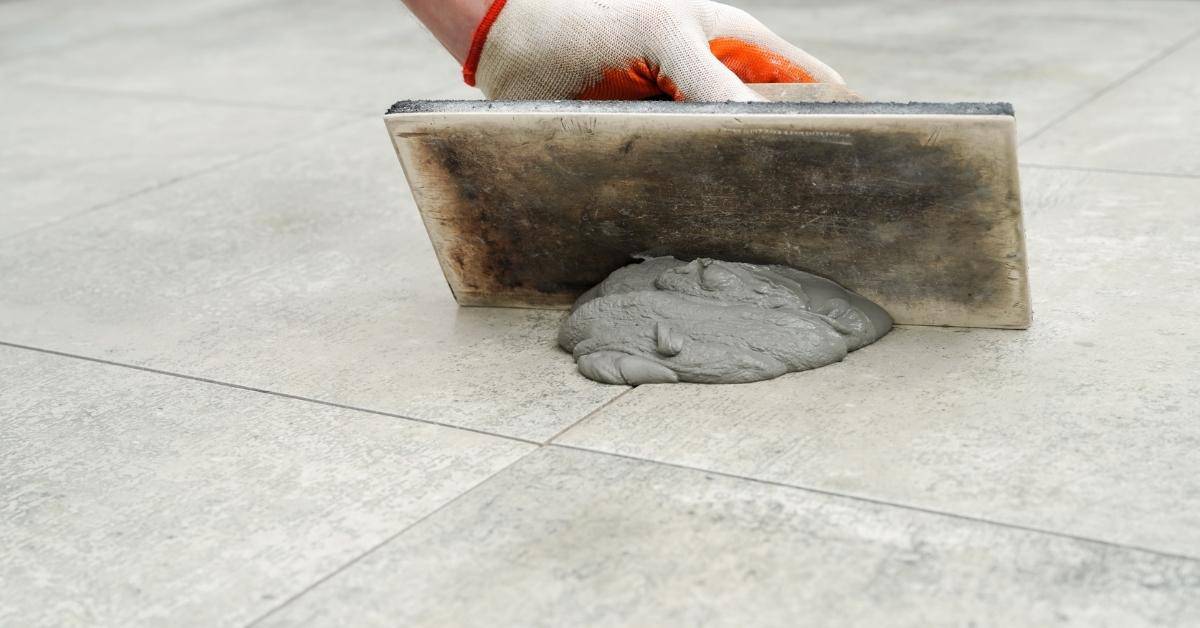
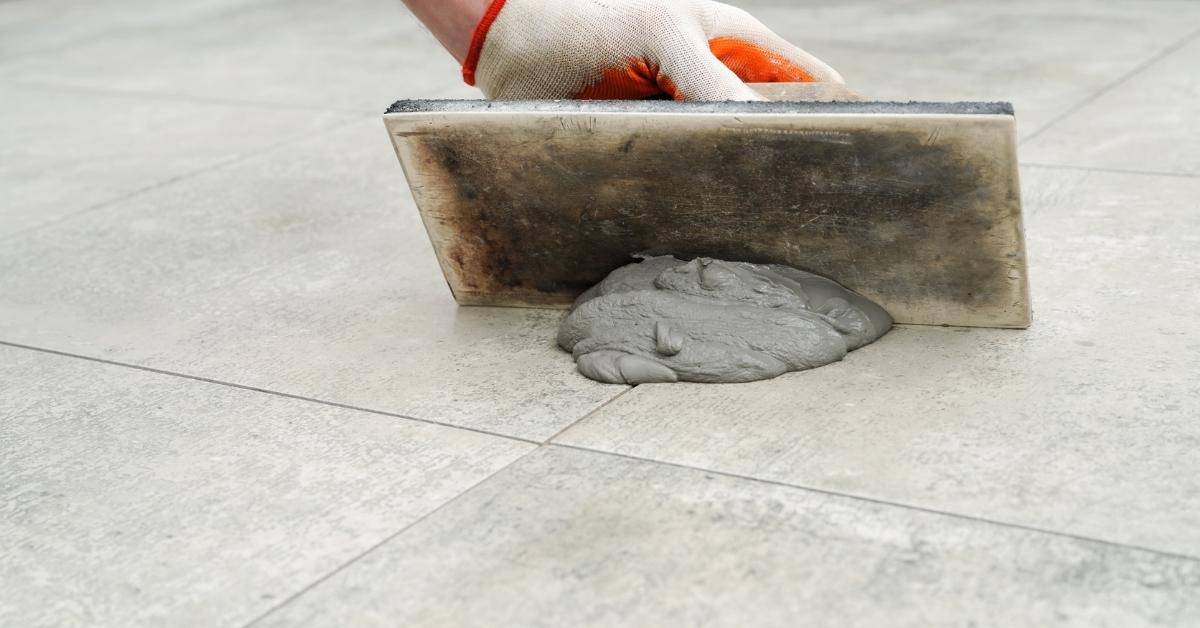
Grout choice sets the look and the strength of the joint, and it must match tile size, joint width, and the trowel notch you used, so don’t pick randomly and expect easy finishing. Sand‑mix grout, epoxy, and color choices all interact with tile scale and joint size, so pick a system that fits the tile, the gap, and what you can live with for years, then anticipate the depth and final texture. Notch size influences how wide the joint becomes and the tool path you follow, which in turn affects flatness, grout depth, and potential lippage, so choose a notch that yields consistent, straight joints and plan edging and finishing early.
Porous tiles and cementitious grout benefit from sealing, but timing matters: seal the tile where absorption is high, seal the grout after it cures, and use the right penetrating or film sealer to prevent staining, moisture intrusion, and discoloration. Notch choice also matters for finishing; align edges with straight edge tools, use edging, and smooth the joints with the proper float and a clean, steady hand to avoid wavy lines and gaps. Do a quick QA at the end: verify joint width, color match, sealer coverage, and moisture control, and watch for grout haze, pinholes, or uneven lippage during curing so you can catch problems before a walk-away job.
Grout selection: sanded vs unsanded vs epoxy
Picking the right grout is crucial for your tile job. For joints wider than 1/8 inch, go with sanded grout. It’s stronger and won’t shrink as much over time. If you have smaller gaps or are working on a backsplash where tiles are close together, unsanded grout is the way to go.
Epoxy grout is for high-traffic areas like kitchens and bathrooms. It’s tough and water-resistant but pricey. Maintenance-wise, epoxy needs less cleaning compared to regular grouts, which can get stained easily if not sealed properly.
Trim, transitions, and edge treatment
When it comes to finishing your concrete slab, don’t skimp on the trim. Use bullnose edges for smooth corners where walls meet floors or where two slabs come together. Metal trim is a good choice too, especially around doorways and high-traffic areas.
Caulk movement joints to prevent water from seeping in and causing damage. Make sure the base compaction is solid before you start caulking; weak spots will lead to cracks down the line. For transitions between different surfaces or materials, use a proper trowel that matches your edge needs—this helps align edges neatly without leaving gaps.
Avoid using cheap trim or skipping movement joints entirely. These details might seem small but they’re crucial for long-term durability and aesthetics of your concrete work.
Safety, Common Mistakes, and Troubleshooting
Safety first drives every step of tile work, from eye and face protection, gloves, dust masks or respirators, and non-slip footwear to a strict rule against loose clothing and a clean work zone around grinders and mixers. Use proper blade guards, splash containment, water management, and correct mixing speeds to prevent kickback or spatter, and never operate wet saws or concrete grinders without following the manufacturer’s safety guidance. Watch for common notch-size mistakes, like choosing 1/4″ versus 1/2″ based on tile thickness or grout joint width, and don’t skip substrate tolerance or the patching and priming recommendations, because those oversights show up as lippage, uneven thin-set, or cracked grout after the install, forcing fixes or rework.
In practice, that attention pays off during troubleshooting and fixes: you’ll identify signs of improper notch size or flatness early and verify flatness with a straightedge and level before grouting, preserving time and material. The benefit is a durable, even surface that won’t crack or shift with seasonal movement, and a safer, faster job with fewer dramatic last-minute scrambles to correct mistakes or redo work later on.
Safety precautions
Wear the right gear: hard hat, safety glasses, steel-toed boots, and gloves. Don’t skimp on PPE. It’s not optional.
Handle power tools with care. Keep blades sharp and clean. Never use a cordless drill without its battery guard to prevent accidental triggers. Always unplug or switch off before changing bits or making adjustments.
When mixing thinset, wear a dust mask and goggles. Thinset can be harsh on your lungs and eyes. Mix in small batches to avoid waste and keep the work area clean.
Common mistakes and quick fixes
Avoid these common pitfalls to keep your concrete project on track.
- Wrong notch depth: Notching too shallow can lead to weak spots. Double-check the manufacturer’s specs for proper depth.
- Poor flatness checks: Skipping this step means uneven surfaces. Use a straight edge or level regularly during work.
- Inadequate coverage: Leaving gaps around edges lets water in, causing damage over time. Ensure full coverage with grout and sealant.
Take the extra minutes to check these points; it’ll save you headaches later on.
Cost, Time, and Advanced Planning Tips
This section lays out a practical cost and timing plan for tile projects, tying material costs to notch sizes (1/4″, 1/2″, or larger) and tile dimensions while clearly outlining labor by task, from prep to finishing. You’ll see a simple material tally that covers adhesive, grout, backer board, sealant, and waste, plus how notch choice affects coverage, consumption, cure times, your tool use, and the risk of rework. It also offers time benchmarks, a lightweight Gantt-style checklist for a backsplash or small tile job, plus quick notes on acclimation, ordering, and checking delivery windows to keep the job on track.
The point is to give you realistic expectations on lead times, acclimation, curing windows, and haze cleanup so you can plan without surprise delays or crunch weeks. That context helps you protect the budget and schedule by planning for extra tile, matching batches, validating tile size and thickness, substrate flatness, and notch compatibility before you cut, lay, or grout. You’ll see why a thoughtful plan pays off by reducing waste, smoothing trades, and giving you a clear, controllable path from delivery to finished grout, with a margin for mistakes and regional supply swings.
Cost comparison by tile type and finish choices
Pick your tiles wisely; they can make a huge difference in both upfront costs and labor expenses. Vinyl tiles, for instance, are budget-friendly but require more meticulous installation compared to ceramic or porcelain tiles. If you’re going with ceramics or porcelains, the cost will be higher initially, but these materials often mean less work during installation since they tend to fit together better.
Finish choices also play a role in your wallet. A matte finish might seem cheaper and easier to maintain at first glance, but glossy finishes can hide imperfections more effectively and last longer with proper care. Remember, the smoother the surface, the better it is for back-buttering, which means less grout lines showing up as bumps or cracks.
When it comes to labor costs, your choice between notch troweling and back-buttering can really add up. Notch troweling is faster but leaves more room for mistakes that need fixing later on. Back-buttering takes longer but ensures a smoother finish with fewer chances of needing repairs down the line.
Advanced layout and scheduling tips for professionals and DIYers
Dry-laying your tiles before you start pouring concrete is a must. It helps catch mistakes early, saving time and money later on. Make sure to check base compaction and level the surface properly first.
Avoid cutting tiles into narrow edge pieces by planning your layout carefully. Start from the center of the room or area and work outwards, using whole tiles where possible. This not only looks better but also reduces waste.
Coordinate with other trades on site to avoid overlapping work schedules. For instance, if you’re pouring concrete for a floor, make sure painters aren’t scheduled to start their work right after the pour. Concrete needs time to cure properly before it can take any weight or be painted over.
Visual Checkpoints and Quality Acceptance Criteria
This section sets clear visual checkpoints you can actually hit on a DIY tile job. Target coverage means at least 95% tile adhesion with no obvious air pockets, glaze haze, or grout-less gaps, and you’ll keep a simple photo log for each area. Check flatness with a straightedge or ledger board, noting high spots or dips beyond 1/16 inch over 12 inches. Aim for uniform grout joints, define minimum and maximum widths, and flag slightly crowded or oversized joints before the grout cures. Then confirm edges, corners, and alignments stay square with cabinets, outlets, and tile seams, and plan a quick clean to remove haze and residue before sealing.
This matters because it gives you a real, actionable finish checklist you can trust rather than guesswork. A practical pass/fail system, a short tool list, and a photo record help you decide when to touch up or rollback, and keep cleanup from turning into a rerun. You’ll move faster with fewer call-backs, reduce the risk of visible misalignments, and protect the long-term look of your install by catching issues before grout cures and adhesive sets.
How to inspect mortar coverage and seating
This checklist helps ensure your tiles are properly adhered with the right amount of mortar. Use it after laying tiles but before grouting.
- Mortar thickness: Check that mortar is at least 1/8 inch thick under each tile. Measure with a ruler; too thin can cause loose tiles.
- Tiles level: Ensure no high spots or gaps between tiles using a straightedge. Unevenness means poor seating and potential cracking.
- Mortar coverage: Look for full mortar coverage under each tile edge, not just in corners. Missing areas can lead to loose tiles over time.
- Pull test: Gently try to lift a corner of the tile; it should resist firmly. If it lifts easily, there’s insufficient mortar or improper seating.
- Random removal: Carefully remove a few tiles and inspect mortar coverage underneath. This reveals any hidden issues missed visually.
- Wall vs floor standards: Walls need full edge coverage; floors can have slight gaps but must be level and firmly seated. Different expectations for each surface.
- No hollow sounds: Tap tiles lightly with a hammer; they should sound solid, not hollow. Hollow sounds indicate insufficient mortar or improper seating.
- Mortar color consistency: Check that the mortar under all tiles is consistent in color and texture. Discoloration can signal inconsistent coverage.
- No visible gaps: Look for no gaps between tile edges and substrate, indicating proper mortar application. Gaps mean inadequate coverage or improper seating.
Quick rule: If you can lift a corner of the tile easily with your finger, it’s not properly seated.
Final walk-through checklist
Use this checklist during your final site inspection before handing over the project to ensure everything meets quality standards.
- Flatness check: Ensure the concrete surface is smooth and even. Use a straightedge or level to confirm no high spots or dips are present.
- Grout width verification: Confirm grout lines between tiles are consistent and meet specifications. Measure several joints with a ruler to ensure uniformity.
- Sealed joints inspection: Check that all joint seals are properly applied without gaps or cracks. Look for any signs of sealer failure.
- Trim fit assessment: Verify trim pieces are securely installed and flush against the surface. Gently tug on each piece to ensure it’s firmly attached.
- Hollow spots detection: Tap lightly with a hammer around edges and corners to check for hollow areas indicating improper installation or voids under tiles.
- Mortar coverage review: Inspect mortar joints for proper seating as previously covered. Confirm no gaps or excess mortar is visible.
- Surface cleanliness: Ensure the surface is free of debris, dirt, and construction residue before final sealing or coating application.
- Water test: Conduct a water test to confirm there are no leaks or seepage points. Pour water over the surface and observe for any pooling or leakage.
Quick rule: If it looks good, feels right, and passes simple tests like tapping and water testing, you’re likely in the clear.
Conclusion
Choosing the right notch size matters for safety, durability, and a clean look that lasts. When you pick 1/4″ or 1/2″, you’re protecting your installation from lippage, adhesive failure, and premature cracks.
Make the move now with this practical check: verify the substrate is flat and clean, decide notch size based on tile size and surface flatness, mix the grout and mortar to spec, hold the trowel at the correct angle, back-butter if required, comb the adhesive with the notched edge, press each tile with steady, even pressure, space and align tiles to keep joints uniform, check for level and true as you go, let the mortar cure as directed, then grout and seal after curing, and perform a final visual check before using the area. Follow these steps in that rough order, and stop if anything looks irregular.
Two common mistakes to avoid are rushing the set time or skipping substrate prep, which invites hollow spots and cracked tile; never skimp on surface flatness or use the wrong notch for your tile size, and always wear eye protection and gloves when mixing and troweling. If you detect excessive lippage, inconsistent bed thickness, or grout that won’t cure properly, pause and recheck the substrate, adhesive, and tile spacing before continuing.
If you’re laying large-format tile on an uneven substrate, or the project scope creeps into stairs or wet areas, it makes sense to call a professional instead of pushing on with compromises. Stay disciplined, test a small area first, and keep safety non-negotiable, because the right notch choice built on solid prep delivers a durable, professional finish you can be proud of.
FAQ
How do I decide between 1/4″ and 1/2″ notch for ceramic tile?
Check the tile thickness and how much adhesive you need under it. 1/4″ works for thinner tiles; 1/2″ is better for large or heavy tiles on flat surfaces. If in doubt, go with 1/4″ and back-butter the tile.
What tile size usually needs a 1/4″ notch?
Small tiles like 4×4 or 6×6 often use 1/4″. Thin tiles benefit from a smaller notch so the adhesive stays put without squeezing out too much.
How does flatness of the substrate affect notch choice?
If the surface is flat within a tight tolerance, you can use the larger 1/2″ notch. If the floor isn’t flat, use the smaller notch and back-butter to even out the bed.