

Introduction
A rocking concrete paver on sand happens when the base shifts and the paver isn’t bedded level. You’ll usually see movement when a surface feels wobbly or shows gaps around edges. This article helps you decide whether to regrade the base or switch to mortar in a simple, hands-on way.
To identify the problem, look for sunken edges, gaps, or a paver that rocks more than nearby units. You’ll need common hand tools, a level, a flat trowel, and the right base material; check labels or manufacturer guidance for anything specific. Start by exposing the base, regrading the sand or base material, and tamping it smooth, then add crushed stone dust or sand to bring the paver back to level. If you switch to mortar, follow guidance on when and how to set pavers with mortar instead of a loose base, and always verify local rules.
Key takeaways
- Identify sunken pavers by measuring gaps and testing rockiness with a straightedge.
- Check base condition: inspect sand bed, crushed stone dust compaction, and drainage.
- Gather tools and materials: screed, level, tamper, polymeric sand, and edging.
- Relevel on sand base using crushed stone dust before applying polymeric sand.
- Know when to regrade or switch to mortar based on load and movement.
- Safety: wear eye protection, observe trenching rules, and avoid heavy lifting alone.
Table of Contents
- Introduction
- Key takeaways
- Quick Diagnosis: Identifying Rocking, Sinking, and Underlying Causes
- Tools and Materials Checklist
- Planning the Repair: Scope, Permits, and Staging
- Removing and Inspecting Pavers and Base
- Fixing on a Sand Base: Releveling with Crushed Stone Dust and Polymeric Sand
- When to Regrade the Entire Area: Signs, Prep, and Workflow
- When to Switch to a Mortar Bed: Pros, Cons, and Essential Steps
- Cost, Time, and Durability Comparison to Inform Your Decision
- Conclusion
- FAQ
Quick Diagnosis: Identifying Rocking, Sinking, and Underlying Causes
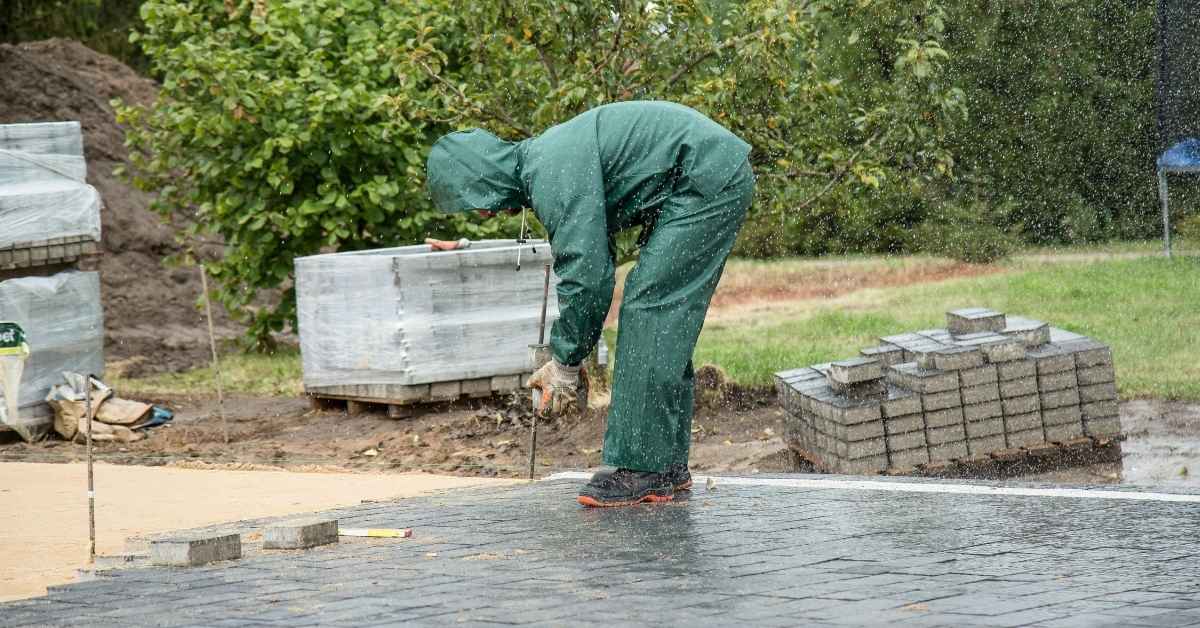
Start by distinguishing rocking from simple settlement with a wiggle test. Note movement direction and use a straightedge to see high and low edges under loading or tapping. Listen for hollow sounds when you tap with a mallet as a quick clue.
Common underlying causes include washout under the edge, insufficient base compaction, edge restraint failure, root intrusion, and voids from missed compaction or drainage issues. Use a thin rod or screwdriver to probe under the paver and check for gaps beneath the joint sand. Inspect drainage and look for patterns that point to a specific cause versus a general problem.
Visual and Tactile Checks
First, give your paver path a good look-over. Check for any gaps between pavers, tilted units, or water pooling. These could all be signs of underlying issues.
Next, grab a straightedge – a long level will do. Run it along the surface to feel for any high or low spots. This’ll help you pinpoint where your grade might be off.
Now, get yourself a thin rod or screwdriver and gently probe under the pavers in suspect areas. You’re looking for any soft spots or voids that could indicate washout or missed compaction.
Common Root Causes to Look For
Washout is a common culprit. It happens when water washes away the base material under your pavers, leaving voids. You’ll see signs of erosion and settlement.
Insufficient base compaction can also cause problems. If the base wasn’t properly compacted, it can settle over time, taking your pavers with it. Listen for hollow sounds when you tap on the pavers with a mallet – that’s a sign of poor compaction.
Failing edge restraints can lead to pavers shifting and rocking. Check your edges for any signs of failure, like gaps or movement.
Tree roots can also cause issues. If you’ve got trees nearby, keep an eye out for any signs of root intrusion, like heaving or cracking.
When the Problem is Beyond DIY
If you’re seeing repeated settlement after repairs, it might be time to call in a pro. This could indicate a more serious underlying issue that needs expert attention.
Large uneven areas are another red flag. If your paver path has big sections that are significantly lower than others, it’s probably not something you can fix on your own.
Drainage into structures is a serious problem. If water is getting into your home or other buildings due to paver issues, don’t try to fix it yourself – get a professional involved immediately.
Tools and Materials Checklist
Define core tool categories: hand tools like a trowel, rubber mallet, chisel, level, straightedge, and pry bar; optional power tools such as a hammer drill with masonry bit, compact mixer, or rotary hammer. Include measuring gear like a laser or transit and a chalk line. Explain each tool’s role in repairs and regrading.
List essential materials and specs: base materials (sand, paver base, polymeric or sharp sand), setting mortars or mixes if converting to mortar, stabilizers or bonding agents, polymeric sand as an option, and sealers. Emphasize checking product labels and local standards for material strengths and bed thickness. Safety and standards notes cover PPE and local requirements for mixes and workmanship.
Essential hand tools and small equipment
Before you start any repair, ensure you have these essential hand tools to remove, set, and check pavers safely.
- Pry bar: Helps lift pavers without damaging them. Skipping this can lead to broken pavers.
- Rubber mallet: Taps pavers into place gently, preventing cracks or damage.
- Trowel: Spreads sand and mortar evenly for a smooth bedding surface.
- Broom: Sweeps excess material off pavers after setting.
- Straightedge: Levels pavers and checks for low spots in the base. Missing this step can cause uneven surfaces.
- Chisel: Helps cut or trim pavers to fit around edges or curves.
- Level: Ensures pavers are even, preventing rocking and sinking.
- Tape measure: Accurately measures paver size and spacing for a neat finish.
Quick rule: Always double-check your tools before starting to avoid delays.
Materials: bedding, leveling media, and joint stabilizers
Choose the right materials for your paver type and climate to ensure a durable repair.
- Bedding sand: Provides a stable base. Check particle size (0.5-1mm) and purity (98% silica). Wrong specs can cause instability.
- Paver base (crushed stone): Creates a solid foundation. Ensure it’s clean, angular, and well-draining to prevent settling.
- Polymeric or sharp sand: Mixed with cement for mortar beds. Check for proper grading (0-4mm) and cleanliness.
- Setting mortars: For mortar bed conversion. Choose one compatible with your pavers and climate. Wrong choice can lead to cracking or delamination.
- Stabilizers/bonding agents: Enhance mortar strength. Check compatibility with chosen mortar.
- Polymeric sand: Finishes joints, preventing weed growth. Ensure it’s compatible with your paver type and climate.
- Sealer: Protects pavers from moisture and stains. Choose one suitable for your paver type and local climate.
Quick rule: Always check product labels and local standards before purchasing materials.
Optional power tools and safety gear
These tools speed up work, but proper use is crucial for safety and efficiency.
- Plate compactor: Consolidates base material. Improper use can damage pavers or create voids in the base.
- Hammer drill with masonry bit: Drills into concrete or stone pavers for anchors. Without proper safety, kickback can cause injury.
- Wet saw: Cuts pavers accurately. Improper use can lead to damaged pavers and water waste.
- Power washer: Cleans pavers before installation. High pressure can damage pavers if not used correctly.
- Safety glasses: Protects eyes from debris during demolition and cutting.
- Dust mask: Shields against silica dust when cutting or drilling pavers.
- Work gloves: Protect hands from cuts, burns, and chemical exposure.
- Ear protection: Reduces noise levels when using power tools.
Quick rule: Always follow manufacturer guidelines for safe operation of power tools.
Planning the Repair: Scope, Permits, and Staging
Define repair scope by quantifying affected pavers and assessing whether issues are isolated or widespread. Decide between spot-fix, regrading, or switching to a mortar-based system. Keep options flexible based on observed conditions.
Drainage and slope check the existing patterns and base stability to prevent future settling. Plan regrading or base repair accordingly and map entry points and staging zones. Outline permits, utilities, and weather considerations to keep the project compliant and safe.
Assessing repair scope
Before you start, figure out the extent of your paver problem. Grab a flashlight and check each paver at night to see if they’re rocking or sinking.
If it’s just one or two pavers, you might get away with a spot fix. But if there are more than that, or if the issue is widespread, you’ll need to consider regrading or switching to a mortar-based system.
Remember, if pavers are sinking, it’s likely due to an unstable base. You might need to dig down and repair that before laying new pavers.
Permits, utilities, and site prep
Before you break ground, check your local regulations. You might need a permit for this work. Call your city or county office to find out.
Mark any underground lines, like gas, electric, or irrigation, before you start digging. You can call 811 to have them marked for free in most places.
Protect any nearby landscaping. Lay down some cardboard or plastic sheeting to keep dirt and debris off your grass and plants.
Scheduling and weather considerations
Timing is key with concrete work. You’ll need a few dry days in a row to let the new base or mortar cure properly. Check your local forecast before you start.
Also, plan for access. Make sure there’s room for equipment and materials to get where they need to go without damaging the existing pavers.
If you’re working on a slope, consider the time of day. It might be easier to work in the morning when the sun is lower and the ground is cooler.
Removing and Inspecting Pavers and Base
Plan a safe removal method with clear PPE and a pause-for-safety approach. If needed, disable nearby utilities and establish a stable work zone. Label and set aside pavers to avoid mix-ups.
Inspect bedding and subgrade for voids, washout, contamination, roots, or moisture issues that could affect new bedding. Evaluate the base layer’s hardness and settling, and note areas needing regrading or replacement. Document fixes before replacement and plan proper disposal and cleanup.
Safe removal and pattern labeling
Start by wearing gloves to protect your hands. Use a flathead shovel or a paver pry bar to gently lift each paver from one corner.
Be careful not to chip the edges. Work in small sections, so you don’t disturb too many pavers at once.
As you remove them, number or mark each paver and record its position. This will help you reinstall them in their original pattern later.
Stack removed pavers in a dry, labeled area to prevent mixing with new ones during replacement.
Inspecting the bedding layer and subgrade
Once pavers are removed, probe the sand bedding layer with a screwdriver or a thin rod. Look for soft spots or voids, which indicate instability.
Check for standing water, erosion, or washout. These issues can compromise your new bedding and should be addressed before reinstallation.
Inspect the subgrade for contamination, such as roots, rocks, or debris. Remove any contaminants found to ensure a solid foundation for your new pavers.
If you find significant issues, note them down. You may need to regrade or replace the affected areas before reinstalling the pavers.
Salvage vs. replace paver decisions
Before deciding whether to reuse your old pavers, inspect them for signs of damage. Cracking or chipping along the edges can weaken the paver and make it susceptible to further damage.
Look for severe edge chips. If more than 10-15% of the edge is chipped, consider replacing that paver.
Spalling, where pieces of the surface flake off, also indicates a paver should be replaced. This is often due to moisture getting into the paver and freezing, expanding, and breaking off pieces.
If pavers show no signs of significant damage, they can likely be reused. However, if more than 20-30% of your pavers need replacing, it might be worth considering a full replacement for consistency in appearance.
Fixing on a Sand Base: Releveling with Crushed Stone Dust and Polymeric Sand
Identify root causes of rocking on a sand-set base and outline when regrading is preferred over switching to mortar. Consider loose base, insufficient compaction, drainage issues, or uneven subgrade as the main culprits. Use these clues to guide the repair path.
Detail a step-by-step workflow: remove problem pavers, clean and inspect the base, relevel with a stabilized sand bedding mix, and recompact in multiple passes. Ensure the surface is flat and solid before reinstallation and joint stabilization with polymeric sand.
Rebuilding the bedding layer (sand vs. stone dust)
When fixing rocking pavers on a sand base, it’s crucial to rebuild a stable, consistent bedding surface. Both sand and crushed stone dust can be used, each with its own advantages.
Sand is commonly used due to its availability and cost-effectiveness. It provides a smooth, even base for pavers. However, it can settle over time, leading to voids that cause rocking.
Crushed stone dust, on the other hand, has a larger particle size and better compaction properties. It’s more stable and less prone to settling than sand alone. Mixing stone dust with sand creates a bedding layer that combines the best of both worlds – smoothness from sand and stability from stone dust.
To create this mix, combine equal parts of clean, well-graded sand and crushed stone dust. This ratio provides optimal stability while maintaining a level surface for your pavers.
Resetting pavers to grade and compacting
After preparing the bedding layer, it’s time to reset your pavers. Start by screeding the bedding material to achieve a smooth, level surface.
Begin setting pavers at one corner of your project, using a straight edge or string line as a reference for alignment. Tap each paver gently with a rubber mallet to ensure they’re seated firmly and evenly on the bedding layer.
Once all pavers are set, it’s time to compact them into place. Use a plate compactor, ensuring it’s large enough to cover at least two paver widths at a time. Make multiple passes over the entire surface, applying even pressure to seat the pavers and remove any air pockets from the bedding layer.
Compaction is crucial for preventing future rocking. It ensures that your pavers are firmly seated on a solid, stable base. After compaction, check your work by walking across the surface – it should feel firm and level underfoot.
Filling and stabilizing joints with polymeric sand
Polymeric sand is a jointing compound that combines sand, polymers, and additives to create a stable, durable bond between pavers. It’s essential for preventing weed growth, stopping insect infiltration, and maintaining long-term stability.
To install, spread a layer of polymeric sand over your pavers, using a scoop or shovel. Work it into the joints with a broom or squeegee, ensuring they’re completely filled to a depth of about 1/2 inch.
After filling, use a vibrating or brushing tool to activate the polymers in the sand. This step is crucial for creating a strong bond between pavers and preventing joint erosion over time. Follow your product’s specific instructions for activation, which may involve watering or allowing the joints to cure naturally.
Be careful not to overapply polymeric sand – it can clog joints if used excessively. Also, avoid wetting the joints prematurely, as this can cause the polymers to wash out before they’ve had a chance to set. Once cured, your pavers should be firmly locked in place, resistant to rocking and other damage.
When to Regrade the Entire Area: Signs, Prep, and Workflow
Define clear criteria for a full regrade, such as widespread settlement, chronic drainage problems, or base failure. Learn to distinguish these from localized settling with a careful assessment. Use the signs to decide if a full rebuild is needed.
Pre-work diagnostics should assess slope, drainage away from structures, and paver height variance. Plan removal, protection of utilities, and temporary drainage as needed. Outline subgrade correction and base rebuild steps to ensure long-term stability and proper drainage.
Indicators for full-area regrade
When your concrete paver installation starts showing signs of widespread distress, it’s time to consider a full regrade. Here are the practical indicators:
Frequent movement across the field: If you notice pavers shifting or rocking in multiple areas, not just one or two spots, that’s a clear sign something’s wrong with the base.
Repeated spot repairs failing: If you’ve tried fixing low spots or sunken pavers before, but they keep coming back, it might be due to an underlying issue that requires a full regrade.
Persistent water flow issues: Standing water, pooling, or consistent drainage problems can lead to base failure and require a complete overhaul of the area.
High-level regrade workflow
The process of regrading your concrete paver area involves several major phases. Here’s a summary:
Demolition: Start by carefully removing the pavers and inspecting the base for any issues. Store them safely for reinstallation later.
Remedial grading/drainage correction: Address any subgrade problems, ensure proper drainage away from structures, and prepare the area for rebuilding.
Rebuilding the base in stable lifts: Lay down a new base using crushed stone or other suitable material. Compact it in layers to create a solid foundation for your pavers.
Relaying pavers with proper edge restraints: Once the base is set, reinstall the pavers following the original pattern, ensuring they’re level and secure. Use edge restraints to prevent future movement.
Drainage and slope best practices
Proper grading is crucial for preventing water-related issues in your concrete paver installation. Here are some key principles:
Positive slope away from structures: Ensure the entire area has a slight, consistent slope (around 1-2%) directing water away from buildings and other structures to prevent pooling and damage.
Consider adding channel drains or other drainage features where necessary to help manage water flow effectively.
Improved edge restraints: Use durable, secure edge restraints along the perimeter of your paver area to prevent pavers from shifting and maintain proper slope over time.
When to Switch to a Mortar Bed: Pros, Cons, and Essential Steps
Define the decision boundary for mortar: situations with slope concerns, heavier loads, or need for rigid support. Compare this to staying with a sand-set approach, using quick criteria to guide the switch. Consider project goals and site constraints.
Outline essential steps: base inspection, excavation or regrading as needed, mortar selection and mixing, forming a stable bed with correct thickness, paver setting, and curing. Discuss trade-offs and common pitfalls to avoid mistakes.
Pros and cons of mortar vs sand set
The choice between a mortar bed and a sand set depends on your project’s needs. Here are the key differences:
Pros
- Durability: Mortar beds provide better long-term stability.
- Rigidity: They offer more support for heavy loads and sloped surfaces.
- Weed resistance: Mortar reduces weed growth compared to sand.
- Freeze-thaw cycling: It handles seasonal changes better than sand.
Cons
- Cost: Mortar is more expensive than sand.
- Installation time: Laying a mortar bed takes longer.
- Cracking risk: Improper base preparation can lead to cracking.
- Drainage: Mortar doesn’t drain as well as sand, so proper design is crucial.
Use a mortar bed when you need extra support, durability, or weed resistance. Otherwise, a sand set might be sufficient.
Key steps in a mortar-bed conversion overview
Converting to a mortar bed involves several key steps:
1. Removal: First, remove existing materials carefully.
2. Subbase preparation: Inspect and prepare your subbase, regrading if necessary.
3. Laying the mortar bedding: Mix and lay a stable mortar bed of proper thickness.
4. Setting pavers: Place your pavers into the wet mortar, ensuring they’re level and well-supported.
Remember to follow manufacturer instructions for mixing ratios and allow adequate curing time.
Future repairs and maintenance considerations
Mortar beds require different repair and maintenance than sand sets:
Repairs: Due to their rigidity, mortar beds may need chipping out and replacing pavers for repairs. This is more involved than simply lifting and resetting pavers in a sand bed.
Maintenance: While mortar reduces weed growth, it still requires occasional cleaning and sealing to maintain its appearance and longevity. Joints should also be checked periodically for any settling or cracking.
Regular inspection and maintenance will help ensure your mortar-bed paver installation lasts as long as possible.
Cost, Time, and Durability Comparison to Inform Your Decision
Identify the main cost drivers such as labor hours, material choices, area size, and site access. Explain how these factors influence the project timeline and long-term durability. Emphasize evaluating access restrictions and safety when planning work.
Explain how material decisions affect durability, including when to favor mortar for movement resistance and weed management versus sand-based options for easier repairs. Provide a framework to gather quotes and compare bids without quoting specific prices, focusing on scope and quality of workmanship.
What drives cost and labor
Costs vary greatly depending on the scale of work. Here’s what to consider:
Labor hours are driven by area size, complexity (like curves or patterns), and access issues.
Material choices impact cost: base materials, pavers, mortar, polymeric sand, and any specialty tools needed. Demolition extent also plays a role.
Complexity of drainage work, if required, adds to both time and cost.
Time and disruption trade-offs
A quick spot-fix minimizes disruption but might not address underlying issues. Here’s what extends timelines:
Full regrades or mortar conversions take longer due to base preparation, setting time, and potential weather delays.
Access issues (like stairs or inclines) slow down work. Complexity of the job also impacts duration.
Plan for downtime: consider when you’ll use the area again and adjust your schedule accordingly.
Durability and lifecycle trade-offs
Each approach has its pros and cons in terms of longevity:
Sand-set repairs are quick but may not address underlying issues. They’re easier to repair, though.
Full regrades provide a solid base but can be labor-intensive. They last longer if done right.
Mortar-bed installations offer superior load transfer and weather resistance. Repairs might be trickier but less frequent.
Maintenance frequency depends on your climate, usage, and how well the initial work was done.
Conclusion
The key to a durable, good-looking paver area is choosing the right repair path now—based on what you find during diagnosis, and sticking to solid, reversible steps that keep you safe and the deck stable for years to come. If the base shows localized rocking but the rest is solid, you can fix within the sand base; if signs point to widespread settlement, plan a full regrade; if movement persists or frost issues loom, a mortar bed may be needed.
To act now, follow this flow: confirm the scope and permits, lay out a staging plan, remove and inspect the pavers and base, then choose your method and work in logical order—clear, level, compact, and test as you go; start small to verify your approach before committing to the whole area; and always test any patch in a low-risk spot before expanding. Use crushed stone dust and polymeric sand for sand-base fixes, or prepare for a regrade if the signs are broad, and switch to a mortar bed only when the pros and cons line up for your situation and climate.
Common mistakes to avoid are skimping on edge restraints or drainage, skipping proper compaction and testing, and applying polymeric sand without letting it cure or in moisture that’s too high. Safety rules are simple: wear eye protection and gloves, work slowly to avoid disturbing adjacent pavers, test on a small patch first, and never rush a cure or set. If you’re unsure about permits, drainage, or frost risk, or if the area is large or structurally compromised, call a professional rather than pushing ahead, and stay focused on a sound repair plan you can stand behind tomorrow and for years to come.
FAQ
How can I tell if pavers are sunken or uneven and what causes it?
Walk the area and look for high or low spots and gaps between pavers. Common causes are a weak base, settled sand, or drainage issues. Check the underlying base and joints to confirm what shifted.
What tools and materials do I need to fix a sunken or uneven sand-base paver area?
Have a straightedge, level, shovel, broom, tamper, and a small rake. You’ll need crushed stone dust or coarse sand, polymeric sand for joints, and new pavers if some are damaged. Always read labels and follow manufacturer instructions for any product you plan to use.
What steps should I take to fix the base layer issue before releveling?
Inspect the base as you remove pavers. Replace or compact any soft spots with fresh base material and recompact in thin lifts. Ensure drainage paths are clear and the base is evenly compacted before retooling the surface.
When and how should I replace pavers and use polymeric sand between joints?
Replace pavers that are cracked or out of alignment. After setting the pavers on a correct bed, sweep polymeric sand between joints and compact as directed by the product label. If in doubt, follow the manufacturer’s instructions and local guidelines.