
Introduction
Tile ideas for small bathrooms are practical ways to choose and install tiles that make a tight space feel bigger and easier to maintain.
Think about contrast, grout color, and mixing tile sizes to create interest without crowding the room, and plan demolition and layout to fit fixtures and doors. For installation, focus on a simple dry layout, careful measuring, and staggered joints to keep lines clean. Waterproofing matters in wet areas, so follow product labels and local rules to choose membranes and installation methods that suit your space.
Key takeaways
- Plan tile sizes and grout lines to maximize perceived space without crowding fixtures.
- Waterproofing: seal shower niches and corners before thinset to avoid leaks.
- Dry-fit layouts and cardboard mockups guide small-bath arrangement; adjust before mudding.
- Use consistent tile layout symmetry; avoid heavy patterns in tiny rooms to reduce chaos.
- Demolition planning matters: protect plumbing lines, doors, and utilities with clear shutoffs.
- Safety: wear eye protection, dust mask, and watch for hidden fasteners during removal.
Table of Contents
- Introduction
- Key takeaways
- Tile Selection Rules for Small Bathrooms
- Planning and Preparation: Measurements, Samples, and Mood Boards
- Demolition, Structural Prep, and Waterproofing
- Plumbing, Piping, and Drainage Considerations for Diyers
- Electrical, Lighting, and Smart Upgrades
- Tiling Techniques and Installation Tips
- Vanities, Toilets, and Fixture Selection for Tight Spaces
- Costs, Materials Checklist, Permits, and Hiring Pros
- Conclusion
- FAQ
Tile Selection Rules for Small Bathrooms
When choosing tile for a small bathroom, think in terms of how size, color, and finish will affect perceived space. Large-format tiles on floors can reduce grout lines and create a seamless look, while small accents can highlight focal areas without crowding the room. Always test samples next to existing fixtures to confirm cohesion with vanities, countertops, and hardware.
Use neutral or light colors to brighten the space, and consider subtle color shifts to add depth without shouting patterns. Pair a small tile with a larger tile to keep visuals calm and avoid busy walls or floors. Select grout colors that blend with the tile to minimize edge lines, and seal grout to reduce maintenance. Test finishes for slip resistance on floors and for how gloss levels interact with lighting and cabinetry.
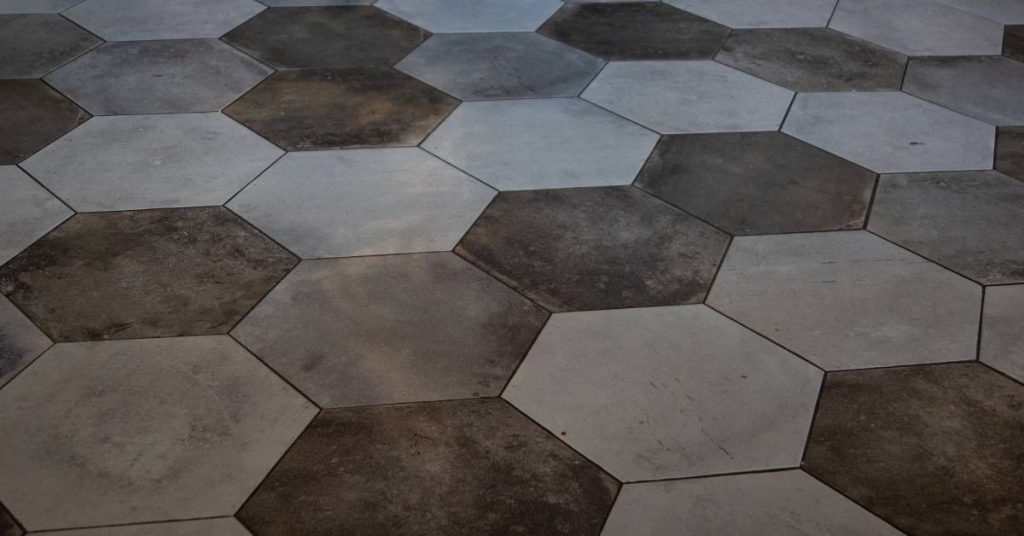
Size, scale, and layout choices
In small bathrooms, tile size matters. Larger tiles make spaces feel bigger by minimizing grout lines.
Floors: Use large-format tiles (24″ x 48″ or larger) for a sleek, expansive look. Keep it simple with horizontal runs.
Walls: Large tiles work here too, but you can mix in smaller accents (like mosaics) to add interest without overwhelming the space.
Color, contrast, and grout strategy
Light colors reflect light, making spaces feel brighter. But don’t be afraid to use color; just keep it subtle.
Color: Stick with a 2-3 shade range for walls and floors. Too much contrast can make a small room feel smaller.
Grout: Match grout to tile color to minimize lines, or go one shade darker for a subtle pop. Seal grout to prevent moisture buildup.
Material and finish considerations
Choose materials that suit your space’s needs and maintain cohesion with fixtures.
- Ceramic/Porcelain: Durable, affordable. Look for PEI rating 4-5 for heavy traffic areas. Avoid high-gloss in small spaces.
- Natural Stone: Luxurious but porous. Seal regularly to prevent staining. Slip-resistant options available.
- Mosaics: Add interest with smaller tiles. Use on accent walls or floors, not both.
Planning and Preparation: Measurements, Samples, and Mood Boards
Start with a clear measurement workflow: measure room dimensions, calculate wall and floor square footage, and note doorway tolerances. Use a tape measure, a laser if available, and a simple notepad or smart device to keep a step-by-step checklist. These basics set up reliable tile ordering and layout decisions.
Order a sensible mix of samples to compare color, sheen, and edge quality under the room’s lighting. Include lead times and check return policies so you can plan without surprises. Build a mood board, digital or physical, to organize options and constraints against your space and budget.
How to order and evaluate samples
Ordering tile samples is crucial before committing to a purchase. Here’s how:
Quantity: Order at least three of each tile option you’re considering. This way, you can compare them side by side and see how they look in different lighting.
Lighting checks: Evaluate samples under the same light conditions as your bathroom. Hold them up to existing fixtures or take them into the room to see how they look at different times of day.
Tactile testing: Run your fingers over the tiles to check their texture and edge quality. This can’t be judged from a photo alone.
Creating a practical mood board
A mood board helps you visualize your tile choices with other elements in the room. Here’s what to include:
Tiles: Add samples of your chosen tiles, or images if you’re still deciding.
Fixtures and finishes: Include photos or swatches of faucets, vanities, paint colors, and other fixtures to see how they pair with your tile choices.
Grout: Don’t forget to consider grout color. It can make a big difference in the overall look of your space. Add samples or photos of grout options you’re considering.
Demolition, Structural Prep, and Waterproofing
Define the scope and required checks before tearing anything out: confirm substrate options and the waterproofing approach for showers and wet walls. Compare cement board vs green drywall and plan how they interact with your tile system. Have a clear idea of the shower pan, slope, and drainage strategy before proceeding.
Follow safe demolition practices: shut off utilities, wear PPE, and protect adjacent finishes. Document any framing or plumbing issues for later repair. Then review substrate prep options and how each will be installed to support a reliable tiling job and waterproofing plan.
Demolition and safety precautions
Before you start, turn off water and electricity at the main valves. Wear gloves, goggles, and a dust mask.
Protect adjacent finishes with plastic sheets or drop cloths. If your home was built before 1978, test for asbestos/lead.
Use a reciprocating saw to cut tile into smaller pieces. Keep a broom and dustpan nearby to manage debris. Hire pros if you’re unsure about structural or electrical issues.
Substrate and wall systems: cement board vs. green board vs. Schluter
Cement board is ideal for showers due to its moisture resistance. It’s thicker, needs more fasteners, and edge details must be taped.
Green drywall resists mold but isn’t as durable. Use it on wet walls, not showers. Schluter/Kerdi systems are integrated kits with membranes, uncoupling membranes, and shower trays.
Choose based on your needs: cement board for heavy-duty use, green board for light moisture, and Schluter for a complete system.
Waterproofing methods and membranes
Liquid waterproofers like RedGard are easy to apply but can fail at seams. Sheet membranes are robust, require proper seam treatment, and need a primed surface.
Integrated kits offer convenience but may limit design flexibility. Avoid common failures by ensuring proper slope, drainage, and following manufacturer’s guidelines for primer, membrane application, and seam treatment.
Always water-test your work after installation to catch any leaks early.
Plumbing, Piping, and Drainage Considerations for Diyers
Outline common changes in small baths, such as piping adjustments and fixture sizing, and note how these decisions affect space and tile layouts. Identify existing piping routes, potential trench locations, and access panel considerations early. Check for any permit or code requirements that may apply to your project.
Decide whether to tackle changes yourself or hire a plumber, especially for major moves or vent work. Plan a high-level sequence from locating lines to final testing, while keeping future maintenance in mind. Anticipate fixed clearances and ensure your layout accommodates these constraints.
PEX Conversion Basics and Benefits
PEX, or cross-linked polyethylene, is a flexible plumbing pipe that’s easy to install and resistant to freezing. It’s great for small bathrooms where space is tight.
Why use PEX? It’s cheaper than copper, easier to install, and can handle expansion and contraction better. Plus, it’s quieter when water runs through it.
Common fittings include SharkBite push-fit connectors. They’re easy to use but remember, they’re not suitable for gas lines or high-pressure systems. Always consult local codes and consider hiring a pro for major reroutes.
Moving Drains and Shower Pans
Shifting a drain can change the layout of your bathroom. It’s not always easy, but it’s doable with careful planning.
Preformed pans are quick and easy to install. They’re great for small spaces where time is money. But they limit your design options. Mortar pans, on the other hand, give you more flexibility but take longer to install.
Ensure proper slope – at least 1/4 inch per foot – to prevent water from pooling. And always waterproof around the drain and pan to prevent leaks. If in doubt, consult a pro or your local building codes.

Electrical, Lighting, and Smart Upgrades
Map the electrical plan to bathroom zones and how lighting will interact with tile surfaces and mirrors. Include ambient, task, and exhaust lighting, plus any heated floor components or smart devices. Ensure plans align with plumbing and fixtures to avoid conflicts behind walls.
Prioritize safety and code compliance with GFCI outlets, moisture-rated boxes, and proper circuit sizing. Consider recessed or slim fixtures and dimmable options to control glare. Plan for smart devices and humidity-safe placement with reliable Wi-Fi and moisture protection.
Lighting layout and wet-rated fixtures
Plan your lighting layout to complement your tile design. Consider ambient, task, and accent lighting.
Ambient: Recessed LED can lights provide even, glare-free light. Place them 4-6 inches from the wall, centered between tiles.
Task: For mirrors, use wet-rated fixtures like vanity lights or sconces. They should be IP54 rated for moisture resistance.
Accent: Consider in-tile lighting strips or LED tape under cabinets to highlight features and create a warm atmosphere.
Floor heat and smart integrations
For heated floors, choose between electric cable or mat systems. Both require proper installation and wiring.
Cable: Install cable in a snake-like pattern, 2-4 inches apart. Use a thermostat with GFCI protection to prevent shocks.
Mat: Mats are easier to install but less flexible. They need proper spacing and should be installed according to the manufacturer’s guidelines.
Smart upgrades: Integrate your floor heating with smart home systems using a compatible thermostat. Ensure it’s rated for damp locations (like bathrooms).
Tiling Techniques and Installation Tips
Define scope and prep for floors, walls, and niches, emphasizing surface prep, substrate compatibility, and essential waterproofing steps before tiling. Establish a clear plan for how you will approach each surface to avoid rework. Keep a short checklist handy for the install day.
Lay out the plan with a planning grid and center lines, explaining how to stagger joints and balance tile sizes. Use spacers and levelers to prevent lippage and ensure consistent joints. Review tools, membranes, thinset, and grout options to fit your tiles and installation plan.
Floor and wall tile installation workflow
The key to a successful tiling job is following a clear sequence. Here’s your step-by-step guide:
Preparation: Ensure surfaces are clean, dry, and structurally sound. Apply waterproof membrane where needed.
Layout and Dry Fit: Plan your pattern on the floor using spacers to ensure even distribution of tiles. Do a dry run on the walls too.
Thinset Application: Mix thinset mortar according to instructions. Apply it to both the back of the tile (back-buttering) and the surface, notching your trowel for better adhesion.
Tile Setting: Press tiles firmly into place, using spacers to maintain even grout lines. Level them with a rubber mallet if needed.
Leveling and Grouting: Allow mortar to cure as per manufacturer’s instructions. Mix grout, apply, let it set, then clean off excess with a damp sponge.
Common tiling mistakes and how to avoid them
Even the most careful DIYer can make mistakes. Here are some common ones to watch out for:
- Improper substrate preparation: Always ensure surfaces are clean, dry, and structurally sound before tiling.
- Insufficient slope: For floors, create a slight slope towards the drain to facilitate water runoff.
- Wrong grout choice: Select a grout that’s suitable for your tile type and the area it’s in (e.g., use epoxy grout in high-moisture areas).
- Skipping primer: Priming surfaces before applying thinset or membrane can improve adhesion and prevent moisture issues.
- Ignoring expansion joints: In small baths, ensure you’ve accounted for expansion joint needs to prevent cracking.
Regularly inspect your work in progress and don’t hesitate to correct any mistakes early on.
Edge, trim, and transition solutions
Finishing edges and transitions properly can elevate your tiling job. Here are some options:
Corners: Use 90-degree trims or bullnose tiles to create clean, finished corners.
Curbs and Thresholds: For showers, use curb tiles to contain water. At transitions between floor types, use threshold strips for a smooth transition.
Clean Transitions: Use transition strips or metal edging at the junction of different floor types to prevent tripping hazards and maintain a cohesive look.
Vanities, Toilets, and Fixture Selection for Tight Spaces
Choose compact vanities and consider wall-hung or shallow-depth units to maximize floor space while maintaining usable counter area. Think about toilet and fixture sizing that keeps a comfortable clearance without crowding the tile pattern. Plan how finishes will flow with tile and hardware for a cohesive look.
Address plumbing access and how fixtures can be installed to minimize disruption in narrow spaces. Align tile runs with vanity and toilet lines, and vary tile sizes to create the illusion of more space. Use border details or linear accents to guide the eye and enhance the layout.
Sizing limits and DIY workarounds
In tight spaces, standard fixture sizes won’t always fit. But don’t let that stop you.
For vanities, aim for 18″ to 24″ wide, 16″ to 18″ deep. Wall-hung styles can save even more space.
If door trim gets in the way, use spacers or build out the wall. Just remember to keep it level and plumb.
Toilet and faucet choices for small baths
Space is tight, but options aren’t. Here’s what to consider:
Toilets: Go compact or wall-mounted. Skirted bowls hide pipes, look sleek. But they might be less comfortable.
Faucets: Opt for low-profile, widespread faucets. They’re space-conscious and easy to clean around.
Remember, comfort’s important too. Don’t sacrifice it all for a few extra inches.
Costs, Materials Checklist, Permits, and Hiring Pros
Set realistic expectations for material and labor costs specific to a small tile project, and understand typical DIY versus pro labor splits. Regional pricing will vary, so use local references to gauge what to expect. Plan for contingencies without tying yourself to exact figures.
Prepare a comprehensive materials checklist that includes tile, substrates, waterproofing, backer board, membranes, primers, sealants, switches, plumbing fittings, and essential tools. Review permit and code requirements to determine when professional involvement is needed. Create a straightforward hiring plan with a decision matrix to decide what to DIY and what to subcontract.
Tools and materials checklist
Before you start your small bathroom tile project, make sure you have all the necessary tools and materials. This list will help you stay organized and avoid mid-project trips to the hardware store.
- Tile saw: Essential for cutting tiles to size. You can rent one if you don’t plan on using it often.
- Trowels (notched and straight): For applying thinset mortar and grout.
- Tile spacers: To maintain even grout lines between tiles.
- Membrane or waterproofing system: Crucial for preventing moisture damage, especially in showers.
- Backer board: Provides a stable surface for tiling. Choose one that’s suitable for your substrate and tile load.
- Primer: Prepares the surface for thinset mortar and improves adhesion.
- Sealants: For sealing grout lines, edges, and corners to prevent water intrusion.
- Safety gear: Includes safety glasses, gloves, and ear protection when using power tools.
- Waste disposal bags: To keep your workspace clean and make cleanup easier.
Quick rule: Always check your tools and materials before starting a project. Missing or faulty items can cause delays and poor results.
Permits, inspections, and when to hire pros
Understanding permit requirements and when to hire professionals will save you time, money, and potential headaches. Here’s a checklist to guide you through the process.
- Plumbing changes: If moving drains or installing new plumbing fixtures, you’ll likely need a permit. Always check local codes before starting any work.
- Electrical work: Installing new outlets, switches, or lighting fixtures may require an electrical permit. Hire a licensed electrician for safety.
- Waterproofing systems: If installing a membrane or shower pan system, ensure it complies with local building codes.
- Inspections: Expect inspections at various stages of your project, such as after framing, plumbing, and electrical work. Check with your local building department for specific requirements.
- HOA considerations: If you live in a community with an HOA, check their rules regarding renovations before starting any work.
- Hiring pros: Consider hiring specialists for complex tasks like moving drains, installing waterproofing systems, or tiling showers. They have the expertise to ensure your project is done right and up to code.
Quick rule: Always check local codes and regulations before starting any major renovation project. Hiring professionals for complex tasks can save you time, money, and potential headaches in the long run.
Conclusion
Finish with a bathroom that looks good and lasts by sticking to solid prep, proper waterproofing, and careful tile work. When you respect measurements, plan for the plumbing and electrical needs, and test small areas first, you reduce costly mistakes and keep safety front and center.
Start by confirming room measurements and tile sizes, pick a layout that suits a tight space, assemble samples and mood boards, verify waterproofing and slope, align plumbing and drainage, check electrical plans and lighting, choose fixtures that fit, and practice cutting and dry-fitting on scraps before setting anything permanently. Keep a clear budget, check permit requirements, and know when to hire pros for rough plumbing, electrical work, or structural changes.
Common mistakes to avoid include rushing waterproofing, skipping a proper slope and waterproof test, and using the wrong thinset or grout for wet areas. Don’t skip safety gear, don’t mix incompatible materials, and never overlook a small leak test or edge seal. If in doubt, test a small area first, read the tile manufacturer’s guidelines, and follow local codes for wiring, GFCI protection, and ventilation.
If the project touches structural work, wiring, or permits, call a pro before you push ahead. For everything else, you can handle careful demolition, prep, tiling technique, and fixture fitment in stages. Stay steady, stay safe, and you’ll finish with durable tile that looks right and works well for years.
FAQ
Design rules: how should I choose tile size, contrast, and patterns for a small bathroom?
Keep tiles light in color to make the room feel bigger. Use similar tile sizes throughout to reduce visual breaks. Avoid bold, high-contrast patterns on large surfaces; use a small accent on a wall if you want a focal point. Always check the tile label or manufacturer guidance for recommended pairings and grouting options.
What are practical tile installation techniques I can use in a tight space?
Plan the layout first and dry-lay the tiles to avoid surprises. Back-buttering helps with thin walls and uneven substrates. Use spacers and leveling clips if you have to, and work in small sections so it doesn’t slip out of plane. Follow the tile manufacturer’s instructions for thin-set and curing times.
How should I approach demolition and layout planning in a small bathroom?
Map the space and remove items that block access. Keep plumbing lines in mind when moving fixtures; don’t over-extend cut lines. Demolish in stages, guard edges, and clean up debris as you go so you don’t trap yourself in a tight corner.
What waterproofing methods or materials should I consider for a DIY tile project?
Use a waterproofing membrane on shower walls and a proper pan liner if there is a shower. Seal all seams, corners, and transitions as directed by the product label. If unsure, consult the membrane manufacturer or local building guidance for surface prep requirements and curing times.