

Introduction
Stucco termination at brick or stone is the method of finishing and sealing the edge where stucco meets masonry so water is kept out and movement doesn’t crack the finish. Do the job with a clear gap for flashing, a solid backstop, and a termination trim that lets water drain; check product labels and local rules for exact flashing and sealant recommendations. This is a DIY task you can handle with basic carpentry and caulking skills if you plan and dry-fit parts first.
Ignore the myths that one material always outperforms the other—both EIFS and traditional stucco can work if moisture paths are controlled and the right details are used. Think about where water will run, where air can dry the wall, and pick trim, flashing, and sealants compatible with your materials; check manufacturer instructions for fire and moisture guidance.
Key takeaways
- Ensure proper termination detailing at brick/stone with compatible flashing and sealants.
- Edge flashing and backer materials prevent water intrusion and cracking.
- Regular inspection checkpoints during install catch cracks before plastering application.
- Common myths about EIFS and stucco debunked; always check moisture management.
- Fire safety: verify coating and detailing comply with local fire ratings and codes.
- Costs and lifecycle value: evaluate long-term repair versus replacement decisions.
Table of Contents
- Introduction
- Key takeaways
- Why Proper Stucco Termination at Brick or Stone Matters
- Key Principles for Watertight, Crack-Resistant Transitions
- Typical Detail Families and When to Use Each
- Flashing, Sealants, and Backer Materials — Specs and Placement
- Installation Sequence and Quality Checkpoints
- Common Mistakes and How to Avoid Them
- Costs, Repair Vs. Replace Decisions, and Lifecycle Value
- Climate, Codes, and Long-Term Performance Considerations
- Conclusion
- FAQ
Why Proper Stucco Termination at Brick or Stone Matters
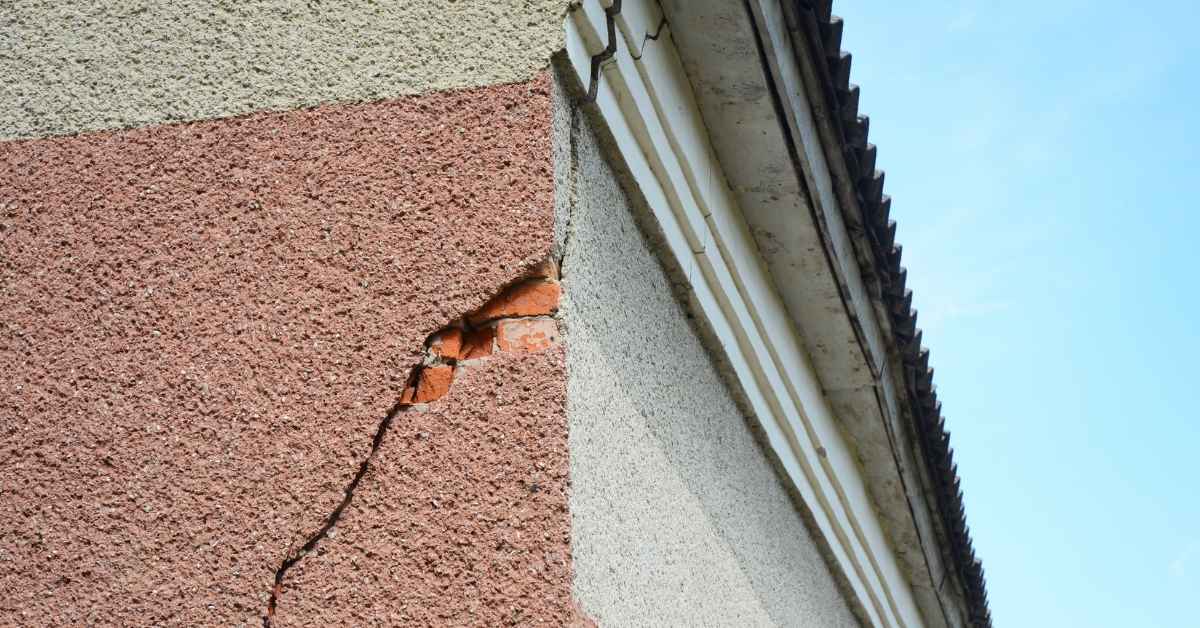
When stucco meets brick or stone the interface is a common failure point because water, movement, and incompatible materials concentrate stress there. Improper terminations can trap moisture behind the stucco or transfer movement into the finish, which leads to cracks that may look cosmetic but often mask deeper, moisture-driven damage to mortar, lath, or substrate.
Key problems to watch for are trapped water, migrated salts, and mortar joint breakdown that accelerate substrate and finish failure instead of just surface cracking. Check product data sheets and local practices for acceptable termination types, and know that correct flashing, continuous drainage, and accessible weeps separate short-lived cosmetic cracks from progressive moisture damage requiring larger repairs.
Performance risks: cracking, moisture intrusion, and delamination
Improper stucco termination at brick or stone can lead to several performance issues. Differential movement between the masonry and stucco causes cracking. This happens when the two materials expand and contract at different rates due to temperature changes.
Capillary action draws water from wet mortar joints into the stucco, leading to moisture intrusion. If this moisture can’t escape, it gets trapped behind the stucco, causing damage over time.
Blocked drainage paths allow water to accumulate and delaminate the stucco from the masonry substrate. This is why proper terminations are crucial to prevent delamination, which can lead to accelerated failure of both the substrate and finishes.
Where failures typically occur (sills, corners, and stepped transitions)
Failures at masonry/stucco interfaces often happen at specific locations. Sills are particularly vulnerable because they’re exposed to both rain and sun, causing rapid expansion and contraction.
Corners are another high-risk area due to the increased stress from differential movement. Builders must pay special attention to these transitions to prevent cracking and moisture intrusion.
Stepped transitions also pose challenges. The change in plane can trap water, leading to moisture issues if not properly detailed with flashing, weep screeds, or control joints.
Key Principles for Watertight, Crack-Resistant Transitions
The design should hit three goals: manage water, allow movement, and maintain continuous protection so water is diverted, stresses are accommodated, and the barrier stays intact. Treat each goal as a decision filter for materials and details at the wall assembly level—if a choice hinders drainage or locks movement it increases long-term risk.
Water management means clear drainage paths and properly integrated flashing; movement allowance means joints, flexible sealants, and compatible backers; continuous protection means an uninterrupted weather-resistive barrier and correct substrate prep. Verify compatibility and performance with manufacturer instructions and use a simple checklist to balance those three goals when selecting flashings, backers, and joint details.
Drainage, control movement, and seal continuity
The key to a watertight transition is managing water and allowing for movement. Here’s how:
Drainage: Create a clear path for water to escape. Flashing at the interface helps direct water outwards and downwards. Ensure it extends beyond the stucco plane.
Control joints: Incorporate them every 8-10 feet horizontally and at all vertical changes. This allows the stucco to move independently without cracking.
Seals: Use flexible, paintable sealants at control joints and expansion joints. They should be compatible with both materials and able to accommodate movement.
Substrate compatibility and differential movement
Different materials move differently due to temperature changes, moisture content, and other factors. Here’s what you need to know:
Brick/Stone: These are rigid and have low thermal expansion coefficients. They can handle some stress but not much.
Stucco/EIFS: These are flexible and have higher thermal expansion coefficients. They move more than brick or stone.
To prevent stress and failure, ensure your backer board is compatible with both materials. Use expansion joints where necessary to accommodate differential movement. Avoid rigid insulation behind stucco at transitions.
Typical Detail Families and When to Use Each
Termination details generally fall into three families: a drained gap with flashing, an overlap/backwrap, and mechanically anchored terminations—each routes water and accommodates movement differently. Choose by reading how each handles drainage and stress: drained gaps actively collect and evacuate water, overlaps rely on backwrapping to shed water, and mechanical anchors are for direct support where backing or ties limit other options.
Pick a family based on substrate type, exposure, and maintenance access—porous stone or open mortar joints favor drained gaps with inspectable weeps, while tightly bedded brick in sheltered locations may accept overlap details if flashing is well integrated. Confirm suitability on product labels or technical sheets and use a risk checklist (exposure level, expected maintenance, ease of inspection) to select the correct family for the site.
Drained gap with flashing (best for high-risk and wet exposures)
The drained gap detail is your best bet when water exposure or trapped moisture risk is high. Here’s why:
Imagine a brick wall under heavy rain. Water will find its way into the stucco. A drained gap lets that water escape. It’s like a tiny, hidden gutter.
But here’s the catch – you need continuous flashing. Flashing is like a waterproof barrier that guides water into the drained gap and out. No gaps in your flashing, or water will find its way back in.
This detail works great on open exposures, windy/wet areas, or where freeze-thaw cycles might cause cracks.
Overlap/backwrap termination (when compatible)
Overlapping or backwrapping stucco over masonry can be effective, but it’s not a one-size-fits-all solution. Here are the compatibility checks:
First, check your masonry mortar joints. If they’re tight and solid, you’re good to go. But if they’re crumbly or weak, water could get trapped and cause problems.
Next, look at your brick ties. They should be in good shape and well-anchored. Stucco can’t backwrap over loose or missing ties.
Lastly, consider maintenance access. If you can’t easily check the joint from inside or out, it might not be the best choice. This detail works well on gable ends and soffits.
Expansion and control joint details at transitions
Stucco and masonry move differently with temperature changes. Control joints help accommodate this differential movement. Here’s how to detail them:
First, place your control joint every 8-10 feet along the transition. This lets the stucco expand and contract without cracking.
Next, fill the joint with a flexible sealant. This seals out water but still allows movement. Use a backer rod to create a void for the sealant to bond with both sides of the joint.
Lastly, ensure your control joints are sloped. Water should drain away from the wall, not towards it. This prevents moisture entrapment and potential damage.
Flashing, Sealants, and Backer Materials — Specs and Placement
Flashing and sealants are first-line defenses; choose materials that are compatible with stucco, mortar, and any metal trim and follow manufacturer instructions for overlap and termination. Don’t rely on a single material—inspect data sheets for substrate adhesion, movement capability, and UV resistance so the chosen flashings and sealants perform together without creating traps.
Backer rods, proper fasteners, and corrosion-resistant fixings are equally important; use backer materials sized to the joint and fasteners rated for the environment. Check product data for elongation, adhesion, and corrosion resistance, ensure flashings slope and project to shed water away from the wall, and verify overlaps and terminations on-site to avoid voids or horizontal pockets that collect moisture.
Flashing materials, slopes, and fastening patterns
The choice of flashing material is crucial for a watertight transition at brick or stone. It must be compatible with your existing stucco and mortar joints, flexible enough to accommodate movement, and durable enough to last.
- Flexible vinyl-backed flashing: Use where flexibility is key, like at corners or transitions. Look for high-quality, thick material. Avoid thin, cheap options that can tear or crack.
- Metal flashing (aluminum or galvanized steel): Ideal for straight runs and sills. Specify 26- or 28-gauge for durability. Avoid copper where it may react with mortar.
- Fabric-reinforced flashing: Great for complex transitions. Check the fabric’s strength and UV resistance. Avoid if not compatible with your stucco system.
- Flashing slope: Maintain a minimum 1/4″ rise per foot to ensure water sheds away. Incorrect slope can lead to water intrusion and damage.
- End laps and fasteners: Overlap flashing by at least 6 inches, and use corrosion-resistant fasteners (stainless or coated steel). Securely attach flashings to prevent lifting in wind or during stucco application. Inadequate attachment can cause water entry.
Sealant selection and joint backing recommendations
Choosing the right sealant is vital to prevent cracking, peeling, or delamination. It should adhere well to all substrates, resist UV degradation, and accommodate movement.
Silicone, polyurethane, or hybrid sealants can be used. Check product data for elongation (movement capability), adhesion strength, cure time, and compatible substrates. Avoid sealants that don’t meet these criteria as they may fail prematurely.
Use backer materials like foam backer rod to control joint depth and prevent overfilling. This helps maintain a consistent joint width and prevents trapping moisture. Incorrect backing can lead to sealant failure or water intrusion.
Tools and materials checklist for transitions
Before starting, use this checklist to ensure you have everything needed for a successful transition. It’s best to gather these items before beginning the project.
- Flashing material: Measure and cut flashing pieces according to your transition details.
- Sealant: Choose a suitable sealant as described above. Ensure it’s compatible with all substrates involved.
- Backer materials (foam backer rod, gaskets): Select the right size and type for your joints to control depth and prevent overfilling.
- Fasteners: Use corrosion-resistant fasteners suitable for your substrate. Stainless steel or coated steel are typically best.
- Tape measure: Accurate measurement is crucial for proper flashing placement and cutting.
- Utility knife: For cutting flashings, backer materials, and sealant tubes.
- Caulking gun: To apply sealant evenly and consistently.
- Trowel or putty knife: For applying sealant and smoothing joints.
- Level: Ensure flashing is properly sloped to shed water away from the wall assembly.
- Product data sheets: Verify ETAs, fire ratings (where relevant), warranty terms, and other important information before starting the project. Skipping this can lead to using unsuitable materials or incorrect installation methods.
Quick rule: Always double-check your measurements and ensure all materials are compatible with each other and your existing substrates.
Installation Sequence and Quality Checkpoints
Follow a logical sequence: prepare and verify the masonry substrate, install continuous weather-resistive barrier and flashing, set primary terminations (weep screed, backwrapping), attach lath and apply coats in controlled stages, then finish and seal joints. Proper sequencing prevents common mistakes like trapping flashing behind wet stucco or applying finish before flashings cure and integrate.
Use clear on-site checkpoints: confirm clean, sound mortar joints; verify flashing overlaps and slope; check lath attachment and scratch/brown coat consistency; and inspect sealant bed depth and adhesion. For uncertain areas, consult product labels and make simple visual or tactile checks—straightness, drainage, and adhesion—to catch problems before the final coat is applied.
Step-by-step installation order from substrate prep to finish
Use this checklist before starting each step of your concrete pour. It’ll help you avoid costly mistakes and ensure a solid, long-lasting result.
- Prepare Substrate: Ensure the base is clean, dry, and free from debris. Check for any cracks or instability – repair if necessary.
- Lay Out Forms: Verify forms are level, square, and properly braced. Measure to ensure they match your desired dimensions.
- Install Flashing: Place flashing at the base of forms to prevent water from seeping behind and causing damage. Check it’s securely attached.
- Apply Lath & Adhesive: Install lath according to manufacturer instructions, ensuring it’s properly embedded in the adhesive. Inspect for any gaps or weak spots.
- Place Reinforcement: Lay rebar or wire mesh as designed. Check it aligns with your plans and is secure within the forms.
- Pour Concrete: Pour concrete to the desired level, ensuring it’s evenly distributed. Use a screed to level off the top.
- Finish & Cure: Float, trowel, and cure the surface according to manufacturer guidelines. Check for any imperfections or signs of curing issues.
- Cut Control Joints: Cut control joints at specified intervals (usually 10-24 feet apart) to control cracking. Ensure they’re deep enough – about 1/4 the slab’s depth.
Quick rule: Always follow the manufacturer’s guidelines for their specific products. This checklist provides general steps, but product-specific instructions may vary.
Visual checkpoints and simple water tests
Use this checklist after each stage of your concrete pour to ensure quality workmanship. It’s best to inspect the surface before any final finish or cure is applied.
- Check formwork alignment: Ensure forms are straight, level, and plumb. Any misalignment can cause costly rework.
- Inspect reinforcement: Verify that rebar is properly placed, aligned, and secured. Check for any gaps or weak points.
- Check aggregate distribution: Ensure concrete has a consistent mix of aggregates throughout. Clumps or voids can weaken the structure.
- Perform slump test: Measure concrete’s consistency by placing it in an inverted cone and checking how much it settles. Aim for 3-5 inches (76-127 mm) of slump.
- Check finish surface: Inspect for any voids, honeycombs, or other defects that could compromise the surface’s integrity.
- Perform water test: Sprinkle water on the concrete. If it beads up and runs off, the concrete is too dry. If it soaks in immediately, it’s too wet. Aim for moderate absorption.
- Check adhesion: Scrape a small area with a trowel to ensure concrete adheres well to the substrate. Poor adhesion can lead to delamination and failure.
- Inspect control joints: Verify that control joints are properly tooled, clean, and at the correct spacing (typically 2-5 times the slab thickness).
Quick rule: Always perform these checks before applying any final finish or cure. A little extra time spent inspecting can save you a lot of money and rework in the long run.
Common Mistakes and How to Avoid Them
Frequent errors include interrupted drainage, flashings tucked under stucco with no outlet, incompatible sealants, and lack of movement accommodation—each can trap water or create stress points that lead to cracking. Avoid these by specifying continuous flashing, correctly placed weep openings, compatible sealants, and clear joint layouts that allow the assembly to move without transferring loads into the stucco finish.
Good practice means verifying substrate readiness, enforcing correct flashings and weep locations, and using compatible mesh and coat thicknesses to reduce cracking risk. When in doubt, check manufacturer instructions and include practical acceptance criteria in specs—clean substrate, proper overlaps, observable drainage path—so installers have clear, enforceable steps to prevent common failures.
Contractor shortcuts that trap water or cause cracking
Some contractors might take shortcuts to save time. But these can lead to trapped water and cracks later on. Here’s what to watch out for:
Missing Flashings: Flashing is crucial at terminations. Missing it lets water in, causing cracks and moisture issues.
Poorly Lapped Membranes: Inadequate lapping of membranes can lead to gaps where water can get trapped and cause problems.
Improper Joint Placement: Incorrect joint spacing or placement can restrict movement, leading to cracking. Make sure joints are properly placed to allow for expansion and contraction.
Material mismatches and improper joint spacing
Using the wrong materials or improperly spacing control joints can lead to a host of problems. Here’s what to consider:
- Incompatible Mortars: Using mortars that aren’t compatible with your brick or stone can cause weak bonds, cracking, and staining.
- Wrong Mesh Reinforcement: Incorrect mesh reinforcement can lead to inadequate strength and cracking. Specify the right mesh for your application.
- Incorrect Joint Spacing: Spacing control joints too far apart restricts movement, leading to cracks. Follow joint spacing recommendations for your specific materials.
- Wrong Sealants: Using incompatible sealants can lead to poor adhesion, cracking, and discoloration. Choose sealants that are compatible with your materials and application.
- Non-Breathable Barriers: Using non-breathable barriers can trap moisture, leading to cracks and other issues. Specify breathable barriers where needed.
Costs, Repair Vs. Replace Decisions, and Lifecycle Value
Correct transition details add upfront cost but reduce the likelihood of recurrent repairs caused by water intrusion and substrate deterioration; weigh that trade-off by asking for itemized bids that separate materials, labor, flashing, and waterproofing. When reviewing estimates, request product specifications, expected lifespan, and warranty terms so you can compare the value of higher-grade details versus short-term fixes.
Decide repair versus replacement by assessing damage scope—localized paint or hairline finish cracks often justify targeted repairs, while widespread moisture staining, failed flashings, or compromised substrate usually indicate larger replacement. Use a decision checklist in bids: extent of moisture, flashing condition, substrate integrity, and access for future maintenance to determine the prudent scope and lifecycle cost.
Cost drivers for proper transitions and what to ask bidders
The cost of correct transition details varies based on several factors. Accessibility, the type of flashing used, and the extent of substrate repair all play a role.
Access: Tight spaces or hard-to-reach areas can increase labor costs.
Flashing types: Some flashings are more expensive than others. Ask contractors about their chosen materials and why they’re suitable for your project.
Substrate repair: If the existing substrate needs extensive repairs, it’ll add to the overall cost. Inquire about the condition of your current substrate and what repairs might be needed.
When targeted repair is sufficient vs. full system replacement
Deciding between a targeted repair and full replacement depends on the extent of damage, substrate condition, and available documentation.
Extent of moisture damage: Localized cracking with minimal moisture behind the stucco may warrant a targeted repair. However, extensive cracking or water damage could indicate a larger problem that requires full replacement.
Substrate condition: If the substrate is compromised, it’s safer to replace the entire system to prevent future issues. Inspect the substrate and consider its overall health in your decision-making process.
Documentation: Keep records of any previous repairs or inspections. This can help you understand the history of your stucco system and make an informed decision about whether to repair or replace it.
Climate, Codes, and Long-Term Performance Considerations
Climate drives detail selection—freeze-thaw cycles, heavy rains, and wind-driven moisture change risk profiles and demand more aggressive drainage and movement detailing in cold or wet regions. Verify code requirements and accepted standards with local building officials and ask installers for the relevant documentation (product approvals, ICC-ES or equivalent reports) when evaluating transition options.
Fire performance, local energy and moisture codes, and inspection expectations also influence material choices and termination placement; request ASTM or UL documentation where fire rating is a concern. Finally, set a maintenance and inspection cadence based on exposure—regular visual checks for stains, efflorescence, and sealant condition plus seasonal inspections will catch problems early and extend long-term performance.
Freeze-thaw, Indiana and similar climates, and durability tips
In Indiana’s freeze-thaw climate, water expands when it freezes, putting stress on your stucco-to-brick/stone transitions. This can lead to cracks and moisture issues.
To improve resilience: Use expansion joints every 16-24 feet to accommodate movement. Opt for flexible sealants that can handle temperature changes without cracking. Ensure proper flashing and weep holes to drain water effectively.
Regular maintenance is key in these climates. Inspect transitions annually, checking for cracks or signs of moisture intrusion. Seal any gaps promptly to prevent further damage.
Relevant standards, permitting, and inspection documentation
Before starting work, use this checklist to ensure all necessary documentation is in place. This will help avoid costly delays or rework.
- ASTM/NFPA Standards: Check for compliance with relevant ASTM (e.g., C926, C1063) and NFPA (e.g., 285, 286) standards.
- Local Building Codes: Verify the project meets local building codes, such as IRC or ICC.
- Energy Codes: Ensure the system complies with energy efficiency requirements like IECC.
- Moisture Management Standards: Check for compliance with ASTM E2415 or similar standards.
- Manufacturer Specs: Collect and review manufacturer’s installation instructions and material specs.
- Installer Certifications: Confirm the installer is certified to apply the specific system being used.
- Permit Records: Ensure all necessary permits have been obtained and are up-to-date.
- Inspection Records: Keep records of all inspections, including final sign-offs.
Quick rule: Regularly review and update these documents throughout the project to avoid surprises at inspection time.
Fire safety considerations for EIFS and traditional stucco transitions
At transitions, fire safety is paramount. Different substrates and transition options behave differently under fire exposure.
EIFS: Ensure the system has been tested and approved by a recognized testing agency like UL or Intertek. Verify it meets local fire codes (e.g., NFPA 285).
Traditional Stucco: Check for compliance with ASTM E119 or UL 10B fire resistance tests. Ensure proper joint treatment and expansion joint details to prevent spalling.
Transition Details: Use non-combustible materials where possible. Follow manufacturer recommendations for flashing and joint treatments at transitions. Regularly inspect transitions for any damage that could compromise fire safety.
Conclusion
Protecting the wall system from water damage ends with solid termination details you can trust. Stay disciplined with the steps you’ve learned: keep the surface dry, follow the order of installation, and verify flashing, sealants, and backer materials are correct for the climate and codes. A good finish looks right and stays looking right for years when you prioritize safety and durability above all.
Checklist in plain language: walk the area and confirm continuous flashing with proper laps, check that sealants and backer materials are appropriate for exterior use and installed where they belong, make sure joints are designed to shed water and avoid traps, follow the documented installation sequence and quality checkpoints, test the system with a simple water shed check after installation, and document any deviations before you backfill or finish. Do this in small sections, keep it dry as you work, and recheck everything from top to bottom before calling it complete.
Common mistakes to avoid include skipping flashing or misplacing it, using the wrong sealant or backing material for the joint, and rushing the sequence so caulk or coatings cure poorly. Safety rules: work in dry conditions when possible, wear eye protection and gloves, protect adjacent finishes from overspray or spills, and never force a joint or waterproofing material into a gap that’s too tight. If you’re unsure about ladder work, heavy lifting, or critical flashing details, pause and reassess before proceeding.
If the detail area looks wrong after your checks, or you’ve got unusual brick or stone profiles, or the area vents or drainage paths seem blocked, call a professional—especially when codes or long-term performance concerns come into play. Stay focused, follow the steps, and you’ll get a durable, water-shedding finish that keeps masonry safe and lasting.
FAQ
Do EIFS and traditional stucco fail the same way when it comes to moisture?
Both want proper drainage and a solid water barrier. EIFS can trap moisture if flashing and drainage are skipped; traditional stucco relies on weep holes and lath to vent. The fix is good detailing at transitions and a continuous moisture plan.
What about fire safety concerns with EIFS and stucco around brick or stone?
Fire behavior depends on the assembly. Don’t assume stucco is automatically fireproof; check the backing, insulation, and coatings. Use manufacturer guidance for any fire-rated components and keep transitions sealed against flame travel paths.
Is it cheaper to install EIFS instead of traditional stucco, and is it worth it?
Cost is not just the upfront price. Labor, maintenance, and failure risk matter. Compare long-term durability and repairability, not just the initial quote. Get the installer’s plan for transitions to brick/stone and how they handle moisture.
How should I handle transitions between stucco and brick or stone to prevent cracks and water entry?
Split the transition with a proper flashing plane and a clean, continuous sealant or express joint. Backer rods and flexible sealants help absorb movement. Verify the plan with product labels and install per manufacturer instructions.