
Introduction
Stucco at concrete slabs means leaving a controlled gap and sealing it so the finish can move without cracking at the slab edge. This protects the stucco from moisture wicking and movement from the slab; check product instructions and local rules for the gap size and backing material. A proper joint combines a backing rod where needed and a compatible sealant applied to a clean, dry surface.
If the stucco terminates too tight to the slab you can open the joint and install backing before re-sealing, or use a flexible sealant designed for masonry-to-concrete transitions. Choose a sealant compatible with stucco and concrete and follow the manufacturer’s prep and cure guidance; when unsure, test adhesion and read product labels. Good joint work is simple but must be done carefully to avoid trapped moisture and premature failure.
Key takeaways
- Seal the joint where stucco meets the slab to prevent moisture intrusion.
- Choose compatible sealants for stucco-to-slab joints and follow manufacturer guidance.
- Respect proper gap design; too tight or too wide jeopardizes movement and cracking.
- Inspect termination points for tight contacts and apply sealant with clean surfaces.
- Maintain safe work practices; use PPE, keep surfaces dry, and ventilate.
- Document maintenance steps and inspection intervals to catch sealant degradation early.
Table of Contents
- Introduction
- Key takeaways
- Why Sealing the Joint Between Stucco and Concrete Slabs Matters
- Proper Gap Size and Joint Design Considerations
- Sealant Types and Selecting the Right Product for Stucco-to-Slab Joints
- Tools, Materials Checklist and Material Specs to Verify
- Step-by-Step Sealant Application with Visual Checkpoints
- How to Diagnose and Fix a Tight Termination (Stucco Pressed Against Slab)
- Common Mistakes, Troubleshooting, and Maintenance Tips
- Cost Factors, Product Recommendations Approach, and Safety Precautions
- Conclusion
- FAQ
Why Sealing the Joint Between Stucco and Concrete Slabs Matters
Sealing the separation between stucco and a concrete slab is about more than neat appearance; it controls moisture movement, accommodates differential movement, excludes pests, and protects finish materials from premature failure. A flexible, correctly prepared joint reduces capillary wicking and helps prevent freeze–thaw moisture damage while allowing for curing shrinkage, seasonal expansion/contraction, and substrate settlement.
Before you pick materials or dimensions, check product data sheets and manufacturer instructions for compatibility and movement limits, and inspect the slab edge and stucco termination for contamination or irregularities. Practical installation includes selecting an appropriate backer rod, priming where required, tooling a smooth convex bead, and choosing a sealant color that blends with the finish; regularly inspect for cracking, loss of adhesion, or hardening and re-seal or repair before water reaches the substrate.
Moisture and Freeze/Thaw Protection
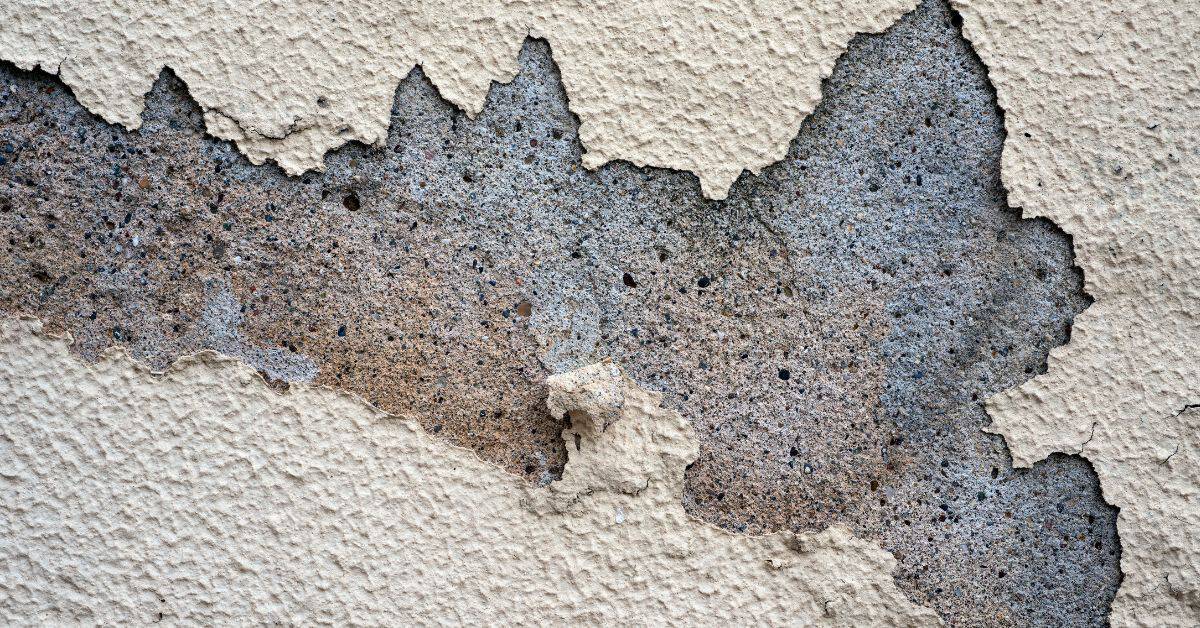
A sealed joint between your stucco and concrete slab is like a barrier keeping water out. Without it, moisture can wick up into the stucco, causing all sorts of trouble.
In winter, that moisture freezes and expands, cracking your stucco. Then when it thaws, it leaves gaps where more water can get in. It’s a vicious cycle that ends with damaged stucco and maybe even corrosion of your rebar.
So, seal that joint. Use a flexible sealant that can handle the freeze/thaw dance without cracking or breaking down itself.
Structural Movement and Finish Longevity
Concrete slabs move. They shrink a bit as they cure, then expand and contract with temperature changes. Stucco doesn’t move the same way, so if it’s stuck to the slab, it’ll crack under all that stress.
A sealed joint lets your slab and stucco move independently. It absorbs those movements without transferring them to the finish, keeping your stucco looking good for years.
Think of it like a hinge on a door. If you try to push a door into a wall instead of letting it swing, something’s gonna break. Same goes for your stucco and slab.
Proper Gap Size and Joint Design Considerations
The gap between stucco and slab is a movement joint designed to absorb differential settlement, shrinkage, and thermal shifts while preventing transfer of movement into the finish. Gap width, depth, and joint geometry directly affect how the sealant performs and how well the joint resists telegraphing or cracking through the stucco.
Confirm dimensional guidance and tolerances from sealant manufacturer literature and local code, and select a backer rod material and size to achieve the intended sealant depth and bond pattern. Plan joint locations to align with crack-control strategies, avoid three-sided adhesion, allow drainage, and make sure the detail remains serviceable for future repairs.
Typical gap guidance and how to choose a safe range
When it comes to gaps in concrete, size matters. You don’t want ’em too small or too big. Here’s what you need to know:
Small gaps usually fall around 1/4″ (6mm), while larger movement joints can go up to about 1/2″ (13mm). But don’t just take our word for it. Always check the product data and local codes.
Remember, gaps help concrete expand and contract with temperature changes. Too small, and you’ll get cracking. Too big, and water can seep in, weakening your slab over time. So, choose wisely, and don’t be a penny-wise, pound-foolish DIYer.
Backer rod, bond-breaker, and joint depth rules
Alright, listen up. You’ve got your gap size sorted, now let’s talk about what goes in it to make a proper seal.
First off, you’ve got two options here: backer rod or bond-breaker. Both serve the same purpose – they create space for your sealant and stop it from sticking to three sides of the joint. This is crucial because if it sticks to all three sides, it’ll crack when the joint moves.
Check your product label to see which one you need. Some sealants work better with backer rod, others with bond-breaker. Don’t mix them up. The size of these should match your joint depth – they come in various diameters, so measure your joint and pick the right one.
Now, about that joint depth. You’ve already chosen a safe range earlier, remember? Good. Here’s where you use it. Insert your backer rod or bond-breaker to a depth that leaves room for your sealant. A good rule of thumb is to leave space equal to the width of your gap.
Sealant Types and Selecting the Right Product for Stucco-to-Slab Joints
Different sealant chemistries perform differently on stucco and concrete; consider adhesion, elongation/return, UV and moisture resistance, and whether the product accepts paint. Compare polyurethane, silicone, hybrid/MS, and polysulfide behaviors against the joint’s expected movement and exposure rather than relying on trade names.
Check technical data sheets for substrate compatibility, movement capability, paintability, cure profile, and recommended primers for stucco or concrete. Use joint width and backing choices to match the sealant’s optimal geometry, watch for common failure modes like debonding or hardening, and plan maintenance intervals based on observed weathering and manufacturer guidance.
Pros and cons at a glance
Each sealant type has its own strengths and weaknesses. Here’s a quick rundown to help you choose the right one for your job.
Pros
- Polyurethane: Excellent adhesion, high movement capacity, paintable.
- Silicone: Superior UV resistance, good movement range, non-staining.
- Hybrid/MS: Balanced performance, good adhesion and movement, affordable.
- Polysulfide: High movement capacity, excellent chemical resistance, long lifespan.
Cons
- Polyurethane: Susceptible to moisture damage, may discolor over time.
- Silicone: Limited adhesion to some substrates, not paintable without primer.
- Hybrid/MS: Lower movement capacity compared to others, may yellow with age.
- Polysulfide: Less UV resistant, higher cost.
Consider your joint’s specific needs and local climate when selecting a sealant. Each has its place in different scenarios.
Compatibility with stucco, concrete, and finishes
Sealants must stick well to both stucco and concrete. Most do, but some may require primers for better adhesion.
Stucco is a cementitious material, so most sealants adhere well. However, some silicones might need a primer. Always check the product data sheet.
Concrete also has good compatibility with all sealant types. Yet, if your slab’s surface is smooth or has a sealer on it, you might need to roughen up or remove that sealer first for better adhesion.
As for finishes, most sealants can be painted over once cured. But some, like silicone, may require a primer before painting. Always follow the manufacturer’s guidelines.
Tools, Materials Checklist and Material Specs to Verify
Gather the right hand tools and consumables before starting: tape measure, utility knife, caulk gun, putty knives, brushes, backer rods, primers, cleaners, masking tape, and PPE for dust and chemical exposure. Optional power tools include an oscillating cutter or rotary tool for tight joints and a moisture meter for substrate checks.
On product data sheets verify standards and properties such as applicable ASTM/ISO references, adhesion to concrete and stucco, elongation, tensile strength, cure time, temperature range, VOC limits, and recommended primers or substrates. Also document joint dimensions, moisture readings, and whether the chosen materials meet local code or warranty requirements before proceeding.
Tools and consumables checklist
Before you start, make sure you have all the essential tools and materials for a smooth job.
- Caulking gun: For applying sealant. Check it’s in good working order.
- Backer rod: Ensures even sealant depth. Choose the right size for your joint.
- Joint saw or grinder: For repairs, ensure blades are sharp and in good condition.
- Cleaners: Degreasers, surface cleaners to prep substrates. Check they’re suitable for concrete and stucco.
- Primers: Bonding primers to improve adhesion. Ensure they match your sealant type.
- Tooling tools: Trowels, putty knives for applying sealant. Inspect them for damage.
- PPE (Personal Protective Equipment): Gloves, safety glasses, respiratory protection. Ensure they’re in good condition and fit well.
- Tape measure: To ensure accurate joint depth and sealant application.
- Square and level: For checking joint alignment and ensuring even application.
Quick rule: Missing tools or materials can lead to poor results. Double-check your list before starting.
What to check on product data sheets
Before purchasing, verify the sealant’s properties match your project needs.
- Adhesion: Check it’s compatible with both concrete and stucco. ASTM D4541 test method should be listed.
- Movement capability: Ensure it can handle the expected joint movement. Look for elongation percentage (ASTM C719).
- Cure time: Check it’s suitable for your project timeline. ASTM D2577 test method should be listed.
- Temperature limits: Ensure it can handle the lowest and highest expected temperatures (ASTM C168).
- VOCs (Volatile Organic Compounds): Check they’re within acceptable limits for indoor use. Look for EPA or local regulations.
- Recommended primers: Ensure they match your substrate and sealant type.
- Substrate prep protocols: Follow the manufacturer’s guidelines for surface preparation.
- Warranty/availability: Check the warranty period and ensure it’s available locally.
Quick rule: Skipping these checks can lead to sealant failure, poor adhesion, or incorrect application.
Step-by-Step Sealant Application with Visual Checkpoints
Start with a full inspection: remove loose material, verify the joint is dry to the touch, and clean surfaces with a non-residue cleaner so the sealant can bond properly. Confirm primer needs from the sealant data sheet and only proceed when temperature and humidity are within the manufacturer’s acceptable range.
Install the correct-size backer rod to set sealant depth, mask edges for clean lines, cut the nozzle to match bead size, and apply sealant with steady pressure and consistent angle. Tool the bead to a smooth, slightly concave or convex finish immediately, check for full contact to both faces, and keep the work area protected until the sealant reaches initial set per the product information.
Step-by-Step Process
Follow this checklist to ensure a successful sealant application from start to finish.
- Inspect the joint: Check for moisture, deterioration, and movement. This ensures you address any issues before applying the sealant.
- Clean the surfaces: Use a non-residue cleaner to remove dust, dirt, and contaminants from both concrete and stucco. A clean surface promotes better adhesion.
- Check substrate compatibility: Ensure the chosen sealant is compatible with your substrates (concrete and stucco) and that it’s suitable for exterior exposure and temperature range.
- Prime if necessary: Apply a compatible primer as specified by the manufacturer to promote adhesion.
- Plan backer rod placement: Determine the correct size and depth of the backer rod to achieve the desired sealant depth and straight bead line.
- Mask the area: Protect adjacent surfaces with painter’s tape to ensure clean edges once the sealant is applied.
- Insert backer rod: Install it at the proper depth to allow the sealant to compress correctly and form a watertight seal.
- Cut sealant cartridge tip: Create the desired bead size by cutting the cartridge tip appropriately.
- Apply sealant: Use steady, even strokes at a consistent angle and pressure to create an even bead.
- Tool and finish the bead: Promptly smooth out the bead with a surface-smoother or caulking tool to create a convex finish with no pinholes or excessive squeeze-out.
- Maintain favorable cure conditions: Keep the temperature and humidity within the manufacturer’s specified range for optimal curing.
Quick rule: Always follow the manufacturer’s instructions for specific product details and safety precautions.
Surface Prep and Priming
Before applying sealant, prepare the surfaces to ensure optimal adhesion and performance.
- Remove loose material: Scrape off any loose stucco or concrete from both sides of the joint using a stiff brush or scraper. This prevents further deterioration and promotes better adhesion.
- Clean the surfaces: Use a non-residue cleaner to remove any remaining dust, dirt, or contaminants. A clean surface ensures better primer adhesion.
- Inspect for sound substrate: Ensure both concrete and stucco are solid and free from cracks or other defects that could compromise the sealant’s performance.
- Dry the joint: Allow the joint to dry completely before priming. Moisture can hinder primer adhesion and lead to premature sealant failure.
- Apply primer: Use a compatible primer as specified by the manufacturer, applying it evenly across both concrete and stucco surfaces within the joint area.
Quick rule: Priming is crucial for promoting adhesion and preventing moisture migration. Always prime if recommended by the manufacturer.
Applying, Tooling, and Curing the Sealant
Proper application, tooling, and curing ensure a durable, long-lasting seal.
- Choose the right bead size: Select a cartridge tip that creates the desired bead size based on joint depth and movement considerations. A proper bead size ensures adequate compression and a watertight seal.
- Apply sealant evenly: Use steady, even strokes at a consistent angle and pressure to create an even bead along the entire length of the joint.
- Tool the bead promptly: Smooth out the bead within 5-10 minutes of application using a surface-smoother or caulking tool. This ensures a smooth, convex finish with no pinholes or excessive squeeze-out.
- Avoid over-tooling: Be careful not to over-tool the bead, as this can create voids and compromise the seal’s integrity.
- Maintain favorable cure conditions (temperature): Keep the temperature within the manufacturer’s specified range during curing. Too low or too high temperatures can hinder proper curing and reduce the sealant’s performance.
- Maintain favorable cure conditions (humidity): Maintain the relative humidity within the manufacturer’s recommended range for optimal curing. High humidity can cause excessive moisture to be trapped under the sealant, leading to potential issues.
- Allow proper cure time: Follow the manufacturer’s instructions for initial skin-over and full cure times. Rushing this process can lead to premature failure of the sealant.
Quick rule: Always follow the manufacturer’s curing recommendations for optimal performance and longevity.
How to Diagnose and Fix a Tight Termination (Stucco Pressed Against Slab)
A tight termination is when stucco bears directly against the slab edge with little or no gap, often showing staining, wicking, or hairline cracking where moisture is trapped or transmitted. Begin diagnosis with a visual and tactile inspection, probe small areas carefully, and take moisture readings or consult a building envelope specialist when readings or visible symptoms suggest hidden moisture.
For repairs, retrofit a flexible seal by creating a proper gap if feasible, installing backer rod, priming if required, and tooling a compatible low-modulus sealant; where the termination is structurally embedded or badly bonded, plan on removing and re-terminating or installing a control joint. Document findings, verify product instructions for cure and compatibility, and schedule follow-up inspections to confirm the repair resolved moisture transfer or movement issues.
Step-by-Step Repair Process
This step-by-step guide walks you through diagnosing and fixing a tight termination between stucco and concrete slab.
- Safety first: Put on gloves, goggles, and a dust mask. Tape off the area to protect nearby surfaces.
- Inspect visually: Look for cracks, stains, or visible contact points where stucco meets the slab.
- Check moisture levels: Use a pinless moisture meter to scan the area. If readings are high (above 17%), probe deeper with a gaten tone device.
- Assess substrate soundness: Tap the slab and stucco. Hollow or dull sounds may indicate damage, requiring professional help.
- Prepare surface: Clean, prime, and let it dry. For tight terminations, use a primer that promotes adhesion and blocks moisture.
- Create mechanical separation (if needed): Saw-cut a control joint into the slab to relieve pressure on the stucco termination.
- Install backer rod and sealant: Insert a compatible backer rod into the saw-cut. Apply an elastomeric sealant, tooling it smooth with a damp sponge.
- Cure properly: Follow manufacturer’s instructions for curing time. Keep the area clean and dry during this period.
- Final inspection: After curing, check the repair visually and with moisture readings to ensure it’s effective.
Assessing the problem and choosing a repair method
Inspecting the tight termination helps determine its severity and the best repair strategy. Here’s what to look for:
Symptoms of a tight termination include: cracking, efflorescence (white powdery deposits), staining, or visible contact between stucco and slab.
Consider these factors when choosing a repair method:
– Movement: If the slab is moving significantly, a simple sealant may not suffice. Consider creating mechanical separation with control joints or saw-cutting.
– Finish condition: If the stucco finish is damaged, you might need to remove and reinstall the termination after repairs.
– Substrate soundness: If the slab or stucco shows signs of damage (hollow or dull sounds when tapped), consult a structural specialist before proceeding.
Practical repair options and when to call a pro
Here are common fixes for tight terminations, along with when to consider hiring a professional:
– Saw-cut joint and backer rod/sealant: If the termination is tight but otherwise sound, saw-cutting a control joint and installing a backer rod with compatible sealant may solve the issue.
– Create mechanical separation: For more severe cases, saw-cutting multiple joints or using expansion foam can relieve pressure on the stucco.
– Localized re-termination: If the termination is damaged or improperly installed, removing and reinstalling it may be necessary. This involves cutting out the old termination, preparing the surface, and installing a new one with proper spacing.
When to call a pro: If you notice significant movement in the slab, extensive damage to the stucco finish, or signs of structural damage (like cracks in the slab), consult a structural specialist or building envelope consultant before proceeding. They can assess the situation and recommend appropriate repairs.
Common Mistakes, Troubleshooting, and Maintenance Tips
Frequent errors include incorrect gap geometry, three-sided adhesion, inadequate substrate cleaning, using an incompatible sealant, or skipping primers that the manufacturer requires. Each mistake shortens service life and increases the risk of water intrusion, so isolate the cause with checks for surface contamination, moisture, and compatibility before repairing.
Correct failures by re-opening the joint to proper dimensions, cleaning or abrading surfaces, installing the correct backer rod, applying primer if specified, and re-sealing with the appropriate product and tooling technique. Establish a simple inspection routine—seasonal or after severe weather—to look for edge lift, cracks, or adhesion loss and reseal as needed to protect the assembly.
Installation mistakes and immediate fixes
To ensure a durable seal, avoid these common installation errors and their quick remedies.
- Wrong gap geometry: Incorrect gaps allow water intrusion. Re-measure and re-cut joints to spec (1/4″ – 1/2″).
- No primer: Missing primer leads to poor adhesion. Clean, prep, and prime surfaces before reapplication.
- Improper backing: Insufficient backer rod causes sealant squeeze-out. Select the correct backer rod for your joint width.
- Three-sided adhesion: Adhering to three sides weakens the seal. Ensure proper substrate preparation and priming on all four sides.
- Wrong sealant type: Using incompatible sealants causes failure. Match sealant to stucco-to-concrete seams, substrate movement, and UV exposure.
Addressing these issues promptly maintains joint performance and prevents water intrusion.
Long-term inspection and reseal triggers
Regularly inspect your sealant joints to maintain their integrity and extend lifespan. Use this checklist after extreme weather events or annually.
- Loss of elasticity: Check for hardening or stiffening, indicating the need for replacement.
- Cracking: Inspect for hairline cracks, which can widen over time and allow water intrusion.
- Visible gaps: Look for openings between surfaces that could let in water or debris.
- Edge lift: Check if sealant is lifting away from the edge of the substrate, suggesting adhesion failure.
- Mold and discoloration: Inspect for signs of mold growth or discoloration, indicating moisture buildup.
- Debris accumulation: Remove any debris that has collected in the joint to prevent water pooling.
- Temperature changes: Check joints after extreme temperature fluctuations, as they can cause sealant movement and stress.
- Surface cleanliness: Ensure surfaces are clean and free of contaminants for proper adhesion and performance.
- Moisture presence: Inspect for signs of moisture or condensation, which can degrade the sealant over time.
Quick rule: If you notice any of these issues, address them promptly to prevent further damage and maintain your sealant’s lifespan.
Cost Factors, Product Recommendations Approach, and Safety Precautions
Costs vary by sealant family, extent of concrete or stucco prep, accessibility, and whether you must remove/determine failing substrate or flashing. Evaluate products by performance attributes on their technical data sheets—adhesion, movement capability, cure behavior, VOCs, and paintability—rather than brand claims.
Plan safety measures: use PPE, ensure ventilation, control dust during preparation, and follow disposal recommendations on the product label. Use a simple decision checklist to estimate materials and labor, validate compatibility with manufacturer instructions and local codes, and factor in inspection and maintenance intervals when budgeting.
Budgeting considerations and cost drivers
The cost of sealing concrete slabs varies greatly depending on several factors. Let’s break down the key budgeting considerations.
Sealant type: Premium sealants offer better performance but come at a higher price. Budget-friendly options may require more frequent reapplication.
Scope of prep/repair: Extensive surface conditioning, joint cleaning, or patch repairs can significantly increase costs. Larger gaps also demand more sealant and labor.
Labor assumptions: Hiring professionals adds to the cost. DIY projects save on labor but may require additional materials for trial and error.
Safety, PPE, and environmental handling
Protecting yourself and the environment is paramount when working with sealants. Here’s what you need to know:
PPE: Wear gloves, safety glasses, and a respirator for proper ventilation. Some sealants can irritate skin and eyes.
Handling and disposal: Follow manufacturer guidelines for storage and disposal. Check local regulations regarding VOCs and waste management.
Spill containment and fire safety: Have rags or absorbent materials on hand to contain spills. Keep sealants away from heat sources and open flames.
Conclusion
Get the seal right and you protect the slab edge from moisture, cracking, and staining. A proper gap and sealant joint keep stucco looking clean and performing long after you’re done.
Make this your final check: verify the gap size and joint design you planned, confirm the sealant type you selected, gather the exact tools and materials, follow the application steps with clean surfaces and test a small area first, and then monitor the joint after curing for any signs of movement or failure. Do each step in the order you documented, and document any changes you made so future maintenance is quick.
Common mistakes to avoid include rushing the joint without a proper backing or backer rod, choosing a sealant that won’t bond to both surfaces, and sealing a joint that sits too tight against the stucco. Never skip surface prep, never press stucco into the joint without testing, and never exceed the cure or cure-time recommendations. If you notice persistent smoke, high movement, or recurring tight termination after a repair, step back and reassess the gap, preparation, and sealant compatibility before pushing ahead. If in doubt about substrate condition, hidden moisture, or structural clues, call a professional rather than risk costly damage.
If the project is in a high-traffic or critical exterior area, or the slab shows significant movement or cracking, plan to bring in a pro rather than pushing through with DIY alone. Stay deliberate, test as you go, and keep the finish tight and weather-ready so you can enjoy a durable, low-maintenance joint for years to come.
FAQ
What makes sealing the stucco-to-slab joint important for performance?
Sealing keeps water out and stops cracks from widening with movement. It also helps the finish look clean and prevents freeze-thaw damage near the joint. Use the right sealant and correct gap to avoid future repairs.
What sealants are suitable for stucco-to-slab joints, and how do I choose?
Common choices are polyurethane, acrylic latex, and silicone sealants. Check the product label for exterior masonry use and compatibility with stucco and concrete. If unsure, follow the manufacturer’s instructions and local guidance.
How should I set the gap between stucco and the concrete slab?
Follow the product guidance for your joint. Don’t leave the stucco pressed tight against the slab; use the recommended gap and backer before sealing. If in doubt, verify with the sealant supplier or the project spec.
How do I fix a tight termination safely and effectively?
Relieve the contact so the joint can breathe, then re-seal with an appropriate sealant. Protect adjacent surfaces, wear proper PPE, and clean up before the sealer cures. If you’re uncertain about the steps, check the sealant instructions or local guidelines for safe application.