

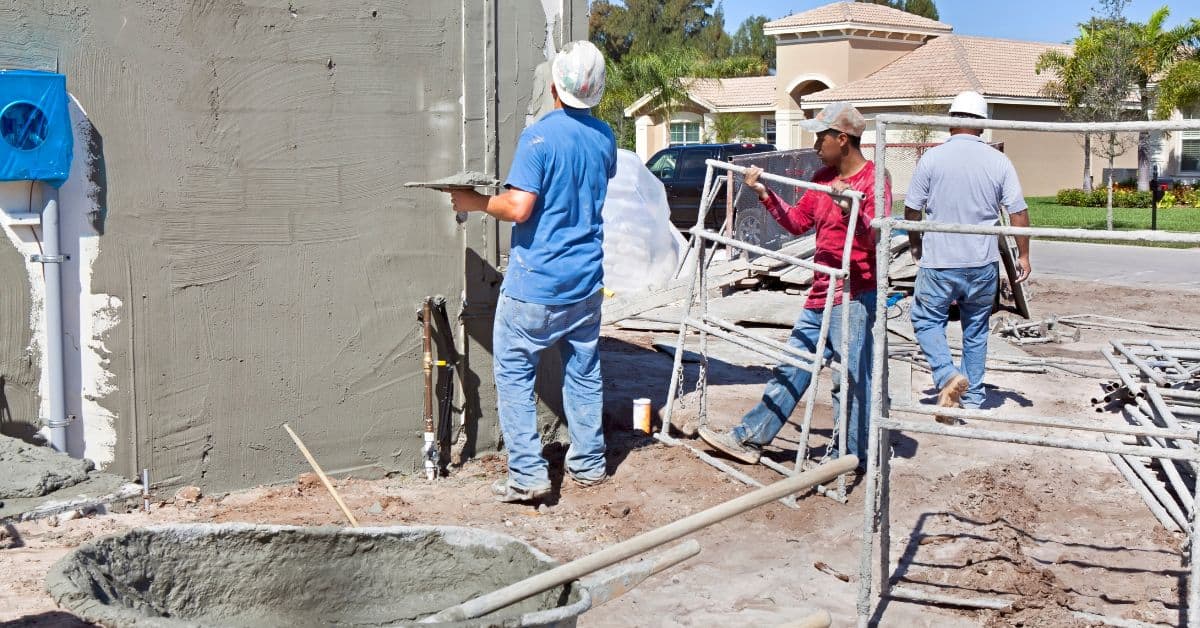
Introduction
Winter stucco repairs are methods to fix cracked or damaged stucco in cold weather while avoiding powdery failures by controlling temperature during mixing, application, and curing. Keep the mix and the surface warm enough before you work, and monitor the curing environment. Plan for a dry, protected area and test the surface feel before moving forward.
Check the product label and local rules for temperature ranges and curing expectations. Use practical warmth strategies like temporary insulation or approved heat sources if allowed, and avoid working on truly frozen surfaces. Take a moment to verify the surface is ready and the patch is adhering before continuing.
Key takeaways
- Inspect substrate for cracks, moisture, and loose stucco before cold-weather work.
- Maintain safe access and PPE; monitor frost risk and slippery surfaces.
- Use compatible materials and follow manufacturer instructions for cold-weather mixes.
- Control surface temperature with shades, heaters, and wind protection without overheating.
- Drying and cure require steady warmth; avoid rapid temperature swings that cause cracking.
- Test patches for adhesion and powder resistance after cure; plan timely rework if needed; safety first.
Table of Contents
- Introduction
- Key takeaways
- Why Winter Causes Powdery (Friable) Stucco Failures
- Temperature Principles Every Repairer Must Know
- Pre-Repair Assessment and Visual Checkpoints
- Materials, Mix Design and Additives for Cold-Weather Repairs
- Surface Prep and Substrate Temperature Control Strategies
- Application Techniques and Curing Tricks for Winter Success
- Tenting, Heating, and on-Site Warming Methods—Pros, Cons, and Safety
- Testing, Troubleshooting, and Repairing Powdery Failures
- Conclusion
- FAQ
Why Winter Causes Powdery (Friable) Stucco Failures
Winter brings a combination of cold, dry air and moisture swings that can destabilize stucco. Low temperatures slow hydration and trap moisture inside the mix. Rapid moisture loss on exposed surfaces adds stress and can leave a soft, powdery surface behind.
These patterns differ from summer issues where heat accelerates drying but can still produce cracking. In winter, freeze thaw cycles and interrupted curing create weak, friable patches that powder when touched. Understanding these mechanisms helps you spot the telltale signs early.
Hydration disruption and weakened binders
Low winter temperatures slow down the hydration process of cement, the key binder in stucco. This means not all cement gets to react with water to form strong crystals that hold everything together.
Imagine it like a cake recipe – if you don’t let the ingredients mix long enough, you’ll end up with uncooked lumps. In stucco, these are unhydrated cement particles that make your finish powdery and weak.
Tip: Keep temperatures above 50°F (10°C) during application to ensure proper hydration.
Moisture movement and salt/electrolyte effects
In cold conditions, moisture in the stucco can move around more easily. This causes salts (electrolytes) to migrate towards the surface.
When this water evaporates, it leaves behind these salts, creating a white powdery deposit called efflorescence. This can mimic the appearance of powdery failure and weaken your stucco finish.
Moreover, these migrating electrolytes can disrupt the chemical balance in the stucco matrix, further weakening it.
Freeze-thaw and bond loss
Water trapped within the stucco can freeze and expand during cold snaps. This puts pressure on the surface, fracturing it and breaking adhesion between layers.
The freeze-thaw cycle repeats this process over time, causing progressive damage that leads to a powdery finish.
Note: This is why it’s crucial to ensure your stucco is properly cured before winter sets in. A well-cured surface can better resist these cycles.
Temperature Principles Every Repairer Must Know
Monitor three main temperature factors: the air around you, the substrate you are bonding to, and the temperature of the repair material itself. Wind and dew point also affect how quickly moisture moves and cures. These variables guide when you can safely apply and cure stucco in cold weather.
Always check the product data sheet for minimum temperature and curing guidance. Use the manufacturer guidance as your baseline and compare it to site conditions. If in doubt, verify with the label or supplier before starting the repair.
Minimum working and curing temperatures
Before you start slapping on that stucco, check the temp. Most manufacturers want a minimum of 40°F (4°C) for application. But here’s where it gets tricky – the curing temperature is often lower, around 32°F (0°C). That’s right, you might need to wait until winter’s chill lifts before your stucco can fully harden.
Why the difference? Working temp is about keeping your mix workable. Curing temp is when that chemical reaction happens, turning liquid into solid. Don’t rush it – incomplete curing leads to weak, powdery stucco.
Always check those product data sheets for exact minimums. And remember, these are minimum temps. Warmer’s usually better for a strong, durable finish.
Warm-up and cool-down rate control
Temperature changes happen, but they shouldn’t happen too fast. Stucco’s like Goldilocks – it wants things just right.
Rapid cooling can cause surface cracks. Too quick a warm-up can lead to incomplete curing. You want gradual changes, no more than 10°F (6°C) per day. Here’s how:
On cold days, warm up your substrate gradually. Use heaters, but keep it slow. Let the sun do its thing if you can. And when it cools down at night, cover your work to protect from sudden drops.
Monitoring tools and simple checks
You don’t need a fancy lab to keep tabs on temp. Here’s what you do:
- Thermometer: Basic, cheap, essential. Check ambient air and substrate temps.
- IR Thermometer: Rentable, around $50/day. Measures surface temps without touching. Great for quick checks.
- Visual Checks: Look for frost or ice. If it’s too cold to touch comfortably, it’s probably too cold to work.
- Dew Point Check: When air cools, moisture condenses. Dew point tells you when that’ll happen. Keep temps above dew point to avoid moisture issues.
- Wind Check: Wind chill can make things feel colder than they are. No work in high winds – it dries out your mix too fast.
Pre-Repair Assessment and Visual Checkpoints
Start with a visual survey for powdering, delamination, and any salt deposits on the surface. Note areas with previous repairs or signs of moisture intrusion. Document sections that feel soft or hollow when tapped gently.
Perform small tests to probe underlying issues. Use a moisture indicator or a simple dampness check to gauge substrate conditions. Look for patterns that point to cracked substrates or trapped moisture that could undermine a repair.
Simple field tests (scratch, tape, and moisture checks)
Before you start repairs, use these quick tests to check for powdering and substrate dampness.
- Abrasion/scratch test: Lightly scratch the stucco surface. If it crumbles or powders easily, it’s friable.
- Tape pull test: Apply painter’s tape, let it sit for a minute, then pull it off quickly at a 45° angle. If the stucco comes off with it, adhesion is poor.
- Moisture meter reading: Use a moisture meter to check for dampness in the substrate. readings above 18% indicate potential problems.
- Salt deposit check: Look for white, powdery deposits on or near the stucco. These could be signs of salt migration.
- Delamination check: Tap the stucco with a hammer. A hollow sound indicates delamination from the substrate.
- Previous repair check: Inspect any existing repairs. If they’re failing, the new repair might too.
Quick rule: Don’t skip these tests. They help you understand what’s causing the powdering and how to fix it.
Identifying active water/salt sources
Before repairing, find and fix any active water or salt issues to prevent recurrence.
- Staining check: Look for dark stains on the stucco. They could indicate water intrusion.
- Efflorescence check: Check for white, powdery deposits on or near the stucco. These are signs of salt migration.
- Flashings check: Inspect flashings around windows and doors. If they’re damaged or missing, water can get in.
- Roof/wall junction leaks: Check where the roof meets the walls. Leaks here can cause stucco problems.
- Gutter check: Ensure gutters are functioning properly and directing water away from the building.
Quick rule: Fix any active water or salt sources before repairing the stucco. Otherwise, your repairs will fail again.
Mapping repair zones and documenting conditions
Before starting work, map out repair areas and document conditions for planning winter repairs.
- Photograph areas: Take pictures of the damaged areas from different angles. This helps you plan your repairs and track progress.
- Mark repair zones: Use chalk or paint to mark out the areas that need repairing. This makes it clear where work needs to be done.
- Temperature history: Note down the lowest temperatures in the area during the winter months. This helps you plan your repairs around temperature guidelines.
- Weather history: Keep a record of any heavy rain, snow, or other severe weather events. These can affect stucco performance.
Quick rule: Good documentation makes winter repairs go smoother. It helps you plan and track your work more effectively.
Materials, Mix Design and Additives for Cold-Weather Repairs
Choose base coats, finish coats, and lath that are compatible with cold repairs and the local climate. Use additives only as recommended by the manufacturer to modify set or workability. Avoid improvised chemical cures and rely on documented product instructions.
Read the product labels and technical data sheets to match the system to the job. If a supplement is suggested for cold weather, verify its compatibility with the base and finish coats. When in doubt, contact the supplier for guidance before mixing.
Choosing the right cement/lime mixes and preblended mortars
When it’s cold, you need a mix that won’t freeze before it sets. Preblended winter-rated mortars are designed for this. They have lower water content and higher cement or lime ratios.
Pros of preblended: Consistent performance, easy to use, no on-site mixing errors.
Cons: More expensive, less flexible for small repairs.
For site-mixed options, follow the 3:1 or 4:1 sand-to-cement ratio. But remember, cold weather slows set time. So, you might need to adjust ratios or use accelerators.
Admixtures and accelerators—what to consider
Accelerators speed up set time. Plasticizers make the mix more workable. Both can help in cold weather.
Types: Calcium chloride (accelerator), air-entraining admixtures (plasticizer).
When to use: Accelerators when temps are below 40°F (4°C). Plasticizers for better workability in cold conditions.
Caution: Always follow manufacturer dosing instructions. Too much accelerator can cause rapid setting and cracking. Check compatibility with other materials.
Water quality and mixing temperature control
Cold water slows down the hydration process. This can lead to longer set times and weaker bonds in winter.
Warm your mixing water (within manufacturer guidance) to improve handling and speed up setting. But be careful, too hot can cause flash setting.
Check: Product data sheets for recommended mixing temperatures. Use warm, clean water. Dirty or salty water can cause efflorescence and weaken the mix.
Monitor your mix’s temperature during winter repairs. Keep it between 50-70°F (10-21°C) for best results.
Surface Prep and Substrate Temperature Control Strategies
Ensure the substrate is dry, sound, and free of contaminants before applying any coating. Remove loose material and lightly profile the surface to improve adhesion. Confirm the substrate temperature is within the acceptable range for the repair product.
If the surface is too cold, use approved warming methods to raise substrate temperature. Consider insulation or temporary shielding to minimize heat loss during application. Always verify that warmers or blankets are used safely per manufacturer and site guidelines.
Drying and Heating Substrates Safely
Before you start, ensure your substrate is dry. If it’s not, use heat to drive out moisture. But be careful.
Never use direct flame or open flames. They can damage the surface and cause uneven drying, leading to cracks.
Instead, use indirect heating methods like space heaters or infrared lamps. Keep them at a safe distance from the wall.
Remember: Heat too fast, and you’ll stress the substrate. Go slow and steady.
Prewetting or Prewarming Masonry and Lath
Before applying stucco, prepare your substrate to avoid weak bond areas. This is especially important in cold weather.
For masonry, prewet the surface with a fine spray of water. Let it soak for 15-20 minutes before application. This helps control suction and prevents rapid drying.
For lath, use infrared lamps to warm it gently. Keep the temperature above freezing but below 80°F (27°C). Prewarming helps prevent cold spots that could weaken your bond.
Always check the manufacturer’s guidelines for specific products and conditions.
Insulating and Protecting from Wind
After application, protect your stucco from cold temperatures and wind. This helps it cure properly and prevents premature cracking.
Use insulated blankets or panels to wrap the repaired area. Secure them with tape or straps. Keep them on until the stucco has cured.
For larger areas, set up windbreaks. Use tarps or plastic sheeting to block drafts. Make sure they’re secure and won’t blow away.
Pro tip: Check your setup regularly. Wind can shift, and you don’t want any cold spots.
Application Techniques and Curing Tricks for Winter Success
Follow a careful sequence for applying coats, paying attention to layer timing and controllable thickness. Avoid thick passes that trap moisture and increase the risk of powdering. Plan for a longer cure window if the conditions are colder or drier than normal.
Finish with tips that help surfaces cure evenly, such as brushing lightly to compact the surface and prevent dusting. Use the manufacturer recommended curing practices and avoid shortcuts that bypass proper set and cure.
Proper layer sequencing and minimum thickness
The key to successful winter stucco repairs is applying layers consistently. Uniform thickness ensures even curing and prevents powdering.
Start by applying a thin base coat, around 1/8 inch thick. This provides a solid foundation for the next layers. Let it cure according to product instructions, usually 24-72 hours depending on temperature.
Next, apply the brown or intermediate coat, typically 3/8 to 1/2 inch thick. Again, allow it to cure as directed. The final finish coat should be around 1/8 inch thick, applied after the intermediate coat has cured.
Controlled drying and extended cure periods
In cold weather, stucco cures slower. To prevent powdering, keep the new stucco moist for longer initial cure.
Misting is a common method. Lightly mist the surface with water after each application, but avoid over-saturating which can cause delamination. Follow product instructions for misting frequency and duration.
Curing compounds can also help retain moisture. Apply them according to manufacturer’s guidelines, usually after the final finish coat has started to set but is still tacky.
Finishing in cold temps: timing and tooling
Timing is crucial when applying finish coats in cold weather. Wait until the intermediate coat has cured fully, usually after 72 hours or more.
- Tool Selection: Use a soft-bristle brush for applying the final coat to avoid overworking the surface. A trowel can be used for initial application and blending.
- Sanding: Sand lightly, if at all, using fine-grit sandpaper (120-150 grit). Over-sanding can damage the finish in cold conditions.
- Temperature Control: Keep tools warm before use. A heated tool bag or even a pocket warmer can help.
- Optional Tools: Rentable tools like heat lamps or space heaters can help maintain surface temperature during application and initial cure.
- Price Cue: Expect to pay around $50-$100 per day for rentals, depending on your location.
Tenting, Heating, and on-Site Warming Methods—Pros, Cons, and Safety
Common warming methods include insulated tents, forced air heaters, heat mats, and radiant heaters. Each option has tradeoffs for comfort, cost, and how it affects moisture. Plan any warming setup to avoid overheating or uneven drying on the surface.
Keep ventilation and fuel safety in mind, especially in enclosed spaces. Follow safety notes from the equipment manufacturer and local codes. Evaluate the impact of heat sources on curing and on surrounding materials before proceeding.
Choosing the right heat source for stucco work
When it comes to heating your winter repair site, you’ve got two main types of heaters: direct and indirect. Direct heaters warm up the air directly, while indirect ones heat objects first, which then radiate warmth.
For stucco work, go with indirect heaters. They’re gentler on your surfaces, reducing the risk of surface drying or combustion. Plus, they won’t cause drafts that could mess up your curing process.
Indirect heaters like radiant heaters or heat mats are great for stucco repairs. They provide even, consistent warmth without the risk of overheating or causing unwanted air movement.
Controlling humidity and ventilation in enclosures
Warming up your repair site is crucial, but it’s not the only thing you need to think about. You’ve also got to control moisture levels to prevent condensation and salt migration onto your stucco surface.
Balance warmth with proper ventilation. Too much heat without enough airflow can lead to excess moisture buildup, which isn’t good for your repairs.
Use fans or portable air conditioners to maintain a steady flow of air. This helps keep humidity levels in check and prevents condensation from forming on your surfaces. Just make sure you’re not creating drafts that could interfere with curing.
Practical setup and sequencing tips
Setting up your repair site for winter work isn’t just about turning on the heat. You’ve got to plan things out so you can maintain stable temperatures during critical cure windows.
Place your tent or enclosure strategically. You want it to protect your repairs from wind and cold, but not trap in too much heat or moisture.
Stagger your repairs if possible. This way, you’re not trying to heat and cure multiple surfaces at once. It’s easier to maintain stable temperatures when you’re working on one area at a time. And remember, timing is key. Keep an eye on the weather forecast and plan your workdays accordingly.
Testing, Troubleshooting, and Repairing Powdery Failures
Use diagnostic steps to identify whether powdering comes from moisture, substrate failure, or improper cure. If needed, remove the failing area and reapply with the correct system and conditions. Consider surface consolidation techniques if the base is intact but powdery.
Decide between patching and full removal based on the extent of damage and substrate health. Rely on tested repair mixes and manufacturer guidance; document the decision process and verify compatibility with surrounding material.
When to Consolidate vs Remove and Replace
Before deciding whether to consolidate or remove powdery stucco, inspect the area carefully. If the powdering is localized and not affecting the entire surface, consolidation might be an option.
Consolidation candidates: Small areas with minor powdering, no visible cracks or delamination, and a stable substrate.
If you find deep cracks, crumbling, or sections that easily flake off, removal back to sound substrate is required. This ensures the repair lasts and doesn’t just mask underlying issues.
Consolidants, Primers, and Bond Coats: Safe Uses
Bond-enhancing primers or consolidants can help stabilize powdery stucco. They work by penetrating the surface, binding loose particles together, and improving adhesion with new layers.
Safety first: Always follow manufacturer guidelines for compatibility with your existing stucco mix and weather conditions.
Be cautious when using consolidants on heavily damaged areas or in extreme cold. They may not provide sufficient stabilization, leading to further deterioration.
Post-Repair Monitoring and Quick Field Checks
After completing repairs, perform follow-up inspections to ensure the stucco is curing properly and adhering well. This helps catch any issues early.
Adhesion check: Gently press on the repaired area with your thumb or use a putty knife to lightly scrape across it. No crumbling or flaking should occur.
Abrasion resistance improves as stucco cures, so recheck after 7-14 days. Keep an eye out for any signs of deterioration during the first freeze-thaw cycle.
Conclusion
Winter brings powdery, friable stucco if you rush or skip the safety checks, so hard, durable repairs come from solid prep, correct materials for cold weather, and disciplined curing.
Before you start any patch or recoat, walk the plan in your head as a single sentence: verify substrate and patch temps stay within safe ranges, confirm a small test area first, align the mix design and additives for cold weather, clean and dry the surface, protect with proper tenting or heating as needed, and follow a controlled curing method with regular checks until the repair hardens. Do not skip the pre-repair assessment, do not guess at temperatures, and do not skip testing first. Keep the work area safe, keep water away from fresh repairs, and document each step so a mistake is easy to spot and fix quickly.
Common mistakes to avoid are applying patches on damp or wind-warmed surfaces, using the wrong mix or additives for cold weather, and skipping the curing or warming plan. Always keep the surface dry and above the minimum substrate temperature recommended, test a small area before full repair, and stop if the patch shows tackiness, cracking, or powdering. If you feel unsure or run into powdery patches beyond a simple touch-up, stop and reassess safety, process, and timing before proceeding. If you notice ongoing moisture, inconsistent heat, or signs of failure, pause and recheck the plan.
If heavy weather or complex damage makes you doubt the outcome, call a professional for a staring point assessment or for the later stages of curing and finish. When it makes sense to step back, do it sooner rather than later, and stay focused on safety, testing, and controlled drying. With the right checks and disciplined execution, you can protect the house, avoid costly repairs, and finish with a solid, long-lasting result.
FAQ
Can I start winter stucco repairs when it looks dry but the substrate is still cold to the touch?
If the substrate feels cold, test the surface with a magnet or a simple touch test to see if it’s below the manufacturer’s recommended temperature range. Don’t proceed until the substrate is within a safe range and the product label allows cold-weather use. When in doubt, check the product instructions and local rules before you mix or apply.
What should I do if I see powdery areas after a repair patch starts to dry?
Powdery spots usually mean the mix dried too fast or didn’t bond. Stop curing in that area and evaluate substrate moisture, ventilation, and temperature. Recheck the product’s curing guidelines and consider redoing the patch with proper weather protection.
How can I tell if my curing environment is safe for winter stucco without relying on guesswork?
Use a reliable surface thermometer and follow the product’s minimum and maximum cure temps. If you can’t maintain that range, postpone repairs or use approved on-site warming methods per manufacturer instructions. Do not rely on guesswork or improvised heat sources that could cause damage or fire.
What signs indicate I should pause repairs and wait for better conditions?
Visible condensation, rapid surface drying, or a chalky finish after initial set are red flags. If you see ice, frost, or persistent moisture on the substrate, pause and recheck with the product label and local guidelines. Safety first—don’t push ahead in uncertain weather.