
Introduction
Fixing leaks at stucco rooflines means sealing and directing water so it doesn’t seep where the wall meets the roof. This job isn’t about slapping on caulk alone; you’ll often need proper flashing and surface prep to make a lasting fix. Approach it with a plan, check the manufacturer instructions for any products you use, and respect local building rules.
Start by inspecting the area for cracks, gaps, or loose stucco and removing any loose material. Clean the surface, then install or repair flashing where the roofline meets the wall, and apply a compatible seal along the joints as needed. Always follow product labels and local guidelines when choosing materials and methods.
Key takeaways
- Document roofline condition before repairs, noting flashing, joints, and substrate integrity.
- Avoid relying on caulk alone; prioritize proper flashing and continuous weather barriers.
- Inspect for cracking stucco, moisture behind coatings, and missing or damaged lath.
- Use code-compliant flashing, weep screed, and starter courses aligned with roof slope.
- Perform repairs with compatible plaster mix and bonding at rebuilt edges to prevent bonds.
- Prioritize safety: use fall protection, ladders, and PPE during roofline work.
Table of Contents
- Introduction
- Key takeaways
- Why Roofline Stucco Leaks Keep Coming Back
- Inspecting and Documenting the Leak Correctly
- How Roofline Details Should Be Built — Fundamentals to Reference
- Repair Strategies That Work (Beyond Caulk)
- Material Specs and Standards Explained (DIY-Friendly)
- Tools, Safety and Preparation Checklist
- Step-by-Step DIY Repair Workflow
- Maintenance, Monitoring and When to Hire a Pro
- Conclusion
- FAQ
Why Roofline Stucco Leaks Keep Coming Back
Leaks at the roofline usually come back because patches hide the real problem. Caulk-only repairs don’t address flashing, drainage, or substrate movement that repeats over time. Look for gaps in the WRB, broken flashing, and cracks that let water move behind the stucco.
Common systemic causes include improper detailing where the roof, wall, and stucco meet, and failure to maintain a continuous drainage plane. Inspect for missing or deteriorated sealants, loose lath, and bridging cracks that bypass surface patches. Understanding these root issues helps you plan repairs that stop the cycle.
Common failure points at the roof-to-wall junction
The roof-to-wall junction is where most stucco leaks start. Here’s why:
Terminations: If your roofer didn’t properly terminate the roofing material at the wall, water can wick right up behind the stucco.
Step flashing: This is the metal flashing that goes under and over shingles to direct water away from the wall. If it’s missing or damaged, water will get in.
Kickout flashing: This is the L-shaped flashing at the bottom of your roof that should be directing water out and away from the stucco. If it’s not there or not doing its job, water can back up behind the stucco.
Counterflashings: These are the metal pieces that go over the top of step flashings to keep water out. If they’re not properly terminated, water will get in.
How water actually gets behind stucco
Water doesn’t just splash against your stucco and leak in. It’s more sneaky than that:
Wind-driven rain: When it rains hard, wind can drive raindrops right into the tiny gaps between your stucco and your roof or walls.
Capillary action: Once water gets into those tiny gaps, it can wick up behind the stucco like a sponge. This is why you might see leaks way above where the water first got in.
Failed WRB or lath interfaces: The Water Resistive Barrier (WRB) and the lath that holds your stucco on should be keeping water out. If they’re damaged, missing, or not properly installed, water will get through.
Inspecting and Documenting the Leak Correctly
Start with a systematic walkaround to locate active and latent leaks. Photograph problem spots from multiple angles and at different times of day to catch moisture behavior.
Keep notes on visible staining, moisture readings if available, and the surrounding conditions. Create a simple map of affected areas and date the observations to support any bid or repair plan. Ensure your documentation aligns with the needs of a contractor or supplier for accurate quotes.
Visual checkpoints and what photos to capture
Before you start, grab your camera. These visual clues will help you understand the leak’s path.
- Roof-to-wall junction: Check where roof meets wall. Look for gaps or missing flashing.
- Flashing laps: Inspect metal flashing laps. Ensure they’re tight and not peeling back.
- Stucco cracks: Photograph any cracks in the stucco. They could be letting water in.
- Adjacent roof shingles: Check nearby shingles. Water might be running down from above.
- Gutters: Inspect gutters. Clogged or damaged ones can cause water to back up and leak.
- Window and door frames: Look for gaps or missing caulk around openings.
- Plumbing vents: Check vent pipes. They should have proper flashing and boots.
- Roof penetrations: Inspect anything that sticks out of the roof – chimneys, skylights, etc.
Quick rule: Don’t skip any obvious signs. Each could be a clue to the leak’s source.
Moisture detection and probing tips
To confirm water penetration, use non-destructive moisture checks. Here’s how:
Step 1: Use a moisture meter. Press the probes into the stucco at suspected leak points. If it reads high (above 15-17%), you’ve got moisture.
Step 2: For smaller areas, use a small probe or a screwdriver. Gently poke the stucco where water might be getting in. If it’s soft or crumbles, that’s a sign of moisture damage.
Step 3: Be careful not to cause extra damage. Only probe where necessary and don’t go too deep.
How Roofline Details Should Be Built — Fundamentals to Reference
Focus on WRB continuity where the stucco meets the roofline, with flashing that directs water away from the wall. The detailing should maintain a continuous drainage plane from top to bottom.
Flashing sequencing matters: insert flashing under shingles or roof edge, above the WRB, and behind the stucco to prevent water intrusion. Keep the system clean of debris and ensure fasteners don’t breach the drainage path. Restore these fundamentals to achieve durable repairs.
Flashing roles and correct sequencing
The first line of defense against water intrusion at roof-to-wall junctions is proper flashing installation. Flashing’s role is to direct water away from vulnerable areas.
Step flashing is installed along the rake edge of the roof, lapping up under the shingles and down over the stucco. It bridges the gap between the roof and wall, allowing for expansion and contraction while keeping water out.
Counterflashing is a strip of flashing that fits into a slot in the masonry or stucco, creating a tight seal around the step flashing. It’s installed after the step flashing to prevent water from getting behind it.
Kickout flashing is used at the eaves and rakes where the roof meets the wall. It kicks water out and away from the wall, preventing it from running down and entering the stucco.
Stucco termination, weep screeds, and transition details
Where stucco meets roofing materials or trim, proper terminations are crucial to prevent water from getting trapped and causing damage. Here’s what to look for:
The weep screed is a horizontal flashing at the bottom of the stucco that allows any water that gets behind the stucco to drain out. It should be installed with a slope towards the exterior, ensuring water doesn’t pool.
At the top, the stucco should terminate below the roof line, allowing for proper drainage and preventing water from wicking up into the stucco. A transition detail, like a metal cap or drip edge, should be installed to direct water away from the stucco.
Check these terminations for any damage, gaps, or improper installation. If they’re failing, they’ll need to be replaced or repaired to ensure proper drainage and prevent leaks.
Repair Strategies That Work (Beyond Caulk)
Begin with targeted flashing replacement where it shows wear or damage. If the WRB or lath is breached, open the area carefully and restore the substrate before re-stuccoing.
Use a layered approach that matches the existing system, from water-shedding components to a proper backer and finish coat. Choose strategies based on the extent of damage and the location of the leak, and avoid relying solely on surface patches.
Replace or retrofit flashing correctly
Replacing old or damaged flashing is crucial to stop recurring leaks at rooflines. Flashing provides a continuous path for water to shed off the wall, preventing it from getting behind the stucco.
Verify that the new flashing overlaps existing roofing materials properly and extends far enough up the wall to direct water away from the stucco.
Use high-quality flashing material suitable for your climate, and follow manufacturer’s instructions for installation. Seal any nail or screw holes with a compatible sealant.
Repairing substrate, WRB, and lath behind stucco
Before reapplying stucco, expose the damaged area to assess and repair or replace the underlying substrate, water-resistive barrier (WRB), and lath.
Check for rotten or damaged sheathing, and replace if necessary. Ensure the WRB is intact and covers the entire wall area behind the stucco.
Repair any broken or missing lath, as it provides the base for the stucco to adhere to. Use galvanized steel lath for durability and resistance to corrosion.
When patching isn’t enough and a remove-and-replace is needed
Sometimes, localized repairs aren’t sufficient to stop recurring leaks. If you find extensive damage or multiple points of entry, it’s time for a remove-and-replace approach.
Remove the damaged stucco section carefully, taking care not to further damage the underlying materials. Inspect the exposed area thoroughly to identify all sources of leakage.
If the damage is widespread or affects structural components, consider consulting a professional before proceeding with repairs. Replace only what’s necessary, following the repair strategies outlined above to ensure lasting results.
Material Specs and Standards Explained (DIY-Friendly)
Identify suitable flashing metals and compatible WRB options, and verify that they are rated for exterior use with stucco. Check that the stucco materials meet the project needs and bond well with the new components.
Always read manufacturer instructions and local code requirements before purchasing materials. Compare labels and data sheets to ensure compatibility and performance with your climate and wall assembly.
Flashing metals and fasteners to consider
The first step in fixing recurring leaks is choosing the right flashing materials. Go for corrosion-resistant metals like stainless steel, aluminum-zinc alloy, or copper.
Stainless steel is a top choice due to its durability and resistance to rust. But check local codes, as some areas may have restrictions on metal types.
For fasteners, use corrosion-resistant options too. Stainless steel screws or nails are usually the best bet. Always ensure they’re compatible with your chosen flashing material.
Stucco mixes, lath, and WRB compatibility
Matching stucco system components is crucial to prevent future leaks. Here’s what you need to consider:
The stucco mix should be compatible with your existing system. If you’re not sure, contact the manufacturer or consult a professional.
Choose lath that’s suitable for your stucco type and wall construction. Metal lath is often used over wood-framed walls, while wire lath can work well with concrete or masonry substrates.
For the water-resistive barrier (WRB), opt for a material that’s compatible with both your stucco system and local climate conditions. Some common WRBs include building paper, house wrap, or fluid-applied membranes.
Tools, Safety and Preparation Checklist
Gather the key tools for cutting, removing damaged stucco, and installing flashing, plus PPE for working at height. Plan for scaffolding, fall protection, and debris containment to protect landscaping.
Prepare the work area by protecting non-target surfaces and organizing fasteners and replacement parts. Double-check that all safety gear is in good condition and that weather conditions won’t compromise the repair window.
Essential tools and materials for the job
Before you start, ensure you have all the necessary tools and materials to complete the job efficiently.
- Tape measure: To accurately measure areas needing repair.
- Level: For ensuring proper installation of new flashing and weep screeds.
- Chalk line: To mark out cuts and lines for new materials.
- Utility knife: For cutting back damaged stucco and caulk.
- Cordless drill: With masonry bit to remove old screws and install new ones.
- Safety glasses: To protect your eyes from debris.
- Work gloves: For handling materials and protecting hands.
- Stucco mix: Ensure it’s compatible with existing stucco and follows local standards.
- Flashing: Choose the right type (z-flashings, step flashings) for your roofing material.
- Fasteners: Stainless steel or hot-dipped galvanized screws for longevity.
- Lath and WRB: Match existing materials to maintain compatibility.
Quick rule: Always double-check your tools and materials before starting. Missing a crucial item can lead to delays and improper repairs.
Safety, access and temporary weather protection
Prioritize safety and protect your home from further damage during repairs.
- Ladder/scaffold: Use a sturdy ladder or scaffold for safe access. Ensure it’s secure and level.
- Fall protection: If working above 6 feet, use a safety harness tied off to a secure anchor point.
- Hard hat: Protect your head from falling debris.
- Ear protection: Use earplugs or earmuffs when using power tools near occupied spaces.
- Temporary weatherproofing: Cover opened walls with plastic sheeting to prevent rain intrusion during repairs.
- Protect landscaping: Lay down drop cloths or tarps around the work area to protect plants and grass from damage.
- Electrical safety: Turn off power to any nearby electrical outlets or circuits before starting work.
Quick rule: Never compromise on safety. Always prioritize it over speed, and follow local regulations and manufacturer guidelines for tools and equipment.
Step-by-Step DIY Repair Workflow
Start by prepping the area and removing damaged stucco to expose the underlying details. Work from the top down to maintain a proper water-shedding sequence.
Install or repair flashing and the WRB, then restore the substrate and apply the finish coat. Allow for proper curing and inspect for any signs of ongoing leaks after a test rain event.
Step-by-Step Repair Process
This step-by-step guide walks you through the process of repairing recurring leaks at your roofline stucco, from prep to finish.
- Inspect and prepare: Check the area for safety. Gather tools and materials listed in our earlier checklist.
- Remove damaged stucco: Carefully cut back the damaged stucco using a utility knife or oscillating tool, as described in the ‘Prep, remove and expose the problem area’ section.
- Examine flashing and WRB: Inspect the exposed flashing and water-resistive barrier (WRB) for damage. If necessary, repair or replace them following our earlier instructions on correct sequencing and integration.
- Install/repair flashing and restore drainage plane: Follow the ‘Install/repair flashing and restore the drainage plane’ section to ensure positive water runoff away from the wall plane.
- Re-lath, stucco patching and final detailing: Reattach lath, apply stucco layers, and detail terminations as outlined in the ‘Re-lath, stucco patching and final detailing’ section. Inspect your work for any missed spots or signs of leakage.
Prep, remove and expose the problem area
Safely removing stucco involves careful cutting back to expose the underlying flashing and WRB without causing further damage.
Start by scoring the stucco with a utility knife or oscillating tool along the lines where you’ll cut. This prevents cracking as you remove the stucco.
Be cautious when using power tools near electrical wires or other hazards. Always wear appropriate safety gear, including gloves and eye protection.
Once scored, use a pry bar or flathead screwdriver to gently lift and remove the damaged stucco in small sections. Work from the top down to minimize dust and debris falling onto undamaged areas.
Install/repair flashing and restore the drainage plane
Correctly integrating flashing with your WRB ensures positive water runoff, preventing leaks at the roofline.
If necessary, replace damaged flashing with a new piece that extends at least 4 inches up the roof slope and laps properly over existing flashing. Secure it using appropriate fasteners as described in our earlier material specs section.
Ensure the flashing is properly sealed to the roofing material and any adjacent walls or terminations, following best practices for your specific roof type.
The WRB should extend up the wall at least 6 inches above the top of the flashing. If it’s damaged, repair or replace it before installing new stucco. Make sure the WRB is properly lapped over the flashing to maintain a continuous drainage plane.
Re-lath, stucco patching and final detailing
Finishing your repair involves reattaching lath, applying new stucco, and detailing terminations to blend the repair seamlessly.
First, reattach any damaged or removed lath using appropriate fasteners. Ensure it’s securely fastened to the substrate and aligned with surrounding lath for a smooth finish.
Mix your stucco according to manufacturer instructions, ensuring it matches the existing texture and color as closely as possible. Apply the first layer (scratch coat) over the repaired area, embedding lath fibers as you go. Allow it to cure slightly before applying the final layer (brown coat), smoothing it out for a uniform finish.
Finally, create weep screeds or other necessary terminations at the roofline to facilitate water drainage and prevent future leaks. Inspect your work closely to ensure a proper blend with the existing stucco and no signs of potential leakage.
Maintenance, Monitoring and When to Hire a Pro
Schedule regular inspections of the roofline to catch wear before it leaks again. Look for new cracks, peeling finish, or damp patches after storms or seasonal changes.
Document warning signs that suggest a pro is needed, such as widespread substrate damage or suspected structural movement. When in doubt, obtain a bid and compare it to manufacturer guidance and local code requirements.
Practical maintenance tasks and visual checkpoints
Regular upkeep is key to preventing leaks. Use this checklist after major weather events or simple tasks like gutter cleaning.
- Check flashing laps: Ensure they’re tight and not peeling back. Water can get in if they’re loose.
- Inspect gutters: Make sure water’s flowing away from the house. Clogs or damage can cause leaks at the roofline.
- Look for cracks: Even hairline fractures can let water in, leading to bigger problems.
- Check caulking: Inspect seals around chimneys, vents, and skylights. Cracked or missing caulk lets water in.
- Examine stucco: Check for signs of deterioration like crumbling or delamination. These can indicate underlying issues.
- Inspect roof edges: Make sure they’re properly sloped to shed water. Flat edges can cause leaks.
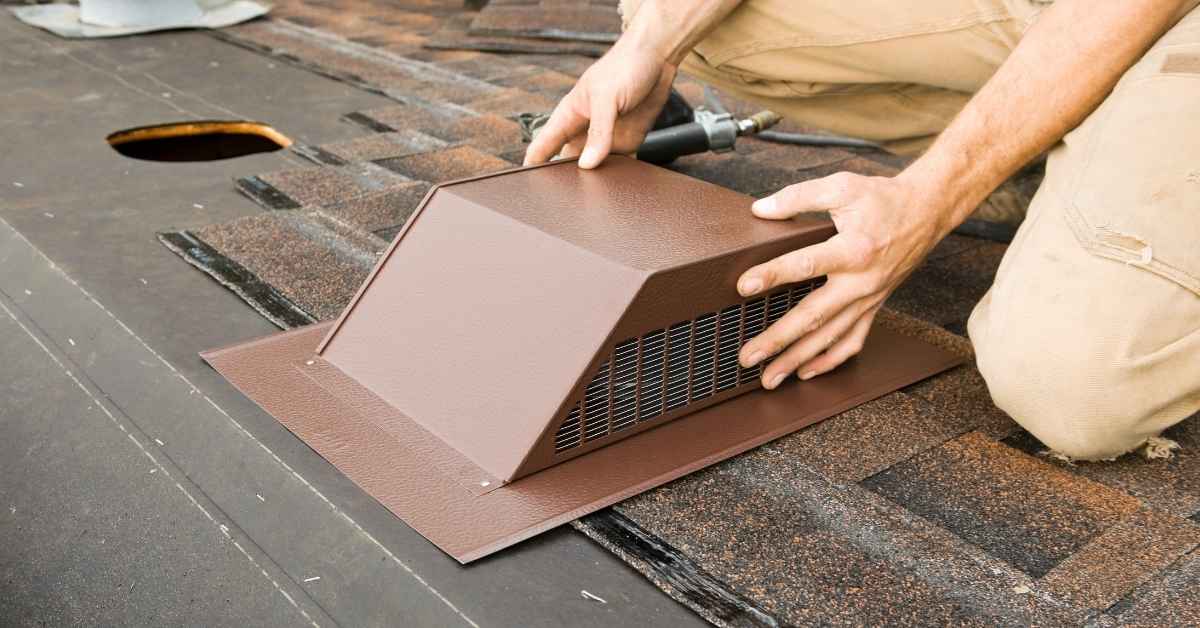
- Check attic ventilation: Proper airflow prevents moisture buildup, which can lead to rot and leaks.
- Look for water stains: These could indicate a leak that’s already happening.
Quick rule: If you find any issues, address them promptly. Small problems become big ones fast with stucco.
Red flags for hiring a specialist and what to ask
Some issues are beyond the scope of DIY. Here’s when to call in the pros and what to ask them.
Extensive rot, interior mold, or widespread staining are all signs that you need professional help. These issues can indicate a large area of damage or a complex problem that requires specialized knowledge and tools.
When hiring: Ask for references and examples of their past work. Check online reviews and ask about their licensing and insurance. Also, request an itemized estimate so you know exactly what you’re paying for.
During the consultation: Ask about their plan to address the issue. They should explain the problem in detail and outline a clear path to fixing it. If they don’t, that’s a red flag. Also, ask about preventative measures they’ll take to ensure the problem doesn’t recur.
Conclusion
Repairing roofline stucco leaks isn’t glamorous, but done right it prevents rewetting, stops damage, and keeps the look clean. Focus on solid details, proper preparation, and real fixes that withstand weather, pedestrian traffic, and seasonal movement. Safety stays first, and a measured approach saves time and money in the long run.
First, inspect and document with purpose: verify the leak path from inside and outside, check flashing and joints, confirm stucco thickness and anchor points, dry everything completely, and note findings with clear photos and measurements before any material touch. Then follow a simple, logical workflow: clean and dry the area, repair substrate and flashing as needed, use correct mortar or patch systems per the material specs, apply appropriate sealants only where they’re meant to live, reinstall new protective details, cure as required, and re-test after a rain or simulated water test. Always use the right tools for the job and test a small area first to confirm adhesion and finish before full-scale repair.
Many mistakes trip DIYers up: sealing too soon or with the wrong product, skipping substrate repair, overbuilding or under-sealing the roofline, and not allowing proper cure times. Safety rules matter too: wear eye protection and gloves, scaffold or ladder safely and level, never work on wet surfaces, and never push a repair when water is actively tracking; move to a dry day or window when you can control the environment. If you’re unsure about flashing details, substrate integrity, or the roof edge geometry, don’t push it.
If the leak keeps returning after the basic steps, or you see extensive cracking, efflorescence, or structural concerns, it’s time to call a pro. A contractor can verify flashing continuity, assess underlying framing, and ensure code-compliant workmanship. Stay disciplined, stay safe, and keep the approach practical—good repairs today protect the roofline for years to come.
FAQ
Why does stucco at the roofline keep leaking even after repairs?
Leaks at the roofline usually come from flashing, movement, or improper transitions. Caulk alone won’t fix underlying drainage or seal failures. Inspect the flashing, seal joints properly, and address any cracks in the substrate before sticking to more fixes.
What should I look for when inspecting roofline stucco leaks?
Check for cracks, gaps, and loose stucco at edges near the roof, corners, and where walls meet the roof. Look at the flashing and any metal or vinyl pieces for corrosion or damage. If you see staining that runs with gravity, trace it to the source above, not just where it drips.
What practical steps fix recurring leaks without relying on caulk?
Repair or replace damaged flashing, install proper drip edges, and tie into solid drainage paths. Patch only after the underlying water path is blocked, and verify the stucco joints aren’t allowing water behind the veneer. Use compatible sealants only where the manufacturer and material allow it.
How do I know if I should hire a pro for roofline stucco work?
If you see extensive cracking, loose stucco, rusted metal, or repeated leaks after basic repairs, bring in a pro. A qualified contractor can confirm flashing integrity and correct material detailing. Always check manufacturer instructions and local rules for approved methods.