
Introduction
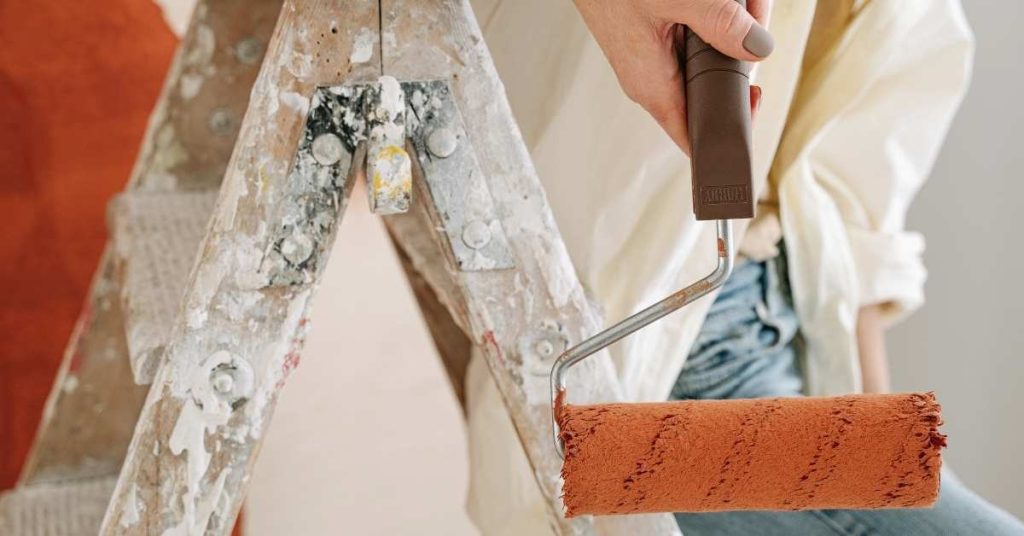
Clay plaster pigments are natural earths and oxides mixed into clay-rich binders to tint finishes, and color control comes down to careful mixing, testing, and understanding how clay and additives shift hue and value. For DIY panels, make small test boards, try layered thin coats, and note drying color versus wet—check product labels and manufacturer instructions for pigment load and compatibility. Keep mottling under control by adjusting particle size, binder consistency, and application methods rather than chasing exact matches after the fact.
Deciding how much to inpaint or compensate is an ethical choice: consider the object’s purpose, who will use or view it, and whether visual reconstruction would mislead; when in doubt, opt for reversible, minimal toning and document choices. For practical testing, evaluate edge adhesion, finish texture, and color stability on spare material and before large-area work check any technical specs you need with the manufacturer or a conservator.
Key takeaways
- Plan and document pigment options before plastering to avoid on-site surprises.
- Pigment compatibility: verify clay body and binder compatibility with manufacturer guidance.
- When mixing, test panels to control mottling, streaks, and blotches early.
- Inpainting ethics: decide degree of compensation based on institutional needs and consent.
- Safety: wear respirator, protect skin, and ventilate area during plaster pigment work.
- Prepare and run test panels step-by-step, record results, and adjust color as needed.
Table of Contents
- Introduction
- Key takeaways
- Article Purpose and Project Decision Checklist
- Pigment Types and Compatibility with Clay Plasters
- Color Mixing Fundamentals for Clay Plaster
- Controlling Mottling, Streaks, and Blotches
- How to Prepare and Run Test Panels (Step-by-Step Protocol)
- Tools, Materials Checklist, and Measuring Practices
- Safety, Health, and Environmental Considerations
- Troubleshooting, Long-Term Performance, and Finishes
- Conclusion
- FAQ
Article Purpose and Project Decision Checklist
This guide helps DIY homeowners and small renovators decide between pigment-based color and natural clay color for plaster and render. Expect clear outcomes: how each approach controls tone and mottling, what to test on small panels, and which method holds up better where moisture, sun, or freeze-thaw are concerns.
Choose pigmenting when you need a wider, repeatable hue range and tighter uniformity; choose natural clay for subtle, earthy variation and easier on-site tweaks, but check compatibility with your lime, cement, or clay base and be honest about maintenance. Run small test panels to check color stability, adhesion, and mottling under the actual light and humidity at the job, and base your pick on appearance, exposure risk, and how often you’re willing to touch up.
When to pigment clay plasters versus using natural clays
Use this checklist when deciding between adding pigments and relying on naturally colored clays for your project.
- Color range needed: Pigments offer wider color options, but may not match natural clays’ earthy tones.
- Depth of color: Natural clays provide subtle hues; pigments can deliver bolder shades.
- Permanence: Pigments may fade over time; natural clays are more stable but have limited colors.
- Material compatibility: Check if added pigments work well with your plaster base (lime, cement, or clay).
- Budget: Natural clays can be cheaper; pigments may add cost but offer more color choices.
- Availability: Natural clays might be locally sourced; pigments could require ordering.
- Environmental impact: Consider the eco-friendliness of each option.
- Historical accuracy: For restorations, consider using natural clays to maintain authenticity.
Quick rule: If you need a wide color range and don’t mind occasional touch-ups, pigments might be your best bet. For subtle, earthy tones and long-term stability, stick with natural clays.
Project factors that affect pigment choice
Consider these factors when selecting pigments for your clay plaster project.
- Substrate type: Different surfaces (concrete, brick, wood) may require specific pigments and primer coats.
- Coat thickness: Thicker coats need more pigment; thinner coats require less to avoid over-saturation.
- Indoor/outdoor exposure: Exterior plasters need UV-resistant, fade-proof pigments. Interiors have more color options.
- Moisture risk: High-humidity areas require moisture-resistant pigments to prevent mold and mildew growth.
- Final finish: Glossy or matte finishes may affect pigment choice and application method.
- Plaster base type: Lime, cement, or clay plasters may require specific pigments for compatibility and adhesion.
- Project scale: Large projects need consistent pigment batches; small projects allow more flexibility in color variation.
Quick rule: Always test pigments on small, hidden areas first to ensure they perform as expected under your specific project conditions.
Pigment Types and Compatibility with Clay Plasters
Clay plasters take pigments from a few main families: natural earths (ochres, umbers, siennas), mineral oxides and whiteners, carbon blacks, and some safe synthetic colorants. Each behaves differently with an earthen binder—expect variations in opacity, tinting strength, lightfastness, and how they disperse in water or fat-rich additives; check the pigment label or datasheet for pH and dispersibility notes before you buy.
Do a small panel test with your exact clay mix, pigment loadings, and any additives to catch problems like bleeding, efflorescence, or color shift under light and humidity. That saves time and frustration: you’ll learn how much pigment gives vibrant versus muted results, whether you need a dispersant or sealer, and how to keep batches consistent across the job.
Natural earth pigments and iron oxides
Earth oxides are commonly used with clay plasters due to their stability, opacity, and natural beauty. They’re made from minerals like ochres (reds), umbers (browns), and siennas (yellowish-reds).
Source: Check if the pigment comes from a reliable source. Local or reputable suppliers are usually best.
Grind: Finer pigments disperse better in clay binders, but not too fine – that can affect opacity and color depth.
Purity: Ensure the pigment is pure to avoid discoloration over time. Some natural pigments may contain impurities that react with light or moisture.
Organic and synthetic pigments
Organic and synthetic pigments offer vibrant colors and can create translucent effects in clay plasters. They include options like carbon blacks, phthalocyanines, and quinacridones.
Advantages: These pigments provide a wide range of colors not achievable with natural earth oxides alone. They can also create unique, semi-transparent effects.
Limitations: Some organic/synthetic pigments may not be lightfast or stable in alkaline environments like clay plasters. Always check the pigment’s lightfastness rating and ensure it’s compatible with your plaster’s pH level.
Remember, vibrant colors often require more pigment loading to achieve desired results. Test first to avoid wasting material.
Compatibility checks (alkalinity, particle size, contamination)
Before using any pigment with your clay plaster, perform some simple compatibility tests to avoid surprises later on.
Alkalinity: Check if the pigment is compatible with your plaster’s pH level. Most clay plasters are alkaline (pH 7-10). Some pigments may react or discolor in these conditions.
Particle size: Ensure the pigment particles aren’t too large, as they won’t disperse evenly and could affect the plaster’s finish. Too small, and they might cause chalking or reduced opacity.
Contamination: Test for any contaminants like salts or heavy metals that could cause efflorescence (whitish deposits) or discoloration over time. A simple water test can help: mix pigment with water, let it sit, then check for residue or color changes.
Color Mixing Fundamentals for Clay Plaster
Color mixing for clay plaster is a step-by-step shop task, not a secret recipe. Start small, add pigment slowly, mix thoroughly, and always test on a labeled panel before making a full batch so you can match the target under consistent light.
Clay and pigments can shift with base plaster, moisture, and temperature, so repeatable panels and a simple color log save headaches. Document every batch, note mixing order and dispersion, and use consistent curing and photos so you can fix mottling or shifts by adjusting pigment load or mixing rather than guessing.
Building color from base tone and tinting strategy
The first step in creating consistent tints is understanding your base clay’s natural color. It’ll influence your final results, so plan accordingly.
For pastel outcomes, start with a lighter base. For saturated colors, use a darker one. Remember, you’re building color here, not just adding it on top.
Tip: Before mixing, look at your base plaster under different lights to understand its undertones and how they’ll interact with pigments.
Dispersion methods and binders for even color
Even pigment distribution is key. Start by creating a wet slurry of your pigment in water or a compatible binder. This helps break up any clumps.
Then, use an appropriate mixer to agitate the slurry. A drill with a paddle attachment works well. Avoid over-agitating though – it can introduce air bubbles that’ll affect color consistency.
Pro tip: Pre-wet your pigment before adding it to your plaster mix. This helps ensure even distribution and prevents specks from forming.
Controlling Mottling, Streaks, and Blotches
Mottling, streaks, and blotches in clay plaster usually come from uneven pigment dispersion and from moisture and drying differences across the surface. Prevent them by pre-wetting or slurrying pigments, keeping batch sizes consistent, mixing slowly and thoroughly, and controlling evaporation at the surface with retarders or by shading and humidifying as needed.
Why this matters: uneven color looks amateur and is hard to fix once dry, so testing and consistent technique save time and material. Do trial panels under the same light and humidity you’ll have on the job, watch for blotching during cure, and be prepared to patch or rebatch if tests show instability—check product labels and datasheets for specific mixing and additive guidance.
Common causes of mottling (material, mixing, and environmental)
The materials you choose, how you mix them, and your job site conditions can all contribute to mottling in clay plaster.
- Pigment settling: Heavy pigments sink to the bottom during mixing. Solution: Pre-wet or pre-mix dry pigments as a slurry before adding to the mix.
- Uneven dispersion: Inconsistent pigment distribution leads to streaks and blotches. Solution: Use slow, thorough mixing and maintain consistent water-to-pigment ratios.
- Moisture gradients: Uneven moisture content in the mix causes variations in drying rates. Solution: Monitor and control temperature and humidity fluctuations during mixing and application.
- Inconsistent water-to-pigment ratio: Too much or too little water affects pigment dispersion. Solution: Weigh and measure ingredients for consistent batches.
- Drying-rate differences: Rapid drying causes blotches and streaks. Solution: Use additives or retarders to control evaporation at the plaster-pigment interface.
Application techniques to minimize mottling
Consistent application is key to minimizing mottling. Start by wetting the substrate evenly to promote uniform plaster absorption.
Maintain consistent trowel pressure and apply even coat thickness to avoid variations in pigment distribution.
Use back-rolling or cross-hatching techniques to ensure uniform pigment distribution across the surface. Protect surfaces from rapid moisture loss with controlled humidity and shading during drying.
Spot fixes and blending methods for mottled areas
If mottling occurs, don’t panic. There are ways to blend and correct these areas.
For small patches, use a feathering technique with a damp sponge or trowel to lightly re-coat the affected area, blending it into the surrounding plaster.
For larger areas, create a matched touch-up blend by mixing a small batch of plaster with the same pigment ratio as the original. Apply this mixture in thin layers, allowing each to dry before assessing and applying additional coats if needed.
How to Prepare and Run Test Panels (Step-by-Step Protocol)
Run small test panels to prove your color, mottling, adhesion, and short-term durability before you commit to the whole job. Set a clear objective, gather pigments, binder or base plaster, substrate panels, trowels and gauges, and keep a simple log for batch IDs and site conditions.
Prepare the panels consistently: clean and control substrate moisture, prime if needed, and use the same surface texture for every panel so results are repeatable. Record environmental data, follow manufacturer mix instructions (check the label/datasheet for ratios and cure guidance), and use visual checks plus basic adhesion and abrasion tests to decide whether to proceed or tweak the mix.
Step-by-Step Process
This sequence will guide you through preparing and running test panels to ensure your concrete mix is perfect before pouring your main slab.
- Gather materials: Collect your cement, aggregates (sand, gravel), water, and any admixtures. Having everything ready prevents delays and ensures consistency in your test batches.
Check: Tick off each item on your list as you collect it. - Calculate mix design: Determine the ratio of cement to aggregates (sand to gravel) based on your required concrete strength. A common starting point is a 1:2:4 or 1:3:5 ratio.
Check: Double-check your calculations and ensure you have the correct amounts of each material. - Wet the test panel forms: Before mixing, lightly wet the insides of your test panel forms to prevent suction and ensure a smooth surface on your test panels.
Check: The forms should feel damp but not soaking wet. - Mix concrete: Combine your dry materials in a wheelbarrow or mixing tub, then gradually add water while mixing. Aim for a consistent, workable consistency.
Check: The mixed concrete should hold its shape when squeezed but still spread easily. - Fill test panel forms: Shovel the mixed concrete into your prepared forms, filling them to the top. Use a tamping bar or vibrator to remove air pockets and ensure even compaction.
Check: The surface should be level and smooth. - Cover and cure test panels: Cover your filled forms with plastic sheeting to prevent moisture loss. Let them cure for at least 24 hours before unmolding.
Check: Ensure the plastic is secure and there are no gaps where air can enter. - Unmold test panels: After curing, remove the forms and check the surface and edges of your test panels for any signs of weakness or defects.
Check: The panels should have a smooth, even surface with no visible cracks or honeycombing. - Test concrete strength: Use a small, portable concrete tester to measure the compressive strength of your test panels. Compare this to your required strength.
Check: Ensure you’re using a reliable, calibrated testing device.
Pro tip: Keep detailed records of each test panel’s mix design, curing time, and resulting strength. This will help you refine your mix design over time and ensure consistency in your concrete work.
Building and conditioning test panels
First off, you need to mimic your final installation’s substrate. That could be plywood, OSB, or even existing concrete. Check the product label for recommended substrates.
Panel size? Keep it manageable, around 2′ x 4′. You’ll thank me later when you’re hauling them around. As for thickness, follow your mix design’s guidelines – usually 3″ to 6″.
Now, let’s talk conditioning. Your test panels need to go through the same wringer as your final pours. That means curing and weathering. Here’s a simple way:
After casting, cover your panels with plastic sheeting for initial curing. Keep them moist for at least 7 days. Then, let ’em sit out in the open, exposed to whatever Mother Nature throws at ’em – rain, sun, freeze-thaw cycles. That’s real-world conditioning.
Application, drying, and curing schedule for tests
Now that you’ve built and conditioned your test panels, it’s time to apply the concrete. Follow these steps:
First, check base compaction. It should be at least 95%. Then, mix your concrete as per manufacturer’s instructions. Aim for a slump of around 4-6 inches.
Apply the concrete to your test panels using a consistent application method, like a strike-off or screed. Ensure you achieve the specified coat thicknesses (e.g., 2″, 3″, 4″) for each panel.
After application, cover and let it cure. The initial curing is critical. Keep the panels moist and covered with plastic sheeting for at least 7 days. Check local rules or manufacturer’s instructions for specific curing times. During this period, maintain a consistent temperature (around 60-80°F) and humidity (above 95%) to ensure proper curing.
Evaluation criteria and documentation
Once your test panels are cured, it’s time to evaluate them. Here’s what you need to check and how to document your findings:
Visual Inspection (Color, Uniformity): Check for any discoloration or inconsistencies in the surface. Compare with the control panel to ensure uniformity. Note down any observations.
Physical Tests (Adhesion, Cracking): Perform a pull test to check adhesion. Use a chisel and hammer to tap along the edges and surface for signs of cracking. Document results with photos and notes.
Durability Tests (Abrasion, Water Exposure): Use a wire brush or sandpaper to test abrasion resistance. Expose panels to water (check local rules on safe exposure times) and inspect for any changes. Log all findings with clear, dated photos and notes.
Tools, Materials Checklist, and Measuring Practices
Gather the right tools and materials before you mix clay plaster: sturdy mixing vessels, hawks, trowels, a reliable mixer, gloves, masks, splash guards, and clamps or supports for test panels. Stock the clay base, chosen pigments, compatible binders or additives, water containers, and pre-cut test panels; use graduated cylinders or a gram scale and pre-mix pigment dispersions to keep each batch consistent.
Measure and record every batch with a simple template that logs batch ID, dry-to-water notes, pigment amounts, and site conditions like temperature and humidity so you can repeat or adjust mixes reliably. Test each mock-up for color under different lights, check workability and adhesion, and store pigments sealed and labeled; clean tools between colors to avoid cross-contamination and protect results.
Tools and mixing equipment
Before you start your concrete project, ensure you have the right tools and equipment. Use this checklist to double-check everything before you begin.
- Concrete Mixer: Check it’s in good working condition. Test run it to ensure it mixes evenly and consistently.
- Sieve (1/4″ or 6mm): Inspect for any damage. Ensure it’s the right size to prevent large aggregate from entering your mix.
- Trowel (2″ – 3″ wide): Check for straight edges and no bends. A good trowel helps achieve a smooth finish.
- Sprayer (optional, but recommended): Ensure it’s clean and working properly to apply a consistent water mist while finishing.
- Brushes (stiff bristle): Check for stiff bristles. Soft or missing bristles won’t remove excess concrete effectively.
- Application aids (dispersion and mottling reducers): Follow manufacturer’s instructions to ensure proper usage and storage.
- Measuring tools (tape measure, level, etc.): Check they’re in good working order. Calibrate if necessary to ensure accurate measurements.
- Protective gear: Ensure you have safety glasses, gloves, and steel-toed boots. Safety first!
Quick rule: Always check your tools before starting a job. Faulty equipment can lead to costly rework or even accidents.
Batch records and visual checkpoints
Before you start mixing, review this checklist to ensure everything is in order. Use it throughout the process to keep your concrete strong and consistent.
- Record ingredient sources: Note down where each ingredient came from – cement, aggregates, admixtures. This helps track any issues later on.
- Measure water content: Use a measuring device or follow the manufacturer’s guidelines to ensure you’re adding the correct amount of water (typically 150-210 liters per 50kg bag of cement). Too much water weakens concrete, too little makes it hard and brittle.
- Check batch weights/volumes: Weigh or measure out your ingredients to maintain the desired mix ratio (e.g., 1:2:4 for a standard mix). Inaccurate measurements lead to poor-quality concrete.
- Time mixing: Keep track of how long you’re mixing. Under-mixing leaves dry spots, over-mixing can cause segregation. Aim for around 3-5 minutes in the initial batch and another 2-3 minutes after adding aggregates.
- Check cement bag labels: Ensure each bag has the same batch number to maintain consistency. Using different batches can result in color variations or strength differences.
- Inspect aggregate quality: Look for any foreign materials, excessive dust, or moisture in your aggregates. These can affect concrete’s performance.
- Test water quality: Make sure the water is clean and free from contaminants. Impure water can cause efflorescence and reduce concrete strength.
- Monitor weather conditions: Keep an eye on temperature and humidity levels. Extreme conditions can affect setting time, strength development, and overall performance.
Quick rule: Always keep records of your mixes. If issues arise later, you’ll need this information to troubleshoot and make improvements.
Safety, Health, and Environmental Considerations
Wear the right PPE when working with clay pigments and lime plaster: a respirator or dust mask for dusty mixing, goggles and gloves for splashes and skin contact, and disposables or coveralls when handling concentrated pigment. Check each pigment’s SDS/MSDS and the label for inhalation or dermal warnings, confirm colorfastness with a test patch, and store pigments sealed and dry to avoid contamination and unexpected reactions with lime.
Control dust and washout on site by working in well-ventilated areas, using local exhaust or wet-mixing to keep particles down, and containing rinse water so it doesn’t enter soil or drains. Keep a simple safety checklist and pigment batch notes, watch for eye or skin irritation and rinse immediately, and consult the product datasheet or a medical professional if symptoms persist.
PPE and safe handling for pigments
Safety starts with the right gear. Here’s what you need:
Respiratory Protection: Clay plaster pigments can kick up dust. Wear a respirator rated for particulates (like N95 or P100) when mixing or applying.
Eye and Skin Protection: Protect your eyes with safety glasses or goggles, and wear gloves to prevent skin irritation from pigments and plaster.
Disposables: Use disposable coveralls to protect clothing. Change into clean clothes before leaving the job site.
Environmental and disposal notes
Protecting the environment is as important as protecting yourself:
Avoid Toxic Pigments: Some pigments are toxic. Always check Material Safety Data Sheets (MSDS) or Safety Data Sheets (SDS). Avoid using any pigment with a ‘toxic’ label.
Control Runoff: Contain rinse water to prevent it from entering drains or groundwater. Use tarps, barriers, and proper disposal methods.
Dispose Properly: Follow local regulations for disposing of unused pigment and binder. Never pour down drains. Contact your local waste management department for guidance.
Troubleshooting, Long-Term Performance, and Finishes
Breathable finishes and pigments can fail in a few predictable ways: efflorescence, whitening, mottling, color bleed, and yellowing. Spotting the cause means checking moisture paths, substrate prep, pigment load, and sealers, and sometimes you must build a small test panel instead of guessing on the wall.
Do a simple workflow: identify whether water or chemistry is at fault, run a moisture or abrasion check, then decide to remix, reseal with a compatible breathable product, or re-plaster. Proper test panels and documented results save time and keep color stable through seasons, UV, and movement—so you don’t have to fix the whole wall after a bad finish.
Common problems and field fixes
Clay plaster surfaces can face various issues over time. Here are quick diagnostics and remedies for common pigment-related problems:
Fading: Check if the surface is exposed to direct sunlight. Reapply pigment or use a compatible sealer to enhance color.
Bloom/Efflorescence: This white powdery deposit indicates excess salts in the substrate. Remove with a wire brush, rinse, and re-plaster.
Sanding/Dusting: Ensure proper curing time before sanding. Use a damp cloth to wipe off dust during sanding.
Cracking: Check for excess moisture or improper substrate preparation. Re-mix plaster with less water and re-plaster.
Choosing sealers and topcoats (testing first)
Sealers and topcoats protect your clay plaster surface. Here’s how to choose the right one:
Breathable sealers like oils, waxes, or silicates preserve color while allowing walls to breathe. Test small areas first to ensure compatibility.
Impermeable coatings provide extra protection but can trap moisture. Always test on panels before full application to avoid compromising wall performance.
Use a simple decision tree: if the sealer enhances color and doesn’t compromise breathability, use it. If not, try another or re-plaster with adjusted pigment load.
Maintenance, re-testing, and longevity checks
Regular maintenance preserves your clay plaster surface’s integrity and color uniformity:
Inspect surfaces annually for signs of wear or damage. Re-touch blends if necessary to maintain consistency.
Re-run test panels every 5 years or after significant environmental changes (e.g., new windows, heating/cooling system upgrades) to ensure long-term performance.
Check for moisture content and substrate movement. Address any issues promptly to prevent further damage.
Conclusion
Finish with confidence by treating color, texture, and durability as a package deal. Safety and careful testing aren’t optional extras—they prevent costly mistakes and unhappy results.
Do this next: verify your project decision and materials, plan a small test panel, mix pigments in small batches on the job surface, run a controlled test, evaluate color and mottling in different lighting, and document what works before scaling up. Check pigment compatibility, adhere to the mixing fundamentals, prepare the panel, record your measurements, monitor for blotches or streaks, and only then apply finishes. Keep safety gear on, work in a ventilated area, and use test panels to confirm long-term performance before committing to the full job.
Common mistakes to avoid are rushing the test phase, skipping compatibility checks, and overworking the plaster once it holds a gather. A simple rule is to test first, document results, and pause if color shifts or texture feels off. If results are unclear or the project scope grows beyond a small area, call in a professional for a final pass or guidance. Stay focused, stay safe, and you’ll finish strong with a durable, even finish that looks right in real light.
FAQ
Should I inpaint clay plaster panels, and who should decide how much to inpaint?
Yes, you can inpaint when you’re restoring or balancing color, but decide who approves the amount first. Get guidance from the project’s owner or curator if relevant, and rely on manufacturer instructions for the materials you use.
How do I decide between general toning and exact color match?
General toning hides more and is faster; exact matches take longer and risk color shifts. Check the pigment and binder compatibility, then test on a scrap piece to see how much adjustment is needed under the expected lighting.
What physical characteristics should I check before inpainting?
Look at the plaster’s texture, porosity, and existing surface finish. If the surface is fragile or highly old, use conservative amounts and follow the manufacturer’s guidelines for any additives or binders.
What about metamerism and lightfastness when choosing inpainting pigments?
Some pigments change color with light or look different under various lamps. Check pigment lightfastness and color stability data from labels or datasheets, and plan tests under your typical lighting conditions.