

Table of Contents
- Introduction
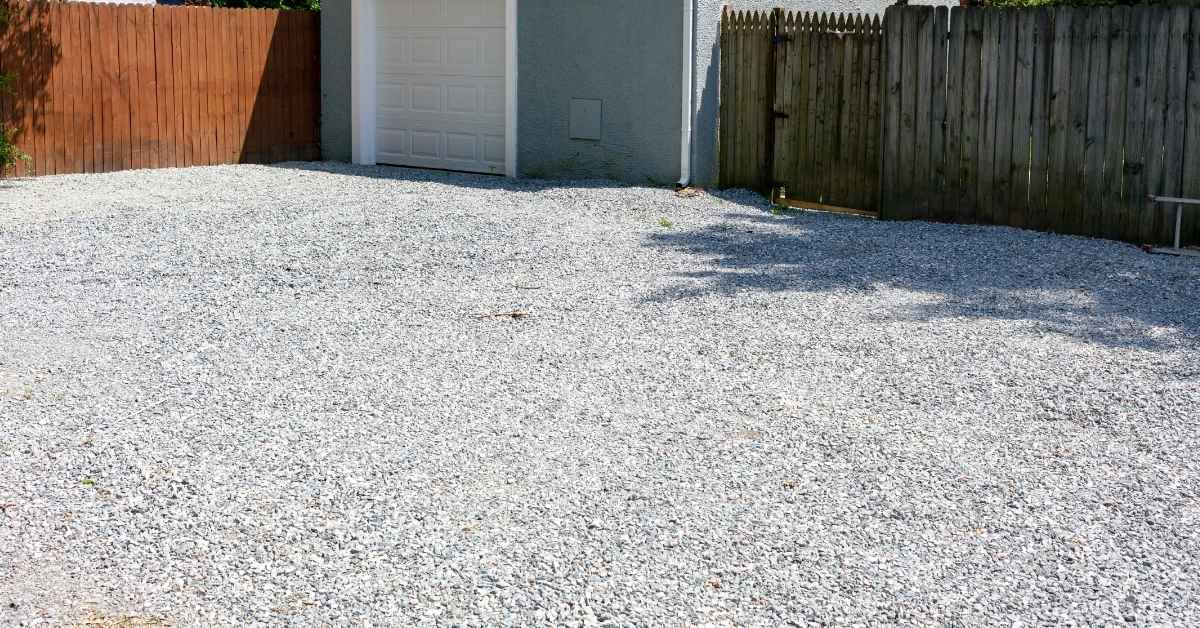
- Introduction to Gravel Driveway Shoulders
- Understanding Geotextiles
- Gravel Over Geotextile: Method and Benefits
- Straight on Soil: Method and Drawbacks
- Cost Analysis: Gravel Over Geotextile Vs. Straight on Soil
- Environmental Impact Considerations
- Safety Considerations During Installation
- Common Mistakes and How to Avoid Them
- Long-Term Performance and Durability
- When to Call in the Pros for Driveway Shoulder Projects
- Conclusion and Recommendations
- Conclusion
- FAQ
Introduction
Installing stable gravel over geotextile is generally more effective than placing it directly on soil for drive shoulders, as it enhances drainage and prevents gravel from sinking into the ground. In this article, we’ll explore the benefits of using geotextiles, compare the longevity and maintenance of both methods, and provide insights into the best practices for creating durable drive shoulders.
Introduction to Gravel Driveway Shoulders
Gravel driveway shoulders are essential components in driveway construction, serving as supportive edges that help maintain the integrity of the driveway. They play a crucial role in facilitating drainage and controlling erosion, ensuring that water is effectively directed away from the main surface.
Proper installation techniques are vital for the stability and longevity of gravel driveway shoulders. Utilizing geotextiles can enhance their performance by preventing the gravel from mixing with the underlying soil. Avoiding common installation mistakes, such as inadequate compaction or improper grading, can lead to a more durable and effective driveway shoulder.
Importance of Driveway Shoulder Stability
Stable driveway shoulders are not just a nice-to-have; they are essential for keeping your gravel driveway in good shape. If the shoulders are weak or poorly maintained, they can lead to erosion and water runoff issues. This can cause the gravel to shift, creating ruts and potholes. Always check base compaction to ensure the shoulders are firm and level with the driveway surface.
Another reason to focus on shoulder stability is to prevent the edges of your driveway from crumbling. When the shoulders are unstable, the gravel can spill over and weaken the driveway’s structure. To avoid this, make sure the shoulders are made of compacted material that can support the weight of vehicles and resist weather changes.
Don’t overlook the importance of drainage. Poor drainage can wash away the shoulders, leading to more significant problems down the line. Ensure that water flows away from the driveway and doesn’t pool along the edges. This will help maintain the integrity of both the shoulders and the driveway itself.
Common Materials Used
Choosing the right materials for your gravel driveway shoulders is crucial. The right choices will ensure durability and a neat appearance, while poor choices can lead to costly repairs.
- Crushed Stone This is the main material for driveway shoulders. Look for angular stones with a size of 3/4 inch. They lock together well and provide stability. Avoid smooth stones; they won’t hold in place.
- Pea Gravel Use this for a decorative top layer. Choose stones around 3/8 inch for a polished look. Be cautious: it can shift easily, so it’s not for structural support.
- Geotextile Fabric This is laid under the gravel to prevent mixing with the soil. Look for a non-woven type for better drainage. Skipping this can lead to sinking and rutting.
- Sand Use as a leveling layer under the gravel. Opt for coarse sand to ensure proper drainage. Fine sand can compact too much and cause water pooling.
- Edging Pavers These keep the gravel contained. Choose concrete or stone pavers for durability. Avoid plastic; it warps and breaks easily under pressure.
- Binding Agent Use this to stabilize loose gravel. Look for a polymer-based product for best results. Avoid cheap options; they often wash away with rain.
- Topsoil Use this to blend the shoulder into the surrounding landscape. Look for screened topsoil to avoid clumps. Don’t use it under gravel; it will lead to instability.
Pro tip: Store your materials in a dry place and cover them to prevent moisture absorption, which can affect their performance during installation.

Understanding Geotextiles
Geotextiles are essential materials in construction, particularly for driveway projects. They come in various types, including woven, non-woven, and knitted, each serving specific purposes such as separation, filtration, and reinforcement.
Using geotextiles in driveway construction offers significant advantages, like improved drainage and soil stabilization, compared to traditional methods. For those tackling DIY projects, understanding the proper installation of geotextiles can lead to more durable and long-lasting driveways.
Types of Geotextiles
When choosing geotextiles, you mainly have two options: woven and non-woven. Woven geotextiles are made by weaving fibers together, creating a sturdy, durable fabric. These are perfect for applications where strength is crucial, like road construction or erosion control. They hold up well under heavy loads and can help stabilize the ground.
Non-woven geotextiles, on the other hand, are produced by bonding fibers together using heat or chemicals. They are more like felt and are excellent for drainage and filtration tasks. If you’re working on a project that requires water flow management, such as a French drain, non-woven is the way to go. Remember, choosing the right type is key to the success of your project.
Some folks make the mistake of using the wrong type for their needs. For instance, using a non-woven geotextile where strength is needed can lead to failure. Always match the geotextile to your specific application to avoid costly problems down the line.
Benefits of Using Geotextiles
Geotextiles are a game-changer for anyone looking to stabilize soil and control erosion. These materials are designed to reinforce the ground, making them perfect for projects where soil stability is a concern. By placing geotextiles between different soil layers, you can significantly improve the load-bearing capacity of the ground. This means fewer headaches with sinking or shifting surfaces.
Erosion control is another major benefit of using geotextiles. When water flows over soil, it can wash away the top layer, leading to a mess and potential structural issues. Geotextiles act as a barrier, keeping the soil in place and allowing water to pass through without causing damage. This makes them ideal for slopes, banks, and any area prone to erosion.
Remember, the key to getting the most out of geotextiles is proper installation. Always check base compaction before laying them down. If you skip this step, you risk undermining the whole project. Also, make sure the geotextile is the right type for your specific needs. Refer back to the types of geotextiles we discussed earlier to ensure you’re using the right one for the job.
Gravel Over Geotextile: Method and Benefits
Installing gravel over geotextile fabric involves a few essential steps to ensure a stable and durable surface. The process begins with preparing the soil by leveling it and removing any debris, followed by laying and securing the geotextile fabric to prevent shifting. Once the fabric is in place, gravel is added and compacted to enhance stability and longevity.
Using geotextile under gravel offers several benefits, such as improved drainage, reduced erosion, and better load distribution. These advantages are crucial for maintaining the integrity of driveway shoulders, especially in areas prone to heavy rainfall or frequent use. Regular maintenance, like checking for fabric exposure and replenishing gravel, helps extend the life of the installation.
Installation Process
Start by preparing the area where you plan to install the gravel. Remove any debris, vegetation, or large rocks. This ensures a clean surface for the geotextile. Next, check base compaction. A well-compacted base is crucial for stability. Use a plate compactor to achieve a firm foundation.
Lay the geotextile fabric across the prepared area. Make sure it covers the entire surface with a slight overlap at the edges to prevent gaps. The fabric acts as a barrier, keeping the gravel from sinking into the soil. Avoid cutting corners here—proper coverage is essential.
Once the geotextile is in place, begin spreading the gravel. Use a shovel or a wheelbarrow to distribute it evenly. Aim for a consistent thickness, typically around 4-6 inches, depending on your needs. After spreading, compact the gravel to ensure it stays in place and provides a solid surface. Don’t skip this step; it prevents future shifting and ruts.
Finally, inspect the edges and make sure the gravel is secure. If necessary, add more gravel to areas that seem thin or uneven. Regular maintenance will keep your driveway shoulders in top shape, so plan to check them periodically.
Benefits of This Method
Using gravel over geotextile offers several practical benefits. One major advantage is improved drainage. The geotextile acts as a barrier that prevents soil from clogging the gravel, allowing water to flow freely. This reduces the risk of water pooling and erosion, keeping your outdoor spaces dry and stable.
Another key benefit is reduced maintenance. The geotextile layer helps keep the gravel in place, minimizing the amount of gravel that gets displaced over time. This means less frequent topping up and leveling, saving you time and effort in the long run.
Additionally, this method enhances the durability of your pathways or driveways. By preventing soil from mixing with gravel, the geotextile maintains the structural integrity of the surface. This leads to a longer-lasting, more reliable foundation that can withstand heavy use.
Straight on Soil: Method and Drawbacks
Laying gravel directly on soil is a straightforward method that involves preparing the ground by leveling and compacting it before spreading the gravel. However, this approach can lead to issues such as gravel sinking into the soil, creating uneven surfaces that require regular maintenance. Additionally, without proper drainage solutions, water can pool and cause erosion.
This method’s simplicity makes it appealing for quick projects, but it comes with drawbacks like increased weed growth due to the absence of a barrier between the soil and gravel. For those considering this technique, it’s important to weigh the environmental and sustainability concerns, as the lack of stabilization measures like geotextile can exacerbate these issues. Understanding these factors can help in making informed decisions for long-lasting and effective gravel installations.
Installation Process
First, you need to prepare the soil where the gravel will be laid. Clear away any grass, roots, or debris. This ensures a clean surface and helps the gravel settle properly. Use a shovel or a tiller if the area is large. Once cleared, compact the soil with a tamper or plate compactor. This step is crucial to prevent the gravel from sinking or shifting over time.
Next, lay down a layer of landscape fabric over the compacted soil. This fabric acts as a barrier, preventing weeds from growing through and keeping the gravel in place. Make sure the fabric is smooth and covers the entire area. Overlap the edges to avoid gaps where weeds could sneak through.
Now, it’s time to spread the gravel. Use a wheelbarrow to transport the gravel and a rake to spread it evenly across the fabric. Aim for a depth of about 2-3 inches. Too thin, and you’ll have bald spots; too thick, and it becomes hard to walk or drive on. After spreading, compact the gravel with the tamper again. This final compaction helps lock the gravel pieces together, creating a stable surface.
Drawbacks of This Method
Going straight on soil might seem like a quick fix, but it comes with its own set of headaches. First off, there’s the risk of erosion. Without a solid base, rain and water runoff can wash away the soil beneath your structure, leading to uneven surfaces or even collapse. It’s crucial to keep an eye on drainage and make sure water doesn’t pool around your project.
Then there’s the issue of increased maintenance. A soil base can shift over time, especially with temperature changes and weather conditions. You’ll likely find yourself having to adjust or level things more often than you’d like. This can be a real pain, especially if you’re not keen on frequent upkeep.
Lastly, don’t underestimate the importance of checking base compaction. If the soil isn’t compacted well, you’ll be dealing with settling issues down the road. This means more work and potentially more costs as you try to fix problems that could have been avoided with a bit more prep work.
Cost Analysis: Gravel Over Geotextile Vs. Straight on Soil
When comparing the costs of using gravel over geotextile fabric versus laying gravel directly on soil, initial material expenses play a significant role. Gravel combined with geotextile fabric may have a higher upfront cost compared to gravel alone, but it can offer substantial savings in the long run by reducing erosion and controlling weed growth.
For DIY enthusiasts or jobsite professionals, understanding these cost dynamics is crucial for making informed decisions. While the installation of geotextile requires more effort and time, it can mitigate future expenses related to drainage issues and soil stability. Ultimately, considering both immediate and long-term financial impacts helps determine the most cost-effective solution for your project.
Initial Installation Costs
When it comes to initial installation costs, laying gravel over geotextile might seem more expensive at first glance. You have to buy the geotextile fabric, which adds to your material costs. However, don’t let this deter you. The fabric helps in stabilizing the ground and reducing long-term maintenance, which can save you money down the road.
For gravel straight on soil, the upfront costs appear lower since you skip the fabric. But beware! Without geotextile, you might face issues like gravel sinking into the soil over time. This means you’ll likely need more gravel sooner than expected, adding to your costs later.
Labor costs can vary based on site conditions. Installing geotextile requires some extra effort, but it’s not rocket science. Just make sure to check base compaction before laying the fabric. For gravel on soil, the process is quicker, but you might end up spending more time fixing problems later. Consider the long-term savings when deciding which route to take.
Long-Term Maintenance Costs
When it comes to long-term maintenance, gravel over geotextile is generally the smarter choice. The geotextile layer acts as a barrier, preventing soil from mixing with the gravel. This means you won’t have to add gravel as often to maintain the surface level. In contrast, laying gravel directly on soil can lead to quicker sinking and uneven surfaces, requiring more frequent top-ups.
Another factor to consider is weed growth. Gravel over geotextile significantly reduces weed penetration, saving you time and effort in weed control. Without the geotextile, expect to spend more time pulling weeds or applying herbicides, which adds to your maintenance costs.
Don’t underestimate the importance of drainage. Geotextile helps with water management, reducing pooling and erosion. If you skip it, you might face water damage and have to redo sections of your gravel path or driveway. In the long run, investing in geotextile can save you money and headaches.
Environmental Impact Considerations
When considering the environmental impact of using gravel over geotextile versus placing it directly on soil for driveway shoulders, several factors come into play. Gravel over geotextile can reduce soil erosion and improve water drainage, while directly placing gravel on soil may lead to increased runoff and potential habitat disruption.
Understanding these differences is crucial for minimizing environmental harm and ensuring sustainable driveway construction. By choosing the right method, you can enhance the longevity of your driveway, reduce maintenance needs, and lower the carbon footprint associated with material production and transportation.
Sustainability of Materials
Choosing the right materials directly impacts the durability and environmental footprint of your project. Here’s a guide to help you pick materials that are both sustainable and effective.
- Recycled Bricks Used for walls and pathways, these bricks reduce waste. Look for uniform size and minimal chips. Great for rustic looks but avoid if you need a pristine finish.
- Type N Mortar Ideal for general use, especially above grade. Check for a compressive strength of 750 psi. Best for softer materials like brick; avoid for heavy loads.
- Low-VOC Paints Essential for finishing touches, these paints emit fewer pollutants. Ensure the label states low-VOC content. Pick lighter shades for better coverage and less rework.
- Reclaimed Wood Perfect for decorative elements. Verify it’s been treated for pests. Use for accent pieces; avoid structural applications unless certified.
- Eco-friendly Insulation Needed for energy efficiency. Look for materials like cellulose or sheep wool. Choose for attics and walls; avoid in damp areas without proper barriers.
- Water-based Sealants Used to protect surfaces, these sealants are less harmful. Ensure compatibility with your base material. Apply in thin layers to avoid peeling.
- Permeable Pavers Ideal for driveways, they allow water to pass through, reducing runoff. Check for strength and weather resistance. Avoid in high traffic areas without proper support.
- Natural Stone Used for durability and aesthetics in landscaping. Ensure it’s locally sourced to reduce carbon footprint. Excellent for patios; avoid if weight is a concern.
Pro tip: Store materials in a dry, cool place to maintain their integrity. Mixing small batches prevents waste and ensures fresh application.
Impact on Local Ecosystems
When you’re working on a project, think about how your methods might affect the local environment. Water runoff is a big deal. If you don’t manage it right, it can carry chemicals and debris into nearby streams or rivers. Make sure your site has proper drainage to avoid this. You don’t want to be the one responsible for polluting local waterways.
Soil health is another thing to keep an eye on. Heavy machinery can compact the soil, which is bad news for plant roots and water absorption. Check base compaction and try to minimize heavy equipment use when possible. If you need to, aerate the soil afterward to help it recover.
Keep in mind that different materials can also impact ecosystems. While we’ve talked about sustainability before, remember that some materials can leach harmful substances into the soil. Always choose materials that are safe and environmentally friendly to avoid long-term damage.

Safety Considerations During Installation
Ensuring safety during the installation of driveway shoulders is crucial to prevent accidents and injuries. Key measures include wearing appropriate personal protective equipment (PPE) such as gloves, safety goggles, and sturdy footwear, as well as handling and storing materials properly. Additionally, operators must follow guidelines for safely using machinery and tools, and be aware of environmental hazards like uneven terrain and adverse weather conditions.
Understanding and implementing these safety considerations can significantly reduce the risk of injury on the job site. Proper safety practices not only protect workers but also ensure the successful completion of the project. By adhering to recommended safety protocols, individuals can maintain a secure working environment and minimize disruptions caused by accidents or emergencies.
Equipment and Tools
Having the right tools makes installing gravel over geotextile or directly on soil safer and more efficient. Here’s what you’ll need to get the job done right.
- Shovel – Essential for moving and spreading gravel. Choose a sturdy, long-handled shovel for better leverage. Don’t skimp on quality; a cheap one will break quickly.
- Wheelbarrow – Use it to transport gravel across the site. A wheelbarrow with a pneumatic tire handles uneven ground better. Overloading it leads to spills and extra work.
- Rake – Necessary for leveling and spreading gravel evenly. Opt for a metal rake with strong tines. A plastic rake won’t hold up under heavy use.
- Compactor – Essential for compacting the gravel layer. A plate compactor is ideal. Rent one if you don’t have it; compacting by hand is ineffective.
- Geotextile Fabric – Prevents gravel from sinking into the soil. Make sure it’s the correct size for your area. Skipping this step leads to uneven surfaces over time.
- Utility Knife – Use it to cut geotextile fabric to size. Ensure it has a sharp blade for clean cuts. Dull blades make the job frustrating and slow.
- Measuring Tape – For measuring distances and ensuring correct placement. A 25-foot tape is usually sufficient. Guesswork leads to costly mistakes.
- Gloves – Protect your hands from blisters and sharp edges. Get a pair with good grip. Bare hands can lead to painful cuts and scrapes.
Pro tip: Rent larger tools like the compactor if you don’t plan on frequent use. It saves money and storage space.
Common Safety Hazards
During installation, tripping hazards are a common issue. Keep your workspace tidy. Remove any loose cables and tools from walkways. If you’re working at heights, ensure ladders are stable and on solid ground. A fall can cause serious injury, so never rush or take shortcuts.
Electrical hazards are another risk. If your project involves wiring, turn off power at the source before starting. Double-check with a voltage tester. Don’t assume wires are safe just because they’re not sparking. If you’re unsure, consult a professional. Better safe than sorry.
Finally, be aware of heavy lifting. Don’t strain yourself trying to lift more than you can handle. Use proper lifting techniques: bend at the knees, keep your back straight, and lift with your legs. If something’s too heavy, get help or use a dolly. Injuries from lifting can put you out of commission for weeks.
Common Mistakes and How to Avoid Them
Installing and maintaining gravel driveway shoulders can be tricky, with several common pitfalls that can lead to costly repairs. From improper base layer preparation to choosing the wrong type of gravel, these mistakes can compromise the durability and effectiveness of your driveway. Additionally, neglecting geotextile fabric and inadequate drainage planning are frequent errors that can result in soil erosion and water pooling.
Understanding these common mistakes is crucial for anyone looking to undertake a DIY project or manage a jobsite effectively. Proper preparation and material selection can significantly extend the lifespan of your driveway, while regular maintenance ensures it remains in optimal condition. By avoiding these errors, you not only save time and money but also enhance the overall stability and functionality of your gravel driveway shoulders.
Maintenance Oversights
One common oversight is neglecting the driveway shoulders. These areas support the edges of your driveway and prevent erosion. If you ignore them, you risk damaging the driveway itself. Regularly inspect and clear debris from the shoulders to ensure proper drainage. Water pooling can lead to erosion and weaken the driveway edges.
Another mistake is failing to check base compaction regularly. Over time, the base material can settle or wash away, especially after heavy rains. This can cause the driveway to crack or sink. Make it a habit to assess the compaction and add material if needed to maintain a solid base.
Don’t forget about vegetation. Allowing grass or weeds to grow unchecked along the shoulders can lead to root damage and moisture retention. Trim back any overgrowth and consider using a weed barrier to keep the area clear. A little maintenance goes a long way in preserving the integrity of your driveway.
Long-Term Performance and Durability
Long-term performance and durability are crucial when considering gravel drive shoulders. Using geotextile beneath gravel significantly enhances its longevity and stability compared to placing gravel directly on soil.
Without geotextile, gravel can suffer from issues like erosion, settling, and increased maintenance. Geotextile acts as a barrier, reducing these problems and ensuring a more durable surface. For DIY enthusiasts or jobsite workers, understanding these benefits can lead to more efficient and cost-effective projects.
Durability in Different Climates
When it comes to durability, climate plays a big role. In hot and dry climates, materials can crack or warp due to extreme temperatures and lack of moisture. Make sure to use materials that are resistant to UV rays and heat. Regularly inspect for signs of wear and tear, and consider applying protective coatings to extend their lifespan.
In cold and wet climates, the freeze-thaw cycle can wreak havoc on structures. Water seeps into small cracks, freezes, and expands, causing further damage. Choose materials that can withstand these conditions and ensure proper drainage to prevent water accumulation. Regular maintenance is key to catching potential issues early.
For those in humid environments, mold and rot are the main concerns. Opt for materials that resist moisture absorption and have good ventilation to keep things dry. Regularly check for signs of mold and treat affected areas promptly to prevent further damage.
User Experiences and Testimonials
Many homeowners have shared their insights on the long-term performance of various methods. One common piece of advice is to check base compaction before proceeding with any installation. A solid foundation is crucial, especially in areas with heavy rainfall or frost. Neglecting this step often leads to settling issues, as noted by several users who had to redo their projects within a couple of years.
Testimonials also highlight the importance of choosing materials suited to your local climate. For instance, users in colder regions swear by materials that resist freeze-thaw cycles, while those in warmer climates focus on UV resistance. One user mentioned that opting for climate-appropriate materials saved them from costly repairs down the line.
Real-world feedback consistently emphasizes the value of proper maintenance. Regular cleaning and sealing can extend the life of your installation significantly. A homeowner from a coastal area noted that annual maintenance prevented saltwater damage, keeping their project in top shape for over a decade.

When to Call in the Pros for Driveway Shoulder Projects
Tackling a driveway shoulder project can be a rewarding DIY task, but sometimes it’s best to call in the experts. Professional guidance is crucial when the job demands specialized skills or equipment. Knowing when to step back and let a pro handle the tricky parts can save time, money, and potential headaches.
- Assessing Soil Stability: If you’re unsure about the soil’s ability to support your project, a professional can conduct soil tests and recommend the best approach.
- Heavy Machinery Operation: Using equipment like compactors or excavators requires skill and experience. Hire a pro to ensure safe and effective use.
- Complex Drainage Solutions: Poor drainage can ruin your project. Professionals can design and implement systems that prevent water pooling and erosion.
- Permits and Regulations: Some areas require permits for driveway work. A contractor will know the local regulations and handle the paperwork for you.
- Large-Scale Projects: If your driveway shoulder spans a large area, professionals can complete the work more efficiently and with better results.
- Custom Design Features: For intricate designs or unique materials, a professional touch ensures precision and quality.
- Time Constraints: If you’re on a tight schedule, hiring a contractor can speed up the process while maintaining high standards.
Benefits of Professional Expertise
Professionals bring a wealth of knowledge and experience to your project. They can foresee potential issues and provide solutions before problems arise. With their expertise, you can expect a durable and aesthetically pleasing result that stands the test of time.
Conclusion and Recommendations
Choosing the right method for driveway shoulder stabilization involves weighing the pros and cons of using gravel over geotextile versus placing it directly on soil. Gravel over geotextile offers better long-term durability and reduced maintenance, while direct soil application is often more cost-effective initially but may require more frequent repairs.
For those considering DIY projects or managing a jobsite, understanding the impact of climate, soil type, and traffic load is crucial for making an informed decision. Additionally, environmental benefits such as improved drainage and reduced erosion can be significant factors in selecting the appropriate method. By considering these elements, you can ensure a more sustainable and cost-effective solution for driveway shoulder stabilization.
Essential Tools and Materials for Installation
To install gravel over geotextile effectively, you’ll need a specific set of tools and materials. These items will help ensure the job is done right, avoiding common pitfalls and ensuring a long-lasting result.
- Shovel – Essential for spreading gravel evenly. Opt for a sturdy, long-handled shovel to reduce strain on your back. Avoid using a flimsy shovel; it might break under the weight of gravel.
- Rake – Use this to level the gravel. A metal landscape rake works best for this task. Be careful not to drag too hard, or you might disturb the geotextile underneath.
- Wheelbarrow – Useful for transporting gravel from the pile to the installation site. A heavy-duty wheelbarrow with a pneumatic tire makes the job easier on uneven terrain. Don’t overload it, or you risk tipping over.
- Geotextile Fabric – This is the base layer to prevent weed growth and stabilize the ground. Choose a high-quality, permeable fabric. Make sure to overlap the edges by at least 12 inches to prevent shifting.
- Compactor – Optional but recommended for compacting the gravel. A plate compactor is ideal. Renting one is a good option if you don’t plan to use it frequently. Skipping this step can lead to uneven settling over time.
- Gloves – Protect your hands from blisters and cuts. Choose durable, well-fitting gloves. Don’t underestimate their importance; hand injuries can slow down your project significantly.
- Measuring Tape – For accurate measurements of the area and fabric. A 25-foot tape is usually sufficient. Double-check measurements to avoid cutting fabric too short.
- Utility Knife – Necessary for cutting the geotextile fabric. Ensure it has a sharp blade for clean cuts. Dull blades can cause frayed edges, leading to fabric unraveling.
Pro tip: Renting larger equipment like a compactor can save money and storage space. Combine trips to the rental store with material pickups to streamline your project timeline.
Common Mistakes to Avoid in Driveway Shoulder Stabilization
When stabilizing a driveway shoulder, certain errors can lead to costly repairs or a shorter lifespan. Avoid these common pitfalls to ensure a durable result.
- Ignoring Drainage Needs Water pooling can erode materials quickly. Ensure proper drainage by sloping the shoulder away from the driveway.
- Using Incorrect Materials Not all gravel or geotextiles are suitable. Refer back to the section on choosing materials and stick to recommended types.
- Skipping Compaction Loose materials shift easily. Compact each layer thoroughly to create a stable base.
- Overlooking Edge Support Weak edges lead to crumbling. Use edging materials to reinforce the shoulder’s sides.
- Underestimating Traffic Load Light materials won’t hold up under heavy use. Match material strength to expected traffic levels.
Double-check these points to avoid common mistakes and ensure your driveway shoulder stands the test of time.
Conclusion
Choosing the right method for your gravel driveway shoulder is crucial for ensuring long-term durability and safety. Using geotextiles under gravel provides a stable and lasting solution, reducing maintenance and enhancing appearance.
Start by assessing your driveway’s current condition and drainage needs. If you opt for geotextiles, lay them evenly over a well-prepared base, ensuring no wrinkles. Spread the gravel evenly, compacting it layer by layer. For those going straight on soil, ensure the ground is firm and well-drained, though this approach may require more frequent maintenance.
Avoid common mistakes like skimping on gravel depth or neglecting edge support. Always wear protective gear and be cautious when handling heavy materials. Remember, rushing the process can lead to costly repairs down the line.
If you’re unsure about handling the installation yourself, consider consulting a professional. They can provide guidance or take over the more challenging aspects. With the right approach, you’ll have a driveway shoulder that stands the test of time. You’ve got this!
FAQ
Why use geotextile under gravel?
Geotextile keeps gravel from mixing with the soil. It stops ruts and potholes, making your drive shoulders last longer. Skipping it means more maintenance down the road.
Can I lay gravel directly on soil?
You can, but it’s not smart. Gravel will sink and shift over time. You’ll end up with a mess and more work fixing it.
What type of geotextile should I use?
Use a woven geotextile for drive shoulders. It’s strong and handles heavy loads well. Non-woven types aren’t tough enough for this job.
How thick should the gravel layer be?
A 4 to 6-inch layer is usually enough. It gives good support and drainage. Too thin, and you’ll see bare spots quickly.
Do I need to compact the gravel?
Yes, you should compact it. It makes the surface stable and prevents shifting. Skipping this step leads to uneven surfaces and more repairs later.