
Introduction
Spray paint makeovers are quick, hands-on transformations using spray paint to refresh surfaces.
They rely on proper prep, careful layering, and finishing touches to look even and durable. This article shares what works and why the results hold up.
Key takeaways
- Plan color schemes on swatches; test on scrap metal before full spray.
- Clean and degrease surfaces; ensure dry, dust-free conditions prior to spraying.
- Maintain consistent distance and even passes; overlap slightly for uniform coverage.
- Choose compatible paint types for material; follow label instructions for prep.
- Ventilate work area; wear respirator, eye protection, and gloves at all times.
- Test finish in hidden spot; consider long-term maintenance and touch-up plan.
Table of Contents
- Introduction
- Key takeaways
- Before-and-After Case Studies
- Types of Spray Paints Suitable for Construction Projects
- Surface Preparation Techniques Before Spraying
- Tools and Materials Checklist
- Spray Painting Techniques and How to Avoid Common Mistakes
- Safety, Ventilation, and PPE Requirements
- Cost Analysis: DIY Materials Versus Hiring Professionals
- Planning Colors, Finishes, and Long-Term Maintenance
- Conclusion
- FAQ
Before-and-After Case Studies
This section collects real makeover examples that show how different surfaces respond to spray paint strategies. You’ll see concrete floors, countertops, masonry, and furniture tackled indoors and outdoors with varied traffic patterns. Each case links the before snapshot to a clear after description and the interventions used.
For every project, observe the surface condition, the chosen colors, and the finish type. The write‑ups highlight the exact primers, sealers, and spray paints that contributed to the result, plus prep and time considerations. You’ll also find lessons learned and common pitfalls to help replicate the success at home.
Quick project summaries
The first case is a worn-out concrete floor in an old garage. We used Rust-Oleum’s Universal spray paint, covering about 200 sq ft in just two hours. The whole job took less than a day.
Next, we tackled a tired-looking wooden picnic table. We chose Valspar’s All-Weather Exterior Spray Paint for its durability and UV protection. It was ready to use again after just one hour of drying time.
Lastly, we transformed an old metal garden bench with Krylon’s Fusion All-In-One spray paint. This project took around 30 minutes per coat, with two coats needed for full coverage.
What made them work (key factors)
The key to success in each case was proper surface prep. We cleaned, sanded, and primed every surface before painting.
Choosing the right spray paint product was crucial. Each project required a different finish type and durability level, so we matched the paint to the job’s needs.
Using the correct technique also played a big role. We used even strokes, kept the can moving, and maintained a consistent distance from the surface.
Lastly, having the right tools – good quality spray paint cans, sandpaper, primer, and sometimes stencils or tape – ensured we got the job done right.
Visual checkpoints and results metrics
Before you start, use this checklist to ensure your project is on track. Check it again after a few weeks or months to see how well your paint job is holding up.
- Coverage: Check that the first coat covered at least 80% of the surface area. If not, you may need more coats.
- Drying Time: Make sure the paint dries to touch in the recommended time (usually 15-30 minutes).
- Sheen Level: Confirm that the sheen level matches your expectations. If it’s too glossy or not glossy enough, you might need to sand and repaint.
- Durability: After a few weeks, check for any signs of chipping, peeling, or fading. If present, you may have skipped a crucial step in prep or chosen the wrong paint.
- Wear Resistance: For high-traffic areas, look for signs of wear after a month. If it’s holding up well, great! If not, consider using a more durable paint next time.
- Ease of Cleaning: Test cleaning the surface with mild soap and water. It should clean easily without damaging the finish.
- Color Retention: Check that the color hasn’t faded or changed tone under sunlight. If it has, consider using a paint with better UV protection next time.
- Adhesion: Gently scratch the surface to check if the paint is well-adhered. If it flakes off easily, you may have skipped priming.
Quick rule: Always follow the manufacturer’s guidelines for drying times and re-coating intervals to ensure your project lasts as long as possible.
Types of Spray Paints Suitable for Construction Projects
This section explains the main spray paint chemistries and where they shine on structural and furniture surfaces. You’ll learn about adhesion, hardness, and UV resistance for each type. Special notes are included for metal, masonry, and high‑heat needs.
We compare water‑based and solvent‑based options, covering odor, cleanup, drying times, and environmental considerations on job sites. Priming and surface prep needs are outlined per material, with guidance on primers and adhesion promoters to boost performance.
Spray Paint Chemistries and Common Uses
Each spray paint type has its own chemistry that makes it excel on certain surfaces. Here’s a quick rundown:
Acrylic-Latex: Great for indoor furniture and walls. It’s water-based, low-odor, easy to clean up, and dries fast. But it’s not as durable or UV-resistant as others.
Enamel: Ideal for outdoor surfaces like metal, wood, and plastic. It’s tough, resists fading, and cleans up with water. But it takes longer to dry.
Lacquer: Best for indoor wood furniture. It dries fast, has a nice sheen, but it’s not as durable or resistant to moisture as others. It also requires mineral spirits for cleanup.
Epoxy: Perfect for floors and concrete. It’s tough, resists chemicals, and can handle high traffic. But it has strong fumes and slow drying time.
Specialty Sprays: Rust Prevention, High-Heat, Multi-Surface
Some projects need extra protection. Here are specialty sprays to consider:
Rust-Inhibiting: Use on metal surfaces exposed to moisture. It prevents rust and extends lifespan. Great for outdoor equipment and vehicles.
High-Heat: Ideal for grills, fireplace tools, or high-temperature areas. It resists blistering and peeling up to 1200°F (650°C).
Multi-Surface: Versatile sprays that work on various materials like wood, metal, plastic, and masonry. They’re convenient but may not perform as well as dedicated products.
Remember, specialty sprays are designed to tackle specific challenges. Use them wisely for best results.
Material Specs and Standards Explained
Choosing the right material is half the battle. Here’s what you should look for:
- Adhesion: Check if it sticks well to your surface. Poor adhesion leads to peeling, chipping.
- Weather Resistance: For outdoor use, ensure it can handle sun, rain, snow without fading or cracking.
- UV Protection: Essential for outdoor surfaces. It prevents color from fading due to sunlight exposure.
- Drying Time: Faster drying means you can get back to work sooner. But slower drying might mean better adhesion.
- Cleanup: Water-based sprays are easier to clean up. Solvent-based require mineral spirits or paint thinner.
Surface Preparation Techniques Before Spraying
Prep details are given for concrete, wood, metal, laminate, and previously painted surfaces, with emphasis on porosity and adhesion. Cleaning and degreasing steps are explained, including when to use solvent versus water‑based cleaners and typical dwell times. Each path ends in a smooth, ridgeless substrate ready for coating.
Repair and sealing guidance covers crack filling, patching, sanding, and addressing peeling paint. Priming and adhesion boosters are discussed with substrate‑specific recommendations and minimum dry times. Masking, moisture checks, and environmental conditions are included to optimize spray results.
Cleaning, Degreasing, and Contaminant Removal
Start by removing any loose dirt, dust, or debris with a stiff brush or broom. For tougher grime, use a pressure washer or scrub brush with warm water.
Degreasing is crucial for surfaces like concrete and metal. Use a degreaser suitable for your substrate – choose one that’s solvent-based for heavy oils, or water-based for lighter contaminants. Follow the manufacturer’s instructions for dwell time.
Rinse thoroughly with clean water after cleaning and degreasing. Allow the surface to dry completely before moving on – this could take a few hours to a full day depending on humidity.
Sanding, Filling, and Priming
Use sandpaper with 60-80 grit for most surfaces to remove any ridges or gouges. For smoother finishes like laminate, use 120-grit. Sand along the grain of the material.
Fill cracks and holes with a suitable filler – use concrete patch for concrete, wood filler for wood, etc. Let it dry, then sand smooth with your chosen grit.
Priming is essential for better adhesion and coverage. Choose a primer based on your substrate: solvent-based for oil-based paints, water-based for latex. Consider using a sealer-prime combo to address porosity issues.
For previously painted surfaces, you can either scuff-sand with fine grit sandpaper or strip old paint entirely before priming.
Substrate Compatibility and Adhesion Tests
Before full application, perform a simple adhesion test. Lightly score the surface with a utility knife, then apply painter’s tape over it. Pull off the tape – if paint comes off, your surface isn’t ready.
Do a small test spray in an inconspicuous area to check for proper adhesion and color match. Let it dry according to manufacturer’s instructions, then lightly scratch or try to peel it off. If it doesn’t budge, you’re good to go.
Consider using a bonding agent if your paint struggles to adhere – apply it, let it dry, then spray as usual. Always follow the manufacturer’s guidelines for best results.
Tools and Materials Checklist
This section separates essential tools from optional items and explains why each matters for durability and finish quality. It includes primer, sealant, and compatible spray devices or cans as must‑haves. Optional gear like low‑VOC respirators and specialty nozzles is covered with practical rationale.
Surface prep gear for degreasing, sanding, masking, and priming is itemized, with quick checklists tailored to wood, metal, glass, and concrete. PPE, workspace safety, paints, primers, thinners, and disposal considerations are addressed alongside quantities and maintenance tips.
Essential gear for every job
Before you start any spray paint makeover, tick off this list to ensure you’ve got the basics covered.
- Spray cans or gun: Your main tool. Choose compatible ones with your chosen paint.
- Respirator: Protects from fumes. Get one with low-T VOC for comfort.
- Gloves: Keeps hands clean and safe from chemicals.
- Drop cloths: Catches overspray, protects floors.
- Masking tape: Defines edges, prevents over-spray onto unwanted areas.
- Sanding blocks or sponges: Smooths surfaces before painting. Use 120-grit for most jobs.
- Degreaser: Cleans surfaces, removes grease and dirt.
- Primer: Bonds paint to surface, improves durability.
- Cleaning supplies: For post-project cleanup. Have rags, soap, and water ready.
Quick rule: Don’t skip these. They’re the foundation of a successful project.
Pro-level tools and upgrades
For larger projects or better finish quality, consider these pro tools and accessories.
- HVLP system: Reduces overspray, provides even coverage. Ideal for large areas like walls or furniture.
- Compressor: Powers spray guns, gives consistent pressure. Great for multiple coats.
- Specialty nozzles: Fine-tune your spray pattern. Wide fan for large areas, narrow for details.
- Better respirator: Full-face model with changeable cartridges. Offers superior protection against fumes and dust.
- Safety glasses: Protects eyes from debris and overspray.
- Work light: Illuminates work area, helps spot missed spots or imperfections.
- Heat gun: Speeds up drying time between coats. Use with caution to avoid warping.
- Spray booth: Contains overspray, improves ventilation. Ideal for indoor projects.
Quick rule: These tools offer better control and finish quality but require more investment.
Consumables and quantity planning
Estimate your paint and consumable needs to avoid mid-project shortages. Here’s how:
- Calculate surface area: Measure length x width of each surface. Divide by coverage rate (check paint can for details).
- Add overage: Plan for 10-15% extra to account for waste, drips, or touch-ups.
- Primer and sealant: Estimate at half the paint quantity. They cover less but are crucial for adhesion and protection.
- Sandpaper: Buy enough 120-grit for entire project. A pack of 10 sheets should suffice for most small to medium-sized jobs.
- Masking tape: Get a roll long enough to cover all edges and patterns.
- Drop cloths: Plan for one per surface plus extras for the floor.
- Degreaser: A small bottle should do. It goes a long way.
- Thinners (if needed): Estimate at 10% of paint quantity. Helps achieve desired consistency.
Quick rule: Overestimate slightly to avoid running out mid-project. Leftover materials can be stored for future touch-ups.
Spray Painting Techniques and How to Avoid Common Mistakes
Foundational spraying techniques cover distance, motion, overlap, and drying times to achieve consistent results. Safety considerations and appropriate PPE are included as part of the setup. Expect practical cues for steady technique on various surfaces.
The guide also addresses common issues like runs, orange peel, and coverage gaps. It offers actionable fixes such as light sanding, re‑spraying passes, and adjusting pressure or nozzle settings. A concise workflow helps you catch problems early and finish strong.
Proper Spraying Technique and Sequencing
To get consistent results, follow these steps:
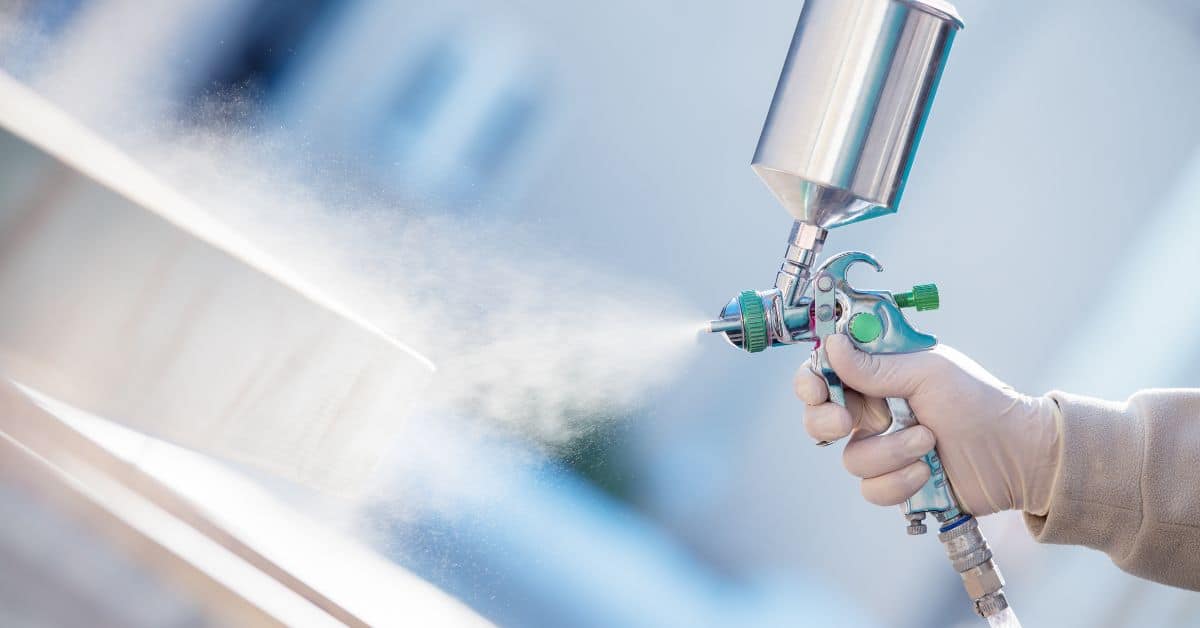
Distance is key. Hold the spray gun about 8–12 inches from the surface. Too close can cause runs, too far might miss spots.
Use steady back-and-forth motion, overlapping each pass by around 50%. This ensures even coverage and no missed areas.
Let each coat flash off for the recommended time before recoating. This lets the paint set but not dry completely, so the next coat adheres well. Check your paint’s label for flash-off times.
Troubleshooting Common Defects
Here are some issues you might face and how to fix them:
Runs or sags? This happens when paint is too thick. Thin it down with reducer, or adjust your spray gun’s air pressure.
Orange peel texture? This is often due to painting in high humidity or over a warm surface. Let surfaces cool before spraying and keep humidity low.
Mottling or uneven coverage? This could be due to inconsistent speed, missed spots, or poor paint quality. Use even passes, check for missed areas, and ensure your paint is well-mixed.
Time-Saving Strategies for Large Projects
For big jobs, every minute counts. Here’s how to speed up without sacrificing quality:
Batch your work. Group similar tasks together. For example, prime all surfaces before moving on to spraying.
Use staging areas. Set up a clean, dry area for each step of the process. This keeps things organized and prevents contamination.
Plan your workflow. Start with the largest or most visible areas first. This way, if you run out of time, at least the most important parts are done.
Safety, Ventilation, and PPE Requirements
Respiratory protection is prioritized, with options and fit considerations for solvents and VOCs. The section explains how to select and use respirators, including cartridge choices and testing where feasible. Proper PPE is emphasized to protect skin and eyes during projects.
Ventilation strategies and fire safety are covered, including managing ignition sources and grounding painted items. Workspace setup, spill kits, disposal, and pre‑spray checklists round out practical safety measures for a DIY environment.
Respiratory Protection and Ventilation
Your lungs are your most valuable tools. Protect them with the right respirator.
Disposable masks, like N95s, are fine for light-duty jobs or low-VOC paints. But for heavy spraying or strong solvents, opt for an elastomeric/half-face respirator with chemical cartridges or a PAPR (Powered Air Purifying Respirator). They’re bulkier but offer better protection.
Ventilation is your other lung-saver. For indoors, set up a mechanical ventilation system with an exhaust near the spray zone, pushing air outwards. Monitor VOC levels if you can. Outdoors, create cross-ventilation by opening windows and doors to opposite sides of your workspace.
Skin and Eye Protection and Protective Clothing
Spray paint isn’t picky about where it lands. Keep it off you with the right gear.
Start with chemical-resistant gloves. They’re cheap, easy to find, and can save your hands from nasty chemicals. Add goggles or a face shield for eye protection. And don’t forget long sleeves or coveralls to keep paint off your skin.
After spraying, decontaminate immediately. Wash exposed skin with soap and water, and clean your gear thoroughly before storing it.
Storage, Disposal, and Fire Safety
Fire safety isn’t just about not smoking. It’s about keeping flammables away from heat sources.
Store flammable aerosols in a cool, well-ventilated area, away from heat and ignition sources. Never store them near electrical appliances or open flames. For waste disposal, follow local regulations. Generally, that means taking paint cans to a hazardous waste facility.
During spraying, use non-sparking tools. Ground painted items to prevent static buildup. And always have a fire extinguisher nearby. Better safe than sorry.
Cost Analysis: DIY Materials Versus Hiring Professionals
Break down typical cost factors such as primers, paints, sealers, and protective gear, plus consumables that affect price. The discussion helps you anticipate material needs without guesswork. Color‑minish options and their impact on budget are noted for planning purposes.
Tool costs and amortization are explained, including when to buy versus rent and how to account for depreciation. The analysis also considers potential rework costs and how long DIY work might take compared with professional bids to guide decision making.
Estimating material and tool costs
To budget effectively, calculate your needs based on project size. Here’s a breakdown:
- Paint & Primer: Estimate 10-15 sq ft coverage per coat. A gallon covers about 400 sq ft. Most projects need 2 coats.
- Topcoat/Sealant: Often not needed, but if required, follow paint’s coverage rate.
- Consumables: Sandpaper (1 sheet per 50-100 sq ft), brushes (2-3 for the project), rollers (1-2).
- PPE: Respirator ($20-$40), goggles ($10-$20), gloves, and coveralls.
- Tools: Sander ($15-$30/day), spray system ($30-$60/day). Rent if project’s small; buy for frequent use.
When to hire a professional
Hiring pros is wise when projects are complex, risky, or time-consuming. They bring:
Expertise: Pros know tricks for tough surfaces and patterns.
Time-saving: They work faster due to experience and better equipment.
Guaranteed results: Many pros offer warranties on their work.
Consider hiring if your project involves high-traffic surfaces, hazardous environments, or large areas with complex patterns.
Budget tips to reduce costs
Save money by:
Renting tools: Only buy if you’ll use them frequently. Rentals are cheaper for one-off projects.
Buying samples: Test colors and finishes before committing to full gallons.
Prioritizing prep: Proper surface preparation prevents costly rework. Sand, clean, and prime well.
Avoiding mistakes: Learn from common DIY painting mistakes to prevent extra coats or repairs.
Planning Colors, Finishes, and Long-Term Maintenance
Define your project scope and color goals, including hue selection and how the palette integrates with the space. The section stresses assessing surfaces for primer needs and substrate compatibility for indoor versus outdoor use. Finish choices are linked to wear expectations.
A rigorous sample testing protocol is outlined with mini swatches, test areas, and lighting variations. A maintenance and recoat plan is provided to help preserve results and plan for future touch‑ups and cleaning guidance.
Choosing color and finish for purpose
The first step is understanding what you want to achieve with your spray paint makeover. The sheen level and color choice greatly impact the final look, durability, and how visible surface imperfections are.
Sheen Level: Matte or satin finishes give a subdued look and are easier to touch up but show imperfections more. Semi-gloss or high-gloss finishes are great for high-traffic areas or surfaces prone to splashes, hiding imperfections better but showing wear over time.
Color Choice: Consider the room’s lighting, existing decor, and the desired mood. Lighter colors reflect light, making spaces feel bigger, while darker hues create a cozy atmosphere. Neutral tones provide versatility, while bold colors make a statement.
Testing samples and mockups
Before committing to spraying your entire project area, create small test panels to confirm your color and finish choices. This step is crucial as colors can look different under various lighting conditions.
Paint mini swatches on paper or cardboard, then view them in the actual room at different times of day. Observe how the light affects the color’s appearance. Once satisfied with the color, create a larger test area on your surface to check for any compatibility issues and see how the finish looks in real life.
Document your findings, noting lighting conditions, substrate reactions, and overall appearance. This will help you make an informed final color choice and avoid costly mistakes.
Maintenance and touch-up strategies
Proper maintenance extends the life of your spray-painted surfaces, keeping them looking like the after photos. Establish a routine cleaning schedule to remove dirt and grime before they build up. For high-traffic areas or surfaces prone to splashes, consider applying a sealant or topcoat for added protection.
For touch-ups, use the same paint and spraying technique as your original project. Apply light, even coats, allowing adequate drying time between each. Keep leftover paint in an airtight container, properly stored, to ensure color consistency for future touch-ups.
Regularly inspect your surfaces for any signs of wear or damage. Address touch-ups promptly to maintain the overall appearance and longevity of your spray paint makeover.
Conclusion
Do this right and the finish sticks, looks good, and lasts. Safety stays visible in the result as much as the color and shine do.
First, clean and repair the surface, sand rough spots, and test a small patch. Decide on the paint type that fits the project, mask surrounding areas, protect floors, and map out a plan for even, thin coats with proper drying time. Gather and prep tools and materials, then apply in a steady motion, keeping the can or gun at the right distance, letting each coat dry before the next, and ventilating the space as you work. Finish with a quality top coat if needed and inspect for drips, touch-ups, and consistency before you call it done.
Common mistakes to avoid are skipping or rushing surface prep, applying thick coats that peel or run, and spraying in a poorly ventilated area without proper PPE. Use a respirator or mask, eye protection, and gloves, work in a well-ventilated space, and test color and adhesion in a small spot first. If the project requires long-term exposure, outdoor elements, or delicate substrates, plan for more durable finishes and expect the option to hire a pro rather than risk costly damage.
If the project grows beyond a small patch or you hit stubborn substrates, don’t push through alone—call a professional for specialized surfaces or large areas. Stay practical, stay safe, and you’ll have a reliable, good-looking result that’s easy to maintain and worth the effort.
FAQ
What types of spray paint should I choose for DIY projects?
Look for paints labeled for the surface you’re coating (metal, wood, plastic). Check the label for enamel versus acrylic, indoor vs. outdoor use, and any rust-inhibiting claims. If you’re unsure, read manufacturer instructions and select a product that matches your project needs.
How should I set up and prep before painting?
Clean the surface and remove peeling finish or rust. Sand rough edges and mask nearby areas that shouldn’t be painted. Lay down drop cloths and ensure good ventilation; test the spray on a scrap piece first.
What are the best practices for applying spray paint?
Keep the can moving and make light, overlapping passes. Start and stop beyond the edge of the target area to avoid drips. Follow the product’s recoat window on the label and allow proper drying between coats as advised by the manufacturer.
How do I choose colors and finishes for a cohesive look?
Choose a base color and one or two accents that work together. Consider finish options (matte, satin, gloss) and durability for the location. Test color samples on a hidden spot to see how they read in your light before committing.