
Introduction
Mineral silicate paint is a breathable masonry coating that bonds to mineral surfaces. It’s often worth it for exterior or historic masonry where you want a lasting, matte finish that can weather damp conditions. It resists peeling when applied correctly, but effectiveness depends on clean, sound substrate and proper surface prep.
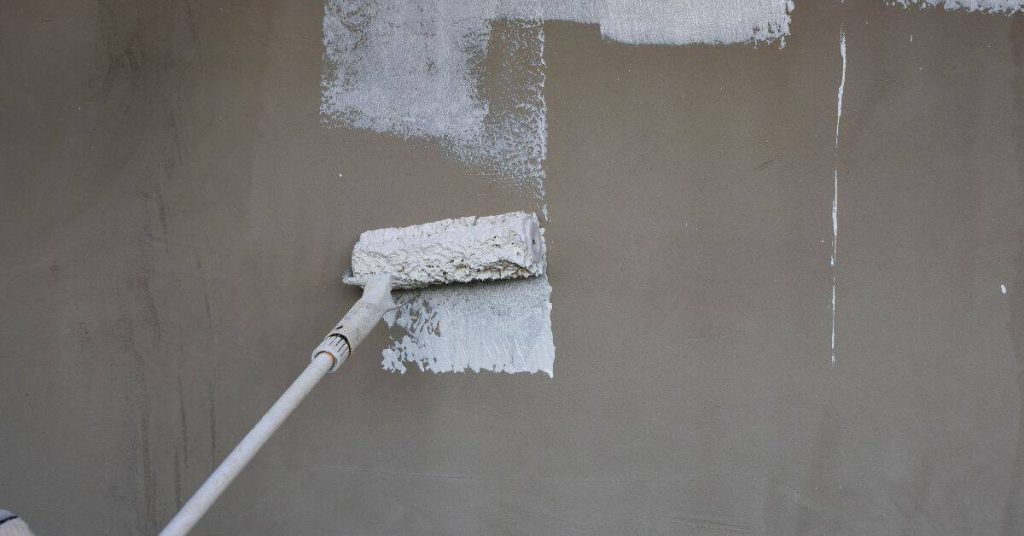
Applying it starts with cleaning and following the product’s instructions for priming or sealing and surface prep. Work in dry, mild weather; apply with a roller or brush, follow thinning and layering guidelines, and let each coat cure before the next. Check the label for coverage, curing times, and any warranty or return options, and follow local rules for masonry coatings.
Key takeaways
- Mineral silicate paint bonds chemically to masonry for durable, color-stable finishes.
- Prep surface: clean, dry, and sound masonry before applying any coat.
- Not all surfaces suit mineral silicate; verify compatibility and manufacturer guidance.
- Tinting options exist, but follow product limits and label recommendations precisely.
- Safety: wear eye protection, work in dry conditions, and ventilate during application.
- Return policies and warranties vary; document warranties, save receipts, and review terms.
Table of Contents
- Introduction
- Key takeaways
- What Mineral Silicate Paint Is and How It Works
- Which Masonry Surfaces Are Suitable — and Which Are Not
- Benefits, Performance Expectations, and Long-Term Value
- Tools, Materials, and Specs to Plan the Job
- Surface Preparation — the Critical First Step
- Application Process: Mixing, Tinting, and Coating Steps
- Safety, Common Mistakes, and Troubleshooting
- Cost Considerations, Warranties, Returns, and Sustainability
- Conclusion
- FAQ
What Mineral Silicate Paint Is and How It Works
Mineral silicate paint is a cementitious coating that uses potassium silicate as the binder. It cures through a chemical bond with the masonry substrate, not just by drying into a film. This creates a durable, integrated finish that becomes part of the wall.
Compared with acrylic or emulsion paints, silicate coatings are typically more breathable and less prone to peeling on porous masonry. They emphasize substrate compatibility, durability, and color permanence, which influences where they work best. Consider porosity, pH, and whether the surface is lime-based or cementitious to determine suitability.
Composition and key properties
Mineral silicate paint is made up of a potassium silicate binder, mineral pigments, and water. The silicate binder is what makes this paint unique.
The potassium silicate in the paint reacts with the carbonates in masonry surfaces, forming an alkaline-resistant, mineral-rich layer that’s permanent and breathable.
This means your paint won’t just sit on top of the surface like some acrylics; it becomes part of the masonry itself. Plus, it allows moisture to pass through, preventing dampness issues.
How it bonds with masonry (chemical vs. film-forming)
Mineral silicate paint doesn’t just stick to the surface like a sticker, it reacts with it.
When applied, the potassium silicate in the paint seeks out carbonates in your masonry – lime, cement, or other mineral surfaces. It forms a chemical bond, a process called ‘mineralization’.
This means the paint doesn’t just sit on top of the surface; it becomes part of the masonry itself. This is why it works best on cementitious and lime substrates.
On the other hand, acrylics and emulsions form a film on the surface that can crack or peel over time, especially on surfaces that move or breathe.
Which Masonry Surfaces Are Suitable — and Which Are Not
Common substrates that accept mineral silicate paints include porous lime-based plasters, brick, concrete blocks, and masonry surfaces that allow vapor movement. Porosity and alkali content affect absorption and curing behavior. These surfaces often show the best long-term performance when the base is breathable.
Be aware of surfaces that are not ideal without prep, such as non-porous or sealed coatings, or substrates with reactive finishes. Gypsum-based plasters and efflorescence-prone walls require special preparation. Always perform moisture, porosity, and cleanliness checks before starting.
Suited surfaces: brick, lime/sand mortar, natural stone
Silicate paints shine on porous substrates like brick, lime/sand mortar, and natural stone. These surfaces are rich in minerals that react with the paint’s silicate content.
Porosity is key here – it lets the paint penetrate deep into the surface, creating a strong bond. This also makes the paint breathable, allowing moisture to escape naturally.
The best results come from untreated or lightly finished surfaces. Historical masonry benefits too, as silicate paints help preserve and enhance its character.
Unsuitable or risky surfaces and simple tests
Silicate paints struggle with non-mineral surfaces like gypsum-based plasters. They also don’t bond well to smooth, sealed, or previously painted surfaces.
Before painting, test for moisture. A quick way is to tape a plastic sheet onto the wall – if it’s damp after 24 hours, there’s moisture migration.
Check alkali content too. Silicate paints work best with alkaline surfaces (pH above 7). Use a pH test strip for quick results.
If in doubt, perform an adhesion test: apply some paint to a small area, let it dry, then scratch it. If it’s hard to remove, you’re good to go.
Benefits, Performance Expectations, and Long-Term Value
The core benefits of mineral silicate paint on masonry are breathability, durability, colorfastness, and relatively low VOCs. Each aspect supports masonry by managing moisture and resisting weathering without forming a plastic film.
Compared with acrylics or limewash, silicate paint often offers better long-term color retention and lower maintenance on suitable substrates. Environmental conditions, porosity, and substrate chemistry influence how well it performs over time and how often maintenance might be needed.
Weather resistance, breathability, and maintenance
Mineral silicate paint’s key benefit is its high vapor permeability. This means it lets moisture escape from your masonry walls, preventing trapped moisture problems that can lead to mold or mildew growth.
Less trapped moisture also reduces the risk of freeze-thaw damage in colder climates. Your masonry will stay drier and stronger for longer.
As for maintenance, this breathability means you won’t have to worry about peeling or flaking paint due to trapped moisture. Occasional cleaning is all that’s needed to keep your walls looking good.
Cost savings and lifecycle ROI
Mineral silicate paint might cost more upfront than some alternatives, but it offers significant long-term value. It’s designed to last, with a typical lifespan of 15-20 years compared to the 5-7 years of acrylic paints.
Less frequent repainting means you’ll save on both paint and labor costs over time. Plus, mineral paint protects your masonry substrate, reducing the need for expensive repairs down the line.
To estimate ROI for your project, consider the size of the area to be painted, the cost of mineral silicate paint versus alternatives, and how often you’d expect to repaint with each option. Also, factor in potential repair costs saved by protecting your masonry substrate.
Tools, Materials, and Specs to Plan the Job
Differentiate between lime-based and cementitious mineral paints and note which substrates they suit, such as brick, stone, mortar, or CMU. Ensure the base allows breathability and is compatible with silicate chemistry.
Prepare a practical list of tools, primers, sealers, and the spec sheet to verify on purchase. Check coverage claims, VOCs, and warranty conditions against the project needs and local rules.
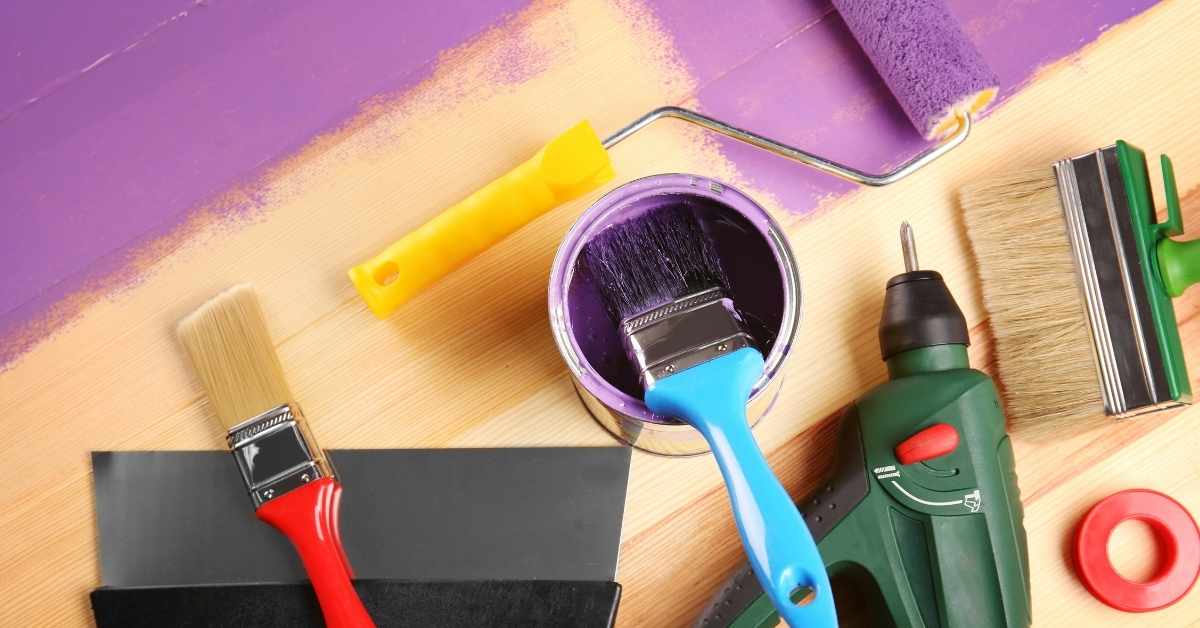
Tools and materials checklist
Before you start your project, tick off this list to ensure you’ve got everything needed for a smooth job.
- Surface preparation: Trowel or wire brush (for scraping off loose material), chisel (to remove any stubborn bits), stiff broom (to clean the surface).
- Masking and protection: Plastic sheets and drop cloths to protect areas you don’t want painted.
- Application tools: Low-nap roller (for large, flat surfaces), wide brush (for edges and details), spray rig (if you’re covering a big area).
- Safety gear: Gloves to protect your hands, goggles for eye protection, respirator to keep dust out of your lungs.
- Mixing tools: A sturdy mixing paddle and drill (to ensure even consistency).
- Access equipment: Scaffolding or ladders (for high walls or hard-to-reach areas).
- Testing kit: Moisture meter (to check substrate moisture levels), efflorescence test strips (to detect soluble salts).
- Cleaning supplies: Mild detergent and soft brush (to clean the surface before painting).
- Binder type: Check if it’s lime-putty or acrylic-free cementitious. Lime-based paints are more breathable but less durable; cementitious are tougher but less permeable.
- Recommended substrate: Ensure the paint is suitable for your surface – brick, stone, mortar, or CMU.
- VOCs: Look for low or zero VOC content to minimize environmental impact and indoor air pollution.
- Coverage guidance: Check the coverage rate (m2/L) to ensure you buy enough paint. A higher coverage rate means fewer coats needed.
- Pot-life/open time: Know how long the paint stays usable once mixed and within which window you need to apply it.
- UV resistance: Ensure the paint can withstand sunlight exposure without fading or cracking.
- Washability: If your surface is prone to dirt, choose a washable paint for easy cleaning.
- Warranty/performance claims: Check if the manufacturer offers a warranty and what performance expectations they set.
Quick rule: Always double-check your tools and materials before starting. Missing something can slow down your job or even ruin your work.
Material specs and standards to verify
The right material choices ensure a durable, long-lasting finish. Here’s what to look for on product labels and technical details.
Quick tip: Don’t hesitate to contact manufacturers for clarification on any unclear product specs. The right material can save you time, money, and frustration in the long run.
Surface Preparation — the Critical First Step
Surface prep is the foundation of adhesion and long-term durability for mineral silicate paint. Skip this step at your peril, as poor prep leads to failures and more work later.
Focus on cleaning, efflorescence control, moisture assessment, and repairing damaged areas with appropriate lime-based materials. A breathable base is essential for reliable performance and color stability.
Cleaning, efflorescence, and repair steps
Start by removing any loose materials with a stiff brush. Be careful not to damage the surface.
Efflorescence, that white powdery stuff, needs to go. Brush it off gently. If it’s stubborn, use a diluted muriatic acid solution (1 part acid to 20 parts water), but rinse thoroughly afterwards.
Repair cracks and loose mortar using a lime-based mortar. Push the repair material into the crack or void with a trowel, then smooth it out. Let it cure before proceeding.
Moisture checks and substrate readiness
Before painting, ensure your masonry is dry. A simple moisture meter can help. The reading should be below 18% for most mineral paints.
Check for hidden moisture sources like leaking pipes or poor drainage. If you find any, address them before proceeding.
Trapped moisture can cause issues later on. Use a damp-proof course if necessary to prevent rising damp.
If your masonry is porous, consider applying a sealer to control vapor movement before painting. Always follow the manufacturer’s guidelines for prep and priming with mineral paints.
Application Process: Mixing, Tinting, and Coating Steps
Start with a clean, sound surface and check moisture before mixing. Ensure the substrate is stable and ready to accept a silicate finish.
Follow the manufacturer’s mixing sequence and tinting guidelines, and apply in the recommended coat sequence with attention to drying between passes. Use the right tools and technique to avoid lap marks and uneven color.
Step-by-Step Process
The following steps guide you through the application process, ensuring a successful outcome with your mineral silicate paint.
- Preparation: Check substrate for moisture using a moisture meter. Efflorescence should be absent or removed. Clean and repair surfaces as needed.
- Mixing: Follow factory proportions. Add dry pigments first, then binder resin. Use an air-free mixing method to avoid bubbles.
- Tinting: Use manufacturer-approved tints. Test small batches on a patch before full application. Allow 24 hours for color stability check.
- Priming (if needed): Apply primer base coat following product guidelines. Let it dry as per recommended intercoat drying times.
- Coating: Apply two coats, allowing the recommended drying time between each. Maintain ambient temperature and humidity within specified ranges.
- Edge Work: Use a brush for details and edges to avoid lap marks and ensure uniform finish.
- Final Check: After the last coat dries, perform an adhesion test by lightly scratching the surface with a coin or nail. If paint comes off, re-coat after initial cure.
Mixing colors at home and custom color tips
To achieve the perfect color for your project, follow these safe DIY tinting practices:
Use manufacturer-approved tints. Always consult the vendor’s approved list to ensure compatibility with the paint.
Test small batches on a patch before full application. This allows you to check color stability and make adjustments if needed.
For custom matching, contact your vendor. They can provide tolerances and guide you through the process to achieve the desired shade.
Application methods, coverage, and drying times
Mineral silicate paint can be applied using brushes, rollers, or spray equipment. Check the product label for recommended application method and expected coverage.
Brush application is ideal for details and edges. It provides better control but may leave visible strokes if not done carefully.
Roller application offers a smooth finish and is suitable for large, flat surfaces. Use a high-quality roller cover to avoid leaving marks.
Spray application provides even coverage but requires proper ventilation and protection from overspray. It’s best suited for experienced users.
Drying times vary depending on temperature, humidity, and paint formulation. Follow the manufacturer’s guidelines for intercoat drying times and recoat windows to ensure optimal results.
Safety, Common Mistakes, and Troubleshooting
Identify safety risks specific to mineral silicate paints, including skin and eye protection, ventilation, and respiratory PPE. Follow local regulations and consult the MSDS when in doubt.
Common mistakes include inadequate prep, improper mixing, and applying over incompatible substrates. Have corrective steps ready for adhesion issues, blotching, and coating failures, and document conditions for future fixes.
Safety measures and PPE during application
Working with mineral silicate paints requires careful attention to safety. Always consult the product’s Material Safety Data Sheet (MSDS) for specific guidelines.
Personal Protective Equipment (PPE): Wear gloves, goggles, and a long-sleeved shirt to protect your skin from contact with the paint. Use a dust mask or respirator when sanding or applying the paint in poorly ventilated areas.
Ventilation: Ensure adequate ventilation during application. Open windows and doors, or use fans to circulate air. If working in an enclosed space like a basement, consider using a portable fan with an exhaust hose.
Handling paints: Be cautious when handling paints with alkaline or lime content. Avoid contact with skin and eyes, and wash hands thoroughly after use.
Common mistakes to avoid and fixes
To achieve a successful outcome when applying mineral silicate paint, be aware of these common pitfalls and how to avoid or fix them.
- Inadequate surface prep: Ensure the surface is clean, dry, and free from dust, laitance, and efflorescence. If not, re-clean, re-sand, or use a suitable primer to improve adhesion.
- Incorrect mixing or thinning: Follow the manufacturer’s guidelines for mixing and thinning. Over-thinning can lead to poor coverage and reduced durability.
- Applying over incompatible substrates: Mineral silicate paints are not suitable for all surfaces. Avoid applying over incompatible materials like plastic, rubber, or previously painted surfaces with poor adhesion.
- Excessive film build: Apply thin, even coats to prevent excessive buildup, which can lead to cracking and peeling.
- Poor timing between coats: Allow the recommended drying time before applying subsequent coats. Rushing this process can result in poor adhesion and reduced durability.
By avoiding these common mistakes and taking corrective action when necessary, you’ll achieve a long-lasting, high-quality finish with your mineral silicate paint application.
Cost Considerations, Warranties, Returns, and Sustainability
Estimate total costs by considering material, surface assessment, labor, and any access needs. Color additives or prep work can affect the overall budget, so plan accordingly.
Understand warranty coverage, return policies, and sustainability claims by checking the fine print and any third-party certifications. Look for low VOC claims, durable performance, and product stewardship details in the manufacturer instructions.
Estimating costs and ordering tips
First, figure out your square footage. Mineral silicate paints are priced per square meter/foot. Then consider:
Surface assessment: Masonry condition and porosity affect coverage. Order a bit extra to account for waste.
Labor time: Estimate how long it’ll take, including surface prep like cleaning or limewash removal.
Scaffolding: If needed, factor in rental costs.
Coats: Most jobs require 2-3 coats. Order accordingly.
Do a trial patch to test your mix and reduce waste.
Warranty, returns, and environmental impact
Warranties: Typically last 5-15 years. They cover color stability, adhesion, and efflorescence control. Register with the supplier.
Returns: Check for restocking fees and return windows. Unopened/unmixed products usually get full credit. Custom tints are often final sale.
Environmental impact: Mineral silicate paints have low VOCs, are mineral-based, and last longer than latex/acrylic alternatives, reducing maintenance cycles. Some have third-party certifications like LEED or GreenGuard.
Ask your supplier for details on their warranty, return policy, and sustainability metrics.
Conclusion
Choosing mineral silicate paint for masonry pays off in durability, appearance, and long-term value when you do the work right and prioritize safety. A solid job protects the wall and keeps the finish looking steady for years, not months.
First, verify the surface is suitable and prepared: inspect for damage, clean thoroughly, repair where needed, and test moisture disclaimers if you suspect damp. Then mix and tint per the product’s spec, set the right work temperature and humidity, lay out masking for non-target areas, and apply in clean, even coats with the recommended tools and timing between steps.
Avoid these common missteps: skipping surface prep or moisture checks, thinning beyond the recommended amount, applying in too cold or too hot weather, and rushing recoat times. Always follow the safety rules—wear eye and skin protection, use proper ventilation, and never mix or apply near ignition sources. Start small, test a patch, and watch for any adverse reaction before proceeding to larger areas.
If you’re working on a large exterior, a complex surface, or you find moisture or structural issues, it makes sense to call a pro rather than push ahead. With careful prep, deliberate application, and patience, you’ll get a durable, good-looking finish that stands up to weather and time. Stay steady, plan carefully, and you’ll finish strong.
FAQ
What are the practical benefits of mineral silicate paint for masonry, and when does it make sense to use it?
It breathes with the wall, resists cracking, and won’t peel like some latex paints. It’s a good fit on old or porous masonry and in areas with weather exposure where long-term durability matters. If you want a finish that ages well without frequent touch-ups, consider it.
What’s the real-world application process for a DIY homeowner?
Follow the manufacturer’s instructions for surface prep, mixing, and thinning if needed. Apply in thin coats with a steady, even technique and allow proper drying between coats. Don’t rush; poor application shows up as uneven color or brush marks.
Can you customize color or finish with mineral silicate paint?
Yes, you can tint the paint within the manufacturer’s tint system. Color and finish choices depend on the product line, so check what options are officially supported and how tinting affects coverage and compatibility with masonry.
How do you estimate material and handle returns or warranties?
Estimate by measuring the area you’ll coat and then use the product label or datasheet to find coverage per unit. Keep receipts and read the warranty and return policy from the supplier; warranties vary, and some issues may require proper surface prep and application per instructions to be valid.