
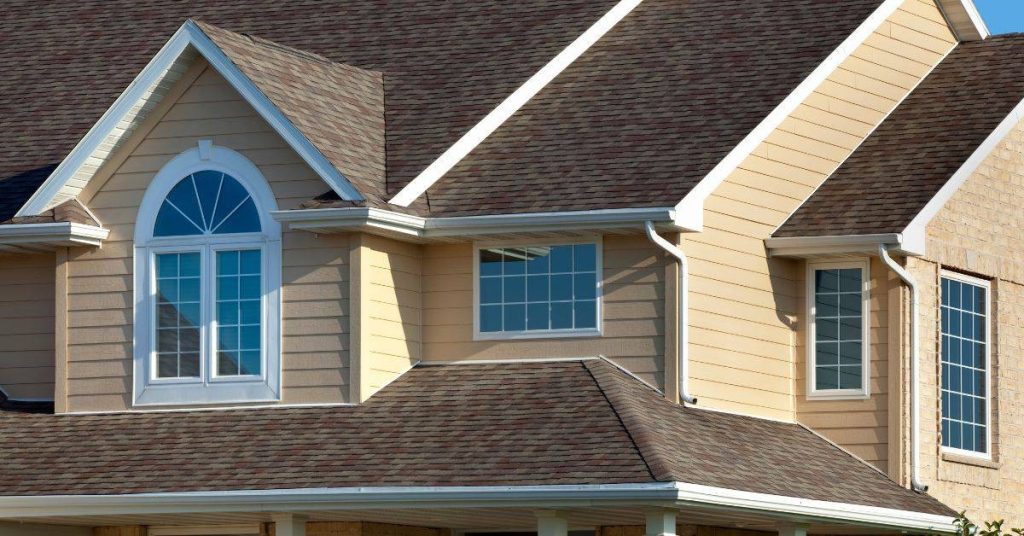
Introduction
Understanding residential roof replacement problems involves identifying causes, testing for failures, and applying fixes.
The guide explains why issues arise, how to recognize them during inspections, and which steps to take to address common defects.
You’ll learn how to assess damage, prioritize repairs, and implement practical, safe approaches that fit real world conditions.
Key takeaways
- After a residential roof replacement, common problems include leaks, moisture damage, and poor flashing.
- Watch for galvanic corrosion at metal flashings due to incompatible alloys.
- Verify proper nail spacing, underlayment alignment, and correct shingle overhang during installation.
- Perform moisture scans and water intrusion tests after completion to confirm seals.
- Document failing components, budget for replacement cycles, and consider full roof replacement when widespread damage.
- Schedule routine inspections, clean debris, and maintain gutter flow to extend life.
Table of Contents
- Introduction
- Key takeaways
- Common problems after a residential roof replacement
- Corrosion and dissimilar-metal interactions
- Installation errors and workmanship failures
- Testing, inspection, and diagnosing problems
- Fixes, repairs, and when to replace again
- Choosing the right contractor, manufacturer, and materials
- Maintenance, prevention, and long-term financial benefits
- Visual checkpoints and troubleshooting guide for homeowners
- Conclusion
- FAQ
Common problems after a residential roof replacement
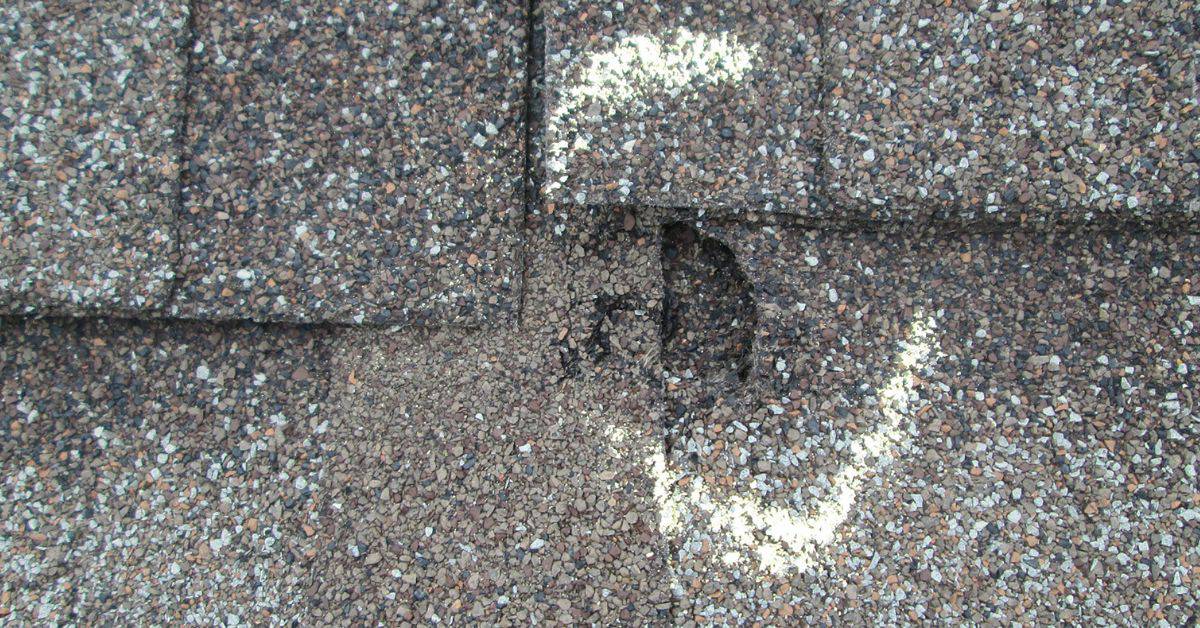
After a roof replacement, homeowners should look for symptoms that hint at underlying issues. Oil canning, leaks, and surface scuffs frequently indicate nonuniform materials or improper installation. Keep an eye on fading or chalking that may signal coating wear or premature aging.
Understanding root causes helps you prevent recurrence. Material compatibility, fastener or seam gaps, inadequate underlayment, and weather during installation are common risk factors. Inspections should adapt to roof type, from asphalt shingles to metal coverings, so you know what to expect for each system.
Oil canning and panel deformation
Oil canning looks like wavy or buckled panels on your roof. It’s usually cosmetic, but severe cases could be structural.
Causes: Material properties, panel profile, substrate changes, thermal movement.
Check for oil canning after installation and during temperature changes. If it’s severe, contact your contractor.
Leaks and water intrusion
Leaks after replacement often come from faulty flashing, nail issues, or poor seams. They’re not always installation problems.
Sources: Flashing failure, fastener issues, poor seams.
Inspect your attic for water stains or mold. If you find leaks, check your warranty and contact the contractor.
Surface damage: scuffing, scratching, chalking, and fading
Handling, transport, and UV/weather exposure can cause surface defects on your roof. Some may affect warranty or aesthetics.
Causes: Handling, transport, UV/weather exposure.
Inspect your roof for defects soon after installation. Document any issues with photos and contact the contractor if necessary.
Corrosion and dissimilar-metal interactions
Metal roofing brings corrosion risks that show up as rust patterns, staining, or weakened fasteners. You may notice uniform wear, pitting, or crevice corrosion around seams and edges. Coatings and galvanization can help, but compatibility matters for long-term performance.
Environmental factors accelerate deterioration. Moisture intrusion, condensation, and poor drainage increase risk, as do coastal salt exposure and temperature cycling. Dissimilar metals create galvanic cells that hasten decay unless you isolate them or use compatible materials.
Types and causes of corrosion
Corrosion in metal roofing comes in several forms. Understanding these types helps you identify issues early.
Galvanic corrosion occurs when two different metals are in contact, creating a galvanic cell that speeds up deterioration. For instance, aluminum and steel together can cause rapid corrosion of the steel.
Crevice corrosion happens where dirt, moisture, or other contaminants get trapped between metal surfaces or under flashing. Salt spray from coastal areas can accelerate this process.
Environmental corrosion is caused by factors like acid rain, temperature cycling, and humidity. Roof runoff can also contribute to corrosion if it carries pollutants or salts.
Dissimilar metals and material compatibility
Using incompatible materials on your roof can lead to big problems. Here are some common issues:
- Galvalume with copper: Galvalume is zinc-aluminum coated steel, but when it comes into contact with copper, it can cause rapid corrosion of the Galvalume.
- Aluminum with steel: Aluminum and steel together create a galvanic cell that accelerates corrosion. Use isolation washers to prevent this.
- Copper with treated lumber: Treated lumber contains chemicals that can react with copper, causing staining and weakening the bond between materials.
- Incompatible sealants or adhesives: Using the wrong sealant or adhesive can cause cracking, staining, or weak bonds. Always check compatibility before applying.
- Concrete with metal flashing: Concrete’s alkalinity can corrode metal flashing if not properly protected. Use compatible materials and coatings to prevent this.
Installation errors and workmanship failures
Common faults to spot include missing or poorly installed flashing around chimneys and vents, wrong underlayment placement, and misaligned panels at seams. These issues can lead to recurring leaks or wind uplift if not corrected. Pay attention to edge details and penetrations during review.
Fasteners and sealing are critical weak points. Loose, overdriven, or corroded screws, plus missing sealants, open paths for water at joints and flashings. Proper detailing at valleys and ridges helps prevent future failures and costly repairs.
Fastening, flashing, and seam mistakes
Proper fastening, flashing, and seaming are crucial for a durable roof. Here’s what to watch out for:
- Loose or overdriven screws: These can cause leaks and wind damage. Ensure screws are snug but not overtightened.
- Improper flashing: Missing or incorrectly installed flashings around chimneys, vents, and skylights lead to water intrusion. Always use proper flashing techniques.
- Poor seam engagement: Misaligned panels can cause leaks and accelerate wear. Ensure panels are properly aligned and sealed.
- Inadequate sealants: Missing or insufficient sealants around flashings and at fastener points invite water intrusion. Always use appropriate sealants.
Regularly inspect your roof for these common mistakes to prevent leaks, wind damage, and accelerated wear.
Common accessory and detail errors
Vents, skylights, penetrations, gutters, and transitions are often overlooked during installation. Here’s how to avoid common mistakes:
- Inadequate venting: Improperly installed or insufficient vents can lead to moisture buildup and ice dams. Ensure proper ventilation.
- Leaky skylights: Incorrect installation or old seals can cause leaks around skylights. Inspect and maintain skylight seals.
- Penetration issues: Poorly sealed plumbing vents, chimneys, or other penetrations can leak. Ensure all penetrations are properly flashed and sealed.
- Gutter problems: Incorrect installation or clogged gutters can cause water to back up and leak under shingles. Keep gutters clean and in good repair.
- Transition issues: Improper detailing at valleys, rake edges, and drip edges can lead to leaks or wind uplift. Ensure proper transition details are used.
Avoid these common accessory and detail errors to prevent leaks, ice dams, and wind damage.
Testing, inspection, and diagnosing problems
A structured approach starts with a thorough visual check of the roof, flashing, penetrations, and attic signs. Look for stains, mold, condensation, and obvious damage. Document findings to prioritize repairs and track changes over time.
Use water testing and basic moisture tools to confirm suspected leaks. Infrared scanning and moisture meters reveal hidden damp zones. When needed, destructive testing in non-critical areas can confirm substrate conditions before major work.
Visual and non-destructive tests
Start your inspection from the ground, then move onto the roof. Use this checklist to spot issues early.
- Roof surface: Check for missing, damaged, or curling shingles. Skip this, and you might miss signs of age or damage.
- Flashing: Inspect around chimneys, vents, and skylights. Cracked or loose flashing can lead to leaks.
- Penetrations: Check where pipes, wires, or other objects pass through the roof. Gaps here can let water in.
- Gutters: Ensure they’re securely attached and free of debris. Clogged gutters can cause water to back up and leak into the roof.
- Attic signs: Look for stains, mold, or condensation. These indicate past or present leaks.
- Moisture meters: Use them on suspect areas to confirm dampness. Skipping this might lead you to miss hidden moisture.
- IR cameras: Scan the roof for temperature differentials. This helps spot insulation issues and hidden damage.
- Photograph: Document everything. Photos help track progress and make case for repairs.
Quick rule: Always inspect from ground up, use tools to confirm suspicions, and document findings.
Water testing and leak tracing
When visual checks aren’t enough, use these water tests to pinpoint leaks.
- Controlled intrusion: Spray water on suspect areas. Watch for leaks inside the house or attic.
- Dye test: Apply food coloring to potential leak sources. Follow dye trails to find entry points.
- Bucket inventory: Place buckets under suspected leaks during rain. This helps confirm if water is coming from above.
- Map leak paths: Trace water paths from exterior leaks to interior damage. This helps prioritize repairs.
- Sequential isolation: Test one area at a time to isolate the source of a leak. Skip this, and you might end up chasing multiple leaks at once.
Quick rule: Always test one area at a time, follow water paths, and document findings for each test.
Fixes, repairs, and when to replace again
Decide between repairs and replacement by weighing leak history, structural integrity, and panel condition. Consider whether repairs will provide lasting relief or simply delay a larger project. A clear plan helps avoid repeating problems down the line.
Repair options range from minor sealant work to localized panel fixes, with full replacement reserved for widespread damage. Understand how each option affects expected life and warranty coverage, and plan accordingly with professional input and documented decisions.
Repair techniques and materials
Choosing the right materials for your roof repair can mean the difference between a quick fix and recurring issues. Here are some key materials to consider:
- Fasteners: Use corrosion-resistant screws or nails rated for your roof’s material. Avoid galvanized fasteners on aluminum roofs due to dissimilar-metal interaction.
- Sealants and tapes: Opt for butyl-based sealants or EPDM rubber tape with high UV resistance. Low-quality materials can crack, stain, or lose adhesion over time.
- Flashing: Rework flashing using the same material as your roof to maintain compatibility. Avoid using dissimilar metals to prevent corrosion.
- Patching vs. panel replacement: For small leaks, consider patching with a suitable sealant or tape. However, if damage is extensive, replacing panels may be more effective and longer-lasting.
- Underlayment: When repairing, use underlayment rated for your climate to prevent future water intrusion. Inadequate underlayment can lead to leaks and structural damage.
Deciding between repair and full replacement
Determining whether to repair or replace your roof involves assessing several factors. Here are some key considerations:
Extent of damage: Minor leaks or isolated issues may warrant a simple repair, while widespread damage could necessitate a full replacement.
Underlying decking condition: Inspect the roof’s structure beneath the panels. If it’s compromised, a full replacement might be required to prevent further deterioration and ensure longevity.
Warranty implications: Check your warranty coverage. Repairs may void certain warranties, making a full replacement more cost-effective in the long run.
Projected remaining life: Consider your roof’s age and expected lifespan. If it’s nearing the end of its useful life, investing in a full replacement might be wiser than repeated repairs.
Budget considerations: Full replacements are more expensive upfront but can save money over time by preventing recurring repair costs. Weigh your budget against the long-term benefits of each option.
Choosing the right contractor, manufacturer, and materials
Vet contractors by checking licenses, insurance, and recent metal-roof experience. Ask for references from similar projects and compare bids for scope clarity and warranty terms. In-person site assessments help ensure accurate proposals.
Manufacturer credibility matters for long-term results. Look for testing, certifications, and available installer networks. Match materials to climate, geometry, and maintenance needs to reduce surprises later.
Contractor vetting checklist
Use this checklist before signing any contract to ensure you’re hiring a reliable and experienced roofing contractor.
- Proof of insurance: Ask for certificates showing liability and workers’ comp coverage. Uninsured contractors can leave you liable if accidents happen.
- Installer certifications: Check if they’re certified by manufacturers like Metal Construction Association (MCA) or similar organizations. Uncertified installers may not follow best practices, leading to installation errors.
- Portfolio of recent metal installations: Ask for pictures or visit sites to see their work quality and consistency.
- Written estimates: Compare apples to apples – ensure all bids include the same materials, warranties, and labor costs. Incomplete bids can lead to unexpected charges later.
- Warranty handling procedures: Ensure they explain both material and workmanship warranties clearly, and how to file claims if needed.
- License verification: Check with your local licensing board to ensure their license is valid and up-to-date. Unlicensed contractors can face penalties or be unable to pull permits.
- Experience with metal roofs: Ask about their experience with metal systems, especially in your climate. Inexperience can result in improper installation and premature failures.
- References from recent metal installations: Contact previous customers to inquire about the contractor’s professionalism, work quality, and punctuality.
- Bid evaluation process: Review each bid for scope clarity (ensure all work is listed), timeline (check for realistic completion dates), and warranty terms (confirm coverage and duration).
Quick rule: Never hire based on price alone. Cheaper isn’t always better, and could cost you more in the long run.
Material specs and standards explained
Understanding material specifications helps ensure your metal roof performs well and lasts as expected.
- Coating type and thickness: Verify the coating provides adequate UV protection and corrosion resistance. Too thin or wrong type can lead to chalking, fading, or rusting.
- Substrate material: Check if it’s steel (G90 or G60) or aluminum. Steel is stronger but can corrode; aluminum won’t corrode but may dent easier.
- Fastener specs: Ensure fasteners match the panel type and have appropriate head style, length, and coating for your roof geometry and climate.
- Industry standards (UL/FM/ANSI): Confirm materials meet relevant standards to ensure they’ve been tested and approved for use in residential construction.
- Panel seam type: Choose between mechanically seamed, standing seam, or exposed fastener based on your roof’s geometry and desired aesthetics. Wrong seam type can cause leaks or aesthetic issues.
- Purlin spacing: Ensure purlins are spaced appropriately for your panel size to maintain structural integrity and prevent oil canning (waviness).
- Paint system: Verify the paint system provides good adhesion, flexibility, and weathering resistance. Poor paint can lead to peeling or cracking.
- Panel profile and gauge: Choose a panel profile that suits your roof’s geometry (e.g., flat for low slopes) and ensure the gauge (thickness) is suitable for your climate’s snow load and wind zone.
Maintenance, prevention, and long-term financial benefits
Set a practical maintenance cadence with seasonal checks and occasional deep inspections. Use a simple DIY checklists to stay on top of small issues before they grow. A proactive approach saves time and hassle later on.
Regular cleaning, sealant renewal, and fastener checks extend roof life and stabilize resale value. Track maintenance in a simple record system to support future inspections and warranty needs.
Routine Maintenance Checklist and Safety Tips
Use this checklist to keep your roof in top shape. Inspect it after storms, seasonally, or annually for best results.
- Inspect shingles: Look for cracks, curls, or missing pieces. Skipping this can lead to leaks and further damage.
- Check flashings: Ensure they’re securely attached around vents, chimneys, and edges. Loose flashings let water in.
- Inspect gutters: Make sure they’re securely fastened and free of debris. Clogged gutters can cause leaks and damage to your roof and home.
- Check for moss or algae: Remove if present, as it holds moisture and can damage shingles over time.
- Inspect vents: Ensure they’re clear of debris and functioning properly. Blocked vents can cause heat buildup in your attic.
- Check for animal activity: Look for nests, droppings, or damage caused by animals. They can cause significant damage if left unchecked.
- Inspect valleys: Ensure they’re clear of debris and functioning properly. Debris in valleys can cause water to back up and leak into your home.
- Check for leaks: Inspect the attic for any signs of water intrusion. Leaks can cause significant damage if left unchecked.
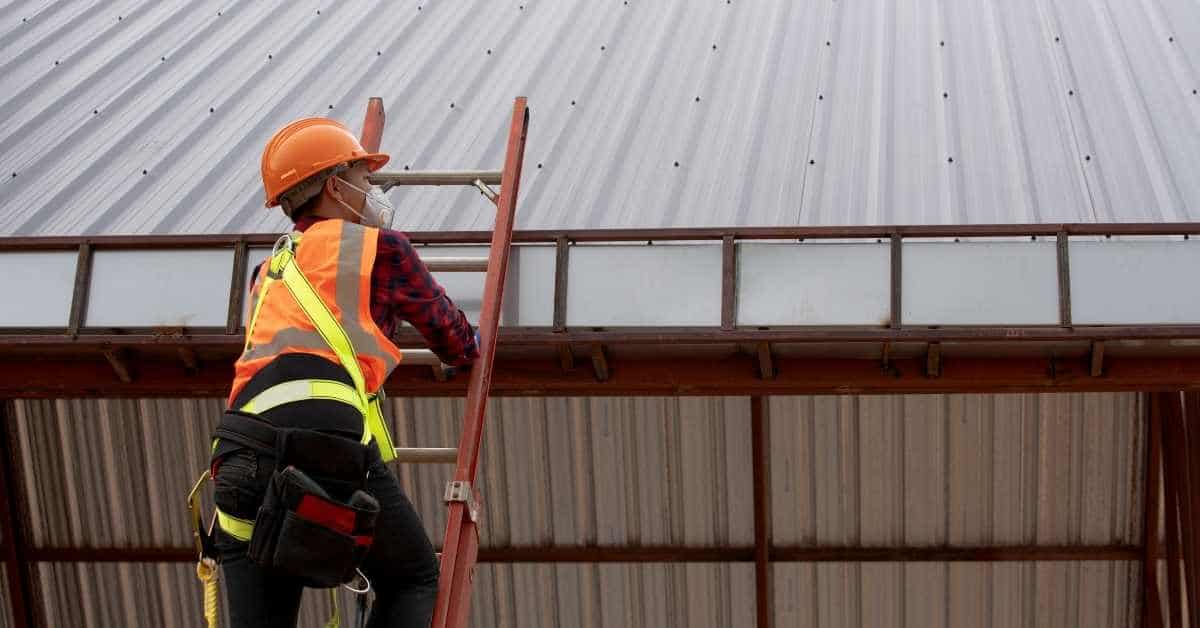
Quick rule: Always wear proper safety gear, including a harness when working on steep roofs. If you’re unsure about any aspect, call a professional.
Estimating Long-Term Savings and Warranty Value
A well-maintained roof can last up to 50% longer than one left neglected. Here’s how to estimate your long-term savings:
Extended warranties: Consider the cost of an extended warranty against potential repair costs. Some manufacturers offer warranties that cover labor and materials for a set period.
Preventive maintenance can extend your roof’s service life by 10-20 years, saving you thousands in repairs or replacement costs. Regular cleaning, sealant renewal, and fastener checks are key to maximizing your roof’s lifespan.
Factors influencing long-term cost-benefit include:
- Roof type: Asphalt shingles have a shorter lifespan than metal or tile roofs but are cheaper upfront.
- Maintenance frequency: Regular maintenance extends your roof’s life, reducing major repair costs.
- Climate and weather conditions: Harsh climates can shorten your roof’s lifespan, making regular inspections crucial.
Visual checkpoints and troubleshooting guide for homeowners
Develop a quick visual checklist for early signs like stains, granule loss, deformed panels, and loose fasteners. Note any flashing damage or sagging that could indicate deeper trouble. This helps you triage before calling a pro.
Document issues with photos and dates, then map problem areas on a simple diagram. Keep notes about weather and prior repairs to share with contractors or insurers for faster decisions.
Photo and documentation best practices
Before you start any troubleshooting, grab your camera or smartphone. Good photos and records will help you understand the problem better and support warranty claims.
- Date stamp: Ensure all photos have date and time stamps to keep track of when issues were first noticed.
- Multiple angles: Take pictures from different angles, close-ups, and wide shots to capture the full extent of the problem.
- Exact location: Note where each issue is located (e.g., north-facing slope, near attic fan) in your photos or on a diagram.
- Weather conditions: Record current weather conditions and any recent storms that might have caused damage.
- Gather documents: Collect any prior inspection notes, contractor estimates, warranties, or installation manuals.
- Map problem areas: Draw a simple diagram of your roof, marking all trouble spots to keep track of them.
- Interior damage: Photograph water stains on ceilings and walls, as well as any musty smells in the attic.
- Gutters/downspouts: Inspect and photograph granule loss or other signs of damage in these areas.
Quick rule: The more details you capture now, the better equipped you’ll be to make informed decisions later.
When to escalate to a professional inspection or a warranty claim
Knowing when to call in the pros can save you time, money, and potential safety hazards. Here are clear signs it’s time to escalate.
- Active leaks: If water is actively dripping into your home, stop troubleshooting immediately and contact a professional.
- Structural sagging: Any noticeable sagging or creasing in the roof line could indicate structural damage that requires immediate attention.
- Repeated failures: If you’ve attempted repairs and the problem persists or recurs, it’s time to call a pro.
- Unresponsive installer/manufacturer: If you’re having trouble getting a response from your roof’s installer or manufacturer regarding warranty claims, don’t hesitate to escalate.
- Safety concerns: Never attempt to inspect or repair damage on steep roofs or sections that appear unstable. Always prioritize safety.
- Warranty expiration: If your roof is nearing the end of its warranty period and you suspect issues, have it inspected professionally before it’s too late.
- Mold or mildew: The presence of mold or mildew can indicate water intrusion that requires professional assessment.
- Persistent odors: A musty smell in your attic could signal hidden moisture damage that needs to be addressed.
Quick rule: When in doubt, it’s always better to err on the side of caution and contact a licensed professional.
Conclusion
Safety, durability, and curb appeal hinge on clear next steps and disciplined checks. Keep the focus on solid workmanship and careful testing so problems don’t hide until they cost more.
Run the post‑replacement checks as a simple sequence: start with a careful exterior walk to spot obvious gaps, loose flashings, or damaged shingles; inspect gutters and downspouts for proper drainage; move to the attic to look for signs of water intrusion or poor ventilation; verify fasteners, sealants, and any metal interactions for corrosion; and finish with a plan for maintenance and a schedule for re‑inspection after heavy weather. Do each check in daylight, in dry conditions if possible, and document anything that looks off so you know where to focus repairs or further evaluation.
Common mistakes to avoid include skipping a full visual and water test, ignoring dissimilar-metal corrosion, or assuming new means perfect. Don’t rush past flashing detailing or reseal critical joints, and always use proper fall protection and a stable surface when on the roof. Do not pry apart roof components or apply fixes you aren’t prepared to back up with a proper seal and test; safety rules first, then thorough testing.
If you’re unsure about flashing, attic signs of trouble, or reliable materials for your climate, don’t push on alone. It makes sense to call a qualified professional when there are uncertain symptoms, widespread leaks, or if you’ve detected corrosion or improper installation. Stay confident by sticking to the checks you can do safely, address the easy fixes first, and plan a measured follow‑up to protect your roof and your home for years to come.
FAQ
Why does a roof leak after a storm?
Leaks show up when there is hidden damage. Look for missing shingles, damaged flashing, or clogged gutters. Fixing a leak isn’t about one patch; it’s about fixing the real cause.
How can I test for leaks safely?
Start by checking the attic for signs of water or mold. Use a flashlight to inspect around flashing, vents, and chimneys. If you see active water, stop and call a pro; a temporary patch is not a real fix.
What fixes are worth doing myself?
Small gutter clogs, loose nails, and loose shingles can be addressed with the right tools. Don’t mess with flashing or underlayment unless you know what you’re doing. A quick patch won’t hold up on a roof with real damage.
When should I replace the whole roof vs patching?
If the roof is old or has widespread damage, patching costs add up fast. If more than a portion needs work, a full replacement is usually the smarter choice. A new roof saves trouble and money in the long run.