
Introduction
A smarter way to install subflooring starts with checking moisture, planning layout, and using the right fasteners. This approach focuses on minimizing gaps, preventing squeaks, and keeping the surface flat for future flooring.
Test areas and simple checks can spot problems early, like uneven planks or hidden moisture. If you find issues, adjust the installation by selecting appropriate materials and following manufacturer instructions and local rules.
Key takeaways
- Inspect subfloor for warping, rot, or stains before any new installation.
- Verify moisture conditions with a meter per manufacturer instructions.
- Use correct fasteners and spacing per subfloor type and plywood grade.
- Dry and level framing before laying any subfloor panels.
- Safety: wear eye protection, masks, and keep work area dry to prevent slips.
- Plan for future repairs with accessible fasteners and clear labeling.
Table of Contents
- Introduction
- Key takeaways
- Why Subfloor Failures Happen
- Diagnostics: How to Test a Subfloor Before Installation or Repair
- Tools and Materials Checklist
- Best Practices for Installing Subflooring
- Fixes and Remediation Strategies (from Simple to Structural)
- Material Specs and Standards Explained
- Visual Checkpoints and Quality Control During and After Installation
- Cost-Benefit Analysis and Decision Guide
- Conclusion
- FAQ
Why Subfloor Failures Happen
Subfloor problems usually come from moisture, fastener issues, or weak support. You’ll also find wrong material choices for the job. Over time these factors show up as buckling, squeaks, or soft spots under the feet.
Look for telltale signs such as staining, warping, or unexplained movement when you walk. Homeowners often misread early indicators as surface floor issues instead of the subfloor. Understanding the root causes helps you fix the right thing the first time.
Moisture and Water Damage
Subfloors are prone to moisture issues. Liquid water can seep in from leaks or flooding, while vapor can rise up from the ground or living space below.
Early signs of moisture problems include:
- Cupping: Boards warp upwards at the edges due to uneven moisture absorption.
- Mold: Visible black, green, or white spots indicate fungal growth, which thrives in damp conditions.
- Squeaks: Moisture can cause boards to swell and shrink, leading to squeaking as they rub against each other or the joists.
Prevention: Use vapor barriers, ensure proper grading around your home, and address any water leaks promptly.
Structural and Installation Errors
Proper subfloor installation is crucial. Avoid these common mistakes:
- Insufficient joist spacing: Joists too far apart can’t support the load, leading to sagging and bounce.
- Improper fastener pattern: Inadequate or incorrect nailing can cause boards to move and squeak over time.
- Lack of blocking: Without blocking between joists, subfloors lack stability and can warp or crack.
- Incompatible materials: Using different materials for joists and subfloor can lead to movement due to varying expansion rates.
Always follow local building codes for joist spacing and use appropriate fasteners. Install blocking between joists to provide additional support.
Material Selection and Compatibility
The right subfloor material is vital for durability and adhesive performance. Common options include plywood, OSB, and cement board.
- Plywood: Use exterior-grade for moisture resistance. Look for CDX or AC ratings. Avoid using indoor-grade outdoors.
- OSB (Oriented Strand Board): Similar to plywood, use exterior-grade with a suitable rating like OSB-2 or OSB-3.
- Cement board: Ideal for wet areas like bathrooms. It’s moisture-resistant but heavier than other options.
- Underlayment: Match the underlayment to your subfloor material and use a compatible adhesive.
Using the wrong material can lead to issues such as cracking, staining, weak bonds, and moisture-related problems. Always choose materials suitable for your specific application.
Diagnostics: How to Test a Subfloor Before Installation or Repair
Start with non-destructive checks like tapping for hollow sounds and checking for movement underfoot. Use simple tools to gauge level, flatness, and stiffness without removing material. Prioritize safety and controlled testing so you don’t create new damage.
Know when to call a pro if you encounter mold, structural concerns, or unusual gradients. Manufacturer instructions and local codes can guide you on acceptable tolerances. If in doubt, verify specs with the product label or data sheet before proceeding.
Visual and tactile inspection routine
Before you start any installation or repair work on your subfloor, it’s crucial to perform a thorough visual and tactile inspection. This will help you identify potential issues early, saving you time, money, and effort in the long run.
- Check for deflection: Deflection occurs when the subfloor sags or bounces under pressure. To check, walk across the floor with your full weight. If it feels spongy or bounces back, there’s likely deflection. For a more accurate measurement, use a straight edge and level to check for gaps between the subfloor and the wall or joists.
- Inspect for gaps: Gaps can occur due to improper installation or movement over time. Use a flashlight to inspect along the edges of the subfloor, looking for any gaps wider than 1/8″. If you find gaps, measure their width and length to determine if they need to be filled.
- Look for staining: Stains on the subfloor can indicate moisture damage or mold growth. Inspect the entire surface, paying special attention to areas around plumbing fixtures, windows, and doors. If you find stains, check for any soft spots that could indicate rot.
- Check fasteners: Loose or missing fasteners can lead to subfloor failure. Use a screwdriver or drill to test the tightness of all visible screws or nails. If they spin easily or are missing, mark their location for repair.
- Measure joist spacing: Joists should be spaced no more than 16″ on center (OC) for most residential applications. Use a tape measure to check the spacing between joists. If you find any that are wider than 16″, they may need additional support.
- Check subfloor thickness: Subfloors should be at least 3/4″ thick for most installations. Measure the thickness of your subfloor in several locations to ensure it meets the required thickness.
- Inspect for delamination: Delamination occurs when the layers of the subfloor separate. Tap the surface with a hammer or tap rod. If it sounds hollow, there may be delamination present. Check for any visible signs of separation as well.
- Check for squeaks: Squeaks can indicate loose joists or subfloor panels. To find the source, have someone walk across the floor while you listen below. Once you’ve located the squeak, mark its location and check for loose fasteners or joist movement.
Quick rule: Always perform a thorough visual and tactile inspection before starting any installation or repair work on your subfloor. This simple step can save you from expensive rework down the line.
Moisture testing methods and target numbers
Before you start any installation or repair work on your subfloor, it’s crucial to test for moisture. Here are the methods and what you should aim for:
Moisture Meter Types: You’ve got two main options – pinless and pin-type meters.
Pinless meters give a quick, non-invasive reading. They’re great for checking large areas. Pin-type meters, on the other hand, provide a more accurate, localized reading by driving pins into the subfloor. Both have their uses, so consider your needs before you buy or rent.
Testing Spots: Test in multiple spots across your subfloor, especially near walls and in areas prone to moisture like bathrooms and kitchens. Check base compaction too – soft spots could indicate high moisture content.
Target Moisture Ranges: Here’s what you’re aiming for with common materials:
- Concrete: Below 4 lbs/1000 sq ft (2.5 kg/m2) of moisture content.
- Wood: Below 12% – 15% moisture content, depending on the species and your flooring manufacturer’s recommendations.
If readings are high or inconsistent, consider a lab test (ASTM F2170) for more accurate results. If you’re unsure about any of this, don’t guess – check with a pro or the product label/manufacturer instructions.
Flatness and deflection checks
Before you start installing or repairing your subfloor, you need to check its flatness and strength. Here’s how:
Straightedge Check: Use a straight 2×4 or level as your guide. Place it on the floor at different angles and locations. If there’s a gap wider than 3/16″ (5mm) between the subfloor and the straightedge, you’ve got a problem.
Stringline Check: Stretch a string taut along your joists. It should be level with the top of the joist. If it sags or touches the subfloor, your joists might be sagging too much. Acceptable deflection is L/360 for live loads (L being the span between supports).
Joist-Sag Check: Walk along your joists. If they feel spongy or sag more than 1/8″ (3mm) under your weight, they’re too weak or damaged. Check for proper base compaction and consider sistering or replacing them.
Tools and Materials Checklist
Gather a basic set of hand tools, a level, a tape measure, and a square for layout. Include fasteners appropriate for your substrate and a quality wood adhesive. Don’t forget safety gear like eye protection and a dust mask.
Stock up on spacers, a chalk line, a mallet, and a saw suitable for subfloor work. Have extra fasteners and sealant or foam as specified by the product instructions. Always confirm fastener type and length on the label or manufacturer guidance.
Essential tools for assessment and installation
Before you start your concrete project, use this checklist to ensure you have all the necessary tools. This will help you assess the area and install your concrete correctly.
- Tape Measure: Verify it’s accurate by measuring a known distance. Inaccurate measurements can lead to ordering too much or too little concrete, wasting money or delaying your project.
- Level (4′ or longer): Check that the bubble is centered on both sides to ensure you’re working with an accurate level. A wonky level can result in uneven surfaces and tripping hazards.
- Straightedge (at least 6′ long): Use it to check for square corners and straight lines. Skipping this step could lead to crooked forms and wasted concrete.
- Circular Saw: Ensure the blade is in good condition and fits your saw. A dull or incorrect blade can cause slow cutting, kickbacks, or poor form quality.
- Drill (with Masonry Bit): Test the drill by screwing a screw into a piece of wood to ensure it’s working properly. A faulty drill can make installing anchors and rebar difficult.
- Jigsaw: Check that the blade is secure and suitable for cutting wood (if using wooden forms). A loose or incorrect blade can cause form damage and slow work.
- Hammer or Mallet: Verify it’s in good condition with no cracks. Using a damaged hammer can lead to damaged tools or injury.
- Fastening Tools (nail gun, staple gun, etc.): Test these tools by firing a few fasteners into scrap wood. Inoperable tools can cause delays and poor form quality.
Quick rule: Always double-check your tools before starting work. Faulty or incorrect tools can lead to rework, delays, and safety hazards.
Fasteners, adhesives, and material specs
Use this checklist before starting any concrete work to ensure you have the right materials and fasteners for a strong, durable job.
- Concrete Mix: Check label for mix type (e.g., general-purpose, high-strength). Ensure it matches your project’s needs. Wrong mix can lead to weak concrete or excessive cracking.
- Water-Cement Ratio: Aim for 0.5-0.6 by volume. Too much water weakens concrete; too little makes it hard to place. Check ratio before mixing.
- Concrete Thickness: Measure and mark out your pour area. Ensure thickness meets local building codes and structural requirements. Insufficient thickness can cause structural issues.
- Reinforcement Bars (rebar): Check size (e.g., #3, #4) and spacing (usually 12″ to 18″ on center). Wrong size/spacing can lead to weak concrete or cracking under load.
- Welded Wire Reinforcement (WWR): If using, check size (e.g., 6×6, 9×9) and spacing. Incompatible sizes can cause poor reinforcement and structural issues.
- Expansion Joints: Ensure you have the right type (e.g., preformed, saw-cut) and quantity for your pour size. Skipping joints can lead to excessive cracking due to concrete shrinkage.
- Fasteners (nails, screws): Check length and type (e.g., common, duplex head). Ensure they’re suitable for the job and won’t corrode in concrete. Wrong fasteners can cause structural failures or corrosion damage.
- Construction Adhesive: If using, check label for intended use (e.g., wood-to-concrete, metal-to-concrete). Ensure it’s compatible with your materials. Using the wrong adhesive can result in poor bonding and delamination.
Quick rule: Always double-check local building codes and manufacturer recommendations to ensure you’re using the right materials and fasteners for your specific project.
Best Practices for Installing Subflooring
Plan a clean layout that minimizes waste and aligns with joists. Acclimate materials in the job space according to product guidance before cutting. Fasten in a pattern that maintains edge support and reduces movement.
Control expansion gaps and coordinate sequencing with other trades to avoid conflicts. Use short, decisive work steps and double-check alignment as you go. Time-saving tips come from pre-cutting and staging materials near the work area.
Pre-install prep and acclimation
Before you start laying subfloor sheets, ensure your jobsite is clean and dry. Remove any debris that could interfere with adhesion.
Acclimate wood products to the job site’s temperature and humidity for at least 48 hours before installation. This helps prevent warping or buckling later on.
Check your framing. Make sure joists are straight, level, and spaced correctly (usually 16″ or 24″ centers). Square up any crooked ones using shims if needed.
Inspect the surface of the joists for any nails or screws that might interfere with subfloor installation. If necessary, sand rough spots to ensure a smooth surface for adhesion.
Fastening patterns and glue-first methods
Use a combination of adhesive and fasteners for best results. Apply construction adhesive evenly across the joist before setting the subfloor sheet.
For fastener spacing, follow these guidelines: 6″ from edges, 12″ on center in fields, and 3″ at joints. Use ring-shank nails or screws designed for subfloors to minimize squeaks.
To reduce squeaks further, consider using squeak-proof fasteners or applying a thin layer of construction adhesive directly onto the joist before installing the sheet.
Always predrill holes when using screws to prevent splitting. Countersink nails slightly below the surface for easy finishing later on.
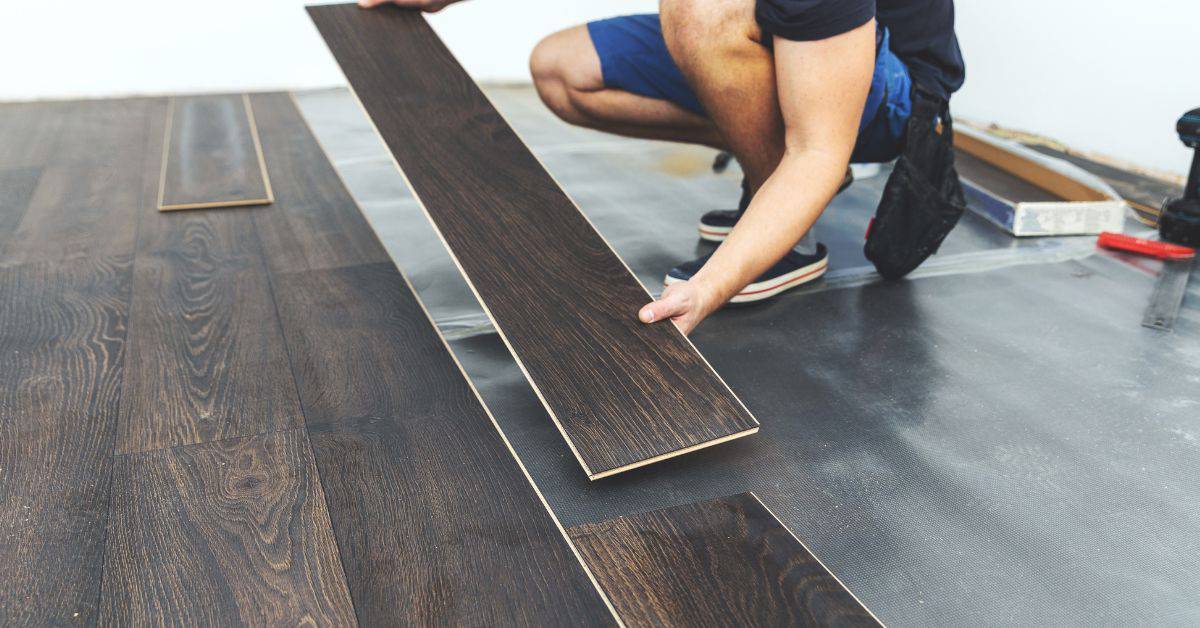
Panel layout, staggering, and edge treatment
Start laying subfloor sheets from a corner of the room. This helps ensure straight lines and minimizes waste.
Stagger end joints like bricklaying – offset each row by at least 24″. This strengthens your subfloor and prevents long cracks from forming.
Seal or sand edges of subfloor sheets to prevent moisture absorption. You can use a paint-on sealer, tape, or even a simple bead of caulk along the edge.
If you’re using a floating floor system, ensure all edges are properly sealed and supported to prevent squeaks and movement.
Fixes and Remediation Strategies (from Simple to Structural)
Start with simple field repairs like resecuring panels or resetting raised edges. Use these when the issue is localized and the substrate is otherwise solid. Move to more involved fixes only as conditions justify.
Structural repairs might include replacing damaged sheets or reinforcing stubborn sections. Choose approaches based on functional criteria, expected longevity, and how the space is used. Document the work for future reference and code compliance checks.
Repairing localized damage and isolated squeaks
First, identify the exact location of the issue. For rot patches, use a screwdriver to probe the area. If it’s soft or crumbles, you’ve found your problem.
To fix, cut out the damaged section using a jigsaw, keeping the cut square and about 2 inches beyond the damage. Apply exterior-grade wood glue along the edges of the hole and insert a new piece of plywood, securing it with screws spaced every 6 inches.
For squeaks, try tightening any loose fasteners first. If that doesn’t work, drill small holes through the subfloor into the joist below, then inject construction adhesive into the holes to bond the two together.
Replacing panels and reinforcing joists
If a panel is damaged beyond repair, cut it out using a jigsaw, following the same procedure as localized repairs. Measure and cut a new panel to fit, applying exterior-grade wood glue along its edges before securing it with screws spaced every 6 inches.
To sister joists, measure and cut a new piece of lumber to match the length of the existing joist. Apply construction adhesive along one edge, then screw it to the existing joist, ensuring it’s flush with the top surface.
Adding blocking or bridging involves installing new pieces of lumber perpendicular to the joists, every 16 inches on center. This helps distribute loads evenly and adds stiffness to the floor system.
Addressing widespread moisture or mold issues
If your subfloor is showing signs of widespread moisture damage, start by identifying the source. Check plumbing, roof leaks, and exterior walls for water intrusion.
Once the source is fixed, dry out the area using fans and dehumidifiers. If mold is present, wear protective gear and use a solution of water and detergent to clean affected areas. Remove and replace any damaged materials.
To prevent future issues, consider installing a vapor barrier on the ground below your subfloor, ensuring proper drainage around your home’s foundation, and sealing all exterior penetrations.
Material Specs and Standards Explained
Know the common subfloor materials and how they differ in handling and stiffness. Read grade stamps and manufacturer notes to understand suitability for your project. Thickness guidance should be checked against the product label and local requirements.
Standards can vary by region, so compare multiple sources such as labels, data sheets, and building codes. If codes vary, rely on the safest recommended range and verify with the installer instructions before proceeding.
Comparing Plywood vs OSB vs Engineered Panels
When it comes to choosing panels for your DIY project, you’ve got three main options: plywood, oriented strand board (OSB), and engineered panels. Each has its own strengths and weaknesses, so let’s break ’em down.
Plywood is the old standby. It’s made from layers of wood veneer glued together, which makes it strong and stiff. It’s great for projects where you need something that won’t warp or twist, like roof sheathing or subfloors. But it can be pricier than OSB.
OSB, on the other hand, is made from wood strands pressed together with resin. It’s cheaper than plywood but not as strong or stiff. It’s fine for walls and floors, but avoid using it where you need something really rigid, like roof sheathing. And remember, OSB soaks up moisture like a sponge, so keep it dry during installation.
Engineered panels, like I-joists or LVL (laminated veneer lumber), are made by gluing layers of wood together with their grains running in different directions. They’re super strong and stiff, making them great for long spans and heavy loads. But they can be pricey and might not be necessary for smaller projects.
Thickness, span tables, and code considerations
The thickness of your subfloor is crucial. It’s what determines how far apart your joists can be spaced and how much weight your floor can hold.
Check your local building codes for the minimum thickness required in your area. It usually ranges from 3/4″ to 1-1/2″. Go with 5/8″ or 3/4″ for most residential floors. Thicker isn’t always better; it just adds weight.
Joist spacing depends on the thickness of your subfloor. Common joist centers are 16″ or 24″, but check your local codes. With a 5/8″ subfloor, you can go up to 24″ on center for most residential loads. If you’re using 3/4″, you might need to stick with 16″. Always consult span tables provided by your joist manufacturer or local codes.
Visual Checkpoints and Quality Control During and After Installation
Create a practical punch list that covers flatness, fastener seating, and edge alignment. Inspect after each major step to catch issues early. Don’t skip timing checks for movement or cure in adhesives.
Document progress with notes or photos so future work matches expectations. Quality control should extend beyond installation to long-term performance and durability checks.
Flatness, fastening, and gap inspections
Use this checklist during installation to ensure your subflooring is flat, securely fastened, and has proper gaps for expansion.
- Check Flatness: Use a long level or straight edge. Tolerance: no more than 1/8″ in 6 feet.
- Verify Fastener Spacing: Check that fasteners are spaced evenly, typically every 6-8 inches along the joists and edges.
- Measure Expansion Gaps: Ensure gaps between panels are consistent (usually 1/2″ to 3/4″) for expansion and contraction.
- Check Fastener Depth: Ensure fasteners are flush or slightly recessed. Protruding nails can damage flooring.
- Inspect Panel Edges: Check for any gaps, warping, or delamination at panel edges.
- Check Glue Joints: If using glue-first method, ensure adhesive has filled the joint and is tacky but not wet.
- Verify Panel Alignment: Check that panels are aligned with joists and each other for a smooth surface.
- Inspect Joist Condition: Ensure joists are level, straight, and free of rot or damage.
Quick rule: Fix any issues immediately to prevent bigger problems later.
Post-install testing and monitoring
Use this checklist after installation to ensure your subflooring is performing as expected and remains in good condition.
- Conduct Walk Test: Walk on the floor to listen for squeaks or creaking. Address any issues immediately.
- Recheck Moisture Levels: Ensure moisture content of subfloor and joists remains within acceptable range (typically 12-15%).
- Test Finish Adhesion: Perform spot tests with a small piece of tape to ensure finish coat adheres properly.
- Inspect for Warping: Check for any warping, cupping, or buckling that may have occurred since installation.
- Check for Delamination: Tap the floor with a hammer. A hollow sound indicates delamination.
- Monitor Temperature and Humidity: Keep an eye on temperature and humidity levels in the room to prevent long-term issues.
- Inspect for Pests: Check for signs of pests, such as termites or rodents, that could damage the subfloor.
Quick rule: Regular monitoring helps catch and fix minor issues before they become major problems.
Cost-Benefit Analysis and Decision Guide
Frame the choice around disruption, expected life, and impact on resale without quoting exact prices. Compare quick fixes, partial replacement, and full replacement by how long they last and how they affect the space. Use practical decision points rather than numbers to guide you.
Consider the tradeoffs between downtime, tooling needs, and future maintenance. Use a stepwise approach to decide how much material or labor to invest for reliable performance in the long run.
When to repair vs when to replace
Repairing subflooring can be a cost-effective solution, but it’s not always the best choice. Here are clear criteria to help you decide:
Repair if: damage is localized (less than 2 sq ft), joists are sound, and there’s no mold or structural deflection.
Replace if: damage is extensive (more than 10% of the subfloor), joists are damaged or rotted, you find mold, or see signs of structural deflection like sagging or cracking.
Longer-term value of smarter installation
Investing in better materials, adhesives, and fastening upfront might seem expensive, but it pays off in the long run. Here’s why:
Better materials like engineered panels or thicker plywood last longer, reducing the need for early replacement.
Using adhesive along with screws increases bond strength, preventing squeaks and improving overall stability.
Proper fastening patterns and techniques reduce callbacks due to finish failures, saving you time and money in the long run.
Conclusion
Safety, durability, and a clean finish depend on applying what you learned: test and verify before you drill in, and never rush through a repair that could unlock bigger problems.
Start by checking a small, hidden area for moisture and damage, confirm that your tests pass, gather the right tools and materials, follow the installation steps in order, keep a sharp eye on every visual checkpoint, and finish with a thorough final inspection to catch anything you missed.
Common mistakes to avoid are skipping diagnostics or assuming the problem is fixed, using the wrong fasteners or adhesive for your substrate, and ignoring moisture or structural signs. Always wear proper PPE, work slowly in a dry, safe area, and keep utilities shut down when working near framing or subfloor edges.
If you see ongoing rot, heavy sagging, widespread mold, or moisture that won’t dry, call a professional rather than pushing ahead. Stay practical, stay patient, and take it one step at a time—your subfloor will be strong, safe, and lasting.
FAQ
How do I interpret moisture test results before installing subflooring?
Check the product label or manufacturer instructions for acceptable moisture ranges. If you’re unsure, compare readings to the same spot on a dry day and look for consistent numbers across the area.
What signs mean I should pause and investigate before starting the job?
If you see damp spots, mold, or a musty smell, stop and dry the area first. Any active leaks or water intrusion must be fixed before you lay new subflooring.
What’s the right way to fasten subflooring to avoid squeaks and gaps?
Use the recommended fastening pattern from the subfloor manufacturer and drive fasteners flush without overdriving. Keep fasteners evenly spaced and check for any raised nails or screws after installation to fix promptly.
When is it necessary to remove and replace damaged subfloor sections or joists?
If wood is soft, crumbly, or shows rot, remove and replace the compromised area. Don’t try to hide damage with new material; compromised support needs proper repair or replacement before new subflooring goes in.