
Introduction
Reprofiling worn broom finish means restoring a broom-textured concrete surface by either applying a thin overlay or replacing the affected slab.
The approach you choose hinges on how deep the damage is, how flat you need it, and what your budget allows. Before you mix anything, focus on proper surface prep, crack clearing, and cleaning so the new surface can bond.
Thin overlays can rebuild texture and height with less downtime, while cut‑and‑replace removes damaged sections entirely and may require matching joints.
For thin overlays, read the product instructions and your local rules to see compatible mixes, preparation steps, and cure times. If you go with cut‑and‑replace, plan for removal, disposal, forming, and long-term durability, and compare how each option performs in high-traffic areas.
Key takeaways
- Assess surface hardness and broom pattern to decide reprofiling versus replacement.
- Prepare worn concrete by mechanically profiling edges and removing loose material.
- Thin overlays suit mild wear; verify compatibility with broom finish and cure.
- Cut-and-replace provides full-depth recovery; plan formwork, joints, and curing time.
- Durability varies by substrate prep, overlay type, and proper installation technique.
- Wear PPE and dust control measures during profiling; budget reflects downtime and materials.
Table of Contents
- Introduction
- Key takeaways
- Assessing the Existing Broom Finish and Decision Factors
- Surface Preparation Techniques for Worn Broom Finish Concrete
- Thin Overlay Reprofiling: Materials, Tools, and Application Methods
- Cut-and-Replace Method: Process and Best Practices
- Performance, Durability, and Expected Service Life
- Cost, Time, and Lifecycle Trade-Offs
- Safety, Environmental, and Regulatory Considerations
- Project Planning, Quality Checkpoints, and Common Mistakes to Avoid
- Conclusion
- FAQ
Assessing the Existing Broom Finish and Decision Factors
Begin by surveying the current surface condition and noting how the broom pattern reads across the slab. Look for wear depth, exposed aggregate, laitance, cracking, spalls, and how uniform the broom finish remains. These observations help decide whether a thin overlay will smoothingly contour the surface or if a full replacement is warranted.
Next, consider load demands and environment. Think about traffic type, how many cycles the surface will see, chemical exposure, and freeze–thaw risks. Also check moisture and vapor considerations that can influence product choice and long‑term performance.
Visual Inspection Checklist
Before you start any work, grab a flashlight and walk the slab. This quick visual check helps determine if your surface is suitable for a thin overlay or needs more serious attention.
- Cracking: Look for hairline cracks (minor) to wide gaps (major).
- Delamination: Check for loose or peeling areas, especially at edges and joints.
- Spalling: Note any chipped or flaking concrete, exposing aggregate or steel.
- Contamination: Inspect for oil stains, efflorescence, or other surface impurities.
- Wear depth: Measure how deep the broom finish has worn down.
- Aggregate exposure: Check if aggregate is exposed due to laitance removal.
- Laitance: Look for a thin, weak layer of cement paste on the surface.
- Broom finish uniformity: Ensure the broom marks are consistent and not excessively worn or missing.
Quick rule: If you spot major cracks, delamination, spalling, or contamination, consider cut-and-replace instead of thin overlay.
Structural Assessment and Testing
To ensure your concrete is structurally sound, perform some simple tests. If results are unclear or concerning, order lab testing.
Slab thickness: Measure the slab’s thickness at multiple points using a simple depth gauge or screwdriver and ruler. Thickness should be consistent and meet design specs.
Check reinforcement condition: Tap the slab with a hammer. A hollow sound may indicate delamination or voids. Also, look for exposed or corroded rebar.
Substrate integrity: Perform a simple pull test using an anchor bolt and wrench. If the concrete pulls away easily, it’s weak and may need replacement. For more accurate results, consider lab testing like compression tests or petrographic analysis.
Surface Preparation Techniques for Worn Broom Finish Concrete
Define the target reprofiling system and the required substrate profile, then translate that into prep steps like cleaning, laitance removal, and contaminant mitigation. Verify that the prepared surface will meet the chosen system’s adhesion needs. Document the baseline so you can compare post‑prep results.
Separate mechanical from chemical prep and pick the method that yields a sound, open pore surface. Include dust containment and safety considerations as part of the plan. Confirm the readiness with simple checks before moving to priming or bonding steps.
Mechanical methods (shotblasting, grinding, scarifying)
Mechanical methods are your go-to for removing contaminants and profiling concrete. Each method has its pros and cons:
Shot blasting is fast and effective at removing laitance, but it can create dust and damage the surface if not done right.
Grinding is slower but provides a consistent profile with minimal dust. It’s great for smaller areas or where dust control is crucial.
Scarifying is aggressive and removes deep contaminants, but it can leave the surface too rough if not controlled.
Chemical cleaning and contamination removal
Chemicals help remove tough residues that mechanical methods miss. Here’s how:
Degreasers tackle oils, greases, and curing compounds. Apply, let it sit, then rinse off.
Etchants like muriatic acid remove efflorescence and salts. Be careful – they’re strong and can harm skin and eyes.
Rinse thoroughly after using chemicals. Residues can inhibit bonding, so don’t skip this step.
Visual checkpoints and moisture testing
Before you start, use these simple checks to ensure your surface is ready:
- Blush test: Sprinkle water on the surface. If it darkens and doesn’t dry quickly, there’s too much moisture.
- Water ponding: Check for standing water. It indicates high moisture content.
- Tape test: Apply painter’s tape, pull off after 30 minutes. If it leaves residue, the surface isn’t clean enough.
- Efflorescence: Look for white powdery deposits. They can inhibit bonding.
- Curing compounds: Check for any remaining curing agents. They can interfere with adhesion.
- Oil or grease: Inspect for stains. They can prevent proper bonding.
- Dust: Wipe the surface. If it’s dusty, clean it again.
- pH test: Ensure alkalinity is below 10 to prevent bond failure.
- MVER test: Measure moisture vapor emission rate. High MVER can cause film formation and bond failure.
Quick rule: If you find issues, address them before proceeding. Moisture and contaminants can ruin your work.
Thin Overlay Reprofiling: Materials, Tools, and Application Methods
Outline the scope of thin overlay options for broom finishes, including cementitious toppings and polymer overlays. Note typical thickness ranges in practice and how texture compatibility affects the plan. Align choices with existing broom texture and detail limits for feathering at edges.
Discuss material selection criteria such as cementitious versus polymer or epoxy systems, aggregate size, flow, cure guidance, and bond promoters. Include a quick look at substrate diagnostics like moisture and crack activity, as these drive priming needs. Keep the sequencing clear from mixing to final set per manufacturer guidance.
Materials and selection criteria
The right materials ensure a strong, durable overlay that lasts. Here’s what to consider:
- Cementitious Mortars: Good bond, flexible. Look for flexural strength. Avoid low-slump mixes.
- Polymer-Modified Mortars: Excellent bond, chemical resistance. Check thickness limits. Watch out for cracking with rapid drying.
- Epoxy Mortars: Strong bond, high chemical resistance. Spec pot life. Prevent staining from contaminants.
- Geopolymer Overlays: Low shrinkage, good bond. Check compatibility with existing concrete. Avoid excessive bleeding.
- Bond Promoters: Enhance adhesion. Use per manufacturer’s guidance. Don’t forget to clean and prime surface first.
Tools and materials checklist
Before you start, ensure you have the right tools for a smooth installation:
- Mixer (electric or gas): For consistent batching. Check capacity matches job size.
- Trowels ( various sizes): For application and finishing. Confirm trowel edges are sharp.
- Sprayer (optional): For applying primer or overlay. Ensure nozzle is clean, clear of clogs.
- Broadcast Aggregates: For slip resistance. Choose size and type matches existing texture.
- Curing Covers: To retain moisture. Use per manufacturer’s guidance. Skip at your own risk: causes slow curing, weak overlay.
- Testing Equipment (moisture meter, level): For quality control. Don’t forget to calibrate before use.
Quick rule: Gather everything before you start. Missing tools mid-job causes delays.
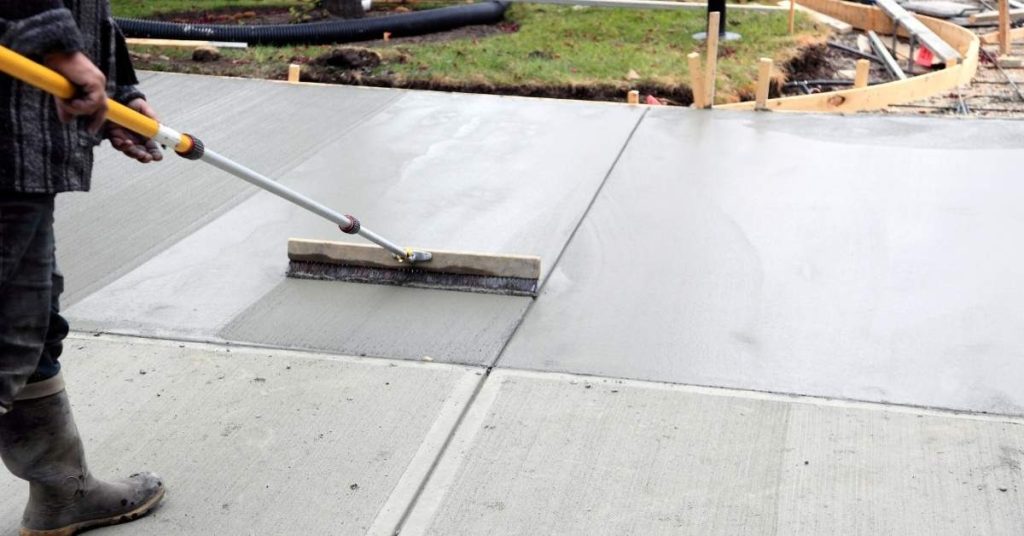
Application methods and finishing (spray, trowel, broadcast)
Apply the overlay in thin layers for best results:
Primer: Apply a thin coat. Let it dry to tack-free. Skip this step: weakens bond.
Scratch Coat (optional): Apply 1/8″ – 1/4″. Drag a brush or broom across wet surface. Let it dry, then clean off excess. Skipping this: reduces texture retention.
Build Coats: Apply thin layers (1/8″ – 1/4″). Use a trowel for even application. Let each coat dry, then lightly abrade before next pass. Too thick: causes cracking.
Tining/Broom Finish: For final layer, use a broom or tine float. Work quickly: overlay sets fast. Don’t rush: poor texture results.
Cut-and-Replace Method: Process and Best Practices
Describe the full‑depth removal workflow, including demolition sequencing, containment, and debris handling in line with site rules. Emphasize safety and efficient disposal practices around the project. Use these steps to plan a clean slate for new concrete.
Explain bonding strategies for the new slab, covering surface prep, moisture control, rebar inspection, and any primers or bonding agents. Include curing, weather considerations, and moisture management to protect the finish during and after placement.
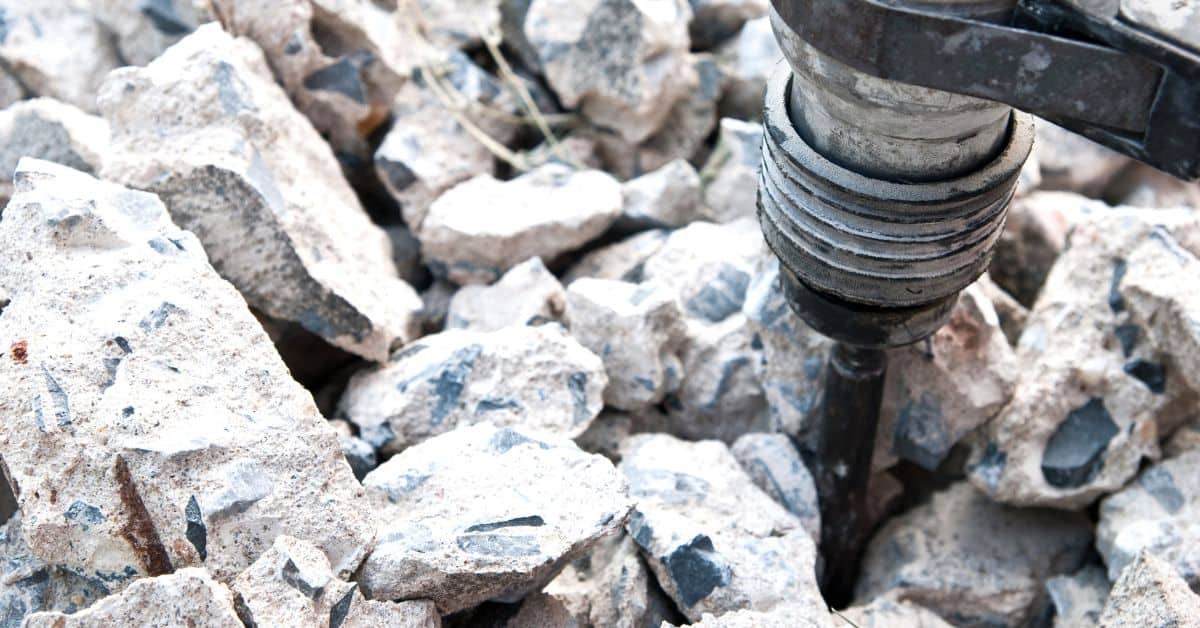
Demolition, removal, and substrate prep
Start by marking out the area for demolition. Use a core drill or saw to cut control joints at regular intervals. This helps prevent random cracking during removal.
Remove delaminated material carefully using a jackhammer or chipping hammer. Wear appropriate safety gear, including ear and eye protection. Contain dust with water or a vacuum system to meet local regulations.
Prepare the substrate by removing all loose material, cleaning it thoroughly, and ensuring edges are well-defined for proper tie-in with the existing slab. Inspect and clean rebar if present, removing any rust with a wire brush.
Replacement materials, placement, and finishing
Material choice is crucial for a successful cut-and-replace. Using the wrong mix can lead to issues like cracking or weak bonding.
- Concrete Mix: Use a high-strength, low-shrinkage mix designed for repair work. Look for mixes with sulfate-resisting cement if your area has sulfate-rich soil.
- Admixtures: Consider using admixtures for enhanced durability and bond strength. Consult a concrete specialist to determine the best options.
- Aggregates: Use clean, well-graded aggregates to ensure proper consolidation and finish. Avoid using materials with high clay content or organic matter.
- Water: Use clean water. Salty or contaminated water can weaken the concrete.
- Placement & Finishing: Place concrete in thin lifts, consolidating each layer with a vibrating screed or poker vibrator. Finish with a broom for a similar texture to the existing slab. Ensure proper curing to prevent cracking and maintain finish integrity.
Performance, Durability, and Expected Service Life
Contrast the typical performance profiles of thin overlays against full replacement, focusing on wear resistance and surface leveling outcomes over time. Consider how the surface will respond to routine use and targeted maintenance. Let this guide expectations for long‑term performance.
Identify key durability drivers like substrate condition, moisture handling, freeze–thaw exposure, and traffic patterns. Outline maintenance needs and when resurfacing or patching might be required. Include a note on warranty and documentation as referenced in manufacturer data.
Wear, Abrasion, and Crack Resistance
When it comes to thin overlays versus cut-and-replace, the material choice makes a big difference in wear and tear. Thin overlays use bonded toppings that can be reinforced with fibers or aggregates for added strength.
Thicker overlays offer better abrasion resistance, but they also take longer to cure. Cut-and-replace, on the other hand, relies on the strength of the new concrete poured in place.
Cracking can occur due to settlement or loading. Reinforcement in thin overlays helps prevent cracks from propagating. In cut-and-replace, proper reinforcement and control joints help manage cracking. If cracks appear, consider strengthening with steel fibers or additional reinforcement before they cause major damage.
Maintenance Schedules and Repairs Over Time
Regular maintenance extends the life of both thin overlays and cut-and-replace. Inspect your surface annually for signs of wear, cracks, or delamination.
For thin overlays, routine cleaning removes debris that can cause damage over time. Spot repairs can be made using the same material as the overlay. Recoat or reseal every 5-7 years to maintain protection and appearance.
With cut-and-replace, minor cracks can be repaired with concrete patching materials. However, if there’s significant damage or deterioration, a full replacement may be necessary. Always follow manufacturer guidelines for maintenance and repairs to keep your warranty valid.
Cost, Time, and Lifecycle Trade-Offs
Frame upfront costs by listing categories such as materials, installation, downtime, and potential rework. Explain what drives each category without quoting numbers. Use this to compare the overall economic picture between options.
Offer a downtime framework and a simple lifecycle approach that weighs initial expense against long‑term maintenance needs. Provide tips for reliable estimates using ranges, assumptions, and data sources while staying practical for DIY planning.
Estimating labor and materials
The quality of your overlay or replacement depends on the materials you choose. Here’s what to consider when estimating:
- Prep time: Include cleaning, grinding, and priming. It takes time to prepare the surface.
- Material yield: Check product data for coverage rates. Don’t assume a 5-gallon bucket covers 100 sq ft; it might only do 40-60 sq ft.
- Equipment hire: Calculate costs for grinders, trowels, sprayers, and other tools. Some may need to be rented.
- Curing/downtime: Factor in cure time before reopening the area. This is downtime you’ll pay for later.
- Labor: Estimate hours needed for prep, application, and finishing. Don’t forget to include cleanup.
Downtime, traffic management, and scheduling
Cure times and access restrictions can disrupt your project schedule. Here’s how to manage:
Cure time: Plan for 24-72 hours of downtime, depending on the product and conditions. This is when the floor is closed.
Access impacts: During application and curing, keep people off the floor. This might mean rerouting traffic or closing a section of your home.
Coordination with other trades: If you’re doing multiple projects at once, plan around cure times to avoid delays. Communicate with your team about when they can access the area again.
Safety, Environmental, and Regulatory Considerations
Identify PPE requirements and respiratory protection needs, with guidance on fit and compatibility for the job. Emphasize dust control and ventilation strategies to keep workers safe. Outline basic planning steps to minimize exposure during work intervals.
Cover waste handling, spill response, and environmental controls for slurry, wash water, and residues. Note local permits or regulations to verify before starting work and how to align site rules with project scope.
Dust control, airborne silica, and PPE
Concrete work generates a lot of dust. Some of that’s crystalline silica – tiny, sharp particles that can cause lung disease if inhaled.
Control dust: Wet down surfaces before cutting or grinding. Use vacuums with HEPA filters to collect dust at the source.
Wear respiratory protection. N95 masks are a minimum. For high dust tasks, use a full-face respirator with P100 filter. Fit-test and do regular medical checks.
Protect your skin too – wear gloves and long sleeves.
Waste disposal and environmental compliance
Concrete waste, contaminated water, and packaging all need proper handling. Here’s how:
Concrete waste: Segregate it from other debris. Recycle if possible – check with local recycling centers.
Contaminated runoff: Contain it. Use barriers and absorbents to prevent it from entering drains or waterways. Dispose of it as hazardous waste if necessary, following local regulations.
Packaging disposal: Recycle what you can. Follow local guidelines for disposing of the rest.
Before starting, check local disposal regulations. Some materials may be classified as hazardous waste and need special handling.
Project Planning, Quality Checkpoints, and Common Mistakes to Avoid
Start with a clear project scope and decision criteria, especially when choosing between a thin overlay and full replacement. Use surface assessments to drive prep and timing decisions. Establish acceptance criteria early for a smoother handover.
Lay out a realistic execution sequence with roles, deadlines, and inspection points. Highlight common missteps such as skipping profiling, missing priming, or over‑thick overlays, and provide a plan to prevent them during the build.
Step-by-Step Project Plan and QA Checklist
Use this checklist from start to finish for a successful reprofiling job.
- Inspect surface: Check moisture, cracks, delamination, laitance. Skip this? Inadequate prep leads to failure.
- Prepare surface: Shot blast or grind as needed. Ensure cleanliness before application.
- Prime surface: Apply compatible primer/bonding agent. Miss this? Bond strength suffers.
- Mix materials: Follow ratios specified by product. Wrong mix? Over- or under-thick overlays result.
- Apply overlay: Use consistent layer thickness. Inconsistent? Profile verification fails.
- Feather edges: Ensure smooth transitions to existing surfaces. Poor feathering causes tripping hazards.
- Cure properly: Maintain correct ventilation and temperature. Poor cure leads to micro-cracking or delamination.
- Inspect final surface: Check flatness, slip resistance, and joint movement. Skip this? Long-term performance suffers.
Quick rule: Follow each step carefully. Rushing through any stage can compromise the entire project.
Common DIY/Contractor Mistakes and Prevention Tips
Avoid these pitfalls for a successful reprofiling job.
- Skipping profiling: Improper surface prep leads to poor adhesion and overlay failure.
- Inadequate bonding/priming: Missed primer application reduces bond strength, causing delamination.
- Wrong material selection: Using incompatible products leads to poor performance and short service life.
- Moisture mismanagement: Ignoring moisture content causes overlay failure and early deterioration.
- Ignoring joint movement: Not accounting for joints leads to cracking and overlay damage over time.
- Poor curing: Inadequate cure conditions result in micro-cracking, delamination, or reduced overlay performance.
- Over- or under-thick overlays: Incorrect thickness affects surface profile, slip resistance, and durability.
- Hiring the wrong specialist: Using inexperienced contractors leads to poor workmanship and project failure.
Quick rule: Know your limits. When in doubt, hire a reputable, experienced professional.
Conclusion
Choosing the right reprofiling path hinges on safety, durability, and how the surface will look and wear over time. Focus on a solution you can trust to hold up under traffic and weather, without risking irreversible damage.
First, assess the existing finish and surface condition, then prepare thoroughly, pick the method that fits the damage, gather the correct materials and tools, test a small area, follow reasonable application steps, cure properly, and finally inspect and plan for routine maintenance. Treat this like a simple workflow you can repeat on other areas if needed, and keep notes for future touch-ups.
Avoid these missteps: rushing prep or skipping it, using the wrong product or mix, neglecting edges or transitions, skimping on ventilation or PPE, or ignoring cure times. Safety first, test a small area to confirm adhesion and appearance, and never exceed the manufacturer’s guidance. If you encounter large cracks, structural issues, or unclear substrate conditions, call in a pro rather than guessing; sticking to solid process and informed decisions will save time, money, and a poor result. Stay steady, keep the plan simple, and you’ll get a durable finish you can be proud of.
FAQ
What surface preparation options work best before reprofiling worn broom finish, and how do I choose?
Mechanical options like grinding, scarifying, or shot blasting remove the old surface and expose fresh concrete. Choose based on derchosen depth, dust control, and the equipment you have access to. Always verify surface profile requirements in the overlay manufacturer instructions and test a small area first.
What types of thin overlays exist for reprofiling, and where are they best used?
Thin cementitious overlays and polymer-modified overlays are common options. They go on in light to moderate thicknesses and cure relatively quickly. Check the product label for bonding, compatibility with broomed finishes, and the intended use in your environment.
How do I approach cut-and-replace concrete repair without turning the job into a total demolition?
Cut and remove only the damaged sections, then replace with fresh concrete or patch material. Ensure proper edge containment, waste handling, and bonding to surrounding concrete. Follow manufacturer or local guidance for curing, sealing, and joint treatment.
How durable are thin overlays compared with cut-and-replace, and what affects longevity?
Thin overlays can restore profile and wear resistance, but durability depends on bonding, substrate prep, and traffic. Cut-and-replace generally yields longer life in severely damaged areas but costs more and takes longer. Always compare product data and site conditions to decide the best option. If unsure, consult the overlay or patching material instructions and local rules.