
Introduction
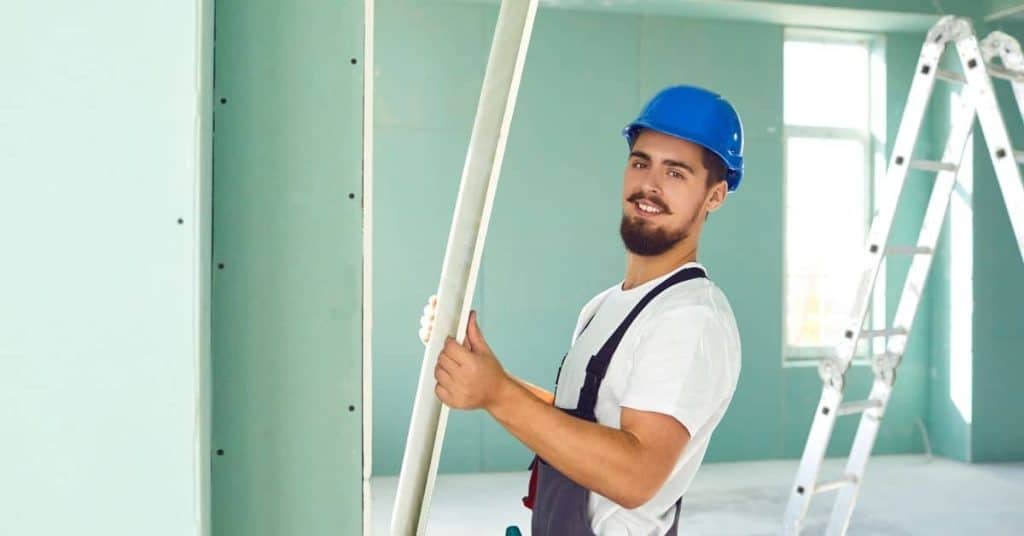
A pipe clamp drywall lift is a simple setup that helps raise and hold drywall during installation. It uses a long pipe or adjustable bar and clamps to lift sheets into place. Check the fit and limitations of your clamp system before using it.
Watch for wobble, slippage, or binding as you lift. Test with a small sheet and gradually work up, keeping the load supported. Always verify alignment and safety limits in the product label and local rules before use.
Key takeaways
- Inspect lift rails and clamps for bending, looseness, or corrosion before use.
- Check setup alignment and enables proper load distribution during initial lift.
- Test clutch and locking mechanisms for secure operation without slippage.
- Use temporary supports and spotters during testing to avoid sudden drops.
- Replace worn parts and calibrate tension only per manufacturer instructions.
- Do not exceed rated capacity; document testing and cease use if unsafe.
Table of Contents
- Introduction
- Key takeaways
- Quick Overview: What a Pipe Clamp Drywall Lift Is and Common Failure Modes
- Causes: Mechanical, Wear, and Setup-Related Reasons for Failure
- Visual Checkpoints and Quick Inspections Before Use
- Diagnostic Tests: How to Systematically Test the Clamp and Lift Mechanisms
- Fixes: Step-by-Step Repairs and Adjustments
- Tools and Materials Checklist for DIY Repairs
- Safety Precautions, Load Limits, and Testing After Repair
- When to Replace the Lift or Call a Professional
- Conclusion
- FAQ
Quick Overview: What a Pipe Clamp Drywall Lift Is and Common Failure Modes
A pipe clamp drywall lift is a simple tool to hold and raise drywall sheets during installation. It uses a pipe clamp mechanism to grip the board while it is lifted into position. Common failure modes include mechanical binding, worn threads, misalignment, and user setup errors that can compromise performance.
Understanding typical uses helps you spot when the lift is behaving oddly. Look for difficulty gripping, uneven lifting, or sudden jerks during operation. These signs point to where you should focus your diagnosis and checks.
How a pipe clamp drywall lift works
A pipe clamp drywall lift is a tool designed to help you install drywall sheets safely and efficiently. It’s made up of a few key components:
Pipe Clamp: This is the part that grips onto a nearby pipe or wall stud for stability.
Support Arm: This extends out from the pipe clamp, providing a platform to rest your drywall sheet on. It’s usually adjustable to accommodate different sheet sizes.
The Locking Mechanism secures the support arm in place once you’ve adjusted it to the right height. Pivot points allow the lift to move smoothly as you raise and lower your drywall sheets.
Most frequent failure symptoms
Even with proper use, pipe clamp drywall lifts can sometimes malfunction. Here are some common signs of trouble:
Slipping: If the lift keeps slipping down the pipe or wall stud, it might be due to a worn-out pipe clamp or incorrect adjustment.
Clamping Failure: If the support arm won’t stay locked in place, you could have an issue with the locking mechanism. This can cause your drywall sheet to shift unexpectedly.
Misalignment: If your drywall sheets aren’t staying level or plumb, it might be due to a misaligned lift. Check that all components are properly adjusted and secured.
Dropped Load: A sudden drop in the lift could indicate a broken support arm or locking mechanism. Always inspect these parts before use.
Unusual Noises, like squeaking or grinding, can also signal that something’s not right with your lift. Don’t ignore these warning signs – address them promptly to prevent accidents.
Causes: Mechanical, Wear, and Setup-Related Reasons for Failure
Mechanical defects like bent components, stripped fasteners, or damaged clamps can prevent secure grip. Normal wear and tear wear down moving parts and reduce smooth operation over time. Incorrect setup or overload can push the lift beyond its intended use and cause failure.
Break down the causes by category to guide troubleshooting. If unsure, verify the part condition with the manufacturer’s instructions or product label. Use safe ranges and options based on what your specific lift requires.
Parts that wear out or break
The jaws and teeth on your pipe clamp drywall lift are under constant pressure. They’ll show signs of wear over time.
Springs lose their tension, pins can bend or break, bushings may wear down, and fasteners can loosen or strip. Keep an eye on these components:
Jaws & Teeth: Check for excessive wear or damage. Replace if necessary.
Springs: Test their tension periodically. If they’re weak, replace them.
Pins, Bushings, Fasteners: Inspect these regularly. Tighten or replace as needed.
Incorrect use or setup mistakes
Using your lift incorrectly can lead to failure. Here are common mistakes to avoid:
- Wrong pipe size: Ensure the pipe fits snugly in the clamp.
- Improper clamp orientation: The clamp should be perpendicular to the wall for stability.
- Loose fasteners: Tighten all bolts and screws before use.
- Exceeding rated capacity: Don’t overload your lift. Stick to its weight limit.
Regularly inspect your setup, tighten loose parts, and adjust as needed.
Material and manufacturing defects
The quality of materials used in your lift affects its lifespan. Here’s what to look out for:
- Low-quality steel: Check for rust or corrosion. High-carbon steel is best.
- Poorly machined parts: Inspect for rough edges, uneven surfaces, or misaligned components.
- Inadequate coatings: Ensure your lift has a protective coating to prevent rust and wear.
- Weak welds: Check for cracks or gaps in the welds. They should be smooth and strong.
If you suspect factory defects, contact the manufacturer immediately.
Visual Checkpoints and Quick Inspections Before Use
Do a quick visual sweep for rust, cracks, or deformed frames before starting. Check that all pins, handles, and locking mechanisms are present and in place. Look for missing hardware and obvious signs of abuse that could compromise safety.
Inspect alignment between the clamp jaws and the lifting arm. If you see gritty motion or binding, treat it as a red flag. Confirm any wear indications against the reader’s guidelines or label.
External visual checks
Before each use, run through this checklist to ensure your pipe clamp drywall lift is safe and ready.
- Inspect frame: Look for cracks or bends. If found, do not use as it may collapse under load.
- Check safety pins: Ensure all are present and secure. Missing ones can cause the lift to drop unexpectedly.
- Examine clamps: Check for wear or damage that could prevent proper gripping of the pipe.
- Look at wheels: Make sure they spin freely and are in good condition. Stuck or damaged wheels can cause instability.
- Check hydraulic cylinder: Inspect for leaks, cracks, or dents. Any damage could lead to failure under load.
- Inspect footings: Ensure they’re solid and undamaged. Wobbly or broken ones can cause the lift to tip over.
- Check load hooks: Make sure they’re secure and undamaged. A broken hook could drop your drywall sheet.
- Look for overload signs: Check for excessive wear, stress fractures, or other signs of prior overload. If present, reduce the lift’s capacity to prevent further damage.
Quick rule: If you spot any issues, err on the side of caution and do not use the lift until it’s repaired or replaced.
Functional quick tests
Before lifting any drywall, perform these simple tests to ensure your pipe clamp drywall lift is working correctly.
- Dry-run clamping: Open the clamps and close them around a piece of scrap pipe. They should grip tightly with no slippage.
- Lock engagement check: Lift the handle to engage the lock. It should hold the lift in place when released. If not, adjust or repair the lock mechanism.
- Holding a light test load: Place a small, manageable drywall sheet onto the lift and raise it slightly. The lift should hold steady without tipping or wobbling.
- Wheel test: Roll the lift gently to ensure all wheels turn smoothly and the lift moves easily in all directions.
- Hydraulic test: Pump the handle a few times. The lift should rise steadily with each stroke, indicating proper hydraulic function.
Quick rule: If any of these tests fail, do not use the lift until it’s repaired to prevent accidents and damage.
Diagnostic Tests: How to Systematically Test the Clamp and Lift Mechanisms
Perform a static load check with a controlled load within the tool’s expected range and observe for smoothness and even grip. Operate the lift through its full range at a moderate pace to feel for sticking or looseness. Listen for unusual noises that might indicate internal wear.
Test each component separately: clamp jaws, threads, and locking pins. If a part doesn’t respond as designed, mark it for inspection, repair, or replacement. When in doubt, follow the manufacturer’s diagnostic steps found on the product data sheet.
Static hold test
Before you start, ensure the lift is on a level surface. The goal here is to test the clamp’s holding capacity under static load.
Secure a known weight or a piece of drywall (around 50 lbs) onto the lift. Slowly raise it until the clamp engages. Now, try to pull the drywall out gently. If it holds firmly without slipping, your clamp is working fine.
If it slips or doesn’t hold at all, you’ve found your problem. Inspect the clamp’s teeth and jaws for any damage or wear.
Movement and wear tests
Grab the lift’s handle and move it through its full range of motion, both up and down. You’re checking for excessive play, binding, or uneven movement.
Pay close attention to: pivots, slides, and the clamping jaw. If you feel any unusual resistance, jerky movements, or too much give, note it down.
Next, perform a few cycles of opening and closing the clamp. Listen for any grinding or squeaking sounds. These could indicate wear on moving parts.
Lock and release mechanism checks
First, engage the lock by raising the lift fully. Try to push down on the drywall gently. If it doesn’t move, your lock is working.
Now, release the lock and lower the lift slowly. The drywall should come down smoothly without any sudden drops or jerks. If it does, check the springs and catch surfaces for any damage or wear.
Inspect: the locking pawl, its spring, and the rack teeth for any signs of excessive wear or damage. Replace any parts that show significant wear.

Fixes: Step-by-Step Repairs and Adjustments
Start with the simplest adjustments, like tightening fasteners and realigning the clamp jaws. Clean and lubricate moving parts with products recommended by the manufacturer. Replace obviously damaged components only after confirming compatibility and availability.
If problems persist, escalate to component-specific checks and consider professional assistance for complex repairs. Always stop if safety is compromised or if a repair requires unfamiliar parts. Verify you used the correct parts per the product instructions or label.
Step-by-Step Repair Process
Follow these practical steps to fix your pipe clamp drywall lift. Safety first, then tackle the main repairs, and finish with a final check.
- Safety first: Unplug the tool, clear the work area, and wear appropriate gloves and safety glasses.
- Identify the problem areas using the visual checks and diagnostic tests from earlier in this guide.
- Gather necessary tools. You’ll likely need a screwdriver, wrench, pliers, and possibly a hammer or chisel.
- Perform the repairs based on your diagnosis. If you’re unsure, refer back to the ‘Causes’ section for guidance.
- Once finished, test the tool using the quick tests mentioned earlier. If it’s working perfectly, clean up and store it properly. If not, recheck your work or consult a professional.
Tightening, alignment, and adjustment fixes
Loose fasteners, misaligned jaws, or improper pipe seating can cause issues. Here’s how to fix these common problems.
First, tighten all loose screws and bolts. Use a wrench or screwdriver, but be careful not to overtighten.
Next, check the jaw alignment. If they’re misaligned, loosen the adjustment screws, realign them, then retighten. Ensure the jaws close evenly and securely around the pipe.
Finally, adjust the clamping pressure. Too much can damage the pipe or tool, too little won’t grip properly. Make small adjustments until it’s just right.
Replacing worn parts
Worn parts like pins, springs, teeth, and bushings can cause failures. Here’s how to replace them.
First, remove the old part. This might involve unscrewing, unclipping, or using pliers to gently pull it out.
Next, inspect the new part before installation. Ensure it’s the correct type and in good condition. Also, check the area where it will be installed for any damage that needs repair.
Finally, install the new part. Fit it securely but not too tightly. Test the mechanism to ensure it works smoothly and correctly.
Corrosion and restoration fixes
Corrosion can weaken parts, making your tool unsafe. Here’s how to clean, remove rust, and prevent further corrosion.
First, clean the affected area. Use a wire brush or sandpaper to remove loose rust. Be careful not to damage the underlying metal.
Next, apply an anti-corrosion treatment. This could be paint, grease, or a specialized anti-rust spray. Follow the manufacturer’s instructions for best results.
If corrosion is severe, it might be unsafe to repair the tool yourself. In this case, consult a professional. They have the expertise and equipment to handle serious corrosion safely.
Tools and Materials Checklist for DIY Repairs
Prepare common hand tools, replacement clamps, and any manufacturer-approved lubricants. Have safety gear ready, such as gloves and eye protection. Keep spare pins or bolts and the correct threading tools on hand for quick fixes.
Check the product label or instructions for exact part numbers and acceptable replacement options. If you cannot confirm part compatibility, contact the manufacturer or a qualified supplier before ordering. Use safe size ranges and clearances as indicated by the instructions.
Essential tools for basic repairs
Before you start any DIY repair, make sure you have these essential tools on hand. This checklist will help you verify that you’re prepared and avoid common mistakes.
- Adjustable Wrenches (10″ & 16″): Check they fit your pipe sizes. Confirm by trying to grip a pipe of the size you’ll be working with.
- Pliers (Needle-nose, Lineman’s): Ensure they’re sturdy and can grip small parts. Test on a small nail or wire.
- Claw Hammer: Check for a solid handle and secure head. Tap a nail to confirm it’s well-seated.
- Punches (Center & Flat): Ensure they’re the right size for your work. Test on a small hole or flat surface.
- Torque Wrench: If using, check it’s calibrated and fits your fasteners. Confirm by torquing a known bolt.
- Lubrication (Penetrating Oil & Assembly Paste): Check they’re suitable for your hardware. Read labels to confirm.
- Tape Measure: Ensure it’s accurate and long enough. Measure a known distance to confirm.
- Level: Check it’s functional and accurate. Level a surface to confirm.
Quick rule: Always check your tools before starting work. Faulty or unsuitable tools cause mistakes and rework.
Parts and consumables to keep on hand
Before starting any DIY repair, it’s crucial to have the right parts and materials at your fingertips. This checklist will help you ensure you’re well-prepared.
- Nails and screws: Check lengths and types (e.g., galvanized, decking, etc.) against your project requirements. Wrong sizes can lead to structural issues or damage tools.
- Fasteners: Keep a variety of bolts, nuts, washers, and other fasteners on hand. Verify they match your existing hardware to prevent stripping or improper fit.
- Replacement jaws: For tools like vise grips or pliers, keep spares in case of damage or wear. Test them before use to ensure proper function.
- Springs: Have a selection of common spring types (e.g., tension, compression) and sizes. Check their resilience by bending gently; if they’re too soft or hard, replace.
- Lubricants: Store multi-purpose, high-temperature, and dry lubricants for various applications. Always check the label to ensure it’s suitable for your project.
- Rust inhibitors: Keep products like WD-40 or similar sprays on hand to prevent rust buildup. Test them on a small, hidden area first to avoid discoloration.
- Material grades: Ensure you have the correct material grades (e.g., lumber, concrete mix) for your project. Check product labels and manufacturer instructions to confirm.
- Sealants and adhesives: Stock up on common sealants (e.g., silicone, caulk), glues, and epoxies. Always check expiration dates and test on a small area first.
Quick rule: Never skimp on quality or skip checking your materials. Using subpar parts can lead to costly rework and damage your project’s longevity.
Safety Precautions, Load Limits, and Testing After Repair
Always reset the lift on a stable surface before mounting drywall. Respect the tool’s load limits and never exceed them. Use spotters or stabilizers if the setup requires extra support.
After repairs, run a controlled test sequence to verify safe operation. Recheck all fasteners, guards, and locking mechanisms. If anything feels off, pause work and re-evaluate before continuing.
Personal protective equipment and safe handling
Safety is paramount when working with heavy tools like a pipe clamp drywall lift. Here’s what you need to protect yourself and ensure safe handling during repairs and testing.
- Hard hat: Protects against falling objects. Ensure it fits well and is adjusted properly.
- Safety glasses: Shields your eyes from debris and potential hazards. Consider anti-fog coating for comfort during prolonged use.
- Work gloves: Provides grip and protects hands from cuts and bruises. Opt for durable, flexible materials like leather or synthetic blends.
- Steel-toe boots: Safeguards your feet from heavy objects and provides stability while lifting and moving the tool.
- Ear protection: Reduces noise exposure during operation. Disposable foam earplugs are affordable and effective.
Verifying rated capacity and safe testing steps
The first step in safely using your pipe clamp drywall lift is knowing its rated capacity. This information should be provided by the manufacturer, usually on a label or in the user manual.
If you can’t find the rating, start with a conservative test load of around 50% of what you estimate the tool’s capacity to be. For example, if you think it can handle 200 lbs, start with 100 lbs.
Always perform incremental testing after repairs:
- Start with a minimal load (e.g., just the weight of the lift itself).
- Gradually increase the load in small increments (e.g., add 25-50 lbs at a time) while monitoring the tool’s performance.
- If the tool handles each increment without issue, continue increasing until you reach or exceed the estimated rated capacity.
When to Replace the Lift or Call a Professional
Consider replacement if the lift shows repeated failures after repairs, persistent mechanical binding, or structural damage that cannot be corrected. Recurring issues are a sign that a professional assessment may be more economical and safer in the long run. Do not push a tool beyond safe operation.
For complex defects or unfamiliar components, contact a qualified technician or the manufacturer for guidance. If the tool is out of date or parts are no longer available, replacement is often the best option. Always verify the professional’s recommendations against local rules and standards.
Red flags that mean replacement is safer
If you spot any of these signs, it’s time to replace your pipe clamp drywall lift. Safety first, always.
Severe structural deformation: Bent or twisted frames can compromise the lift’s stability and strength.
Multiple cracked welds: Welds hold everything together. If they’re cracking in multiple places, it’s a sign of serious damage.
Extensive corrosion: Rust eats away at metal, weakening it. If you see rust all over, replacement is the safer bet.
Finding qualified repair services or compatible replacements
When repairs aren’t enough, here’s how to find a pro or a suitable replacement.
Evaluating repair shops: Ask for references, check licenses and insurance, and get estimates from at least three places. A good shop will explain the issue clearly and offer fair pricing.
Selecting a replacement lift: Make sure it’s compatible with your existing clamps and can handle the loads you need. Check ratings, reviews, and warranties to ensure you’re getting quality.
Compatible clamp parts: When buying replacements, match part numbers or consult the manufacturer to ensure they fit your lift. Cheap, incompatible parts can cause more problems down the line.
Conclusion
Get this right and the lift will stay safe, durable, and finish the job without damaging walls or ceiling. The key is to verify the clamp and lift are in good shape, test every function, and only push load within the rated limits after you’ve confirmed solid, repeatable performance.
Make your closing checks in one clear pass: visually inspect for bent parts or wear, confirm set screws and locks are present and engaging, test the clamp and lift mechanisms unloaded, run a light load at a low height to confirm smooth operation, then recheck for any play or drift before proceeding to full height and full load tests. If anything feels odd, stop, reassess, and document what you found. Do not proceed with higher loads until the system behaves predictably. Keep the area clean, wear eye protection, and verify the work surface and supports are stable before each test or lift attempt.
Two common mistakes to avoid are ignoring small wear signs that can multiply under load and exceeding the published load limits or forcing a sticking mechanism instead of diagnosing it. A simple safety rule is never operate a lift that shows misalignment, binding, unusual noises, or creeping height; treat that as a failure and fix it or replace it. If you’re unsure about alignment, or the repair requires disassembly that risks bending a critical rail or thread, stop and seek help. When in doubt, consult a professional rather than guessing, and remember that careful testing in a small, controlled area protects the whole project—and your home. Stay disciplined, stay safe, and stay patient when the lift is involved in your drywall work.
FAQ
How can I tell if the pipe clamp drywall lift is overloaded or at risk of failure?
Look for any bending, flexing, or unusual twisting in the pipe or frame. If the lift feels stiff or hard to move, stop and recheck the load and mounting points. Check the manufacturer label or instructions for the load limits and never exceed them.
What are common signs of misalignment or binding during lifting?
Noticeable binding, jerky motion, or a creak in the mechanism is a red flag. The drywall panel should rise smoothly without tilting or drifting. Stop and inspect the clamps, screws, and track for gaps, wear, or debris.
How do I safely test the lift before lifting drywall overhead?
Perform a dry run with no panel or a lightweight mock-up to verify smooth operation. Check that all clamps bite evenly and that the pipe locks securely in place. Lower slowly and calmly, watching for any slip or change in angle.
What should I do if the clamp slips or the pipe slips during lifting?
Lower the load immediately and stop work. Remove power or release control if safe to do so and reset the clamp tension. Inspect for worn pads, damaged threads, or loose fasteners, then repair or replace before continuing.