
Introduction
Drywall on T&G walls is the process of mounting standard drywall sheets over a tongue-and-groove wall surface to create a flat, paint-ready surface. This setup hides the wooden joints and gives you a clean finish to work with. It’s a hands-on job that mixes framing checks with typical wall finishing steps.
Start by checking the wall for flatness and any obvious high or low spots, then attach the drywall with appropriate fasteners and tape the seams. Look for red flags like loose or squeaky boards, pronounced gaps at joints, or visible bowing in the sheet edges, and address them before finishing. If you’re unsure about how your setup will behave, double-check the manufacturer or local guidelines for fastener patterns and seam treatment.
Key takeaways
- Assess condition of T&G surface; heavy damage or warped panels require repair first.
- Drywall over T&G requires solid fastener plan and consistent spacing per code guidance.
- Protect floor and surrounding finishes; use drop cloths and dust barriers during work.
- Tape and mud properly to avoid sunken joints; feather edges flush with wall.
- Check corners and trims after mud cures; use corner bead where applicable.
- Address red flags early: moisture, mold, or loose panels mean delays.
Table of Contents
- Introduction
- Key takeaways
- Project Overview and When to Choose Drywall over Leaving T&g Exposed
- Pre-Work Assessment and Red Flags to Watch for
- Tools and Materials Checklist
- Preparation: Bringing T&g Walls Ready for Drywall
- Installation Steps: Hanging Drywall over T&g
- Taping, Mudding, and Finishing for a Smooth Surface
- Dealing with Corners, Trim, and Fixtures
- Common Problems, Troubleshooting, and Red Flags After Installation
- Conclusion
- FAQ
Project Overview and When to Choose Drywall over Leaving T&g Exposed
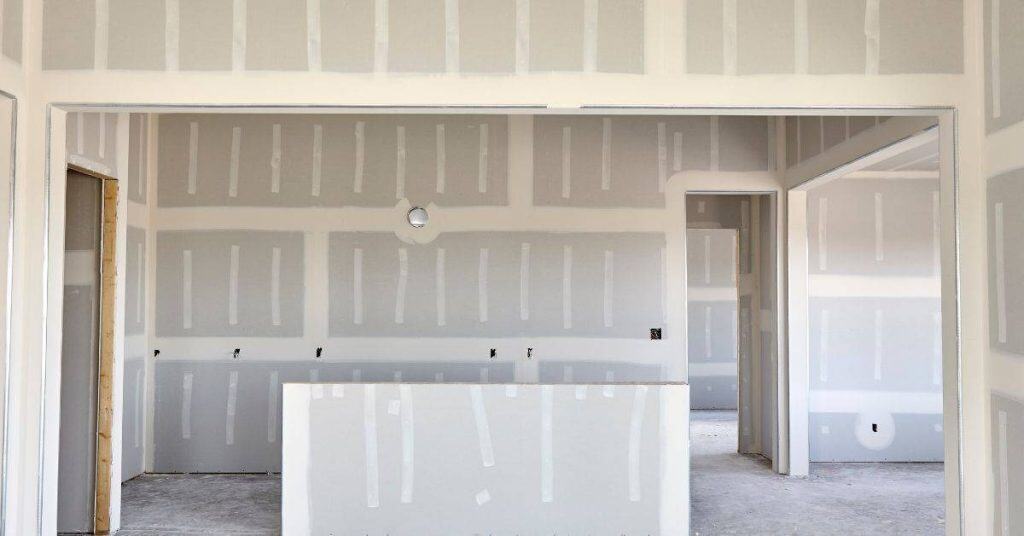
Tongue-and-groove walls are built from interlocking boards that create a continuous surface. They can be decorative or rough depending on age and style. Drywall can smooth the look or add insulation and fire protection.
Covering with drywall hides flaws and can improve energy performance, sound control, and cleanability. Leaving T&g exposed preserves the original character and may be preferable when the framing is sound and the boards are in good condition. Always check local rules, aesthetic goals, and manufacturer guidelines before deciding.
Situations that favor drywalling
Tongue-and-groove (T&g) walls add charm, but sometimes you need a smooth surface or extra insulation. Here’s when to consider drywall:
Modernizing finishes: Drywall lets you update your home’s look with fresh paint or wallpaper. It’s perfect for contemporary styles.
Insulation: Drywall provides better insulation than T&g, helping regulate temperature and reduce energy bills.
Fire rating: Drywall has a higher fire resistance rating. If you’re concerned about safety or need to meet code requirements, drywall is the way to go.
Situations to keep T&g exposed
Tongue-and-groove walls are a feature, not something to hide. Here’s when to leave them visible:
Character and history: If your home has historic charm or rustic appeal, exposing the T&g maintains that character.
Structural considerations: Removing T&g could compromise structural integrity. Always check with a pro before deciding to cover them.
Unnecessary work: If your T&g is in good condition and you’re happy with the look, why go through the trouble of covering them?
Pre-Work Assessment and Red Flags to Watch for
Start with a thorough inspection of the existing T&g walls and surrounding structure. Look for warped boards, water stains, or soft spots that indicate moisture or rot. Check for signs of insect damage, mold, or framing gaps that could affect a drywall installation.
Also note electrical or plumbing behind the boards and any uneven areas that could change scope. If you find major issues, or if the framing looks inadequate, plan for professional input before proceeding. When in doubt, verify with a licensed pro and consult local codes.
Structural and moisture issues
Before you start hanging drywall on T&G walls, it’s crucial to check for any structural or moisture issues. These can compromise the integrity of your walls and lead to costly repairs down the line.
Rot: Check for soft spots in the wood. Tap the wall with a hammer; if it sounds hollow or feels spongy, you might have rot. Inspect closely for any visible signs.
Mold and moisture intrusion: Look for water stains, peeling paint, or a musty smell. These can indicate mold growth or moisture problems. Use a moisture meter to confirm your suspicions.
Hidden utilities and hazardous materials
Before you start installing drywall, it’s essential to know what lies behind the T&G boards. Incorrect material choices can lead to cracking, staining, or weak bonds.
- Wiring: Check for any exposed wires or signs of electrical work. Use a stud finder to locate live wires before drilling. If you’re unsure, call an electrician.
- Plumbing: Look for water supply lines or drain pipes behind the walls. Be careful not to puncture them with screws or nails.
- Lead/PCBs: If your home was built before 1978, it may contain lead-based paint or PCB-containing materials. Test for these before disturbing any surfaces.
Tools and Materials Checklist
Gather basic tools for measuring, cutting, and fastening, plus safety gear like goggles and a mask. Have a utility knife, measuring tape, square, and a drill or screw gun ready. Don’t forget a mud pan, trowels, and a drywall knife for finishing.
Choose the drywall type appropriate for your project and any extra insulation or vapor barrier you may need. Include joint compound, drywall tape, and corner beads. Confirm fasteners and any recommended adhesives or blocking with product labels or manufacturer instructions.
Recommended drywall types and sizes
Choose the right drywall for your project to ensure durability and performance.
- Standard Drywall: 1/2″ or 5/8″. Use 1/2″ for most rooms, 5/8″ for ceilings and high-moisture areas. Skip this and you might end up with sagging or damaged walls.
- Moisture-Resistant (Green-Board): Use in bathrooms, laundry rooms, and kitchens. It’s designed to resist mold and mildew growth. Don’t skip this in wet areas; moisture can cause serious damage over time.
- Fire-Rated (Type X): Required by code in some areas, like between habitable spaces or near fireplaces. Use it where needed for safety reasons.
- Soundproof (Type C): Ideal for shared walls and bedrooms. It reduces noise transfer. Don’t skip this if you want a quieter home.
Quick rule: Always follow local building codes when choosing drywall types.
Fasteners, adhesives, and seam materials
Use the right fasteners, adhesives, and seam materials for a strong, durable drywall installation.
- Screws: Use drywall screws, not nails. They hold better and reduce the chance of popping. Don’t skip this; nails won’t hold as well.
- Construction Adhesive: Apply before hanging drywall for extra holding power. Skip this and your drywall might sag or fall off over time.
- Joint Tape: Use paper tape for most jobs, fiberglass for corners. Don’t mix types; they won’t work together.
- Compound (Mud): Use setting-type compound for the first coat, lightweight for touch-up. Don’t skip this step; it’s crucial for a smooth finish.
Quick rule: Always use high-quality materials to ensure a lasting result.
Preparation: Bringing T&g Walls Ready for Drywall
Begin by cleaning the surface and removing trims or moldings as needed. Address any high or low spots to create a flat plane. If the surface is uneven, plan for furring or other leveling methods as recommended.
Install blocking for fixtures and double-check that the substrate is solid and secure. When in doubt about the proper approach, follow guidance from product labels or professional instructions. This step sets the stage for a stable, lasting install.
Options for creating a flat substrate (furring vs. screwing directly)
Before you start hanging drywall, you need to create a flat surface on your T&G walls. Here are two common methods:
Furring strips: Nail or screw strips of wood (usually 1x3s) horizontally onto the existing T&G. This creates a flat surface for your drywall. Pros include easy installation and it’s great for covering minor imperfections. Cons: It can be time-consuming and adds extra cost.
Screwing directly into studs: If your T&G is securely attached to studs, you can screw through the grooves directly into the studs. This method is faster but requires precise placement of screws to avoid visible fasteners on your drywall. It’s best for surfaces with minimal imperfections.
Dealing with irregularities and insulation upgrades
T&G walls often have gaps, uneven surfaces, or lack proper insulation. Here’s how to address these issues:
Filling gaps: Use joint compound or expanding foam to fill any gaps between the T&G boards. This ensures a smooth surface for your drywall and prevents drafts.
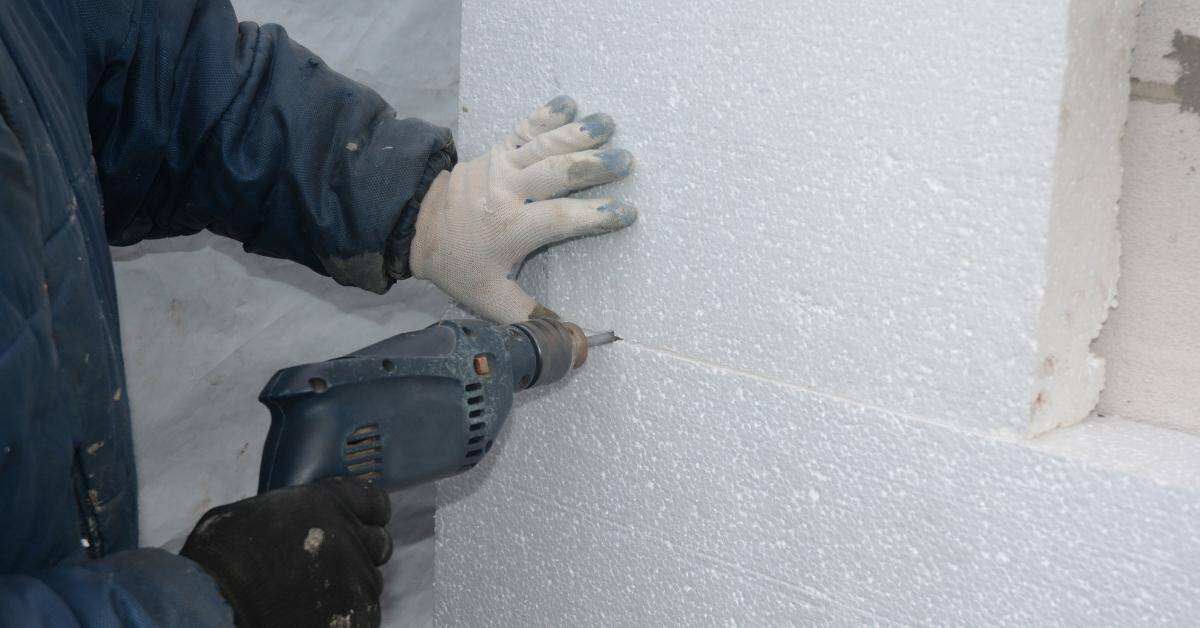
Insulating cavities: If your walls are not insulated, consider adding fiberglass batts or foam board insulation before installing drywall. This improves energy efficiency and reduces noise transfer.
Adding vapor/air barriers: Depending on your climate, you might need to add a vapor barrier (to prevent moisture from entering the wall) or an air barrier (to stop air leaks). Use polyethylene sheeting or foam board for these purposes. Make sure to install them correctly based on local building codes and climate considerations.
Installation Steps: Hanging Drywall over T&g
Plan the panel layout to maximize long edges and minimize waste. Mark and cut boards carefully to fit around openings and corners. Start with fastening panels at the edges and work toward the center with appropriate screws or nails.
Avoid common mistakes like misaligned seams or overfastening. Maintain staggered seams for strength and look. If you’re uncertain about orientation or fastener spacing, consult manufacturer instructions or local codes.
Measuring, cutting, and fitting panels
Start by measuring your walls accurately. Mark the stud locations to help guide your cuts.
For openings like doors or windows, measure from the top of the opening down to the bottom plate. Cut your drywall panel along this line using a utility knife and straight edge.
When working with long panels in tight spaces, consider cutting them into smaller sections before bringing them up to the wall. Be careful not to damage the T&G surface while maneuvering the panels.
Fastening technique and screw pattern
Use drywall screws, not nails. They hold better and won’t pop out over time. Choose a length that’s long enough to penetrate the stud by about 1/2 inch but not so long they go through.
Space your screws every 8-10 inches along the edges of the panel and every 12 inches in the field. This helps prevent the drywall from buckling or warping.
Countersink your screws slightly to create a recess for the joint tape. Be careful not to overdrive or underdrive them – use a drill with a clutch set to help control the depth.
Taping, Mudding, and Finishing for a Smooth Surface
Apply joint tape over the seams to prevent cracking and telegraphing. Use a light first coat to embed the tape and fill gaps, then build up with additional coats as needed. Finish with a feathered edge to blend into the surface.
Sand smoothly between coats and take care to avoid gouges or ridges. Follow the finish level guidance from the drywall product data sheet or manufacturer instructions. If moisture or substrate issues are present, adjust steps accordingly or seek professional input.
Choosing joint compounds and tools
When it comes to taping, mudding, and finishing your drywall, you’ve got two main types of joint compound to choose from: setting-type and ready-mix.
Setting-type compounds are faster-setting, ideal for when you’re in a hurry or working on large areas. They come as powder that you mix with water just before use. But remember, they’ve got a shorter working time, so you’ll need to hustle.
Ready-mix compounds, on the other hand, are slower-setting and easier to work with. They’re great for fine finishing work or when you’ve got all day. No mixing required, just open the bucket and go.
As for tools, you’ll need a mix of tapes, knives, and corner tools:
- Tapes: Paper tape is cheap and easy to use, but it can show through thin drywall. Mesh tape is stronger and won’t show through, but it’s pricier.
- Knives: Start with a 6″ or 8″ wide knife for broad coverage. Then switch to a 10″ or 12″ for final finishing passes.
- Corner tools: For inside corners, use a corner trowel. For outside corners, you’ll need a corner bead and a special tool to apply it.
Always check product labels and manufacturer instructions to ensure you’re using the right compound for your specific job. And remember, safety first – wear gloves, goggles, and a dust mask when handling joint compounds.
Achieving desired finish levels and paint prep
After taping, mudding, and finishing your drywall, you’re ready for the final touch – painting. But first, let’s ensure a smooth surface and optimal paint adhesion.
Finish Levels: You’ve likely heard of finish levels like Level 4 or 5. These refer to the smoothness of your wall. Level 4 is suitable for most homeowners, offering a uniform appearance with minor imperfections visible under close inspection. Level 5 provides a near-perfect surface, ideal for high-end projects or critical areas.
To achieve these levels, check your joint compound and sanding techniques. For Level 4, use a fine-grit sanding screen (120-grit) and lightly sand. For Level 5, opt for a higher grit (220 or above) and sand thoroughly, ensuring no visible trowel marks or imperfections.
Priming: Priming is crucial for paint adhesion and coverage. Choose a primer suitable for your wall type – latex for drywall, oil-based for stains/sealers. Apply two coats, allowing proper drying time between each (check manufacturer’s instructions). This ensures a uniform appearance and better paint durability.
Dealing with Corners, Trim, and Fixtures
Inside and outside corners should be reinforced with proper beads and careful mudding to prevent cracking. When reinstalling baseboards or casings, make clean, tight joints for a finished look. Plan for repositioning or replacing electrical covers and fixtures after drywall is installed.
Take care not to damage wires or plumbing when trimming or mounting. If you’re unsure about clearances or mounting methods, verify with installation guides or a qualified electrician or carpenter. Safety and accuracy at corners matter for a neat result.
Transition details and reveals
When drywall meets existing T&G trim, you need clean reveals to maintain a professional look. Here’s how:
First, use a utility knife to score the paper face of the drywall along the trim line. Then snap it off, using a straight edge for support.
For wider gaps, use a trim bead. Nail or staple it in place, then fill any gaps with joint compound and sand smooth.
Pro tip: For returns, use a return bead to create a 90-degree angle. Apply joint compound, let dry, then sand flush.
Reinstalling or adapting electrical/plumbing fixtures
Before installing drywall, mark and cut out openings for outlets, switches, and plumbing fixtures. Here’s how:
Use a utility knife to score the drywall along your marks. Snap it off, then use a drywall saw to cut out the opening.
Check code clearances. For electrical boxes, that’s usually 1/2″ from the edge of the box to the nearest drywall edge. For plumbing, follow local codes.
Pro tip: If you’re moving or adding fixtures, consult an electrician or plumber first. They can ensure your work is up to code and safe.
Common Problems, Troubleshooting, and Red Flags After Installation
Watch for nail pops, cracking seams, or joint telegraphing, which can indicate framing movement or poor mud application. Moisture blistering or staining may signal hidden leaks or high humidity issues. Settling can create gaps that require attention and resealing.
For any persistent or worse symptoms, document the issue and consult a pro to assess underlying causes. Use the product’s troubleshooting steps from the label or data sheet, and follow local regulations for remediation. When in doubt, seek professional advice to prevent long-term damage.
Detecting and fixing telegraphing and movement
Telegraphing is when the T&G pattern of your drywall shows through the finished surface. It’s usually caused by uneven wall or floor surfaces, not enough furring strips, or using rigid materials like plywood instead of drywall.
Check base compaction. If it’s soft, you might need to re-compact and add more material. Then, add more furring strips or use resilient channels to create a solid, even surface for your drywall.
If the problem is severe, you might need to replace panels. Always check manufacturer instructions and local building codes before making changes. Don’t be lazy; do it right the first time.
Long-term moisture and mold prevention
Moisture and mold can wreck your concrete over time. Here’s what you need to do:
Ventilation is key. Make sure there are no airtight spaces where water vapor can build up. Check your plans or local rules if unsure.
Keep humidity in check. Aim for indoor relative humidity between 30-50%. Use a hygrometer to monitor it. If you find moisture, don’t panic – fix the source and ventilate.
If staining or mold appear, act fast:
- Identify the source (leak, condensation, etc.).
- Clean and dry the affected area thoroughly. Use a solution of water and detergent, then rinse with clean water.
- Apply an antifungal treatment to prevent mold regrowth. Follow product labels for safety.
Conclusion
Getting drywall up over T&g is about doing the prep right, keeping people safe, and delivering a clean, durable finish that won’t shake loose or crack later.
First, verify the situation: check for moisture, rot, or loose boards, confirm you have the right tools and materials, bring the T&g walls to a consistent base, and then follow the hanging, taping, mudding, and finishing steps in a steady sequence. Move methodically, test a small area first, and keep edges and corners tight and square as you go.
Safety comes first—wear goggles and a dust mask, secure ladders, and keep work areas dry. Common mistakes to avoid include skipping the red flags during the pre‑work assessment, overtightening screws or taping too soon, and letting corners or joints gap after mudding. If you encounter persistent moisture, active leaks, structural instability, or electrical work behind the wall, don’t push on; call a professional before you damage framing or wiring.
If things don’t feel right, or you’re unsure about any step, pause and reassess. When you can stand back and see a smooth, true surface that will hold paint and trim without cracking, you’ve earned a solid finish. Stay focused, work in logical passes, and you’ll finish strong.
FAQ
Can I screw drywall directly to T&G boards, or do I need to remove the tongue-and-groove first?
You can fasten into the underlying studs or blocking, not just the face of the T&G. Check that the T&G are securely attached and flat enough to accept drywall. If anything is warped or loose, fix it first or remove the problematic sections.
What should I check for moisture or rot before drywalling over T&G?
Make sure the wall is dry and sound. Look for staining, softness, or mold. If in doubt, follow the manufacturer instructions or local guidelines and address any moisture issue before proceeding.
Should I remove the existing T&G or can I leave it in place when drywalling?
If the T&G is flat, solid, and the room needs a smoother surface, you can leave it. If the grooves are deep, high ridges, or if the wood is warped, removal or replacement may be needed to get a clean finish. Decide based on the surface you’ll be mounting to and the finish you want.
How do I finish around corners and fixtures after installing drywall over T&G?
Use proper corner beads for inside/outside corners and secure fixtures with the correct backing behind the drywall. For tricky spots, double-check edge alignment and follow the drywall compound instructions on the product label. If unsure, consult the manufacturer instructions or local rules for best practices.