
Introduction
Patching plaster after plumbing access holes means rebuilding the damaged wall so it won’t drum when you tap it. Start by carefully removing loose plaster around the hole and cleaning the edge so the patch bonds well. Check the backing and, if needed, install a thin scrim or patching plaster to create a solid base before you mix the patch material.
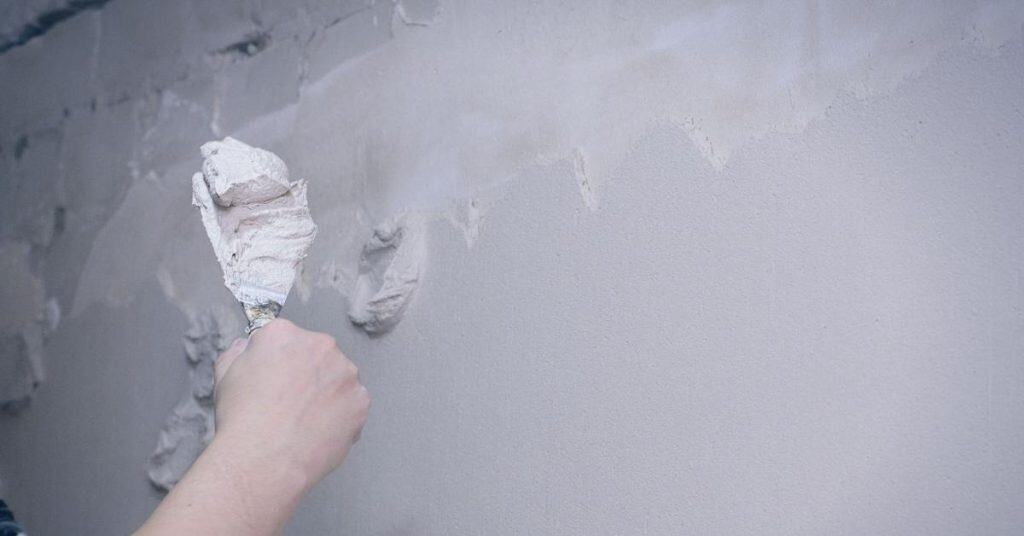
Mix and apply the plaster in thin, workable layers, letting each pass set enough to grip without shrinking. Key the surface lightly and smooth it with a straight edge or float, then feather the edges into the surrounding wall. If the patch drums after drying, recheck the prep, dampen the area, and follow the patching material’s instructions or local rules to adjust.
Key takeaways
- Assess plaster around hole; remove loose material without compromising surrounding structure.
- Secure backing properly to prevent movement and reduce drumming during cure.
- Always shut water and wear eye protection before starting work.
- Mix plaster to a smooth consistency and work in thin, even coats.
- Seal joints with reinforced plaster mesh to minimize hollow sounds.
- Test patch by tapping; listen for dull thud indicating solid, non-drumming.
Table of Contents
- Introduction
- Key takeaways
- Quick Overview and What “Drumming” Means
- Tools, Materials, and Safety Checklist
- Preparing the Access Hole and Surrounding Plaster
- Choosing the Right Backing and Securing It to Eliminate Drumming
- Patching Methods That Resist Drumming
- Sealing, Bonding, and Finishing to Prevent Hollow Sounds
- Testing, Troubleshooting, and Eliminating Remaining Drumming
- Preventing Future Problems and Maintenance Tips
- Conclusion
- FAQ
Quick Overview and What “Drumming” Means
Drumming happens when a patched plaster panel sounds hollow or vibrates with taps after plumbing work. It differs from a solid patch by the noticeable resonance you can hear or feel. The goal is a durable, non-resonant repair that blends with the surrounding wall.
Root causes include an air gap behind the patch, poor adhesion to plaster lath or backing, and loose or damaged lath or backing that cannot carry the patch load. Diagnostic checks involve a thorough knock test across the panel and listening for tone variations. Suspected voids behind the patch should be probed to locate hollow areas and cracks.
Why drumming matters
Drumming in patched plaster is more than just an annoyance. It’s a sign of structural weakness that can lead to bigger problems down the line.
When you tap on a solid patch, it sounds firm and full. But when there’s ‘drumming’, it means there’s air behind the patch, making it sound hollow. This air gap weakens the patch, making it less able to carry loads and more likely to crack or separate over time.
Drumming also affects your home’s acoustics. Hollow patches can amplify noise, making your home feel less quiet and peaceful. In some cases, it can even make your home sound echoey, like a bad recording studio.
In short, drumming is a sign that your patch isn’t as strong or durable as it should be. It’s important to address it to prevent further damage and maintain your home’s comfort and aesthetics.
How this guide is different
Most how-tos stop at ‘apply joint compound’ or ‘use green glue’. But those methods don’t always address the root causes of drumming, and they can be costly in the long run.
This guide goes deeper. We’ll show you how to properly prep your patch area, seal it to prevent air gaps, and use cost-effective materials that still provide long-term durability. We’ll also explain why some common methods don’t work as well as they should.
We’ll walk you through the entire process, from diagnosing the problem to testing your repair for non-resonant sound. And we’ll do it in a way that’s practical and jobsite-real, because we know you’re not just reading this – you’re doing this.
So, if you want a patch that’s strong, durable, and silent, keep reading. We’ve got you covered.

Tools, Materials, and Safety Checklist
Essential tools for cutting plaster and accessing plumbing include pry bars, a utility knife, a saw, a hammer, a rotary tool with cutting attachments, and a clamp set for safe handling of lath. Use power tools with dust collection when possible to keep the work area clean. Have a buddy or helper for safer handling of long lath sections.
Materials include patching plaster or plaster patch, bonding agents, mesh or tape, lath repair materials, and a finish layer suitable for plaster or drywall surfaces. Choose the patch and reinforcement that match the substrate you are repairing. Plan for the right backing and compatible finishes before starting.
Tools and materials (budget and pro options)
Before you start your concrete repair project, use this checklist to ensure you have everything you need. It’s best to gather all tools and materials before starting any work.
- Oscillating tool: For cutting and grinding. Check it has a suitable blade for the task (e.g., wood, metal, or concrete). If unsure, check the product label.
- Putty knife: For applying and spreading materials. Ensure it’s the right size for your repair job. A common size is 4-6 inches wide.
- Plaster patch: For filling small cracks or holes. Check it’s suitable for concrete surfaces. If unsure, check the product label.
- Screws: For attaching backing material. Use concrete screws with a suitable length (usually 1/2″ to 3/4″) and gauge (usually #8 or #10).
- Adhesive: For bonding mesh and backing materials. Check it’s compatible with your chosen patching compound. If unsure, check the product label.
- Mesh tape: For reinforcing large cracks or holes. Ensure it’s wide enough to cover the repair area. Common widths are 1.5″ to 3″.
- Backing material (e.g., plywood): For supporting mesh and patching compound. Check it’s in good condition with no warping or cracks.
- Safety glasses: Essential for protecting your eyes from debris during cutting and grinding.
Quick rule: Always check product labels to ensure you’re using the right materials for your specific repair job. Skipping this can lead to poor adhesion, premature failure of the repair, or even damage to surrounding surfaces.
Safety and plumbing precautions
Before starting any plumbing work, it’s crucial to ensure your safety and protect your fixtures. Use this checklist to prepare your workspace and avoid common pitfalls.
- Turn off main water supply: Locate your main water shutoff valve (usually near the street or where your water line enters your home). Turn it clockwise to close, counterclockwise to open. Check that no water comes out of any faucets in your home.
- Avoid pipe damage: Be gentle when handling pipes. Use pipe wrenches carefully to avoid bending or breaking them. Always support pipes with a bucket or other stable object before loosening connections.
- Protect fixtures: Cover nearby fixtures with plastic bags or towels to prevent debris from entering and damaging them. Secure the covering with tape.
- Wear respirator/eye protection: When working with old pipes, wear a respirator and safety glasses to protect against asbestos, lead, or other harmful particles. Check your respirator’s filter before starting work.
- Secure electrical circuits: If you’re working near any electrical outlets or wires, turn off the power at your home’s main electrical panel. Test the wires with a non-contact voltage tester to ensure they’re safe to touch.
- Check for leaks: Before starting work, inspect all visible pipes and connections for leaks. Tighten any loose connections gently with an adjustable wrench.
- Have a bucket ready: Place a bucket under the pipe you’ll be working on to catch any water that may escape when you loosen the fitting.
- Know your local rules: Check if you need a permit for this work. Some jobs, like replacing supply lines or moving pipes, may require professional help due to local codes.
Quick rule: Always prioritize safety first. If you’re unsure about any aspect of the job, consult a professional plumber before proceeding.
Preparing the Access Hole and Surrounding Plaster
Assess damage and determine how much plaster to remove to reach solid edges. Look for moisture signs, crumbling edges, or hidden damage behind the patch area. Enlarge the opening to a clean shape that provides solid backing and access to supports without ragged edges.
Remove loose plaster back to solid edges so the remaining material bonds to a stable substrate. Clean the area thoroughly and inspect for hazards like lath staples, pipes, or electrical components. Verify backing presence and plan for anchors or reinforcement before patching.
Inspecting the backing and lath
Before you start patching, it’s crucial to ensure your backing is solid. Tap on the plaster around the hole with a wooden stick or handle. You’re listening for a solid ‘thud’, not a hollow sound.
If you find voids behind the plaster, mark them and plan to fill these before applying your patch. This could be as simple as adding some joint compound mixed with fiberglass mesh tape.
Check for any signs of rot or damage in your lath. If found, replace it before proceeding. Use a small pry bar to gently test the strength of the lath and backing.
Protecting plumbing and nearby finishes
Before you start working, protect your pipes. Use painter’s tape to shield any exposed pipe threads or fittings from the dust and debris.
If there are minor leaks, route them temporarily with a bucket and cloth until you can fix the issue properly after patching. Never leave a leak unattended as it could cause further damage.
Be mindful of nearby finishes like paint or wallpaper. Use drop cloths to protect these areas from dust and debris. If you’re using power tools, keep them at a safe distance to avoid damaging these surfaces.
Choosing the Right Backing and Securing It to Eliminate Drumming
Match backing options to the situation: plywood or OSB patch, cleats or splines, metal lath tied to framing, or expanding foam with blocking. Use quick rules of thumb based on plaster thickness, hole size, and pipe location to select a backing. Secure backing with appropriate fasteners and methods.
Edge treatment should integrate with surrounding plaster to prevent drumming. Use feathered joints and careful layering of joint compound to minimize movement at the perimeter. Follow a step by step workflow: prep, install backing, reinforce, test, and plan finishing.
Installing blocking, cleats, or a backer board
To prevent an air gap and keep your patch from ‘drumming’, install internal support. Here’s how:
Blocking: For small holes (under 6″ diameter), use 1×4 or 1×6 blocking. Size it to fit snugly across the hole, then secure with screws into stable framing.
Cleats: For medium-sized holes (6″-12″ diameter), use 1×8 or 1×10 cleats. Space them every 4-6 inches around the hole’s perimeter and secure with screws, ensuring they overlap at least 2 inches.
Backer board: For large holes (over 12″ diameter), use a rigid backer board like plywood or OSB. Size it to cover the hole completely, then secure with screws every 6-8 inches around the perimeter and along any seams.
Using mechanical fasteners and adhesives correctly
Secure your backing to eliminate ‘drumming’. Here’s how:
Screws: Use drywall or wood screws, 1-2 inches longer than the backing thickness. Space them no more than 6-8 inches apart around the perimeter and along any seams. Ensure they’re driven into stable framing.
Nails: Avoid using nails alone as they can pull out over time. If used, ensure they’re at least 1″ longer than the backing thickness and space them no more than 4-6 inches apart.
Construction adhesive: Apply a bead of construction adhesive along the perimeter and any seams before securing with screws or nails. This bonds the patch to the backing for long-term stiffness.

Patching Methods That Resist Drumming
Patch patching challenges come from resonance when the patch material and substrate interact with the wall. Material properties such as stiffness, mass, and bonding influence the outcome. The aim is a patch that does not ring when tapped.
Compare methods for plaster bases, including traditional plaster mix, drywall patches with joint compound, mesh with bonding agents, and skim coatings. Consider how each approach handles different patch sizes and finish requirements. Prepare surfaces, bond properly, and control cure conditions to minimize vibration.
Small holes and cosmetic patches
For tiny holes under 4 inches, like drill bit marks or small pipe stubs, you want a patch that’s stiff but not too heavy to avoid resonance. Here’s how:
Mesh + Bonding Compound: Apply lightweight mesh tape over the hole. Use a flexible, lightweight bonding compound to fill and smooth. This method provides good stiffness without adding much mass.
Preformed Patches: For small holes, use preformed plaster or drywall patches. They’re quick and easy. Ensure they’re well-bonded with joint compound or mastic to prevent drumming.
Large openings and full-panel replacement
When dealing with large holes or entire panels, like gasketed access points, you need a patch that’s strong but also bonds well to the existing substrate. Here’s how:
Drywall/Greenboard Replacement: For large openings, replace with new drywall or greenboard. Use construction adhesive and mechanical fasteners to secure it to the existing lath or studs. Tape and finish with joint compound.
New Plaster Keyed to Backing: If your wall is plaster, use a new piece keyed to the backing. Secure with mastic and mechanical fasteners. Skim-coat with a thin layer of fresh plaster for a seamless look.
Sealing, Bonding, and Finishing to Prevent Hollow Sounds
Plan patch scope by locating hollow-sounding areas and removing loose plaster. Check for moisture or leaks and evaluate whether plaster, lath, or drywall dictates the repair path. Create a path that ensures a solid bond at edges and backing.
Thorough surface preparation includes cleaning, dust removal, and light dampening to reduce suction for bonding. Use a plaster-appropriate bonding agent according to manufacturer instructions. Apply a scratch coat to establish a solid base, then a brown coat if needed.
Best practices for taping and feathering seams
When it comes to taping, you want a strong bond that’ll stand the test of time. Here’s how:
Tape application: Press tape firmly into the joint compound using a taping knife. Make sure it’s fully embedded and there are no air pockets.
Feathering: Apply your first layer thin, reducing thickness as you move towards the edge of the patch. This creates a smooth transition between the patch and existing plaster, preventing weak edges that could vibrate.
Let each layer dry according to product guidelines before applying the next. This usually takes around 24 hours. Be patient; rushing can lead to weak bonds.
Final skim coat and texture matching
The final coat is crucial for a seamless, drum-free finish. Here’s how to get it right:
Matching texture: If your existing plaster has a textured finish, you’ll need to match it. Use a spray-on texture or apply by hand with a hopper and trowel. Start light and build up gradually for an even look.
If your walls are smooth, apply a thin skim coat using a wide taping knife. Work in small sections at a time, keeping a ‘wet edge’ to avoid visible lines.
Sanding: Once dry, lightly sand the patch with fine-grit sandpaper. Be careful not to sand too hard and create thin spots that could drum. Wipe off any dust with a damp cloth before painting or texturing.
Testing, Troubleshooting, and Eliminating Remaining Drumming
Establish a simple testing sequence to locate hollow or low-density patches using knuckle taps or firm taps with a rubber mallet. If available, a vibration probe can help map resonance, then mark the patch area for remediation. Map hollow zones on the surface to guide work.
For each hollow zone, plan corrective actions such as re-backing, re-screwing, or injecting adhesive. Re-test after each step to confirm the sound is stable and the patch is rigid. Address moisture and curing considerations to ensure long-term results.
When to Inject Adhesive or Use Expanding Foam
Injecting adhesive or using low-expansion foam can help fill voids and eliminate drumming. But be careful not to stress plumbing pipes or cause the patch to bow.
Adhesive: Use construction adhesive sparingly, only in small voids. Too much can push against pipes, causing stress. Apply with a caulking gun, filling voids without overfilling.
Expanding Foam: Choose low-expansion foam to avoid excessive pressure on pipes and the patch itself. Apply in small amounts, allowing it to expand naturally into voids. Don’t force it.
Signs That a Repair Needs Professional Help
While DIY repairs are great, some issues require a pro plumber or plasterer. Here’s when to call one:
Persistent Hollow Sound: If drumming persists across a large area despite your efforts, it might indicate a bigger issue like damaged lath or structural problems.
Structural Rot: If you notice soft spots, crumbling plaster, or visible rot in the backing, stop work immediately. This could be a sign of serious structural damage that needs professional attention.
Recurring Moisture: Persistent moisture can lead to mold and further damage. If you’ve patched up leaks before but they keep coming back, it’s time to call a pro.
Inaccessible Pipework: If you can’t reach the pipes to secure them or check for leaks, it’s safer to bring in a professional who has the tools and expertise to handle such situations.
Preventing Future Problems and Maintenance Tips
Provide access panels or service openings that allow plumbing work without compromising patch integrity. Leave clear access and plan for safe serviceability. Consider moisture control to protect repairs from future issues.
Set up a maintenance plan with periodic checks after plumbing work and seasonal inspections. Use durable, water-resistant materials at the access point and document any findings for future repairs. Include signs of trouble to watch for and a simple action plan if issues reappear.
Designing durable plumbing access panels
To prevent future drumming, plan your plaster patches around accessible plumbing access points. Here’s how:
Avoid repeated patch-and-drums: Use removable panel methods like:
- Framed backing with a removable panel.
- Magnetic trim for easy access.
- Recessed access box for a flush finish.
These methods let you service plumbing without compromising patch integrity. Measure and place panels carefully to maintain structural support and acoustic performance.
Long-term inspection and care
Regularly inspect your plaster patches after plumbing work to catch any issues early. Here’s a simple schedule and checklist:
- Post-plumbing (1 week): Check for new cracks, separation, or squeaks.
- Seasonal checks (spring/fall):
- Inspect for water stains, mold, or mildew growth.
- Annual deep check: Tighten any loose screws, reapply sealant if needed, and ensure no moisture buildup.
Quick rule: If you notice new cracking, a muffled drum sound, or water stains, address them promptly to prevent bigger problems down the line. Regular care keeps your patches durable and drum-free.

Conclusion
Getting this patch right isn’t cosmetic only—it stops hollow sounds, locks in moisture, and keeps the wall solid for years. Do the backing and sealing smartly, and you’ll finish without repeats or costly fixes.
Make the patching plan clear in your head and then in your hands: check the size of the hole, choose a backing that fits, secure it solidly, apply the patch with proper bonding, seal the edge, test with a light knock, and then finish with caution. If anything is loose, rattling, or shows a drum after you cure, stop and reassess before you continue; work in small steps and verify each stage as you go.
Common mistakes to avoid include using the wrong backing or not securing it well enough to stop drumming, skimping on adhesion and masking, and rushing the finish before the patch fully cures. Always wear eye and skin protection and shut off water and power when you’re near the work area. If you run into hidden rot, a sizable void, or you’re unsure about the plumbing behind the wall, call a pro rather than guessing—the extra cost is small compared to a repeat patch or bigger damage.
With a solid backing, careful patching, and a deliberate finish, you’ll have a quiet, strong repair that lasts. Stay methodical, test as you go, and you’ll finish confident and mess-free.
FAQ
Should I remove damaged plaster around the plumbing access hole before patching?
Yes. Remove loose and damaged plaster around the hole so your patch bonds to solid material. Leave a clean, square or slightly bevelled edge to help the new patch grip.
What’s the best way to prepare the area for patching?
Chisel back to sound plaster and clean dust from the surface. Dampen the surrounding area lightly so the patching material bonds without drying too fast. Protect nearby surfaces to keep dust and mortar off them.
How do I mix and apply plaster for a durable patch?
Follow the manufacturer’s directions on the plaster bag for mixing consistency. Apply in layers, keeping each layer damp to prevent cracking, and press the patch to eliminate air pockets. Don’t rush; let each layer set before applying the next.
What finishing steps help prevent hollow or “drumming” sounds after patching?
Finish the surface smooth and flush with the surrounding plaster, using light passes to avoid gouging. Feather the edges and cure the patch properly; if you see tiny hollows, fill and re-sand carefully. Seal the patch to protect it from moisture and future damage.