

Introduction
Outdated paint colors are colors that no longer fit your space or design plan and should be refreshed. Start with a cohesive design plan, then test color ideas in small patches to see how they read with existing materials and lighting.
Test samples in different lighting conditions—morning, afternoon, and artificial light—to see how a color shifts. Consider the sheen and finish, since gloss levels can change how bold or muted a color appears and affect durability. Always check product labels and manufacturer guidance for prep, compatibility, and local rules before committing to a full repaint.
Key takeaways
- Finish a cohesive design plan before selecting paint to guide color choices.
- Test samples in natural and artificial lighting to see true color shifts.
- Understand color notation and swatch labeling to compare shades accurately.
- Consider sheen and surface texture when applying paint to avoid surprises.
- Use budgeting tips and test areas before committing to repainting.
- Leave a Reply Cancel reply—engage feedback, compare opinions, and resolve indecision.
- Wear proper respirator and ventilate during testing to protect indoor air.
Table of Contents
- Introduction
- Key takeaways
- Why Outdated Paint Colors Matter
- Start with a Cohesive Design Plan — Don’t Pick Paint First
- Understanding Paint Swatches and Color Notation
- How to Test Paint Samples Properly Before Committing
- Choosing a Timeless, Versatile Palette (Avoid Trends That Age)
- Dealing with Indecision, Anxiety, and Differing Opinions
- Paint Sheen, Finish, and Surface Considerations
- Budget-Friendly Testing and Repainting Tips
- Conclusion
- FAQ
Why Outdated Paint Colors Matter
Old or trendy paint choices can date a home and influence how buyers/readers perceive value. They can also affect daily mood, making spaces feel heavier or cooler than intended. You’ll often see telltale signals in living areas and kitchens as hint markers to watch for.
Common indicators include avocado or olive greens, mauve undertones, harvest-gold or peach hues, heavy wood-toned cabinetry, and walls with over-saturated gloss. Finishes and trim cues—like high-gloss sheens or mismatched trim—can scream dated if not paired with softer neutrals. Start a simple audit: survey walls and trim, note rooms with several dated elements, and collect a few swatches to test in natural light before deciding what to update first.
Signs a color is outdated
Outdated colors can be spotted by their distinct visual clues. Here’s what to look for:
Yellowing whites: Once pristine white walls now have a yellow tinge, often due to age and exposure to sunlight.
High-gloss 1990s neutrals: Glossy paint was popular in the ’90s. Now it can make spaces feel dated and cold.
Heavy mauves and dated accent walls: These bold choices were trendy decades ago but now scream ’80s or ’90s rather than contemporary.
The real cost of keeping outdated paint
Outdated paint colors can hit your wallet in more ways than one. Here’s how:
Aesthetically, outdated colors can make a home feel dated and uninviting, affecting daily mood and perceived value.
Financially, when it comes time to sell, outdated paint can pose challenges during staging and may even lower resale appeal. Buyers often prefer neutral backdrops they can easily personalize.
Moreover, repainting later will be more expensive if you’ve let the problem fester. Old paint may require extra prep work or multiple coats to cover up.
Start with a Cohesive Design Plan — Don’t Pick Paint First
Begin with a design framework that reflects the architecture, lighting, and built-in features. This helps you set constraints and a natural vibe before choosing colors. You’ll save yourself from a scramble of mismatches later.
Identify 1–2 focal elements or traffic patterns, and map how people move through the space to guide color choices. Choose major textiles and large furniture first, so rugs, curtains, and upholstery anchor the palette. Develop a paint strategy that reinforces the plan across walls, accents, and ceilings, then add a practical checklist to prevent costly missteps. Include quick prompts to validate lighting, finishes, and long-term usability.
Identify your room’s “crucial element”
The first step in creating a cohesive design plan is to find the anchor, or ‘crucial element’, for your color scheme. This could be a statement piece of furniture like a sofa, a built-in unit, a striking artwork, or even the flooring.
Choose something that stands out and represents the overall style you’re aiming for. It should be a reflection of the room’s personality and the colors you want to incorporate.
Pro tip: Start with the largest or most prominent item in the room. This will help create a visual hierarchy and ensure your color choices complement it effectively.
Create a simple color hierarchy
A well-designed space should have a clear color hierarchy, much like a well-built structure has a strong foundation. This means assigning roles to your colors – primary, secondary, and accent.
The primary color is the dominant shade in the room, usually covering the largest surface areas like walls. The secondary color supports the primary, often used for larger furniture or textiles. Finally, the accent color adds pops of contrast and interest.
To create balance and flow between rooms, consider using the same primary color throughout adjacent spaces, then vary the secondary and accent colors to reflect each room’s unique function and style.
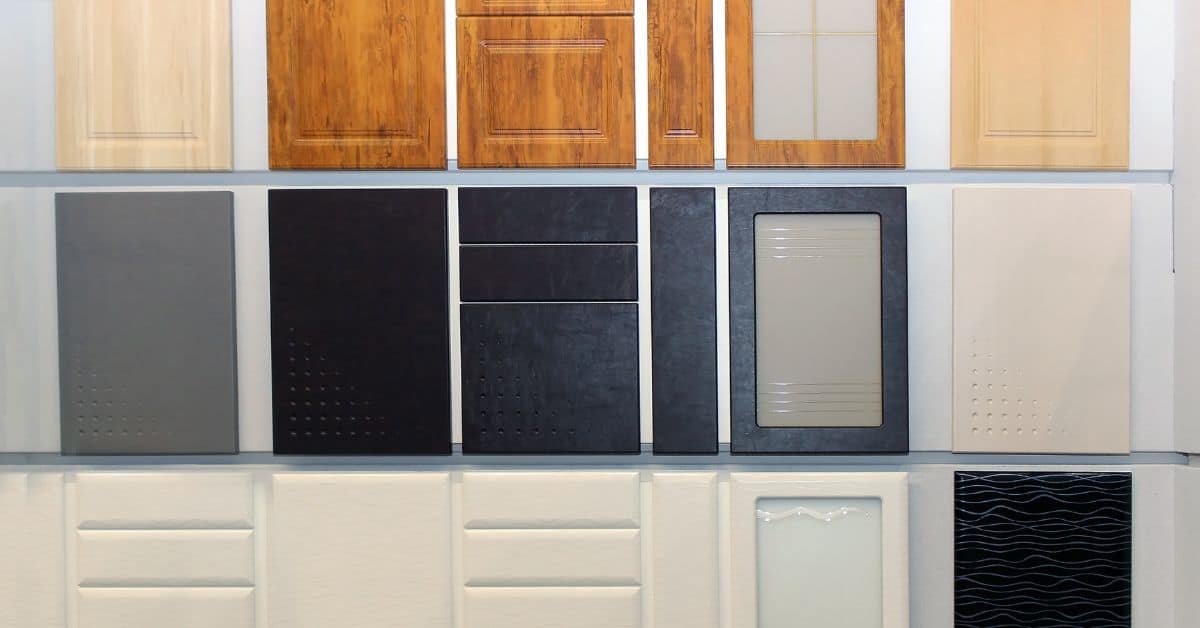
Understanding Paint Swatches and Color Notation
A paint swatch should show brand, color name or code, and finish, and you’ll want that context for concrete projects. Undertones matter because lighting and adjacent surfaces push perceived warmth or coolness in different directions. A tiny chip can mislead you if you don’t compare full-sized swatches.
Know vendor color notation and codes, and how finish and clear labeling play into your choice. Texture, glaze, and gloss level can skew what you see on a small chip, so view full-size samples whenever possible. Use a simple workflow: compare several chips, read the manufacturer’s notes, and check dry-time and finish recommendations before committing to a color.
Undertones, value, and chroma explained
A paint’s undertone is its base color – warm (reds, oranges), cool (blues, greens), or neutral. It affects how a color looks under different lighting.
Value is lightness/darkness. A high-value color is light; low value is dark. It can make a room feel bigger or smaller.
Chroma is saturation – how intense the color is. High chroma colors are vibrant, low chroma are muted. They can change the mood of a room.
Comparing brands and color matches
Brands have different base pigments. A ‘white’ from one might look yellowish in another. Always compare chips side by side.
Factory mixes can vary. If you need a specific match, ask for a custom mix or test pot first. It’s worth the extra cost to avoid repainting.
Pro Tip: Some stores offer color matching services. Use them if you’re unsure about a match.
How to Test Paint Samples Properly Before Committing
Set clear testing goals so you know what real-life color looks like with your lighting and sheen. Record results clearly to compare options later, not just on a single swatch. This avoids late surprises after you’ve painted.
Use a mix of sample types: wall swatches, peel-and-stick cards, painted squares in your chosen sheen, and a small quart for broader patches. Place them in multiple rooms with varied daylight and artificial light, including different background trims. Keep notes and photos to guide a final choice without redoing large areas.
Step-by-Step Process
The following steps guide you through testing paint samples properly before committing to a color. This process ensures you make an informed decision, saving time and money in the long run.
- Preparation: Gather your materials – wall swatches, peel-and-stick samples, paint, brushes, tape, labels, and a notebook for recording results. Ensure good ventilation and safety gear (gloves, goggles).
- Safety Check: Test a small patch of each sample on an inconspicuous area to check for adverse reactions with existing paint or wall materials.
- Sample Application: Apply samples using the methods mentioned earlier – swatches, peel-and-stick, painted squares in desired sheen. Label each clearly with color name and location.
- Main Work: Place samples on at least two walls per room, view them at different times of day, and test with all light sources on/off to see color shifts.
- Observation & Documentation: Observe samples at key intervals – morning, midday, evening, under artificial lighting. Note how color shifts with light, how it looks with adjacent trim, and how texture affects appearance. Photograph with consistent framing for later comparison.
- Decision Making: After 48-72 hours of living with the samples, use your checklist or rubric to rate hue accuracy, warmth/coolness, and compatibility with existing furnishings. Narrow down to 2-3 finalists before making a decision.
- Cleanup & Final Checks: Remove or repaint samples as needed, ensuring no damage is left behind. Double-check your final choice under various lighting conditions before proceeding with painting.
Best practices for sample placement and lighting checks
To get accurate readings of your paint samples, it’s crucial to place them in strategic locations and observe them under different light conditions.
Paint samples on at least two walls per room, preferably opposite each other. This helps you see how the color interacts with natural and artificial light throughout the day.
View your samples at key intervals – morning, midday, evening – to understand how they change with varying natural light. Additionally, test them under all artificial lighting conditions in the room to ensure they look good when the sun goes down.
Consider placing samples near windows with different exposures (north/south) and on walls with varied backgrounds to reveal undertones. This comprehensive approach helps you make a well-informed decision about your paint color.
Size, finish, and viewing timeframe
Choosing the right size, finish, and viewing timeframe for your paint samples ensures you get a true representation of what the color will look like on your walls.
Use wall swatches or painted squares that are at least 2′ x 2′ to accurately see how the color interacts with its surroundings. For larger rooms, consider painting entire walls or using peel-and-stick samples for a more realistic view.
Test your samples in the final sheen you plan to use. Different sheens can dramatically change how a color appears, so it’s essential to test them side by side if possible.
Live with your paint samples for 48-72 hours before making a final decision. This timeframe allows you to see how the color looks at different times of day and under various lighting conditions. It also gives you a chance to grow accustomed to the color, helping you make an informed choice that you’ll be happy with for years to come.
Choosing a Timeless, Versatile Palette (Avoid Trends That Age)
Start with timeless neutrals as foundations and safe accent colors that work across spaces, finishes, and lighting, steering clear of passing fads. A good base helps every room feel cohesive even as decor changes.
Explore versatile color families and pairings, such as cool neutrals with crisp whites or warm neutrals with creamy whites, plus navy or charcoal as anchors. Test strategies include large swatches in multiple wall areas and observing daylight versus artificial light. When modernizing, consider repainting key accents, swapping textiles or trim, or updating hardware instead of a full repaint, and choose finishes with durability and washability in mind.
Neutral systems that stand the test of time
When selecting timeless neutrals, consider two main categories: warm and cool. Warm neutrals like beige, greige, or warm gray have a cozy, inviting feel. They pair well with natural wood tones, brass, or gold hardware.
Cool neutrals such as cool gray, taupe, or light beige create a crisp, modern atmosphere. They complement stainless steel, chrome, and other cool-toned metals. Remember, the key to longevity is matching your neutrals to your room’s existing finishes.
Test different neutral shades on large swatches in various lighting conditions to ensure they work with your space’s natural light and artificial lighting at night.
Using accents and accessories to update (without repainting)
Before you grab a paintbrush, consider updating your room’s feel with textiles, rugs, art, and hardware. Swapping out throw pillows, curtains, or area rugs can instantly shift the room’s color palette and style.
Artwork and decorative accents in updated hues can also modernize a space. For instance, if you’re aiming for a coastal vibe, swap out heavy drapes for light, airy sheers and add some seashells or driftwood decor.
Hardware is another easy update. Swap out dated cabinet pulls and knobs with sleek, modern ones to give your room an instant facelift without the mess of painting.
Dealing with Indecision, Anxiety, and Differing Opinions
Decision fatigue comes from too many options and endless variations. A strict, limited-choice frame—such as a short list of palettes—helps you move toward a decision. Timed decisions also prevent overthinking from stalling progress.
Use constructive feedback methods by asking the right people and avoiding noise or unsolicited opinions. Plan mediation steps for conflicting tastes, like neutral baselines, weighted voting, or testing blocks on walls to compare options. Emphasize test-first results with lighting considerations and clear decision criteria, and keep a simple habit—the habit of documenting color decisions—to keep debates manageable.
Practical rules to reduce overwhelm
When you’re feeling overwhelmed by color choices, remember these practical rules:
Limit your options. Stick to a palette of 3-5 colors. Any more and it’s just too much.
Use a color hierarchy. Prioritize your room’s crucial element – that one thing that’ll catch the eye first. Choose your main color from there, then pick supporting colors based on that.
For final picks, do a quick pros/cons test. List out what you like and dislike about each color. It helps clarify your thoughts and makes decision-making easier.
When to hire a pro or use online color consultation
There are times when it’s worth getting professional help with your colors:
Complex spaces. If you’ve got a room with lots of architectural features, different lighting sources, or it’s just plain tricky, consider hiring an interior designer. They can provide on-site consultations and tailored advice.
Remote color services. If you’re not ready to commit to a full design service, online color consultation platforms can be a good middle ground. For a fee, they’ll provide virtual color recommendations based on your room’s details and photos.
Expect to provide detailed info about your space – measurements, lighting conditions, existing colors, etc. The more accurate the info, the better their advice will be.
Paint Sheen, Finish, and Surface Considerations
Sheen changes how light interacts with color, affecting depth and perceived tone. Flat, eggshell, satin, semi-gloss, and gloss each respond differently under daylight and artificial lighting.
Choose sheen based on room use and surface: kitchens, bathrooms, living areas, trim, and cabinets each have best-fit options, with moisture-prone areas often needing higher durability. Don’t skip priming or surface prep, as adhesion primers and repairs can shift final color and sheen. When testing, patch test with the same sheen and compare under natural and artificial light to avoid drift after application.
Matching sheen to room function
Choose a paint sheen that complements the room’s purpose and the activities that happen there. Here are some practical guidelines:
Living Spaces (Flat/Eggshell): These rooms need a forgiving, easy-to-clean finish. Flat or eggshell sheens hide imperfections well and don’t reflect too much light, making them ideal for walls in living areas.
Kitchens & Bathrooms (Satin/Semi-Gloss): High-traffic zones like kitchens and bathrooms require a more durable, washable finish. Satin or semi-gloss sheens are easier to clean and maintain than flat or eggshell finishes.
The trade-off is that they reflect more light, so they’ll show imperfections more easily. But for these high-use areas, the extra durability is usually worth it.
How surface texture and previous paint affect color
The texture of your walls and the existing paint can significantly impact how your new color appears. Here’s what you need to know:
Glossy or Textured Walls: These can change the perceived color, making it appear lighter or darker than it would on a flat, smooth surface. For example, a glossy wall might make a color look more vibrant, while a textured one could dull it.
To mitigate this, consider sanding down glossy surfaces and priming textured ones before painting. This helps create a consistent base for your new color to adhere to and ensures the final result is as expected.
Existing Paint: If you’re painting over old paint, make sure it’s in good condition and well-adhered. Otherwise, you might end up with peeling or flaking, which can affect the sheen and hue of your new color. Always test a small area first to ensure compatibility.
Budget-Friendly Testing and Repainting Tips
Adopt budget-friendly testing methods by using affordable tester pots, sample cards, or leftover paint from other projects, and compare colors under real room lighting. Consider a quick ROI check to gauge value without committing to full cans.
Plan practical test zones and partial repaint strategies: pick representative panels or a single accent wall, apply 1–2 coats of each color, and document results with photos and notes. Determine how many square feet to cover and extend tests to nearby areas with minimal disruption. DIY work is often feasible for patch prep and rolling, while larger runs or high ceilings may benefit from a pro. Estimate total paint needs with room dimensions, add a safe buffer, and keep leftover paint in the same batch to avoid tone mismatch. Finally, maintain a simple documentation process to record color names, finishes, lighting, and final decisions, plus cleanup and re-testing plans for a future refresh.
Tools and materials checklist for DIY testing
Before you start, gather these essentials to make your color testing a breeze.
- Sample cans/peel-and-stick: Buy small tester pots or use leftover paint from previous projects. A little goes a long way for testing.
- Brushes/mini rollers: Use these to apply the samples. Mini rollers help achieve an even finish.
- Painter’s tape: Mask off areas to keep your tests neat and contained.
- Drop cloths: Protect floors from drips and spills.
- Measuring tape: Accurate measurements help estimate paint quantities later.
- Pencil and paper: Jot down notes about each color’s appearance in different lights.
- Timer (optional): Set a reminder to check colors at different times of day.
- Clear, well-lit area: Choose a spot with natural light for accurate color viewing.
Quick rule: Don’t skip measuring. It’s crucial for estimating paint needs later on.
Safe budget ranges and when to spend more
When it comes to paint, you often get what you pay for. Here’s how to navigate the price spectrum.
For most interior walls, mid-range paints (around $20-$40 per gallon) offer a good balance between quality and affordability. They typically provide better coverage and durability than cheaper options.
Durability matters. If you’re unsure about product quality, check the finish’s durability rating. It should be clearly stated on the label or in the product description.
For high-traffic areas or surfaces that need to withstand frequent cleaning (like kitchens and bathrooms), consider splurging on a premium paint ($40-$70 per gallon). They often have better stain resistance and washability. But remember, you can still find great options in the mid-range.
Always verify prices locally. Online deals might not beat out sales or discounts at your neighborhood hardware store.
Conclusion
Set up a solid plan first, test early and often, and stay focused on safety so the finish lasts and your home looks right without costly mistakes. A timeless palette combined with careful testing minimizes drama and protects surfaces.
When you finish, keep it simple: confirm you have a cohesive plan, pick a few sample colors, test them on small wall patches with the correct sheen, note how they look at different times of day, and decide before you buy any gallons. Work in a calm order: prep the space, test in the real light, compare with your design plan, and then commit in controlled steps rather than rushing to cover the whole room.
Common mistakes to avoid are choosing color first without a plan, skipping proper sample testing or ignoring sheen and surface compatibility, and overcorrecting after one opinion. Follow the safety basics: ventilate, wear a mask if dust or sanding is involved, protect floors and cabinetry, and test on a small area before committing to a full repaint. If you see peeling, suspect lead paint in older homes, or you’re dealing with large exterior areas, call a pro rather than push ahead alone. When you move forward with confidence and care, you’ll finish with a durable, timeless look that you can live with for years.
FAQ
How do I pick colors after I’ve established a cohesive design plan?
Start with neutral base colors that won’t compete with your furniture and flooring. Add accent colors in small doses so they don’t overwhelm the room. Always check the paint label for tinting limits and follow manufacturer instructions for mixing and application.
Test large swatches on the wall to see how they play with your design plan, not just on a sample card. If unsure, compare swatches in the room at the same time of day you’ll use the space. Local rules or guidelines aren’t usually the issue here, but follow the label for any restrictions.
How should I test paint samples in different lighting conditions?
Put samples on multiple walls if possible and observe them in morning, afternoon, and evening light. Use natural light as a baseline and supplement with your room’s artificial lighting. Read the product label for recommended cure times before judging finish and color in low light.
Keep a color journal or photo notes to track how each option changes as the light shifts. Avoid making final calls after only artificial light or on overcast days. If you’re unsure, compare how the color looks next to your trim or cabinetry in the same lighting.
What about the psychological effects of color on mood and energy?
Color can subtly influence how a space feels—calm, energized, cozy, or formal. Cool colors tend to recede and can feel more serene; warm colors can feel more inviting but may feel busy if overused. Check color psychology guidance and test your chosen hues in the actual room before committing.
Use larger rooms with bolder accents sparingly to avoid a heavy atmosphere. If you’re unsure, start with a safe, neutral backdrop and add color only where you want emphasis. Always verify any claims with manufacturer instructions and your own testing data.
Why is sheen important and how do I choose it?
Sheen affects how color looks from different angles and how durable the surface will be. Lower sheens (matte/eggshell) hide flaws better; higher sheens (semi-gloss/gloss) are easier to clean but show imperfections. Check the product data sheet for recommended sheens by room and surface type.
Match sheen to use: living spaces and bedrooms usually do well with softer sheens; kitchens and bathrooms benefit from higher wipeability. If in doubt, test the finish on a sample panel in the actual room to see how it reflects light.