
Introduction
Preparing glossy surfaces for painting can be a time-consuming process, but understanding the timeline and breaking it down into manageable steps can make all the difference. Whether you’re using a liquid deglosser or sanding, knowing how long each step takes is crucial to planning your project effectively.
In this guide, we’ll walk you through the prep process with a clear timeline, helping you understand when to use deglossers and when to sand, and how much time to allocate for each task.
The Prep Timeline: Deglossers vs Sanding
Preparing glossy surfaces involves several steps that require careful timing. Here’s a detailed timeline comparing the use of liquid deglossers and sanding:
- Surface Inspection & Cleaning (15-30 minutes): Inspect your surface for any damage, grease, or dirt. Clean it thoroughly to ensure proper adhesion.
- Deglosser Application (10-20 minutes per coat + drying time): Apply the deglosser according to the manufacturer’s instructions, usually with a brush or roller. Allow it to sit for the recommended time (usually 15-30 minutes), then wipe off excess and let dry (typically 1-4 hours). Repeat if necessary.
- Sanding (20-60 minutes): Start with a lighter grit sandpaper, gradually moving to coarser grits. Sand lightly and evenly, being careful not to gouge the surface. Wipe away dust between grits.
- Deglosser or Sanding: Final Check & Prep (15-30 minutes): After deglossing or sanding, check for a uniform dull finish. Wipe away any remaining residue or dust before priming.
- Priming & Painting (Varies): Once your surface is prepped, apply primer and let it dry according to the manufacturer’s instructions. Then, proceed with painting.
Total time varies depending on the size of the area, the condition of the surface, and whether you’re using a deglosser or sanding. However, understanding this timeline will help you estimate your project duration more accurately.
Key takeaways
The prep process significantly impacts your overall painting schedule. Allocating sufficient time for each step ensures a durable, long-lasting paint job.
- Deglossers remove gloss without aggressive abrasion; follow label instructions and ventilation.
- Sanding yields tooth but can gouge; choose appropriate method and stop at edges safely.
- Deglosser method suits tight timelines; sanding needed on greasy surfaces or difficult coatings.
- Always test adhesion on a hidden area before full priming and painting.
- Protect nearby surfaces and wear gloves, goggles, and a mask during prep.
- After prepping, verify dull uniform sheen and clean dust before priming.
Table of Contents
- Introduction
- Key takeaways
- Why Prepping Glossy Surfaces Matters
- Overview: Deglossers Vs Sanding — Pros and Cons
- When to Choose Deglosser Vs When to Sand
- Tools and Materials Checklist
- Step-by-Step: Using a Liquid Deglosser Safely and Effectively
- Step-by-Step: Sanding Glossy Surfaces (Manual and Power)
- Checking Readiness: Visual and Tactile Checkpoints
- Priming and Painting After Prep
- Conclusion
- FAQ
Why Prepping Glossy Surfaces Matters
Glossy surfaces resist paint adhesion, so prep work is essential for a durable finish. Poor adhesion can lead to peeling, flaking, and blistering after the project is done.
Expect a smoother, longer-lasting result when you aggressively prep to remove the gloss and create a matte, key-ready surface. This sets the stage for even coverage and a professional look that lasts.
How Gloss Affects Paint Adhesion
High-gloss surfaces are smooth and slick, which makes it tough for paint to stick. They’ve got a low surface profile – that’s the tiny peaks and valleys on your wall. Less surface area means less room for paint to grab onto.
Glossy surfaces also have a chemical finish that repels water-based paints. This is why you’ll see poor adhesion, even if you think you’ve sanded enough. It’s not just about the physical grip; it’s about the chemistry too.
To make paint stick, we need to change the surface – roughen it up a bit and break down that glossy finish. This is where deglossers and sanding come in. They give paint something to grab onto and help it bond with the surface.
Common Problems From Inadequate Prep
Skipping or rushing through prep work can lead to a world of trouble. You might end up with paint that peels, flakes, or blisters – no one wants that.
Insufficient deglossing or sanding leaves behind smooth patches where paint won’t stick. Over time, these spots can start to peel, especially in areas with high humidity or temperature changes. It’s like when you don’t prime your walls before painting; the paint just doesn’t want to stay put.
Another issue is uneven sheen. You’ll see shiny spots where the glossy finish still shows through. This looks unprofessional and can be tough to fix later on. Brush marks might also show up more easily on inadequately prepped surfaces, making your paint job look sloppy.
Overview: Deglossers Vs Sanding — Pros and Cons
Liquid deglossers work chemically to dull and prepare the finish without heavy abrasion. They are faster for flat panels and tighter spaces but may require multiple coats or follow-up cleaning.
Sanding physically abrades the surface to create tooth for primer. It works across a wider range of finishes but can generate dust and needs careful edge work to avoid gouges.
Pros and cons of using a liquid deglosser
A liquid deglosser is a quick, easy way to prep glossy surfaces for painting. It’s great for detailed moldings and hard-to-reach areas.
Pros
- Fast application and drying time
- Easy to use, just wipe on and wipe off
- Great for intricate details and moldings
- Reduces the need for heavy sanding
- Minimal dust compared to sanding
Cons
- Strong fumes, require proper ventilation
- May not completely remove gloss on all surfaces
- Compatibility issues with certain paints and primers
- Can leave a residue if not properly removed
A liquid deglosser is ideal when you need speed and detail, but it might not be enough for heavily glossed or non-porous surfaces.
Pros and cons of sanding (manual and power)
Sanding, whether by hand or with a power tool, provides reliable mechanical tooth for paint adhesion.
Pros
- Creates a consistent, uniform surface texture
- Reliable method for removing gloss and preparing surfaces
- Offers control over the level of aggression (light to heavy sanding)
- Can be used on various surface types
- Power tools speed up the process significantly
Cons
- Labor-intensive, especially for large areas
- Generates a significant amount of dust
- Risk of damaging surfaces if not done carefully
- Requires proper safety equipment (respirator, goggles)
Sanding is best suited when you need reliable surface preparation and don’t mind the extra effort. It’s also great for larger, flat areas.
When to Choose Deglosser Vs When to Sand
Choose chemical deglosser for smooth, flat surfaces or when you want to minimize dust and scuffing. Check the product label for surface compatibility and safety notes before use.
Opt for sanding when the finish is thick, contains contamination, or when you need a durable key on complex profiles. Verify your surface type and edges match the sanding approach in the manufacturer instructions.
Best scenarios for deglossers
Deglossers shine when you’re dealing with thin topcoats. They’re perfect for quick jobs and intricate profiles where sanding might be tricky or time-consuming.
Verify these before you start: the surface is clean, dry, and free of any wax or polish. Also, check if the existing finish can handle a deglosser – some may not react well.
Deglossers won’t level surfaces or remove thick buildup. They’re more about preparing the surface for better paint adhesion rather than heavy-duty prep work.
Best scenarios for sanding
Sanding is your go-to when you’ve got thick buildup, glossy enamel, or areas needing leveling. It’s a powerhouse for heavy-duty prep work.
Ideal situations include: preparing bare wood, removing old paint, stain, or varnish, and smoothing out rough spots. Sanding gives you control over the surface – you can level it, remove imperfections, and create a smooth base for painting.
However, sanding isn’t always quick or easy. It generates dust, requires proper safety gear, and may take longer than using a deglosser. But when you need serious prep work done, sanding is the way to go.
Tools and Materials Checklist
Put together basic PPE like eye protection and a mask, plus cleaning supplies. Include a deglosser or solvent and the appropriate sandpaper grits for your project.
Also gather sanding blocks or a powered sander, tack cloths, and a compatible cleaner or solvent. Always confirm product data sheets or labels for usage specifics before starting.
Safety gear and ventilation needs
Before you start, make sure you’re equipped to handle chemicals and dust safely.
- Respirator: Use a P100 respirator for sanding and a vapor respirator for deglossers. Always follow manufacturer’s instructions.
- Gloves: Wear chemical-resistant gloves when handling deglossers, and dust masks or respirators during sanding.
- Eye protection: Use safety glasses with side shields to protect from debris and chemicals.
- Ventilation: Ensure your workspace is well-ventilated. For sanding, use a HEPA vacuum or wet sand to minimize dust.
- Avoid: Never sand without proper ventilation or use deglossers in unventilated areas.
Quick rule: Always prioritize safety first. Don’t skip protection, no matter how small the job seems.
Paint-ready materials and primers to have on hand
Having the right paint and primer ensures a smooth finish. Here’s what you need:
- Primer: Choose an oil-based or water-based primer that bonds well with glossy surfaces, like Zinsser B-I-N or Kilz Premium.
- Adhesion promoter (optional): For tough cases, use a bonding primer like Bulls Eye 1-2-3 to enhance adhesion.
- Paint: Select a paint compatible with your chosen primer. Check labels for compatibility and recommended surface preparation methods.
- Tack cloth: Use a tack cloth to remove dust before painting. Never use a dry cloth as it can leave lint behind.
Quick rule: Always check paint and primer labels for compatibility with your chosen prep method (deglossing or sanding) and surface type.

Step-by-Step: Using a Liquid Deglosser Safely and Effectively
Start with a clean surface and follow the deglosser’s instructions for application. Work in manageable sections to avoid streaking and overlap neatly.
Finish by wiping away residue and inspecting for a dull, matte look. Ensure the surface is dry and ready for primer according to the product instructions.
Step-by-Step Process
This step-by-step guide walks you through using a liquid deglosser safely and effectively to prepare glossy surfaces for painting.
- Wear safety gear: gloves, goggles, and a respirator. Ventilate the area with fans or open windows.
- Clean the surface: remove dust, dirt, and grease using mild soap and water or a suitable cleaner. Let it dry completely.
- Shake the deglosser can well. Apply it to a small area (about 3×3 feet) at a time using a paintbrush or roller.
- Work quickly: use a clean, damp cloth or pad to rub the deglosser into the surface in circular motions. Keep the cloth damp and wring it out frequently.
- Check for matteness: after about 15-30 seconds, check if the surface is no longer glossy but has a dull, matte finish. If not, continue rubbing until it does.
- Let it dry: allow the treated area to dry completely before moving on to the next section or applying primer (usually takes 1-2 hours).
- Inspect for imperfections: check for any missed spots or areas that still appear glossy. Re-treat if necessary.
- Prime and paint: once the entire surface is matte, apply a suitable primer and let it dry before painting.
Prep and Application Technique
Proper preparation and application technique ensure even coverage and effective deglossing. Here’s how to do it right:
Start with a clean surface, free of dust and debris. Use a suitable cleaner if necessary.
For application, use high-quality pads or rags designed for liquid deglossers. Work in small areas (about 3×3 feet) at a time to avoid lap marks.
Tip: Work in manageable sections and maintain a ‘wet edge’ to prevent visible lines where you’ve stopped and started again.
Troubleshooting Deglosser Issues
While liquid deglossers are generally reliable, issues can arise. Here’s how to troubleshoot common problems:
If residue remains after rubbing, it might indicate an incompatible finish or a deglosser that’s too old. Try switching to a different deglosser or consult a paint professional.
If the surface still appears glossy after treatment, you may not have rubbed in the deglosser properly or left it on long enough. Re-treat the area, ensuring you work it into the surface thoroughly and leave it for the recommended time.
Note: If the surface becomes tacky or sticky after application, it’s likely that the deglosser is incompatible with the finish. Stop immediately and consult a professional to avoid damaging the surface.
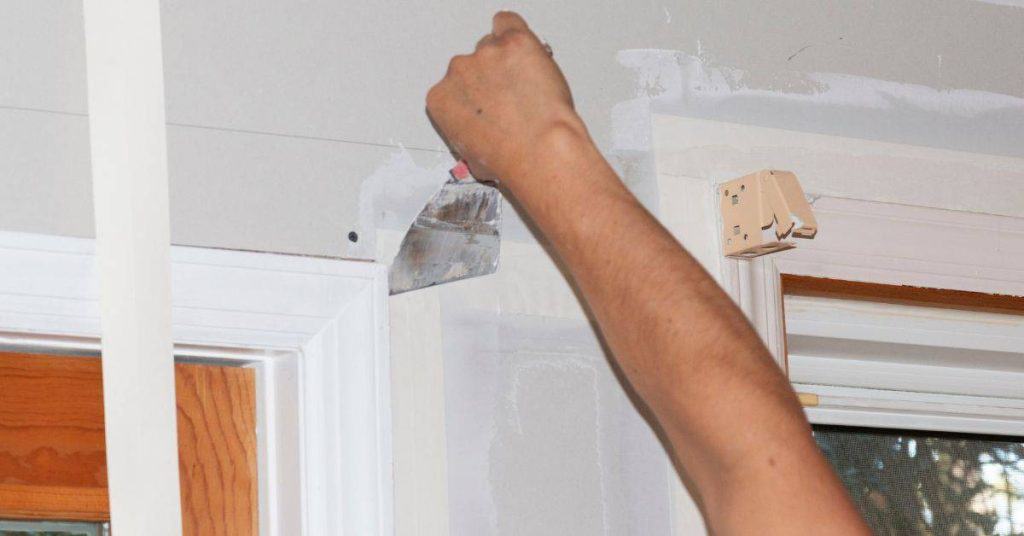
Step-by-Step: Sanding Glossy Surfaces (Manual and Power)
Begin with a light grit and gradually move to finer grits as needed, following a consistent pattern. Control pressure to avoid rounding edges or creating gouges.
Keep the area clean to manage dust and complete a final wipe-down so the surface is uniformly matte and ready for primer. Verify there are no glossy spots left that could cause poor bonding.
Step-by-Step Process
This section guides you through the practical steps of sanding glossy surfaces using both manual and power tools, ensuring a smooth finish ready for primer.
- Preparation: Gather your tools – sandpaper in varying grits, sanding block or orbital sander, safety gear (glasses, mask, gloves), drop cloths, and tack cloth. Check your surface is clean and dry.
- Start with coarse: Begin with 120-grit paper for manual sanding or 150-grit for power tools to remove the gloss. Work in small sections, using even pressure.
- Progress to fine: Once the gloss is gone, switch to 220-grit to smooth out any scratches. For tough spots, use a damp cloth with 220-grit to avoid over-sanding.
- Edges and details: Protect edges with painter’s tape and use a sanding sponge or folded sandpaper for tight spaces. Be gentle to avoid rounding edges.
- Cleanup: Wipe down the surface with a tack cloth to remove dust. Check for any missed spots or scratches. If unsure, consult a professional before painting.
Grit selection and sanding progression
Choosing the right grit is crucial for effective sanding without damaging your surface. Start with a coarse grit to remove gloss, then progress to finer grits for smoothing.
Start with 120-grit for manual sanding or 150-grit for power tools on most surfaces like paint and varnish. For delicate veneers, start at 220-grit.
Once the gloss is gone, progress to 220-grit to smooth out any scratches. If you’re unsure about your surface or grit choice, test on a small hidden area first.
Avoid over-sanding by stopping when the surface feels smooth and even. Using too high a grit or sanding too long can damage underlying layers.
Managing dust and preventing surface damage
Proper dust management keeps your workspace clean and prevents health issues. It also helps avoid damaging your surface by rounding edges or sanding through layers.
Use a dust extractor with your power sander to contain dust at the source. For manual sanding, use drop cloths and a vacuum or tack cloth for cleanup.
To protect edges and details, use painter’s tape before sanding. Be gentle when sanding around edges to avoid rounding them off. If you’re working on veneers or thin paint layers, be extra careful not to sand through.
Regularly check your progress with a damp cloth to see any scratches or missed spots. This helps prevent over-sanding and ensures a smooth surface ready for primer.
Checking Readiness: Visual and Tactile Checkpoints
Look for a uniform matte appearance without reflections and test by feeling for even roughness. A good key should feel dull rather than slick in multiple spots.
Use an adhesion test or tape test if available, and watch for signs that more prep is needed. Rely on local rules or product guidelines for acceptable pass/fail criteria.
Tape Adhesion Test and What to Look For
Before applying primer or paint, use this test to ensure your glossy surface is ready. It’s quick and helps avoid peeling issues.
- Apply painter’s tape: Press firmly along the edges of a 2×4-inch area.
- Let it sit: Give it 15-30 minutes to bond with the surface.
- Pull off: Grab one end and pull at a 90-degree angle.
- Inspect: Check for any paint or residue coming off. None is good!
- Repeat: Do this in different spots to ensure consistency.
- Check edges: Make sure no residue remains at the tape’s edges.
- Feel surface: After removing, run your hand over the area. It should feel smooth and clean.
- Look for shine: If it’s still glossy, you might need to degloss or sand more.
Quick rule: If tape pulls off cleanly with no residue, your surface is ready. If not, prep more before painting.
Visual Inspection Checklist
Before you prime or paint, give your glossy surface a once-over with this visual checklist. It helps catch any issues early.
- Check for streaks: They indicate missed spots during deglossing or sanding. Re-prep those areas.
- Look at edges: Ensure they’re clean and free of residue.
- Gloss spots: If you see any, they need more attention – either degloss or sand them.
- Residue: Any remaining deglosser or dirt will show up as haze. Clean it off.
- Sanding scratches: Lightly sanded surfaces should have faint, uniform scratches. Deep ones need re-sanding.
- Dust: Wipe down with a tack cloth to remove any dust before priming.
- Uneven sheen: This could mean some areas were missed or not prepped enough. Re-check your work.
Quick rule: If everything looks clean, smooth, and free of residue, you’re good to go. If not, address any issues before painting.
Priming and Painting After Prep
Choose a primer that suits the prepped surface type and finish, following the label guidance. Consider how the primer will interact with the chosen topcoat and substrate.
Observe drying or flash times per the manufacturer instructions, then proceed with the recommended paint type. Confirm compatibility notes and any required drying sequences before applying the final coat.
Primer selection and application tips
When choosing a primer for your prepped glossy surface, consider two main types: bonding primers and stain-blocking primers.
Bonding primers are ideal for deglossed surfaces. They create a strong bond between the substrate and your topcoat, preventing peeling or chipping. Use them after deglossing to ensure optimal adhesion.
Stain-blocking primers are great for sanded surfaces or when dealing with stains. They seal the surface and prevent tannins from bleeding through. Apply them after sanding and before painting.
Application thickness matters too. Aim for a thin, even coat. Too thick and it’ll crack; too thin and you won’t get the benefits. Let it dry according to manufacturer’s instructions – usually 1-2 hours – before applying paint.
Paint selection and finish recommendations
For deglossed surfaces, water-based paints are typically the best choice. They bond well to deglossers and provide a durable, washable finish. Opt for a satin or eggshell sheen for balance between durability and ease of cleaning.
For sanded surfaces, consider oil-based paints. They offer excellent adhesion and leveling, making them great for high-gloss finishes. However, they have longer drying times and strong odors, so use with proper ventilation.
To minimize brush or roller marks:
- Use high-quality brushes and rollers in good condition.
- Apply paint in thin, even coats, allowing adequate drying time between each (usually 2-4 hours).
- Work in one direction, following the grain of the surface if applicable.
Conclusion
Prep is the difference between a paint job that looks good now and one that lasts. Take safety seriously, follow the method that matches the surface, and you’ll avoid costly fixes later.
First, decide on the approach based on the surface and product, then inspect and clean the area, read the product directions, test a small spot, then apply the chosen deglosser or proceed with sanding, wipe away dust, and finally verify the surface is dry and uniformly dull before priming and painting. If using a deglosser, work in a well-ventilated area with gloves and eye protection, and if sanding, start with a lighter grit and progress gradually, checking for a uniform dull finish before moving on. Always prime after prep and before color, and follow the paint manufacturer’s directions for drying times and recoating windows.
Two common mistakes to avoid are skipping the test area and rushing the process, which can leave uneven patches or soft spots; also don’t skip ventilation, PPE, or dust containment, and don’t skip the readiness check once you think you’re done—feel the surface and look closely to ensure it’s uniformly dull and dry. Safety rules to follow are clear: keep ventilation active, wear gloves and eye protection, use a dust mask or respirator as needed, clean up spills promptly, and never accelerate drying with heat or direct sun on an unpainted surface.
If the surface is severely glossy, damaged, or you’re unsure about the substrate or paint compatibility, consider a pro for a durable, warranty-worthy finish. When in doubt, pause, seek a second opinion, and plan to recheck alignment with primer and paint after any professional input. Stay steady, follow the steps, and you’ll finish with a durable, good-looking result you can be proud of.
FAQ
When should I reach for a chemical deglosser instead of sanding a glossy surface?
Use a deglosser when the finish mostly wipes clean and dulls with a cloth. If the gloss stays slick or resists cleaning, or if you have stubborn spots, light sanding is the safer bet. Always follow the product label for specific guidance.
What safety steps should I follow when using a deglosser around trim, hardware, and outlets?
Remove or protect nearby hardware and outlets, and work in a well-ventilated area. Wear gloves and eye protection, and keep the workspace free of ignition sources if the product is solvent-based. Read the label for PPE requirements and proper ventilation.
How long should I wait or dry before priming after prep with a deglosser or after sanding?
Follow the product label for dry or cured times. Make sure the surface feels dry to the touch and is free of residue before priming. If in doubt, err on the side of a longer dry time as recommended by the manufacturer.
Can I combine deglossing and sanding to speed up the prep, and how should I do it?
Yes, you can deglose first to dull the sheen, then lightly sand any stubborn spots. Don’t oversand the glossy area; keep the finish flat and smooth. Use that approach only on spots that resist deglosser action and follow safe methods from the product instructions.