
Introduction
Install ceramic tile flooring on a concrete subfloor by following proper surface prep, layout, and setting methods.
The guide walks through practical steps you can apply, from preparing the concrete and selecting materials to laying and finishing, so you’ll know what to do and how to avoid common mistakes.
Key takeaways
- Assess concrete moisture and flatness before starting to ensure tile adhesion.
- Use polymer-modified thinset and proper trowel size for tile type.
- Remove moisture sources and seal floor edges to prevent bonding failures.
- Set layout with full tiles in main areas; cut only as needed.
- Allow tile to acclimate 24 hours; read grout and sealer cure times.
- Wear eye and foot protection; use dust mask during cutting and grinding.
Table of Contents
- Introduction
- Key takeaways
- Project Overview and When to Choose Ceramic on Concrete
- Tools and Materials Checklist
- Pre-installation Inspection and Concrete Prep
- Layout Planning and Tile Cutting Strategy
- Adhesion and Setting Tiles (Step-by-step)
- Grouting, Sealing, and Finishing Touches
- Safety Stops and Best-Practice Safety Measures
- Troubleshooting Common Problems and When to Call a Pro
- Conclusion
- FAQ
Project Overview and When to Choose Ceramic on Concrete
Ceramic tile on a concrete slab is a solid option when the slab is flat, clean, and free of major cracks. It works in kitchens, bathrooms, and utility rooms where you want a durable, easy-to-clean surface. If the concrete moves, is damp, or is badly pitted, this setup can fail without proper prep.
This matters because good prep and the right materials prevent failures and long-term headaches. You’ll get a hard-wearing floor that resists spills and scrapes, but you must address moisture, crack control, and movement with proper thinset, underlayment if needed, and expansion gaps. Always check the product label and manufacturer instructions, and follow local guidance for your exact slab and room conditions.
Advantages and limitations
Ceramic tile on concrete offers durability that’s hard to beat. It can handle heavy foot traffic, resist moisture, and stand up to wear and tear better than most flooring options. You get a clean, modern look with easy maintenance—just sweep or mop.
However, there are limitations too. Concrete subfloors can be tricky if they’re not perfectly level or have cracks. Moisture is another big concern; concrete that’s damp or prone to leaks isn’t ideal for direct tiling. You need a solid, dry surface to get the best results.
To avoid issues, make sure your concrete slab is in good shape before you start. Check it thoroughly for any signs of cracking or unevenness. If there are problems, consider using a membrane or underlayment to create a stable base.
When not to tile directly on concrete
There are times when you should avoid tiling straight onto concrete. If the slab is cracked, uneven, or has significant moisture issues, it’s best to look for alternatives. A floating subfloor can be a good option if your concrete isn’t stable.
Before you start any work, check the condition of the concrete carefully. Look for signs of water damage, cracks, and other structural problems that could cause issues later on. If there are any doubts about the slab’s integrity, it’s better to address those first before laying tile.
If moisture is a concern, consider using a vapor barrier or waterproof membrane under your tiles. This can help prevent future problems like mold growth or delamination of the tiles from the concrete surface. Always take time to assess the situation and plan accordingly.

Tools and Materials Checklist
This section gives you a complete, organized checklist of tools, materials, and optional items for a typical ceramic tile install on concrete. It’s written for DIY homeowners so you can prep without guessing. Use it to gather everything before you start.
Following the list keeps you from stopping mid-work to hunt supplies. It also helps you plan for prep, layout, and setting so the tile sticks and lasts. If a item needs a number or spec, check the label or datasheet for guidance.
Essential tools
This checklist helps you prep your toolbox for a smooth tile job.
- Tile cutter: For scoring and breaking tiles; check it works well before starting.
- Notched trowel: Apply thinset evenly; ensure the notches match your tile size.
- Mixing bucket: Mix thinset or grout properly; use a clean, dry bucket for each batch.
- Grout float: Spread and smooth grout lines; make sure it’s big enough to cover the tiles.
- Level: Ensure your floor is straight; check every few feet as you go.
- Caulking gun: Apply sealant around edges; test with a small amount first.
- Square and measuring tape: Mark out tile layout accurately; double-check measurements before cutting tiles.
- Spacers: Keep grout lines consistent; use the right size for your tile spacing.
Quick rule: Always have a backup tool or two in case one breaks during work.
Materials and consumables
This checklist ensures you have all the right materials for your tile project.
- Ceramic tiles: Choose quality, durable options; check boxes are not damaged or missing pieces.
- Thinset mortar: For adhering tiles to concrete; ensure it’s fresh and properly mixed.
- Grout: Fills gaps between tiles; select color that complements your design.
- Uncoupling membrane: Prevents cracking from substrate movement; install before setting thinset.
- Tile adhesive: For securing tiles to the membrane or concrete; check for proper viscosity and coverage.
- Sealer: Protects grout from stains and water damage; apply after curing period.
- Sanded vs. unsanded grout: Choose based on joint width; sanded for wider joints, unsanded for narrow ones.
- Mortar additive: Improves workability of thinset; add according to manufacturer’s instructions.
Quick rule: Always buy extra materials to account for cuts and breakage during installation.
Pre-installation Inspection and Concrete Prep
Before you pour or finish, inspect the slab for flatness, moisture, cracks, and cleanliness. Note any uneven spots, damp areas, or peeling coatings. Fix what you can or plan the right treatment for the next steps.
Skimping on prep invites problems like poor adhesion, cracks opening up, and finish failures. Doing a thorough prep now saves you time, money, and headaches later. If unsure about a crack, moisture test, or cleaning method, check the label or manufacturer instructions and follow local rules.
Moisture testing and mitigation
Before laying tile, test the concrete for moisture to ensure it’s dry enough.
- Test with calcium chloride: Place a small container of salt on the slab; measure weight gain after 72 hours. If too high, use a vapor barrier.
- Use a moisture meter: Insert into concrete to get readings; compare against manufacturer specs for tile adhesives.
- Check for dampness: Look for condensation or wet spots; address with drying time and dehumidifiers if needed.
- Evaluate existing membranes: Ensure any previous moisture barriers are intact and undamaged before applying new layers.
- Select appropriate primer: Choose an epoxy-based primer that seals the slab effectively against moisture intrusion.
- Apply vapor barrier correctly: Lay down a continuous layer of plastic sheeting over the entire area to prevent water from rising through.
- Allow drying time: Give treated areas ample time to dry out completely before proceeding with installation.
- Consult manufacturer guidelines: Follow specific instructions for testing and treating concrete based on tile adhesive requirements.
Quick rule: Always test moisture levels first; address any issues before laying tiles.
Leveling, patching, and crack repair
Concrete must be flat and free of cracks to ensure a smooth tile surface.
- Inspect for cracks: Look closely at the slab; mark any visible breaks or gaps needing attention.
- Fill small cracks: Use epoxy-based filler for durability; apply in thin layers until full depth is reached.
- Grind high spots: Remove excess material with a grinder to create a level surface suitable for tiling.
- Apply self-leveling compound: Pour and spread evenly over low areas; let cure according to manufacturer’s instructions.
- Check flatness regularly: Use a straight edge or laser tool to ensure the slab remains within acceptable tolerances.
- Patch large holes: Fill with concrete patch material mixed to match existing color as closely as possible.
- Seal repaired areas: Apply a thin coat of epoxy sealer over patched regions for added protection and durability.
- Allow proper curing time: Give all repairs sufficient time to set before moving on to the next step.
Quick rule: Always repair cracks and level the surface thoroughly before installing tiles.
Layout Planning and Tile Cutting Strategy
Plan your tile layout before you start to balance the pattern and keep cuts small. Measure carefully and mark reference lines, and decide where expansion joints belong.
This approach saves time and money, reduces waste, and helps you avoid awkward gaps. Knowing where joints go keeps the floor flat and grout lines straight. Check the label or manufacturer instructions for guidance on expansion joints.
Dry layout and full-bond patterns
Start by laying out your tiles dry on the concrete to see how they fit. This helps you visualize the pattern, stagger joints, and ensure symmetry across the room.
Choose between a full-bond or grid layout based on tile size. Full-bond means placing tiles edge-to-edge without grout lines in between, which is great for small tiles but can look cluttered with larger ones.
A grid pattern involves setting the tiles with regular spacing and grout joints around them. This approach works well for large tiles and helps balance visual impact across bigger areas.
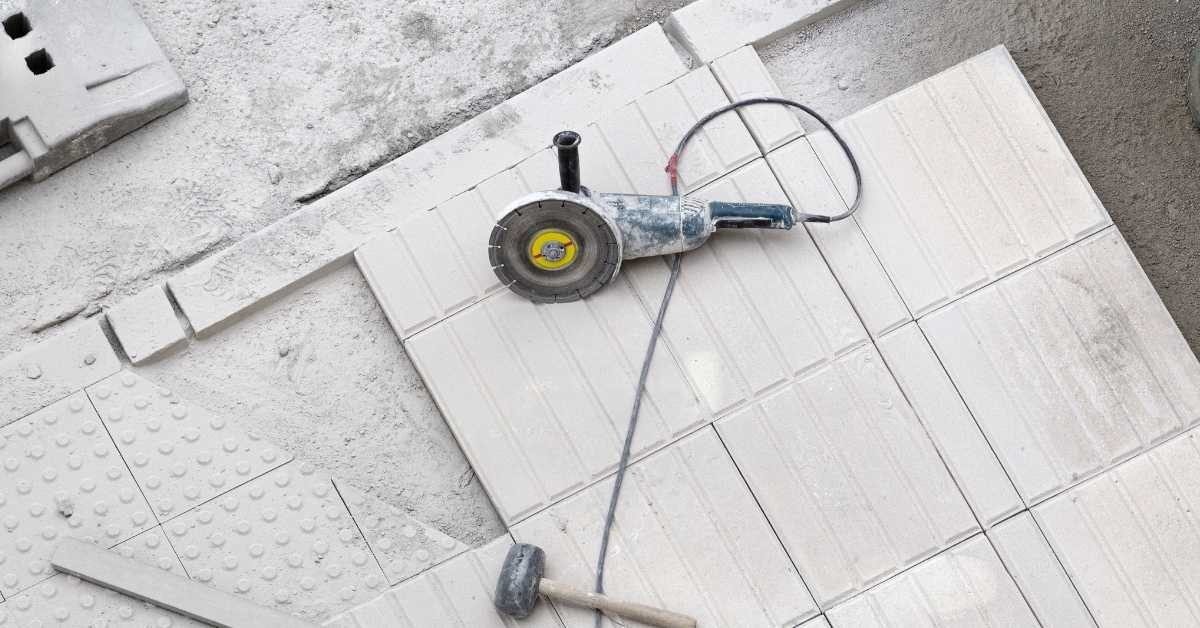
Cutting techniques and safety
To cut ceramic tile, use a wet saw or manual cutter. Wet cutting is safer as it reduces dust and keeps the blade cool. Always wear protective gear like goggles and gloves.
For accuracy, mark your cuts with a pencil first, then score the tile firmly with the cutter before breaking it along the line. Double-check measurements to avoid mistakes.
Safety is key—never force the cutting tool or rush through the process. Take breaks if needed to stay alert and focused on the job at hand.
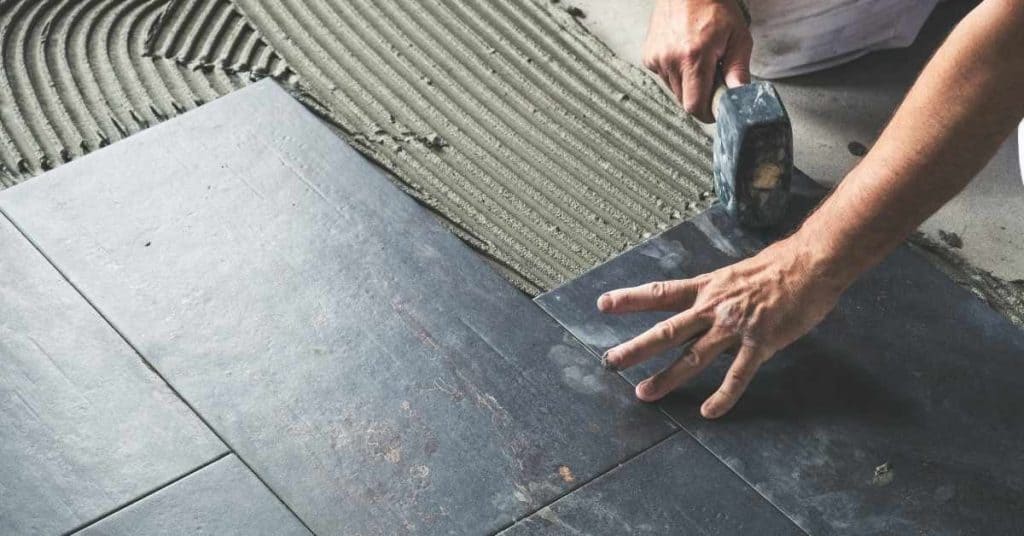
Adhesion and Setting Tiles (Step-by-step)
Adhesion starts with a proper thinset bed, placing tiles, and keeping joints even. Spread the thinset on the substrate, comb it to a uniform thickness, set each tile in place, press firmly, and wiggle slightly to seat it. Check that every tile has full bed contact and consistent spacing before the mortar sets.
This matters because solid bonding prevents loose tiles, cracks, and water trouble down the line. Consistent bed coverage and correct spacing give you a durable floor or wall you can trust. If you need exact gaps or mix instructions, check the label or datasheet from the thinset you’re using.
Step-by-Step Process
This sequence ensures your tiles are properly adhered and set, with minimal risk of future issues.
- Start by laying out the tile pattern on the concrete surface using spacers. This helps you visualize the final layout and adjust as needed before setting any tiles.
- Mix thinset according to manufacturer instructions. Use a notched trowel to apply it evenly, ensuring full coverage without leaving gaps or puddles.
- Place each tile into the thinset bed using spacers for consistent joint spacing. Press down firmly but avoid overworking the thinset.
- Tap tiles gently with a rubber mallet to ensure they are fully seated and level. Check alignment frequently; adjust as necessary before the thinset skins over.
- Once all tiles are set, let them cure according to manufacturer guidelines. Inspect for any gaps or unevenness and make adjustments if needed.
Mixing and Applying Thinset Correctly
Mix your thinset until it reaches a peanut-butter-like consistency. This ensures the right balance between workability and adhesion.
Use a notched trowel to apply thinset, selecting the correct notch size based on tile dimensions. For large-format tiles, butter each one individually for precise placement.
The open time of your thinset will vary by brand; pay attention to this so you don’t let it dry out before setting your tiles. If unsure, refer back to the manufacturer’s instructions.
Setting, Tapping, and Checking Alignment
Place each tile into the thinset bed using spacers for consistent joint spacing. This helps maintain a uniform look throughout your installation.
Tap tiles gently with a rubber mallet to ensure they are fully seated and level. Check alignment frequently; adjust as necessary before the thinset skins over, which can make adjustments difficult or impossible.
Use a straightedge or tile level to check for flatness and levelness regularly. This ensures your floor will be safe and comfortable to walk on once it’s set.
Grouting, Sealing, and Finishing Touches
This section covers grouting, cleanup, sealing if necessary, and finishing touches like transition strips and baseboards to complete the install. Follow practical steps for a neat, durable finish.
Doing it right matters because good grout, sealant, and trim protect the install from moisture and wear. If you need specifics, check the product label or datasheet for directions, and follow any local guidance or manufacturer instructions.
Grout selection and application
Choosing the right grout is crucial for a long-lasting tile job. For most ceramic tile installations, you’ll want to use sanded grout, which provides better durability and flexibility compared to unsanded grout, especially in joints wider than 1/8 inch.
Mix your grout according to the manufacturer’s instructions, aiming for a consistency similar to peanut butter. Apply it evenly across the tile joints using a float, making sure not to let the grout dry on the surface of the tiles. Once you’ve applied the grout, use a grout sponge with clean water to remove excess from the tile surfaces.
Let the grout cure for at least 24 hours before sealing or applying any finishers. During this time, keep the area free from foot traffic and moisture exposure to ensure proper curing.
Cleanup is key after grouting. Use a clean sponge with water to wipe away excess grout, then follow up with a dry towel to remove any remaining haze. This will give your tiles that polished look you’re aiming for.
Sealing and expansion joints
Once the grout has cured, it’s time to seal both the tile and grout surfaces. This step is essential for protecting your installation from stains and moisture damage. Use a high-quality sealer that matches the type of tiles you’ve installed.
Expansion joints are critical in any tile job, especially on concrete floors where movement can occur due to temperature changes or structural shifts. These joints should be placed at perimeters and control joints to allow for natural expansion without damaging your installation.
To finish these joints properly, use a flexible material like polyurethane caulk that won’t crack over time. Apply the caulk carefully along the joint lines using a caulking gun, then smooth it out with a damp finger or tool before it sets.
Sealing should be done after all grout has cured and expansion joints are properly finished. Follow the manufacturer’s instructions for application methods and drying times to ensure your sealant bonds correctly.
Safety Stops and Best-Practice Safety Measures
Safety stops and checks keep you from rushed mistakes. Follow stop points to pause before critical steps and inspect gear, tools, and plan. This keeps injuries and long term failures from slipping through.
These checks catch wrong setups, damaged gear, or sloppy prep before you commit. They save time and money by preventing rebuilds and injuries. Do not rely on memory; confirm each step with a quick pause and a visual check.
Personal protective equipment and jobsite setup
Before you start laying tiles, make sure your workspace is safe and you’re protected. Here’s what to do:
- Eyes: Wear safety goggles to protect from dust and flying debris. Check for ANSI Z87.1 certification.
Tip: Use a face shield if you’re cutting lots of tiles. - Masks: Get an N95 respirator mask to filter out thinset and grout dust. Make sure it fits snugly around your nose and mouth.
Note: Consider a powered air-purifying respirator (PAPR) for longer projects, about $100. - Hearing: Earplugs or earmuffs are essential when using power tools like cutters. Look for noise reduction ratings (NRR) of at least 25.
Tip: Use foam earplugs that expand in your ears for a better seal. - Gloves: Wear heavy-duty nitrile gloves to protect hands from thinset and grout. Choose ones with textured grips for better handling.
Note: Consider leather gloves if you’re using manual tools like chisels or hammers. - Ventilation: Ensure good airflow in your workspace, especially when mixing adhesives and grouts. Use fans to push air out of the room.
Tip: Open windows and doors during breaks to clear out dust and fumes.
Quality-control stops during install
Stopping at key points throughout your tile installation is crucial for catching issues early. Here are the main checkpoints:
First, re-check moisture levels after completing any repairs or leveling work. Use a hygrometer to ensure the concrete is dry enough before applying thinset.
Next, perform bond tests by pressing tiles into the thinset and checking if they stick firmly without sliding off. This ensures proper adhesion and prevents future failures.
Finally, verify that your grout joints are consistent in width and depth. Use a joint spacer tool to maintain uniformity across the entire floor. Consistent joints look better and prevent water from pooling.
Troubleshooting Common Problems and When to Call a Pro
This section covers the common tile problems you’ll run into and how to tell what’s causing them. You’ll see lippage, hollow tiles, grout cracking, efflorescence, and moisture failures, plus quick checks to separate bad install from a weak material. You’ll learn what you can fix yourself and when it’s time to call a pro.
Knowing the cause matters because it saves time and money. Use simple checks first and follow product labels or datasheets for fixes, and avoid cutting corners on cracks, movement, or water issues. If in doubt, check the label or ask a pro when something feels off or unsafe.
Repairing and Replacing Tiles
If a tile is damaged, start by scoring around the edges with a utility knife to break it free from surrounding grout. Use a hammer and chisel or a tile remover tool to carefully lift out the broken piece without damaging adjacent tiles.
Clean any debris from the old thinset and ensure the surface is level before applying new thinset. Press your replacement tile firmly into place, making sure it aligns with existing grout lines. Tap gently with a rubber mallet to set it in correctly.
Check that the new tile sits flush with its neighbors; if there’s lippage (uneven edges), use a grinder or tile saw to trim down high spots until everything matches up neatly.
To keep your ceramic tile flooring looking great, sweep regularly with a soft broom. For deeper cleaning, use mild soap and water; avoid harsh chemicals that can damage grout or tiles.
Prevent moisture issues by sealing the floor annually to protect against stains and water damage. Check for any signs of efflorescence (white powdery residue) which indicates excess moisture—address this promptly with a cleaning solution designed for ceramic tile.
Understand your product warranties before installation; these typically cover defects in materials but not wear or misuse. Installer guarantees may offer additional peace of mind, so it’s worth discussing these terms upfront to protect your investment.

Conclusion
The main payoff comes from doing it right the first time: a floor that stays flat, looks sharp, and won’t fail under daily use because you respected the prep, the materials, and the curing times. Stay focused on safety, and you’ll avoid costly rework and have a durable, high-quality finish.
First, verify the concrete is flat and clean, test for moisture, gather and inspect tools and materials, mark a solid layout, cut tiles with a reliable strategy, apply adhesive and set tiles in manageable sections, back-butter as needed, let the setting mix cure per manufacturer guidance, then grout, seal, and protect the edge transitions as the finish cures. Plan each step in order, keep expansion gaps at edges, and test a small area if you’re unsure before proceeding full speed.
Common mistakes to avoid include mixing too much adhesive at once or working too quickly, skipping expansion joints or not allowing full cure time, and neglecting proper ventilation, eye and skin protection, or a clean working surface. A simple safety rule is to test any change on a small patch first, wear the right PPE at all times, and never walk on unfinished tiles until the adhesive is set. If you encounter persistent lippage, mystery moisture, or a substrate problem you’re not sure how to fix, don’t hesitate to call a professional rather than forcing a risky workaround. With careful prep, steady progress, and a measured pace, you’ll finish with a floor that looks good and lasts.
FAQ
Do I need to remove old flooring before tiling?
Yes. Remove old flooring if it can flex or peel. A solid, clean concrete surface with no edges peeling is best for tile.
Should I grind or patch the concrete first?
Yes. Grind high spots and fill cracks or pits. A flat, smooth surface helps the tile bond and stops hollow spots.
What thinset or mortar should I use?
Use a polymer-modified thinset rated for use on concrete. Check the bag for exterior or interior use and the right coverage for tiles you chose.
How long before I can grout and walk on it?
Wait the recommended set time on the thinset, usually 24 hours. After grouting, keep traffic off the floor until the grout cures fully.