
Introduction
Caulk tube grout problems are issues caused by improper application or drying of grout sealant from a tube that require practical fixes. This article walks you through simple, hands-on steps to identify and fix common issues like gaps, sagging, or cracking. You’ll know when to stop and how to check the product label and surface before proceeding.
Start by cleaning the area, removing loose material, and ensuring the surface is dry before reapplying. Use fresh material and follow the product labels, then tool or smooth as needed, and stop if you see bubbling, peeling, or persistent gaps. If results still fail, reassess surfaces and consider adjusting your approach or seeking guidance from a local pro or manufacturer instructions.
Key takeaways
- Confirm whether the issue is caulk or grout before starting demolition work.
- Gather proper tools and materials from the checklist to avoid delays.
- Safe removal: cut caulk with a utility knife, then peel and clean.
- Inspect for moisture damage and mold; address underlying leaks before re-caulk.
- Follow stop rules: pause work if substrate shows instability or high moisture.
- Mark visual checkpoints and quality-control steps to ensure durable seal.
Table of Contents
- Introduction
- Key takeaways
- Quick Overview: Are You Dealing with Caulk Vs Grout Issues?
- Tools and Materials Checklist
- Inspecting the Damaged Area: Step-by-Step Diagnosis
- Safe Removal of Old Caulk and Damaged Grout
- Re-Caulking and Regrouting: DIY Step-by-Step Procedures
- Stop Rules and Troubleshooting: Avoid Common DIY Mistakes
- Visual Checkpoints and Quality-Control Checklist
- Material Specs and Standards Explained
- Conclusion
- FAQ
Quick Overview: Are You Dealing with Caulk Vs Grout Issues?
Caulk and grout perform different roles in tiling joints. Caulk is a flexible seal that covers gaps and moves with substrates. Grout is a hard filler that locks tiles in place between joints.
Commonly they get confused around showers, sinks, and tub surrounds. A leak can come from the wrong product or from improper installation. DIY fixes work for simple cases, but more complex leaks may require a professional evaluation.
Caulk vs Grout — Functions and Ideal Locations
Caulk and grout are both essential for sealing and protecting tile surfaces, but they serve different purposes and perform best in specific areas.
Caulk is a flexible sealant designed to fill joints between tiles, corners, and edges. It’s ideal for areas that experience movement or vibration, like shower walls and tub surrounds. Caulk can stretch and compress without cracking, making it perfect for sealing gaps around fixtures and in corners.
Grout, on the other hand, is a thick mixture of cement, water, and sand used to fill the spaces between tiles on flat surfaces like floors or walls. It provides structural support, preventing tiles from shifting or moving. Grout isn’t flexible like caulk, so it’s not suitable for areas with movement.
Common Problem Symptoms and Root Causes
When you’re dealing with issues in your tiled surfaces, look out for these telltale signs. They might indicate a caulk or grout problem:
Cracking, separation, or staining could mean the caulk or grout has failed due to improper surface preparation, using the wrong type of caulk, or exposure to excessive moisture. Soft spots in your grout might indicate water damage, while mold growth suggests a persistent moisture problem.
Improper substrate preparation, such as not allowing surfaces to dry completely before applying caulk or grout, can also lead to issues down the line. Always ensure your surfaces are clean, dry, and primed (if necessary) before applying any sealant.
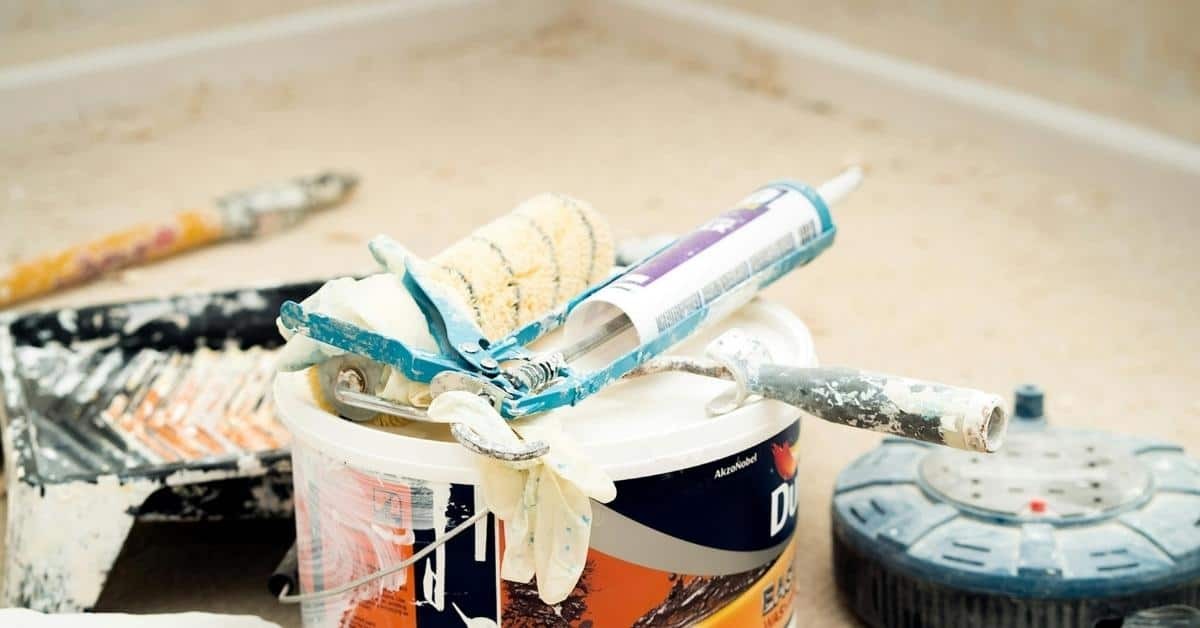
Tools and Materials Checklist
Collect a basic set of tools for diagnosis and repair, including a caulk gun, utility knife, putty knives, and a grout float. Have the right caulk type and color, plus a compatible primer or sealant as needed. Include safety gear such as gloves and eye protection.
Offer budget-friendly options by choosing standard silicone or acrylic caulk and economical grout, while noting specialty products for high moisture areas. Check product labels and manufacturer instructions to confirm suitability for bathrooms. If in doubt, compare data sheets and local code guidance before starting.
Recommended caulk and grout products and why
Before you start, know your options. This checklist helps you choose the right caulk and grout for your job.
- Silicone: Ideal for tubs and showers. It’s waterproof, flexible, and durable. Skip it? Water can seep in, causing mold and damage.
- Siliconeized Acrylic: Great for kitchen countertops. It’s stain-resistant and cleans easily. Miss this? Stains may set in, making cleaning tough.
- Urethane: Perfect for floors. It’s durable, resists abrasion, and can handle heavy traffic. Overlook it? Your floor might show wear faster.
- Mildew-Resistant Options: Essential for damp areas like bathrooms. They prevent mold growth. Forget this? Mold can form, leading to health issues and costly repairs.
Quick rule: Always match the caulk or grout to your surface’s needs. Don’t skimp on quality; it’ll save you trouble down the road.
Useful extra tools for cleaner results
These tools ensure professional-looking joints and make your job easier.
- Scrapers: Remove old caulk or grout. Skip it? Leftover residue can cause new applications to fail.
- Caulk Removal Tools: Easily remove large amounts of old caulk. Miss this? You’ll struggle with the cleanup.
- Backing Rod: Creates a smooth, even bead. Without it? Your caulk line might be uneven or have gaps.
- Masking Tape: Keeps caulk where you want it. Don’t use it? Caulk can bleed onto unwanted areas.
- Finishing Tools: Smooth out your caulk bead. Skip this? Your finished joint might look rough or have air bubbles.
- Cleaners: Remove dust, dirt, and old sealants. Neglect this? New applications won’t stick properly.
Quick rule: Don’t rush through prep work. A clean surface ensures your caulk or grout adheres well and lasts longer.
Inspecting the Damaged Area: Step-by-Step Diagnosis
Begin with a visual inspection of joints and tile edges for cracks, softness, or separating edges. Gently test adhesion around the area with a fingertip or a plastic tool. Look for moisture signs behind the grout or caulk, such as damp patches or a musty smell.
Decide whether to remove and replace caulk, regrout, or repair the substrate based on your checks. Do adhesion tests on suspected areas to confirm where the failure lies. If moisture is ongoing, address the source before sealing again.
Step-by-Step Process
Inspecting the damaged area involves a clear, systematic process to determine the extent of the problem and plan your repair. Here’s how:
- Preparation: Put on safety glasses and gloves. Clear away any debris or obstructions.
- Visual Inspection: Look for cracks, gaps, or discoloration in the caulk or grout. Check if it’s only surface damage or if it goes deeper.
- Probing Test: Gently press on the surrounding tiles to check their stability. Use a flathead screwdriver to probe the joints and see if they’re hollow or crumbling.
- Moisture Check: Look for signs of moisture behind the caulk or grout. If it’s damp, you might have a bigger problem that needs professional attention.
- Adhesion Test: Try to lift the edges of the caulk or grout with a utility knife. If it lifts easily and comes off in large chunks, it’s likely not adhered properly and will need replacing.
- Final Check: Once you’ve completed these steps, take a moment to look at the area again as a whole. Make sure your findings are consistent and that you understand what needs to be done.
How to tell if grout or caulk failed
To determine whether your problem is with the grout or the caulk, perform these simple tests:
Press Test: Gently press on the caulk or grout. If it feels soft or spongy, it might be a sign of moisture damage.
Probing Test: Use a flathead screwdriver to probe the joints. If the material crumbles easily, it’s likely failed and needs replacing.
Water Test: Apply some water to the area. If it beads up and doesn’t absorb, your caulk is probably still doing its job. If it soaks in, you might have a problem with both the caulk and the grout.
Assessing substrate and tile condition
When inspecting the damaged area, it’s crucial to look beyond just the caulk or grout. Here’s what to check:
Loose Tiles: Gently press on the surrounding tiles. If any feel loose or wobbly, you might have a bigger problem with your substrate that needs addressing before you can repair the joints.
Mold Behind Material: Look for signs of mold or mildew behind the caulk or grout. This could indicate a moisture problem that needs to be addressed at its source.
Crumbling Substrate: If your probing test reveals crumbling material under the joints, it might be a sign that your substrate is failing and needs repair before you can re-caulk or regrout.
Safe Removal of Old Caulk and Damaged Grout
Start by loosening the old caulk with a utility knife or a caulk removal tool. Work slowly to avoid nicks on tile edges. For grout, use a grout saw or multi-tool to remove loose material while keeping the surrounding joints intact.
In tight corners, take small careful passes and use a scrap tool to guide removal. If silicone is stubborn, apply a silicone remover product per the label and follow the recommended dwell time. Clean the joints thoroughly before any new material goes in.
Manual and power removal techniques
Start by using a razor blade to carefully cut along the caulk line. This helps prevent damage to surrounding surfaces.
For tougher spots, use grout saws or oscillating tools. Be cautious around tiles to avoid chipping. Always wear safety glasses and gloves.
Chemical softeners can help too. Apply, let it sit, then scrape off the softened caulk. But be careful, they can damage some surfaces if left on too long.
Never use power tools in tight corners or where tiles meet walls. You could break them. Manual tools are safer here.
Cleaning and preparing the joint
After removing old caulk, clean the area with a damp cloth to remove residue. Let it dry completely.
Use a suitable cleaner or primer to prep the surface. This ensures new caulk adheres properly. Follow product instructions for best results.
If you’re re-grouting, use a grout remover tool to clean out old grout. Be gentle to avoid damaging tiles.
Wipe away any dust or debris with a damp cloth and let it dry before applying new material.

Re-Caulking and Regrouting: DIY Step-by-Step Procedures
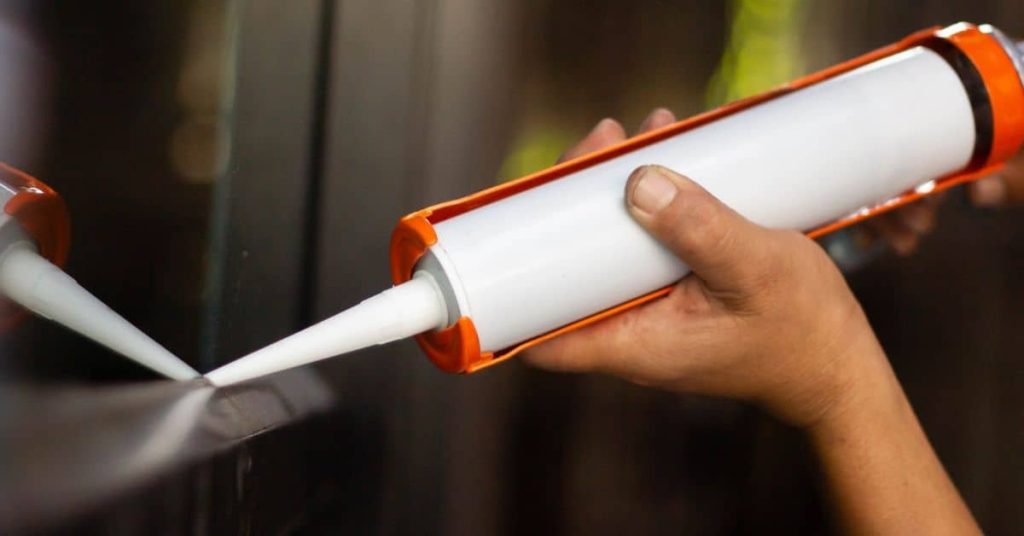
Place a backer rod in deep gaps if needed before applying caulk to control depth. Load the caulk into the gun and cut the nozzle at an angle for a smooth bead. Tool the bead with a finger or a caulk smoother to seal joints evenly.
For grout, mix or apply the grout according to the product instructions and press it firmly into joints. Wipe excess grout with a damp sponge before it sets and finish with a final clean after cure. Allow the sealant and grout to cure fully as directed on the product label before exposure to moisture.
Step-by-Step Process
The following steps will guide you through re-caulking and regrouting your tiled surfaces, ensuring a long-lasting, watertight seal.
- Remove old caulk and grout: Use a utility knife or oscillating tool to cut along the existing caulk line. Then, use a grout saw or multi-tool with a grout removal blade to scrape out the old grout. Why: This ensures a clean surface for new materials to adhere to. Check: The surface should be free of old caulk and grout.
- Clean the surface: Thoroughly clean the area with a mixture of water and mild detergent, then rinse and let it dry. Why: A clean surface promotes better adhesion of new materials. Check: The surface should be free of dirt, soap residue, and moisture.
- Inspect for damage: Check for any cracks or damaged tiles that need repair before proceeding. Why: Addressing these issues now prevents further water intrusion and costly repairs later. Check: No visible cracks or damaged tiles.
- Apply new caulk: Using a caulk gun, apply a bead of silicone caulk along the joint between the wall and floor/backsplash. Smooth it out with your finger or a damp sponge. Why: Caulking prevents water from seeping behind tiles. Check: The caulk should be smooth and even, filling the entire joint.
- Mix new grout: Follow the manufacturer’s instructions to mix your grout powder with water until you achieve a smooth, spreadable consistency. Why: Properly mixed grout ensures good coverage and adhesion. Check: The grout should have no lumps or dry spots.
- Apply new grout: Using a rubber float, spread the grout diagonally across the tile joints, forcing it into the spaces. Work in small sections to avoid letting the grout set before you can clean it off. Why: Proper grouting fills the joints and prevents water intrusion. Check: The grout should fill the joints evenly.
- Clean excess grout: After about 15-20 minutes, use a damp sponge to wipe away any excess grout from the tile surface. Rinse and wring out the sponge frequently. Why: Cleaning off excess grout prevents a hazy, unclean look on your tiles. Check: The tile surface should be clean and free of grout haze.
- Let it cure: Allow the grout to cure for at least 72 hours before exposing it to water or heavy foot traffic. Why: Proper curing ensures the grout’s strength and longevity. Check: The grout should feel dry and firm to the touch.
Pro tip: Always wear gloves when handling caulk and grout to protect your hands from irritation. Consider using a pre-mixed grout for easier application and less mess.
Applying caulk correctly (tub/shower corners, trim joints)
First, pick the right caulk. For tubs and showers, use a silicone-based caulk designed for wet areas. Check the label to ensure it’s suitable for your surface.
Choose the correct bead size. A #8 or #10 bead is usually best for tub/shower corners and trim joints. It provides a good seal without being too bulky.
Apply caulk using a caulking gun, cutting the tip at a 45-degree angle to match your joint. Smooth it out with a wet finger or a damp sponge, avoiding gaps. Let it cure for at least 24 hours before exposing it to water.
Regrouting tiles without removing tile
If your grout’s cracked or missing but the tiles are still solid, you can regrout without taking them out. Here’s how:
First, clear out the old grout using a grout saw or oscillating tool. Be careful not to damage the surrounding tiles.
Once it’s clean, wipe down the area with a damp sponge to remove any dust. Let it dry.
Now, choose your grout. Match the color and type (sanded or unsanded) to what you’re replacing. Follow the manufacturer’s instructions for mixing.
Apply the new grout using a rubber float, forcing it into the joints. Remove excess with a damp sponge, keeping a consistent joint width.
Let it set, then seal to protect from moisture and stains. Check your local hardware store for suitable sealers.
Stop Rules and Troubleshooting: Avoid Common DIY Mistakes
Never caulk over loose or deteriorated grout; fix the base first. Do not caulk onto wet surfaces; wait for a proper dry condition as advised by the product instructions. Avoid layering products in a way that traps moisture beneath the seal.
Keep an eye on joint movement and avoid overfilling joints, which can crack. If results seem off, recheck the manufacturer guidance and verify environmental conditions before proceeding. Use quick fixes only when the underlying issue is clearly addressed.
What to do if caulk keeps pulling away
If your caulk is peeling off like a bad sunburn, you’ve got a problem. Here’s how to fix it:
First, strip it all out. Don’t try to patch over failing caulk. It’s like trying to fix a leaky roof with a Band-Aid. Use a utility knife or caulk remover to get every last bit off.
Now, check your base compaction. If it’s soft or crumbly, that’s why your caulk is walking the plank. You might need to redo your prep work and ensure you’ve got a solid foundation.
Next, consider if you’re using the right product. Some caulks just don’t play nice with certain surfaces. Check the label or manufacturer instructions to make sure you’re not fighting a losing battle.
Dealing with recurring mold or staining
If you’re seeing mold or stains on your concrete surfaces repeatedly, it’s time to dig deeper. Here’s what you need to do:
Check ventilation. Concrete needs to breathe. Make sure there’s enough airflow around your slab. If it’s a basement floor, ensure your sump pump is working and consider installing a dehumidifier.
Use mildew-resistant products. When sealing or painting, opt for mildewcide-added sealers or paints to prevent mold growth. Always follow manufacturer instructions.
Check thickness and compaction. If your concrete is too thin or poorly compacted, it can hold moisture and encourage mold. Check the original construction details or consult a pro if you’re unsure.
If mold keeps coming back after these steps, it might be a sign of deeper moisture problems. Don’t just replace caulk; find and fix the source. It could be a leaky pipe, poor drainage, or even high groundwater levels. Check your home’s plumbing and consult local building codes for waterproofing requirements.
Visual Checkpoints and Quality-Control Checklist
Before starting, note visible gaps, cracks, and loose tiles as indicators of the repair scope. After completion, look for uniform joints, consistent color, and a smooth grout line. Ensure there are no gaps or pinholes in the caulk or grout.
Post-job, inspect at three intervals to catch early failures and verify cure times per product instructions. Use your visual cues plus gentle moisture checks to confirm durability of the repair. Create a simple timeline for anticipated inspections and touch-ups.
Aftercare and curing timeline
Use this checklist once you’ve finished re-caulking or regrouting to ensure a successful, long-lasting repair.
- 24 hours: Keep the area dry. Do not expose it to water or moisture.
- 72 hours: Gently wipe the joint with a damp cloth to check for any residue. If present, remove it carefully.
- 1 week: Inspect the joint for any cracks or gaps. Apply gentle pressure to ensure adhesion is intact.
- 30 days: Test the seal by running water over the joint in a shower or tub. Check for leaks or signs of moisture penetration.
- Avoid: Using harsh chemicals or abrasive cleaners on the new caulk or grout during this period.
Quick rule: Patience is key. Allowing the caulk and grout to cure fully ensures a strong, lasting seal.
When to call a pro — decision guide
Before attempting any repair, consult this checklist to determine if professional help is needed.
- Substrate damage: If more than 10% of the surface beneath the tile or caulk is damaged, consider calling a pro.
- Persistent leaks: If water continues to seep through after initial repairs, there may be underlying structural issues that require professional assessment.
- Structural concerns: Any signs of bulging walls, warped floors, or other structural issues should warrant a call to a professional.
- Electrical/plumbing involvement: If the repair involves any electrical components or plumbing, always consult a licensed professional.
Quick rule: When in doubt, it’s better to err on the side of caution. A small investment in professional help can prevent costly mistakes and damage.
Material Specs and Standards Explained
Explain key product specs like movement capability, shore hardness, mildew resistance, and VOCs in plain language. Use safe ranges and general guidance to match bathroom and kitchen needs. Always verify product data sheets for exact figures and tolerances.
Relate specs to typical scenarios you’ll encounter, such as shower corners and sink backsplashes. Encourage readers to compare labels and manufacturer notes to confirm suitability. If you are unsure, consult the data sheet or seek advice from a local supplier or pro before purchase.
Reading labels and performance claims
When shopping for caulk or grout, don’t get overwhelmed by the technical jargon. Here’s what you need to know:
Temperature Range: Look for products that can handle your bathroom or kitchen’s temperature swings. For typical applications, choose ones rated from -10°F to 130°F.
Movement Capability: Caulk should flex with the substrate it’s applied on. Check the label for movement capability in percentage. For tiles, aim for 25-50% movement.
Adhesion Claims: Ensure the product adheres well to your surface. Look for claims like ‘adheres to damp surfaces’ or ‘suitable for use on ceramic tile’.
Environmental and health considerations
Your health and the environment matter. Here’s what to consider:
Ventilation: Always work in a well-ventilated area when using caulk or grout. Open windows, use fans, or wear a respirator if needed.
Low VOCs: Volatile Organic Compounds can be harmful. Choose low-VOC products to minimize exposure. Look for labels like ‘low VOC’ or ‘zero VOC’.
Disposal and Safe Use: Dispose of old silicone or grout responsibly, following local regulations. When using solvents or primers, always follow the manufacturer’s safety guidelines.
Conclusion
Finish with clean edges, a solid seal, and a surface that won’t trap moisture or crack. The right approach protects safety, durability, and looks, especially in wet areas where failures show fast.
Remember to run the checklist in order: verify the issue type, gather the right tools and materials, inspect the area thoroughly, safely remove old caulk and damaged grout, reapply caulk and grout with even pressure, and complete the visual checkpoints to confirm a solid seal before testing for leaks.
Avoid these mistakes: don’t rush the removal or skip a full clean and dry time, don’t mix products unless your plan calls for it, and don’t skimp on safety gear or ventilation. Always test a small area first, follow the product directions, and respect that imperfect edges invite problems later; if you feel unsure, pause and double-check before you proceed.
If the patch involves a persistent leak, extensive damage, or uncertainty about substrate condition, it’s wise to call in a pro rather than push ahead. Stay patient, follow the steps, and you’ll keep the project safe, affordable, and long-lasting.
FAQ
Why is caulk not sticking to grout corners?
Most times it’s: dirty surfaces, moisture, or using the wrong type of product for the job. Clean both surfaces thoroughly and verify you’re using the right caulk/grout combo for that area. Always check the manufacturer instructions on surface prep and cure guidance.
How do I stop caulk from shrinking or pulling away after the job?
Apply the caulk in clean, steady strokes and don’t overwork it. Use a compatible primer if the manufacturer recommends it, and smooth the bead with a proper tool or damp finger before it skins over. If it still moves, recheck surface prep and product suitability per labels.
What should I do if grout and caulk separate after it cures?
Identify the joint type and re-clean the area. Remove the compromised material and reapply with the correct products for that joint, following the label for cure time and surface prep. If in doubt, check the product instructions or contact the manufacturer for pairing guidance.
How can I fix moldy or degraded caulk without damaging tiles?
Carefully remove the old caulk with minimal pressure on surrounding tiles. Apply fresh caulk neatly and use a compatible mold-resistant option if the area is prone to moisture. Always follow the product’s cleaning and curing directions and avoid skimpy beads that trap moisture.