

Introduction
Garage floor coatings come in paint, epoxy, and polyaspartic, each with its own durability profile.
Paint is simple and forgiving, epoxy offers a thicker hard coat, and polyaspartic dries fast and resists temperature swings. This guide helps you compare protection, appearance, and DIY viability before you pick.
You’ll learn what to expect in terms of wear, heat, and how creative you can get with color and finish. The application process differs in prep, mixing, and curing time, and some options are more DIY-friendly than others. Check the label and local rules, and glance at recent posts from a few competitors to see real results.
Key takeaways
- Epoxy and polyaspartic coatings offer strong chemical resistance and abrasion protection when properly prepared.
- Garage floor paint is cheapest upfront but requires maintenance and frequent touchups.
- Polyaspartic cures faster and tolerates temperature swings better than epoxy.
- Proper surface prep and ventilation are critical for DIY success and safety.
- Recent Posts compare options from two to three competitors for context.
- Safety: wear respirator, eye protection, and follow manufacturer instructions to prevent hazards.
Table of Contents
- Introduction
- Key takeaways
- Quick Comparison Snapshot — Which Material Wins for Typical Garage Use
- Protection, Durability, and Longevity Comparison
- Appearance, Customization, and UV/Color Stability
- Application, Surface Prep, and Curing/Turnaround Times
- DIY Vs Professional Installation — Risk, Cost, and Warranty Considerations
- Real-World Performance: Water, Moisture, Chemicals, Traction, and Hot Tires
- Cost, Lifecycle Value, and Impact on Resale
- Safety, Environmental Impact, Tools & Materials Checklist, and Common Mistakes to Avoid
- Conclusion
- FAQ
Quick Comparison Snapshot — Which Material Wins for Typical Garage Use
Garage floors face a tradeoff between protection, appearance, cost, and longevity. Each system stacks up differently on wear resistance, moisture barriers, color stability, and upkeep. Understanding these basics helps you decide what matters most in your space.
Use-case framing matters: low-budget refresh, high-traffic areas, sun exposure, DIY versus pro help, and downtime tolerance all shift the best call. Look for practical cues in prep needs, curing timelines, and how costs can creep with primers and topcoats. The quick verdict usually hinges on your priorities: durability, look, or fastest turnaround.
Best-for scenarios
Each garage floor coating has its sweet spot. Here’s when to pick one:
Paint: If budget’s tight, and you want a quick, low-cost refresh.
Epoxy: For mid-range budgets, high durability, and better protection against moisture.
Polyaspartic: When top-notch performance matters most – heavy traffic, sun exposure, or demanding DIY projects.
How to choose using three questions
Answer these three questions to find your best fit:
1. Budget: Paint’s cheapest, followed by epoxy, then polyaspartic.
2. Exposure/Traffic: More sun and traffic? Polyaspartic holds up best. Less? Paint or epoxy might do fine.
3. Who will install: DIY-friendly? Paint’s easiest, then epoxy. Pro help only? Consider polyaspartic for top results.
Protection, Durability, and Longevity Comparison
You want to know how each coating bonds to concrete and where protection comes from. Some systems seal the surface, while others penetrate for deeper abrasion and impact resistance. How a product handles moisture and peeling ties directly to its bond with the substrate.
Assess durability in terms of hardness, flexibility, and how well it resists chipping and temperature swings. Longevity signals come from datasheets, warranties, and how prep quality or UV exposure can shorten or extend service life. Practical checks include bond strength claims and required recoat intervals from manufacturers.
Bonding and concrete penetration
Proper bonding with the concrete substrate is crucial for long-lasting garage floor coatings. A true bond means the coating penetrates into the concrete’s pores, creating a strong chemical link.
Poor bonding results in peeling, delamination, and easy damage. Check product datasheets for adhesion test results or ask your installer about their application process to ensure deep penetration.
Surface sealers, like garage floor paints, sit on top of the concrete, offering less protection against abrasion and impacts compared to coatings that penetrate and bond.
Flexibility and thermal cycling
Garage floors experience temperature changes and slab movement. Flexible coatings can handle these shifts better, preventing cracking and delamination.
Epoxies and polyaspartics are more flexible than garage floor paints. They can bridge minor cracks and accommodate slight slab movement without breaking down.
However, extreme temperatures can still cause issues if the coating isn’t flexible enough. Always check a product’s thermal cycling resistance before applying.
Chemical, abrasion, and impact resistance
Garage floors face harsh conditions: automotive fluids, cleaners, heavy loads, and impacts. Different coatings offer varying levels of protection.
Epoxies and polyaspartics provide excellent chemical resistance due to their deep penetration into the concrete. They also handle abrasion and impacts well, making them ideal for high-traffic areas.
Garage floor paints offer decent protection but are less resistant to chemicals and abrasion than epoxies or polyaspartics. Topcoat chemistry matters too – aliphatic topcoats perform better long-term against UV exposure and yellowing compared to aromatic ones.
Appearance, Customization, and UV/Color Stability
Finish options span gloss, semi-gloss, and matte, with topcoats altering gloss retention. Consider how each finish affects cleanliness and room brightness. Pigments and clear layers drive color fidelity over time.
Flakes, textures, and patterns add slip resistance and style, but also influence maintenance. UV exposure drives fading or yellowing; know which system holds color best in sunlit garages. For appearance preservation, lean on UV-resistant topcoats and follow practical cleaning and recoating schedules tailored to sun exposure.
Color, Flakes, and Texture Options
When it comes to garage floor coatings, you’ve got plenty of choices for finish, color, and texture. Let’s break ’em down.
For finish, you can pick from glossy, semi-gloss, or matte. Glossier finishes make your garage feel bigger and brighter, while matte hides scuffs better. Topcoats can help maintain that gloss over time.
Color-wise, you’ve got solid colors, quartz/flake blends, and translucent hues. Solid colors are simple and clean. Flakes add a touch of class – think metallic or granite chips. Translucents give a subtle, semi-transparent look. Choose what fits your style.
Flakes and textures aren’t just for looks. They hide stains and scuffs, making maintenance easier. Larger flakes hide more, but denser packs can make the floor feel rougher underfoot.
UV Stability and Long-Term Gloss Retention
Sunlight’s a garage floor coating’s worst enemy. It fades colors, yellows clear coats, and dulls gloss. Here’s how to fight back.
First off, check the technical data sheet. Look for UV-stable chemistries like 100% solids epoxy or polyaspartic. These hold up better against sunlight. Avoid urethanes – they yellow over time.
Next, apply a UV-resistant topcoat or clear coat. This adds another layer of protection. Reapply every few years to maintain gloss and color.
Lastly, keep your garage door closed when you’re not using it. Less sun exposure means less fading and yellowing. It’s simple but effective.
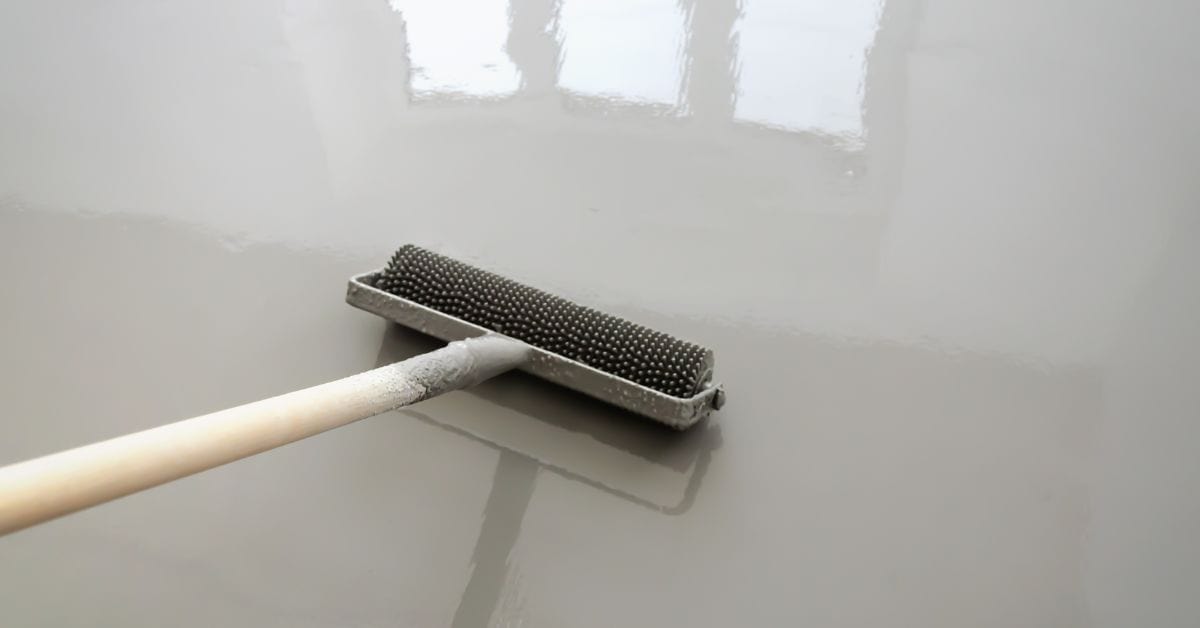
Application, Surface Prep, and Curing/Turnaround Times
Prep drives results: surface profiling, moisture testing, and crack repair determine bonding readiness. The better the prep, the longer the coating will hold up under traffic. Look for substrate requirements that affect install feasibility.
Crack repair, proper filling, and releveling matter because small missteps show up as failures later. Mixing accuracy, batch sizing, and pot life influence gloss and adhesion. Environmental controls and weather windows shape cure and return-to-service timing.
Surface prep and common application mistakes
Proper surface preparation is key to a lasting concrete job. Here are some common mistakes to avoid:
- Skipping cleaning: Dirt, grease, or other contaminants can cause peeling. Always clean the surface before applying.
- Ignoring repairs: Cracks and holes need filling before you apply concrete. Ignoring them leads to bubbling and delamination.
- Not profiling: A rough surface helps concrete bond better. Sandblasting, grinding, or acid etching can help achieve this.
Double-check these points before you start. A little extra work upfront saves a lot of trouble later on.
Mix ratios, pot life, and working time
First things first, always check the product label for your concrete mix’s specific ratio. It’ll usually be something like 1:2:4 (cement:sand:aggregate). But don’t just guess, measure it out right.
Now, pot life – that’s how long your mixed concrete stays usable before it sets. It varies by product and temperature, so check the manufacturer’s instructions. In warm weather, you might have as little as 30 minutes. In cooler temps, up to an hour.
Working time is similar but refers to how long you’ve got to place and finish your concrete before it starts to set. Again, check those instructions. Once it starts setting, you’re racing against the clock. Don’t waste time – plan your pour and finishing sequence ahead.
Curing stages and realistic turnaround
Concrete needs time to gain strength. It’s not just about slapping it on and calling it a day. Here’s what you need to know:
Tack-free: This is when the surface isn’t sticky anymore, usually after a few hours. You can walk on it, but don’t go dancing. Check your product label for exact times.
Light-use: After a day or two, you might think it’s ready for heavy use. Wrong! It’s still gaining strength. Be gentle with it. Follow manufacturer instructions to know when it’s safe for heavy traffic.
Full cure: This takes time, usually around 28 days. That’s right, you’ll have to be patient. After this, your concrete is at its full strength. But remember, even after 28 days, it’s still gaining a bit more strength over time.
DIY Vs Professional Installation — Risk, Cost, and Warranty Considerations
DIY kits vs pro installs differ in prep depth, material quality, and cure management. Consider value against limitations and potential downtime. Warranties reflect these differences and what is covered in terms of labor and materials.
Fast-curing chemistries pose specific risks like blush or pinholes if mishandled. Understand how warranties and contractor oversight affect long-term performance. Use clear criteria to decide when to hire an installer and how to vet a contractor effectively.
Typical DIY pitfalls and how to avoid them
DIY garage floor coatings can go wrong if you’re not careful. Here are common mistakes and quick prevention tips.
- Insufficient surface prep: Not cleaning, etching, or priming the concrete properly leads to poor adhesion. Always follow the surface prep guidelines.
- Poor mixing: Incorrect mix ratios and incomplete stirring can cause uneven curing and reduced durability. Follow the kit’s instructions precisely.
- Timing errors: Not allowing enough time for each step, especially curing, can ruin your project. Plan your timeline accordingly.
- Ignoring temperature and humidity: Extreme conditions can affect cure times and final results. Maintain ideal temperatures (60-85°F) and low humidity levels.
Prevent these pitfalls for a successful DIY garage floor coating job.
What professionals bring (testing, equipment, warranties)
Hiring pros brings value-added services that enhance your garage floor’s longevity and appearance.
- Moisture testing: Pros use moisture meters to ensure concrete slabs are dry enough for coating, preventing delamination. Expect to pay around $50-$100 for this service.
- Industrial grinders: Pros use diamond grinding equipment to remove contaminants and profile the surface, ensuring better adhesion. Rentals start at $200/day.
- Controlled environments: Pros monitor temperature and humidity during application and cure times, ensuring optimal conditions for curing. This can cost extra if environmental control measures are needed.
- Warranty coverage: Pros typically offer warranties covering labor, materials, and repair logistics. These usually last 1-5 years, depending on the product and installer.
These professional services ensure a quality job, but they come at an additional cost.
Real-World Performance: Water, Moisture, Chemicals, Traction, and Hot Tires
Moisture vapor drive, standing water, and chemical spills test each system differently. Look for practical thresholds and common failure modes to plan mitigation. Moisture readiness before install is critical.
Slip resistance under dry and wet conditions matters for safety, as does how surface texture holds up to heat and traffic. Testing guidance and moisture mitigation options help you prevent future issues. Documentation of tests and product datasheets support warranties.
Sealing, moisture vapor, and prevention of bubbling
Before applying any coating, test your concrete’s moisture levels. Use a moisture meter, calcium chloride test, or in-situ RH reading.
Acceptable readings vary by product, but generally, RH should be below 75% and calcium chloride test results under 4 lbs per 1000 sq ft/24 hours. If borderline, consider moisture mitigation options like vapor barriers or mold inhibitors.
Apply appropriate primers or lock-in agents to seal the concrete and prevent moisture vapor drive. Follow product-specific guidelines for application and curing/temperature conditions.
Traction and slip resistance options
For safety, consider adding non-slip additives or textured flakes to your coating. These increase traction under dry and wet conditions.
However, be mindful of cleanability. Too much texture can trap dirt and debris. Balance safety with ease of maintenance.
Gloss level also affects slip resistance. Matte finishes provide better grip than high-gloss ones. Choose a balance that suits your needs.
Hot-tire pickup and vehicle-related stresses
Some coatings can soften under hot tires, leading to blistering or lifting. This is more common with epoxy and paint systems.
To prevent this, consider using a polyaspartic topcoat. It’s more resistant to heat and vehicle-related stresses. Alternatively, test your chosen system by parking a hot car on it for 24 hours before full application.
Always follow manufacturer guidelines for temperature conditions during application and curing. This ensures the coating can withstand heat from vehicles.
Cost, Lifecycle Value, and Impact on Resale
Total cost of ownership considers upfront material and installation against service life and recoating needs. Factor in downtime, prep depth, and maintenance when weighing options. A well-documented, quality install can influence resale appeal.
Longevity ranges depend on climate, traffic, and upkeep, so translate durability into time-based value. A simple framework can help compare options and guide decisions based on long-term plans and expected use. Transparency in specifications and warranties strengthens buyer confidence.
Upfront vs Lifetime Cost Comparison
A garage floor coating’s true value lies in its lifecycle, not just the initial price. Let’s break down the costs:
Upfront: Materials, labor, and surface prep. DIY can save on labor but requires time and skill.
Lifetime: Service life, recoating intervals, maintenance. Here’s how they stack up:
– Paint: Cheap upfront, short lifespan (2-5 years), frequent recoats.
– Epoxy: Moderate upfront, longer life (8-15 years), fewer recoats.
– Polyaspartic: Highest upfront, longest life (10-30+ years), least recoats.
Resale Value and Buyer Perceptions
A well-done garage floor coating can boost your home’s appeal. Here’s how:
– Durability: A high-quality, long-lasting coating signals low maintenance to buyers.
– Appearance: An attractive finish makes a strong first impression.
To maximize resale value:
– Document the system specs and warranty terms.
– Keep records of any maintenance or repairs.
– Disclose all this information to potential buyers.
Safety, Environmental Impact, Tools & Materials Checklist, and Common Mistakes to Avoid
Ventilation, PPE, and spill containment are essentials for safe mixing and application. Prioritize airflow and personal protection to minimize risk. Check local disposal rules and product SDS for environmental handling.
Prepare a practical tools and materials list with a clear sequence for prep, application, and cleanup. Common mistakes include under-ventilating and skipping surface prep. Verify cure times under typical temps and consider consulting a professional for tricky substrates.
Safety precautions and ventilation
Before you start, ensure you’re protected and well-ventilated.
- Respirator: Use a respirator with organic vapor cartridges to protect against harmful fumes during mixing and application.
- Goggles: Wear safety goggles to shield your eyes from splashes and debris.
- Gloves: Use chemical-resistant gloves to prevent skin contact with chemicals.
- Footwear: Wear sturdy, non-slip shoes or boots for traction and protection.
- Ventilation: Open windows and doors, use fans, or set up a temporary ventilation system to keep the area well-ventilated.
- Spill containment: Have absorbent materials on hand to contain spills and prevent them from entering drains or spreading.
- Safety Data Sheet (SDS): Consult the product’s SDS for specific hazards, precautions, and first aid measures.
- Fire safety: Keep a fire extinguisher nearby in case of accidental sparks or flames.
Quick rule: Always follow manufacturer guidelines and use the recommended PPE to minimize risks.
Tools and materials checklist
Gather these essentials before starting your garage floor coating project.
- Protective gear: Safety glasses, gloves, and a respirator as mentioned above.
- Mixing tools: Stir sticks or mixing paddles for accurate mix ratios.
- Rollers/brushes: High-quality rollers and brushes suitable for the chosen product’s application method.
- Etching/etch removal supplies (if needed): Etching solution, scrub brush, and safety acid-resistant gloves for proper surface preparation.
- Masking tape: Painter’s tape to protect walls, baseboards, and other areas from overspray or drips.
- Cleaning solvents: Appropriate cleaners (e.g., acetone, denatured alcohol) for preparing the surface and cleaning tools.
- Measuring cups/buckets: Accurate measuring tools to ensure correct mix ratios.
- Drop cloths/tarps: To protect the floor from spills and contain overspray.
Quick rule: Having the right tools and materials ensures a smooth, efficient application process.
Environmental considerations and disposal
Be mindful of your impact on the environment throughout the project.
- VOC limits: Check product labels for VOC content. Aim for low-VOC or zero-VOC products to minimize air pollution.
- Solvent use: Limit solvent usage by choosing water-based or 100% solids products when possible.
- Surface prep waste: Collect and dispose of etching solution, cleaning residue, and other surface preparation waste responsibly.
- Disposal instructions: Follow product labels and SDS for proper disposal of leftover materials, rinsates, and used tools.
- Local regulations: Check local regulations regarding hazardous waste disposal to ensure compliance.
- Recycling options: Look into recycling programs for empty containers and other packaging materials.
- SDS review: Always review the product’s SDS before starting work, as it contains crucial information about environmental hazards and disposal methods.
Quick rule: Proper disposal and recycling help minimize your project’s environmental impact.
Conclusion
Get a finish that protects, looks right, and lasts. Safety and proper prep are non‑negotiable, or you’ll pay later in peeling, staining, or costly repairs.
First, run a quick, practical checklist: confirm the slab is dry or test for moisture, choose a coating that fits your garage use, measure the area and budget, read and follow the product label, ventilate well and wear PPE, clean and repair any cracks, perform a thorough surface prep, apply per the manufacturer’s curing times, and plan a realistic turnaround that minimizes downtime.
Common mistakes to avoid are skipping or rushing prep, ignoring moisture or cracks, and skipping cure time or ventilation. Always test a small area first, use the right primer if required, and follow safety rules—protect your eyes, lungs, and skin. If you’re dealing with widespread cracking, active moisture, or a floor heating system, call a professional before you push ahead, or you risk permanent failure. Decide now on a plan you can complete safely, then execute with focus and discipline.
FAQ
How do paint, epoxy, and polyaspartic coatings differ in protecting a garage floor?
Paint is the least protective option. Epoxy and polyaspartic coatings seal the concrete better and resist chemicals longer, but they still need proper surface prep to perform well.
What appearance options exist, and how do they hold up over time?
Paint comes in many colors but can fade or wear through faster. Epoxy offers a glossy look and solid color options but can yellow with UV exposure. Polyaspartic coatings can be clear or pigmented and stay UV-stable longer, with a hard, smooth finish.
Which coating is most durable under heavy use and temperature changes?
Durability depends on prep and maintenance. Epoxy handles impact and abrasion better than paint, while polyaspartic is usually the toughest and quickest to cure, but proper installation is critical for all three.
What should I know about applying these at home versus hiring a pro?
DIY is possible for paint and some epoxy kits if you follow the label, but gaps in prep or ventilation can ruin results. Polyaspartic often needs specialized equipment and precise mixing—consider a pro if you’re unsure about temps, humidity, or curing times.