
Introduction
Garage floor epoxy colors are the tinted options you apply over epoxy to change the shade and look. You can choose solid color, color flakes, or metallic looks, but you should confirm compatibility with the topcoat and base coat on your concrete. Check product labels for UV stability, coverage, and application layers, and plan for how flakes or color will affect cleaning and wear.
UV resistance and durability depend on the resin system and the flake choice, so read the manufacturer’s directions and local rules. Maintenance comes down to cleaning, resealing when needed, and touching up damaged areas so the color stays even. Consider how sun exposure in your garage might fade color and whether you want a matte or glossy finish.
Key takeaways
- Test color swatches on a small area before full-coverage epoxy.
- Choose flake blends that hide dust and complement garage lighting.
- UV resistance requires coatings rated for sunlight; verify manufacturer specifications.
- Prepare surface properly; moisture issues ruin color adhesion and durability.
- Maintenance includes regular cleaning and resealing when color or gloss fades.
- Avoid over-thinning; follow product instructions to prevent uneven color and flaking.
Table of Contents
- Introduction
- Key takeaways
- Why Epoxy Color, Flake Systems, and UV Resistance Matter
- Choosing Epoxy Colors — Fundamentals and Visual Effects
- Flake Systems Explained — Types, Blends, and Installation Styles
- Specialty Finishes — Metallics, Terrazzo, and Custom Visual Effects
- UV Issues and Long-Term Color Stability
- Preparation, Application Steps, and Visual Checkpoints
- Durability, Maintenance, and Repairing Color/Flake Systems
- Costs, Common Mistakes, and Making the Final Choice
- Conclusion
- FAQ
Why Epoxy Color, Flake Systems, and UV Resistance Matter
This section explains how color, texture from flakes, and UV stability work together to shape the look and durability of a garage floor. You’ll see how neutral versus bold choices interact with lighting, vehicle use, and perceived space. It also covers how you can predict long-term performance by combining color, texture, and topcoat choices.
You’ll find practical decision factors like budget, maintenance expectations, epoxy system compatibility, and whether a flake or solid finish fits storage, vehicles, and work zones. The guidance includes testing ideas such as small samples and UV exposure checks. A simple decision framework helps you match color and flakes to room aesthetics, durability needs, and UV protection levels with a straightforward checklist and scenarios.
What this article will help you decide
The goal of this guide is to empower you, the DIY homeowner, to make informed decisions about your garage epoxy floor. After reading, you’ll be able to:
Select the perfect color for your space, considering lighting and personal taste.
Choose a flake system that suits your needs in terms of texture, reflectivity, and slip resistance.
Decide on topcoat choices and prep and maintenance priorities to ensure long-term performance.
Key benefits of thoughtful color and flake choices
The right combination of color and flake system can transform your garage into a functional, attractive space. Here’s what you stand to gain:
Improved light: The right colors and flakes can reflect light, making your garage feel brighter and more spacious.
Hide wear and tear: Flake systems help disguise scuffs, scratches, and stains, keeping your floor looking newer longer.
Increased resale value: A well-designed epoxy floor can boost your home’s appeal and market value.
Simplified maintenance: The right choices make cleaning easier and reduce the need for frequent touch-ups.
Choosing Epoxy Colors — Fundamentals and Visual Effects
This section introduces basic color theory for garage floors and how hues, saturation, and lightness influence mood and space perception. It explains how shade choices can shift brightness and the sense of room size. You’ll learn how color interacts with lighting and reflection in a practical way.
You’ll weigh tradeoffs between light colors for visibility and ease of cleaning versus dark tones that hide stains and wear. The discussion includes how finish sheen alters these effects and what to consider for stain visibility and cleanup. Quick-start tips help you sample colors under mixed daylight and fluorescent lighting and plan with flakes and UV topcoats for a cohesive look.
How color affects lighting, perceived size, and dirt visibility
Lighter colors reflect more light, making your garage feel brighter and bigger. But they also show dirt and stains easily.
Dark colors, on the other hand, hide stains well but can make dust and scratches stand out. They also absorb light, making the space feel smaller.
Think about your needs: if you want a clean look all the time, go lighter. If you’re after a ‘workshop’ vibe that hides dirt, consider darker tones.
Matching floor colors to your home and garage use
Your garage floor should complement your home’s exterior. If it’s visible from the street, match or contrast with your house color.
Consider primary use: if it’s a showroom, go for lighter, classier tones. For a workshop, darker, tougher colors might be better.
Think about how you’ll use the space. If it’s for parking, lighter colors are safer. If it’s for working, consider durability over brightness.
Practical tips for sampling colors and avoiding regret
Don’t rush into a color choice. Take your time to avoid regrets later.
- Test on-site: See how the color looks in your actual garage, not just on a swatch.
- View at different times of day: Light changes throughout the day, so see how your chosen color looks in morning, afternoon, and evening light.
- Test with topcoat and flakes: Your final floor will have a topcoat and possibly flakes. Make sure they work well together.
- Avoid fluorescent lighting: It can skew colors, so test under mixed daylight or incandescent light.
By following these tips, you’ll make an informed decision that you won’t regret later.
Flake Systems Explained — Types, Blends, and Installation Styles
This section identifies major flake options such as broadcast flakes, pre-blended kits, and metallic or non-metallic varieties, and explains how flake size and blend patterns change the overall appearance. It covers how flakes modify light diffusion, slip resistance, and the ability to hide minor imperfections. You’ll get guidance on choosing grit and topcoat textures that suit your space.
You’ll read about installation styles like broadcasting during cure, using pre-mixed kits, and creating custom blends. The notes include density of broadcast and the impact of micro- versus full-coverage options. A quick checklist helps you coordinate color with base epoxy, consider UV stability, and plan for maintenance needs.
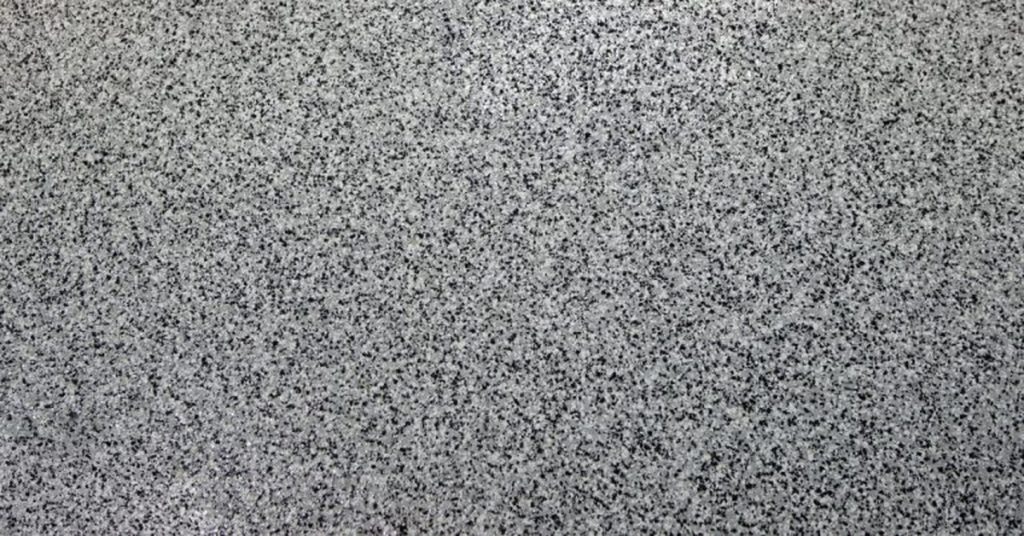
Flake types: vinyl flakes, colored quartz, mica, and metallic chips
Choose your flakes based on the look you want. Here’s a quick rundown:
Vinyl Flakes: These are classic, durable, and affordable. They give a uniform, solid color look.
Colored Quartz: For a more natural, earthy feel. They reflect light differently, giving depth to your floor.
Mica Flakes: Want a bit of sparkle? Mica flakes add a subtle shimmer. Great for showroom-style garages.
Metallic Chips: Go big with metallic chips. They’re bold, eye-catching, and perfect for high-end garage designs.
Full broadcast vs. scattered vs. sealed flake approaches
How you apply your flakes matters. Here are three methods:
Full Broadcast: This is dense coverage, wall-to-wall. It’s uniform, hides imperfections well, but can be more expensive.
Scattered (Micro-coverage): Fewer flakes, scattered randomly. It’s cheaper, shows off your base epoxy color more, but may not hide imperfections as well.
Sealed Flake Approach: Flakes are broadcast, then sealed with a topcoat. This locks in the flakes, gives you gloss or matte finish, and enhances slip resistance.
Specialty Finishes — Metallics, Terrazzo, and Custom Visual Effects
This section covers metallic epoxy finishes and terrazzo-style systems, including common color options and how they interact with garage wear. It discusses maintenance considerations and practical limits for heavy-traffic garages. You’ll understand how these looks hold up under daily use.
You’ll see design techniques to create depth and movement, such as layering and marbling, plus ideas for logos or accent graphics. The notes also address practical pros and cons for slip resistance, chemical and UV exposure, and upkeep. They highlight prep, cure times, and ventilation needs for best results.
Metallic epoxy: wow factor and real-world tradeoffs
Metallic epoxy finishes bring a high-gloss, dimensional look to your garage floor. Imagine copper, silver, gold, or aluminum flecks shimmering under lights. It’s like having a piece of art on your floor.
But, these floors aren’t for the faint-hearted. Application is tricky and requires a pro’s touch. Reflectivity can cause glare, so consider lighting carefully. And maintenance? You’ll need to clean regularly to keep those flecks shining.
Another thing – metallic epoxies show every imperfection in your concrete. So, make sure your surface is in tip-top shape before you start.
Patterning and layering techniques for custom floors
Want a floor that’s truly one-of-a-kind? Consider patterning and layering techniques. Stencils can create intricate designs, borders add a touch of class, and multi-layer effects give your floor depth.
For simple patterns, you might be able to DIY it. But for complex designs or multiple layers, consider hiring a pro. They’ve got the skills and experience to make your vision a reality.
Remember, each layer adds time and cost. So, plan your design carefully before you start. And keep in mind that while these techniques can hide minor imperfections, they won’t fix major ones.
UV Issues and Long-Term Color Stability
This section explains why some epoxy colors change with sun exposure and which topcoat strategies help preserve color and gloss. You’ll learn how pigment choices and resin types influence stability. It also covers how to interpret product claims about UV resistance.
You’ll compare topcoat options such as aliphatic protectants and clear blends, and how each affects long-term appearance. Practical guidance includes testing methods, datasheet checks, and recommended approaches for evaluating results before applying a full floor.
Causes of yellowing and which chemistries are most affected
UV exposure breaks down certain epoxy resins and pigments, leading to color shifts over time. This is why some garage floors can turn yellow or chalky after prolonged sun exposure.
The chemistry behind this lies in the type of epoxy resin used:
- Aromatic resins are more susceptible to UV damage due to their chemical structure, which contains benzene rings that absorb UV light and break down.
- Aliphatic resins, on the other hand, have a more stable molecular structure with no benzene rings. They’re less prone to UV degradation but can still yellow if not properly protected.
Pigment choices also play a role in color stability:
- Some pigments are naturally more UV-stable than others. For instance, metallic pigments tend to hold their luster better under sunlight compared to some organic dyes.
- Dark colors can absorb more heat and UV light, which may accelerate degradation if not protected properly.
UV-resistant topcoats, maintenance, and testing recommendations
To mitigate UV damage and maintain long-term color stability, use UV-stable aliphatic topcoats or clear coats. These provide an extra layer of protection against sunlight:
- Aliphatic polyurethane: Offers good UV resistance and maintains gloss levels.
- Polyurea: Provides excellent chemical resistance but may not offer the same level of UV protection as aliphatic polyurethane or polyaspartic topcoats.
- Polyaspartic: Known for its fast cure time, it also offers good UV resistance and maintains gloss.
- Clear acrylic/polyurethane blends: These can help protect against UV damage while maintaining the appearance of your floor.
Maintenance involves periodic inspections to check for any signs of yellowing or chalking. If you notice any issues, address them promptly to prevent further degradation:
- Perform small-area accelerated-exposure tests from product datasheets before committing to a full-floor application. This helps ensure the chosen topcoat provides adequate UV protection.
- Keep your garage floor clean and free of debris that could scratch or damage the surface, accelerating UV degradation.
Preparation, Application Steps, and Visual Checkpoints
This section outlines the essential prep and application sequence that directly affects color and flake outcomes. It emphasizes substrate condition, moisture testing, profiling or etching, and degreasing for reliable adhesion and uniform pigment distribution. It explains how these steps set up for even color and flake dispersion.
You’ll find color and flake planning tips, including pigment stability and clear coat compatibility, broadcast density, and even dispersion strategies. The notes also cover temperature, humidity, and product-specific pot life, and how these factors influence gloss and color consistency during the job.
Tools and materials checklist for color & flake systems
Before you start, gather all necessary tools and materials to ensure a smooth application process. Use this checklist to verify you have everything needed.
- Grinders: For surface preparation, remove any high spots or imperfections.
- Vacuums: To clean the floor thoroughly before and after application.
- Primer/Etcher: To prepare the surface for better adhesion. Check compatibility with your chosen epoxy system.
- Epoxy Base Coat: Your chosen color and type (100% solids, water-based, etc.).
- Flake System: Choose your desired flake type, size, and blend. Ensure they’re compatible with your base coat.
- Topcoat Sealer: To protect the floor and enhance gloss. Check compatibility with your base coat and flakes.
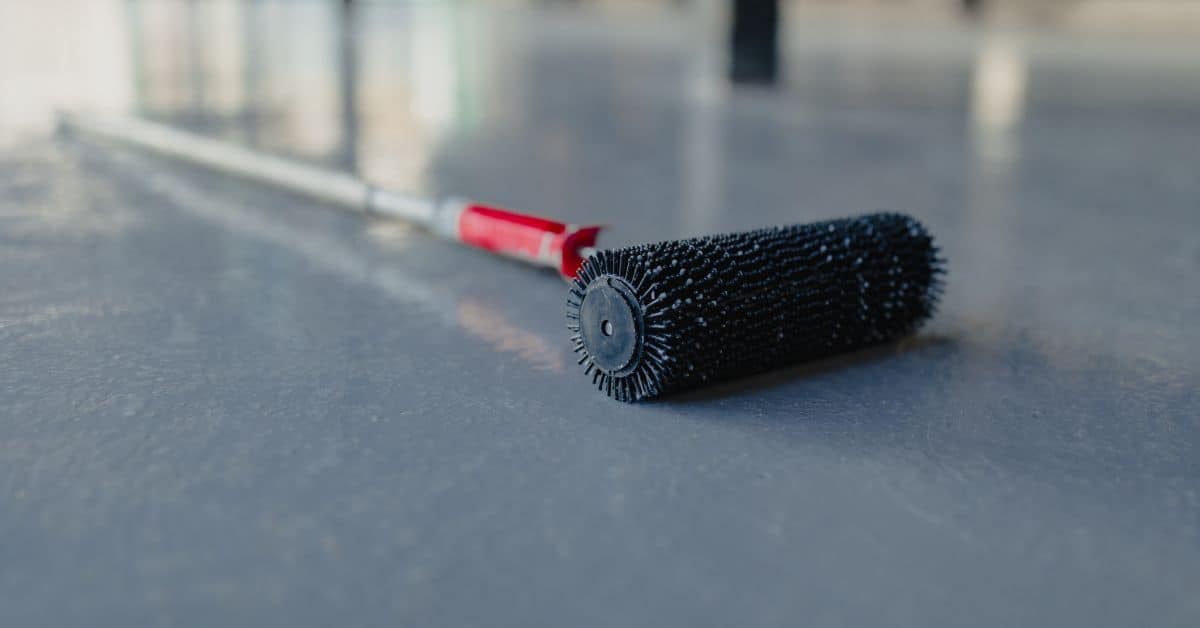
- Broadcast Supplies: Plastic squeegees, trowels, or spreaders for even application of flakes.
- Safety Gear: Gloves, safety glasses, and respiratory protection.
Quick rule: Always verify product compatibility on datasheets to avoid adhesion issues or color changes.
Typical application sequence and curing considerations
Follow this step-by-step application sequence for optimal results. Remember, cure conditions and pot life vary by product, so follow manufacturer guidelines.
- Preparation: Clean, repair, and prime the substrate to ensure a smooth surface.
- Moisture Testing: Check for moisture vapor emission to prevent blisters or delamination.
- Etching/Profiling: To increase surface area for better adhesion. Use an etcher or grinder.
- Degreasing: Clean the floor thoroughly with a degreaser to remove any contaminants.
- Apply Primer/Etcher: Evenly apply primer/etcher according to manufacturer’s instructions.
- Apply Base Coat: Mix and apply base coat evenly, maintaining a ‘wet edge’ to avoid lap marks.
- Broadcast Flakes: While the base coat is still wet, broadcast flakes evenly across the floor using plastic squeegees or trowels.
- Apply Topcoat Sealer: Once flakes are set (usually 24 hours), apply topcoat sealer for protection and gloss enhancement.
Quick rule: Follow manufacturer guidelines for cure conditions and pot life to maintain color consistency and gloss.
Visual quality checkpoints during installation
Regularly inspect your work throughout the application process to ensure an even, high-quality final appearance.
- Substrate Dryness: Before applying any product, ensure the substrate is completely dry. Moisture can cause adhesion issues or blisters.
- Color Uniformity: Inspect base coat for consistent color and coverage. Uneven application may result in visible patches.
- Flake Coverage Density: Check flake broadcast for even distribution. Inconsistencies can lead to thin or ‘bald’ spots.
- Edge/Partition Coverage: Ensure edges and corners are fully covered with base coat and flakes. These areas often get overlooked, leading to incomplete coverage.
- Tack-Free Surface: Before applying topcoat sealer, ensure the surface is tack-free. Applying too soon can cause fish-eyes or pinholes.
- UV Exposure Tests: If using UV-resistant topcoats, perform spot tests in direct sunlight to check for yellowing or fading risk.
Quick rule: Regularly inspect your work throughout the application process to catch and correct any issues early.
Durability, Maintenance, and Repairing Color/Flake Systems
This section focuses on routine cleaning and preventative practices that help preserve color vibrancy and flake integrity. It identifies safe products and tools for regular maintenance without dulling the finish. You’ll gain a practical sense of how to keep the floor looking fresh between repairs.
You’ll find guidance on seasonal maintenance tasks, spot repairs, and decision points for re-coating or refreshing color. The notes cover safety considerations, cure times, and when to escalate to more extensive repairs based on damage extent and flake type.
Cleaning and Preventive Maintenance Best Practices
Epoxy flooring is durable, but it needs regular cleaning to keep its color vibrant and flakes intact. Here’s a simple routine:
Weekly: Sweep or vacuum the floor to remove dirt and debris. Use a mild detergent mixed with warm water for mopping. Avoid harsh chemicals like bleach that can damage the topcoat.
Monthly: Apply a UV-resistant topcoat if you haven’t already. This protects against sun damage, which can cause yellowing or fading over time.
Avoid: Abrasive materials like steel wool or harsh scrubbing that can scratch the surface and dislodge flakes.
Repairing Chips, Worn Areas, and When to Recoat
Over time, your epoxy floor may show signs of wear. Here’s how to tackle minor repairs:
Chips or small worn areas: Clean the area, sand lightly, then apply a touch-up coat of epoxy mixed with the same color flakes used originally. Blend well into surrounding area.
Worn or faded spots: If the damage is larger or more widespread, you might need to reseal or recoat the entire affected area. Start by lightly sanding and cleaning the floor, then apply a new coat of epoxy with matching flakes.
Full system refresh: If your floor shows significant wear across its entire surface, it’s time for a full recoating. Follow your original application steps, ensuring you prep the surface properly to achieve a lasting bond.
Costs, Common Mistakes, and Making the Final Choice
This section links color complexity, flake density, and specialty finishes to value and cost considerations. It explains how DIY kits compare with professional installations and what drives overall pricing. You’ll know what to watch for in quotes and specifications.
You’ll review common DIY and design mistakes to avoid, such as inadequate surface prep or skipping swatches. A practical decision checklist helps you define budget, choose color family and flake density, verify substrate readiness, compare warranties, and decide between DIY or pro installation.
How color choice and flake system affect budget and ROI
The cost of your garage floor epoxy depends on the colors, flakes, and finishes you choose. Let’s break down how these choices impact your budget and return on investment (ROI).
Color complexity: Darker or metallic hues often come at a premium due to specialized pigments. While they can boost aesthetics and resale value, ensure they fit your budget.
Flake density/size: More flakes or larger sizes mean higher material costs but increased visual appeal. Balance this with durability; denser flakes may hide scratches better but could be more labor-intensive to apply.
Specialty topcoats: High-end finishes like metallic or glitter effects, or UV-resistant topcoats, can raise costs but enhance longevity and appearance. Consider if they’re worth the extra investment for your needs.
Top common mistakes (and how to avoid them)
Even with the best intentions, DIYers often make costly mistakes when installing garage floor epoxy. Here are some frequent errors and tips on how to avoid them.
- Inadequate prep: Skimping on surface preparation can lead to adhesion issues and premature failure. Always clean, grind, and prime the concrete before applying epoxy.
- Skipping primers: Primers improve adhesion and help seal the substrate. Neglecting them can result in delamination and reduced durability.
- Improper broadcast density: Too few or too many flakes can affect the final look and performance. Follow manufacturer guidelines for optimal results.
- Using non-UV-stable topcoats: Insufficient UV protection can cause color fading over time. Always choose a topcoat with appropriate UV resistance, especially for garages with open doors.
By avoiding these common pitfalls, you’ll ensure a long-lasting, attractive garage floor that meets your expectations and budget.
Decision checklist: DIY vs professional and what to verify
Before you start your garage floor epoxy project, use this checklist to help decide whether to go DIY or hire a pro.
- Substrate condition: Inspect the concrete for cracks, moisture issues, or other damage. Repairs may be needed before applying epoxy.
- Ventilation needs: Ensure proper ventilation during application and curing to prevent fumes from building up.
- Skill level: Honestly assess your experience with similar projects. If you’re unsure, consider hiring a professional.
- Warranty: Check if the product offers a warranty and what it covers. Some warranties require professional installation.
- Product datasheets: Review manufacturer guidelines for application, mixing ratios, and cure times to ensure you’re prepared.
- Moisture/vapor barrier: Test for moisture and install a vapor barrier if necessary to prevent delamination.
- Color swatches: Obtain color samples and test them in your garage to ensure they match your expectations under different lighting conditions.
- Cure times: Plan for adequate cure time before using the garage again. Prolonged use during curing can cause damage or reduce longevity.
Quick rule: If you’re unsure about any aspect of the project, it’s better to consult a professional or hire one to ensure a successful outcome.
Conclusion
Color decisions finally come down to protecting your floor’s durability and how it looks day after day. Do the prep, pick a UV-stable system, and apply it with steady, safety-minded work so the finish lasts and shines without peeling or fading.
Check in this order: confirm the concrete is sound and clean, perform a small test patch to verify shade and gloss under your lighting, choose the base epoxy color and the flake blend, gather proper safety gear and ventilation, mix per the product directions, apply primer and the color coat, broadcast or lay in the flake system as planned, and finish with a cure that follows the exact time guidelines.
Common mistakes to avoid include skipping prep or skipping the test patch, under- or over-thinning the mix, and ignoring UV exposure while choosing colors. Safety rules to follow are simple: wear a respirator and eye protection, ensure good ventilation, follow the product’s mixing and cure times exactly, and keep kids and pets away from the work area until it’s fully cured. If you’re unsure about surface cracks, structural issues, or large-area coatings, don’t push through—consult a professional to prevent costly mistakes and risky failures.
When the job stretches beyond a small spot or when you hit complex finishes like metallics or terrazzo, it’s time to call in a pro. Stay deliberate, test first, and you’ll end up with a durable, great-looking floor that stands up to years of garage use and sunlight exposure. You’ve got this—steady hands, clear steps, solid results.
FAQ
What color options can I expect for a garage floor epoxy?
You can choose solid colors, color chips, or blends with flakes. Some systems offer metallic looks or custom tints, but you must verify with the manufacturer. Check colorfastness and fade resistance on the product label or datasheet.
How do I choose a flake system and how should it be applied?
Flake systems come in different chip sizes and densities. You can broadcast flakes during application or embed them in a finish coat for a more uniform look. Read the label to confirm coverage rates and installation steps, and plan for a light to moderate amount of waste.
How important is UV resistance for garage floor coatings, and what should I look for?
UV resistance matters for color longevity and clarity. Look for UV-stable resins or a UV-blocking topcoat and confirm with the product instructions. If in doubt, ask the manufacturer how the finish performs under sunlight and heat.
What surface prep and cost factors should I plan for?
Prep matters more than the color. You’ll need a clean, dry, and mechanically sound concrete, with any old coatings removed. Costs vary with prep needed, chip quantity, number of coats, and the color options you pick—check the label, datasheet, or local rules for guidance.