

Introduction
Concrete color samples that predict reality are mockups used to forecast how a finished mix will look under curing and sealing.
As a hands-on DIY, you compare small, controlled slabs with different curing conditions and sealers to see how color holds up. Always check product labels and manufacturer instructions, and follow local rules for curing temperature and moisture ranges.
Field distress survey methods help you pinpoint MRD patterns, locations, and the extent of damage in the test area.
For any lab analysis approach, rely on standard procedures and check manufacturer instructions or local requirements to interpret results safely. Use simple data interpretation guidelines to shape a practical MRD treatment plan, and verify suggested remedies against site conditions and codes.
Key takeaways
- Use full-scale mockups with identical mix, form, and curing to predict color accurately.
- Document ambient conditions and sealers used during each color sample for traceability.
- Inspect curing temperature and moisture control during curing, flags color shifts early.
- Choose sealer type based on desired gloss, color depth, and maintenance needs.
- Create a simple workflow for measurement, documentation, and visual acceptance checks.
- Include field distress survey methods and MRD considerations in the plan for color samples.
- Wear eye protection and gloves when handling sealers and curing compounds.
Table of Contents
- Introduction
- Key takeaways
- Why Mockups Are the Single Best Predictor of Finished Concrete Color
- Types of Color Samples and When to Use Each
- How Curing Conditions Alter Final Color
- Sealer Selection and Application: How Sealers Change Color
- Measurement, Documentation, and Visual Acceptance Workflow
- Sampling, Handling, and Laboratory Testing Protocols
- Common Mistakes, Pitfalls, and Troubleshooting
- Cost, Timeline, and Decision Framework for Mockup Programs
- Conclusion
- FAQ
Why Mockups Are the Single Best Predictor of Finished Concrete Color
A well-executed mockup reveals real-world color outcomes better than color chips or photos because it sits in the same environment and uses the same materials as the actual floor. It should replicate the substrate color and texture, the formwork footprint, the curing method, and the final finish to mirror real conditions. A good mockup also gives you a tangible reference for later comparisons.
Key variables must be controlled to reproduce the look: cement type, mix proportions, aggregate color, water-to-cement ratio, admixtures, slump, and surface treatment. Replication requires matching ambient temperature, humidity, airflow, curing duration, and sealing timing. Documenting lighting, viewing angles, and color targets helps you measure progress against a defined standard.
What a mockup must replicate (materials, finish, and environment)
The materials you use and how you finish the concrete in your mockup are crucial. They directly affect the final color outcome.
- Cement type: Use the same cement type as planned for the real pour to match color and strength development.
- Mix proportions: Maintain consistent water-to-cement ratio and aggregate size distribution to avoid color variations.
- Aggregate exposure: Expose aggregates in your mockup like you will on-site. Too much exposure can cause discoloration, while too little may hide the true color.
- Finishing tools: Use identical tools and techniques to replicate the final finish – troweling, floating, or brooming.
- Environmental conditions: Match on-site temperature, humidity, and airflow. Concrete cures differently in various environments.
Sources of color variability to expect
Even with a perfect mockup, natural variations can occur between pours due to factors beyond your control.
Cement source: Different cement brands have slight color differences. Order in bulk or from the same batch to minimize variation.
Water content: Too much water can cause graying, while too little may result in a darker color. Maintain consistent water-to-cement ratio.
Placement technique: How concrete is placed and consolidated affects its final appearance. Ensure your mockup replicates the real pour’s placement method.
Setting realistic acceptance criteria
Establishing clear acceptance criteria helps manage stakeholder expectations and ensures everyone is on the same page regarding color tolerances.
Visual vs. instrument-based: Use both visual inspection and instrumental measurements (like L*a*b*) to set criteria. What looks good by eye might not pass instrumental tests.
Requiring additional samples: If initial mockups don’t meet acceptance criteria, create more samples with adjusted variables until you achieve the desired color within acceptable tolerances.
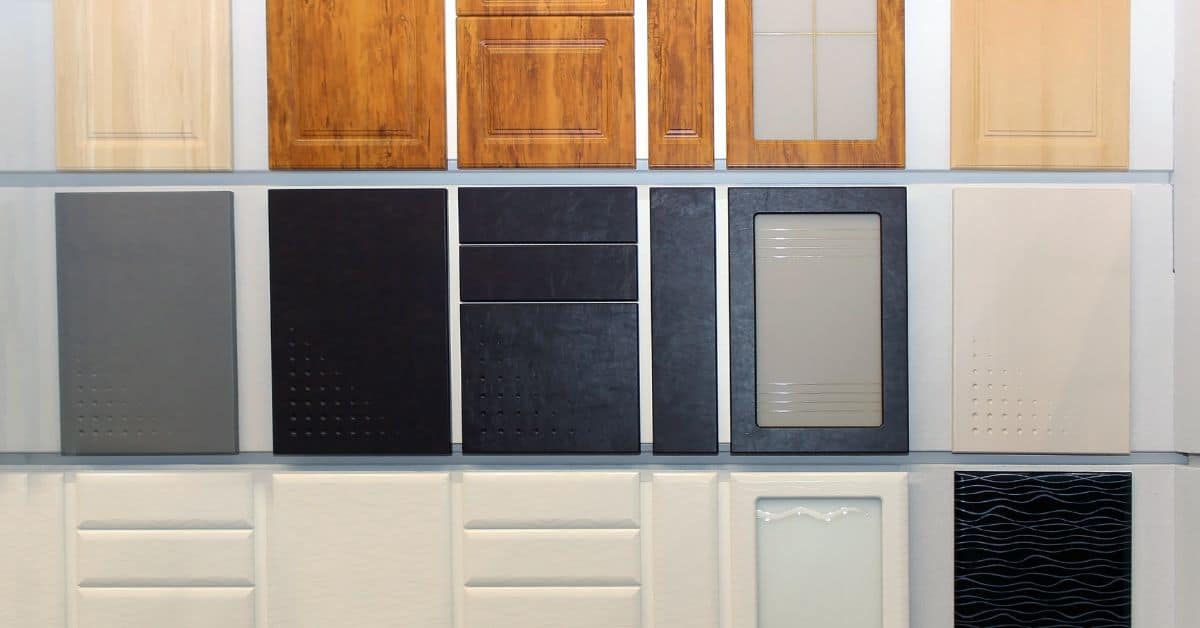
Types of Color Samples and When to Use Each
Full-scale panels provide realism by showing how color reads on the actual substrate and under field conditions. Small lab tiles offer quick, repeatable tests with lower cost and shorter lead times. Field patches and mockup strips give a practical bridge between shop measurements and site realities.
Choose based on project scale, curing regime, substrate type, and expected color variability. Consider accuracy versus cost and time, noting that lab samples may not capture field curing effects while full-scale panels demand more planning. A simple decision flow helps you pick the right type at each project milestone.
Full-scale in-situ panels and test pours
Pouring full-scale concrete panels on-site is the best way to replicate real-world conditions. These mockups capture everything from placement methods, finish techniques, to curing effects.
Ideal for: Large projects, complex finishes, and when color consistency across the entire project is crucial.
Pros: High realism, captures field conditions, helps validate mix designs. Cons: Time-consuming, higher cost, requires careful planning and documentation.
Pour test panels early in the project to allow time for adjustments to mix design or curing regime if needed.
Laboratory slabs and controlled tiles
Lab-prepared samples let you isolate variables like cement type, admixture, or pigment. They’re ideal for initial mix design development.
Ideal for: Small projects, initial mix design, isolating specific variables under controlled conditions.
Pros: Quick turnaround, repeatable results, allows precise control over variables. Cons: May not capture field curing effects, doesn’t account for placement and finishing methods.
Use lab samples early in the process to narrow down your mix design options before moving to larger mockups.
Spot patches and temporary field tests
Quick field patches are useful for fast decisions, like checking a new pigment or adjusting admixture dosage. They’re not meant to replace full mockups.
Ideal for: Small adjustments, quick checks, when time or resources don’t allow for full-scale mockups.
Pros: Fast, cheap, can be done on-site with minimal disruption. Cons: Limited realism, doesn’t capture long-term curing effects, not suitable for final color approval.
Use spot patches wisely – they’re best for small tweaks, not major decisions. Always follow up with full-scale mockups when possible.
How Curing Conditions Alter Final Color
Moisture availability, temperature, evaporation rate, and hydration heat are the main curing drivers that shift pigment appearance and gloss. Different curing methods interact with pigment systems and surface finishes to produce color variance. Expect color to evolve from initial shade to mature color as curing progresses.
Mockups should replicate field curing conditions and document environmental data like humidity and temperature. Schedule color measurements at multiple milestones to track changes. Sealer and surface treatments can alter perceived color after curing, so stage tests accordingly.
Effects of temperature and humidity during curing
Temperature and humidity play a significant role in how your concrete’s color develops. Here’s what you need to know:
Hot, dry conditions speed up hydration, making the surface appear lighter and drier. It also reduces gloss due to faster evaporation.
Cool, wet conditions, on the other hand, slow down hydration. This results in a darker, more moist appearance with increased gloss. Always record these conditions for accurate mockups.
Curing methods and membrane effects (wet, moist curing, curing compounds)
Different curing methods impact your concrete’s final color. Here are the main ones:
Wet curing keeps the surface damp, promoting a darker, glossier appearance.
Curing membranes and plastic covers seal in moisture but allow some evaporation. This results in a mid-range tone with moderate sheen. The exact effect depends on the specific membrane used.
Always consider your chosen curing method when planning mockups to ensure accurate color prediction.
Timing: finishing, curing start, and sampling windows
The timing of finishing, starting the cure, and taking samples greatly influences your concrete’s observed color. Here’s why:
Finishing too early can lead to a lighter, drier appearance due to rapid evaporation. Wait until the bleed water is gone before finishing.
Starting the cure too soon can trap moisture and darken the slab. Allow some initial drying time before applying curing methods.
Sampling too early gives a false reading. Wait at least 28 days for the concrete to reach its mature color before making acceptance decisions or applying sealers.
Sealer Selection and Application: How Sealers Change Color
Sealer chemistry and film characteristics influence color depth, gloss, and perceived wetness. Film thickness, application method, and top-coat opacity drive color shifts, so two coats or different film builds can yield different results. Substrate color, texture, and porosity also affect how sealers read under lighting.
Mockups are essential to observe color, sheen, and changes under varying lighting and curing states. Test multiple sealer options with consistent application methods and curing times, and document lighting, UV exposure, and environmental conditions for comparison.
Sealer types and their color/gloss effects
Different sealers alter your concrete’s appearance. Understand what to expect:
Penetrating Sealers soak in, leaving a natural look with slight sheen. They won’t change the base color much.
Film-Forming Sealers, like acrylics and polyurethanes, sit on top. Acrylics give a matte finish, while polyurethanes can be satin or glossy. They enhance colors and microtexture.
Application variables that affect appearance
The way you apply sealer matters:
Film Thickness: More coats or higher application rates mean richer colors and gloss.
Method: Spraying gives a uniform finish, brushing can leave streaks. Reproduce your method on mockups.
Ambient Conditions: Temperature and humidity affect curing and final appearance. Keep it consistent with real conditions.
Long-term change: yellowing, wear, and maintenance impacts
Sealers age differently:
Yellowing: Some sealers, especially solvent-based, can yellow over time. Test for this.
Wear: High-traffic areas may show scuffs or scratches. Consider maintenance cycles in your plan.
Maintenance: Regular cleaning and touch-ups keep the sealer looking good. Plan for these tasks.
Measurement, Documentation, and Visual Acceptance Workflow
Establish a repeatable measurement protocol using a spectrophotometer or calibrated colorimeter and define target color spaces to minimize metamerism. Set lighting and viewing angles that reflect real use to improve consistency. Attach metadata to each measurement for traceability.
Standardize photography and documentation with fixed cameras, lighting, and white balance. Record curing conditions, sealant type, and mix batch alongside each image. Create a structured visual acceptance workflow with go/no-go decision criteria tied to instrumental data and visual reviews.
Tools and metrics: spectrophotometers, L*a*b*, and visual scales
A good color measurement protocol starts with the right tools. Here’s what you need:
- Spectrophotometer or Calibrated Colorimeter: These devices measure color numerically in a standardized way. Rentals start around $50/day.
- CIE L*a*b* Color Space: This is the industry standard for color measurement. It describes color in three dimensions: Lightness (L*), Red-Green (a*), and Yellow-Blue (b*).
- Visual Scale (optional): For quick, on-site checks, use a visual scale like NCS or RAL. They’re cheap but less accurate than instrumental measurements.
- Lighting and Viewing Angles: To minimize metamerism – when colors look different under different lights – use standardized lighting (D65/10°) and viewing angles (45°).
- Data Logger (optional): For ambient temperature/humidity tracking, consider a data logger. They’re around $30-$50.
Photography and lighting standards for before/after records
Consistent photography ensures your records accurately reflect color. Here’s how:
Use a fixed camera, tripod, and consistent lighting to minimize variations. A simple two-light setup – one on each side of the sample – works well.
Set your white balance manually (5600K for daylight) and use a gray card as a reference. Capture images in RAW format for post-processing flexibility.
Include reference swatches or color charts in every shot to account for lighting changes. Also, capture full-scale test patches at defined intervals – like 24 hours, 7 days, and 14 days – to track curing progress.
Reporting and sign-off: what to record on mockup sign-off forms
To ensure everyone’s on the same page, capture these details on your sign-off form:
Mix Batch ID: Note down the batch number for traceability.
Curing Method and Duration: Specify how (wet curing, membrane) and for how long the sample was cured.
Ambient Conditions: Record temperature and humidity during curing. If you used a data logger, include its readings here.
Sealer Used: Note down the type and batch number of the sealer applied.
Measurement Readings: Include L*a*b* values from your spectrophotometer or colorimeter.
Approver Signatures: Get sign-offs from all stakeholders to confirm acceptance.
Sampling, Handling, and Laboratory Testing Protocols
Translate pavements-style sampling into color testing by planning objectives, sample locations, and replication to capture representative color results under real conditions. Define specimen handling, labeling, and chain-of-custody to prevent mix-ups. Implement controlled curing to minimize variability.
Detail lab-prep workflows and conditioning prior to color measurement to preserve comparability. Choose measurement instruments and geometries, and document calibration, acceptance criteria, and data templates. Include QA/QC steps to ensure consistency across tests.
Safe and representative field sampling procedures
When it comes to getting color samples from your concrete, safety’s the first thing. Wear gloves, eye protection, and a hard hat. If you’re cutting or coring, use a wet saw to keep dust down.
Pick samples from different spots on mockups. This way, you get a fair idea of what the final color will be under real-world conditions. Avoid areas near joints or edges; they might not represent the whole slab’s color.
To avoid contamination, wrap each sample in plastic right after cutting. Label them clearly with location and date. Keep ’em separate from other samples until testing.
Sample handling, storage, and pre-test curing
Label each sample with a unique ID, location, and date. This helps keep track of your samples from mix to measurement.
Transport them carefully in sturdy boxes. No jostling around! Keep ’em in the same environment they were cured in until testing. If you can’t, replicate the curing conditions in the lab as close as possible.
If you’re sealing some samples but not others, do it before testing. This way, you see how the sealer affects color under real-world conditions.
Recommended lab tests and how to interpret results
First off, do a visual comparison. Compare your samples side by side with the mockup under standard lighting conditions.
Then, use a colorimeter or spectrophotometer for numerical readings. Calibrate it before each test. Remember, L*a*b* values are relative; what matters is how they compare to your target color.
Check moisture content too. It can affect color readings. If it’s high, let samples dry under controlled conditions before testing.
Beware: Don’t rely on just one test or reading. Color’s complex; use multiple methods for accurate results.
Common Mistakes, Pitfalls, and Troubleshooting
Ensure mockups match the actual project conditions, including substrate type, texture, curing temperature, humidity, and exposure. Mismatches here drive color drift and finish variance. Align formulation and mixing to avoid color-altering mistakes and document batch numbers for traceability.
Plan for proper curing and consistent moisture retention, noting deviations that could affect color. Test finishes, sealants, and gloss under identical conditions and curing times. Establish a quick-reference troubleshooting workflow for common color issues and re-testing steps.
Execution errors that invalidate mockups
Certain mistakes during the creation and handling of concrete color samples can render them unreliable. Here are some common execution errors to avoid:
- Using different finishing tools: Each tool leaves a unique mark on the surface. Stick to one type for each mockup.
- Inconsistent mix batches: Ensure all samples use the same batch of concrete mix to prevent color variations.
- Ignoring ambient differences: Mockups should be exposed to the same conditions as the real project. Different environments can alter color development.
- Inadequate curing: Inconsistent or improper curing can lead to color drift. Maintain controlled, comparable conditions across all samples.
Consistency is key in creating valid mockups that accurately predict the final product’s appearance.
Misjudging sealer and wet-look effects
Applying a sealer to concrete changes its color and gloss. Approving unsealed mockups can lead to disappointment once the real project is completed.
Always test with the intended sealer: Apply it to your mockups under identical conditions as you would on the actual project.
Wet-look effects, where the concrete appears darker and glossier when wet, can also mislead. Allow samples to dry completely before making color judgments.
Sealed mockups provide a more accurate representation of the final appearance, helping you make informed decisions about your project’s color scheme.
Communication and contractual failures
Poor communication and inadequate documentation can lead to disputes and rework. Here’s how to avoid these pitfalls:
Document mockup expectations: Clearly outline the conditions under which samples will be created, cured, and evaluated in your project plans.
Get approvals in writing: Once you’ve agreed on a color or finish, obtain written confirmation from all parties involved. This protects everyone’s interests and helps prevent misunderstandings later on.
Regularly review and update contracts: As changes occur during the project lifecycle, ensure your documentation reflects these updates to maintain clear expectations about mockup standards.
Cost, Timeline, and Decision Framework for Mockup Programs
Define the scope and cost categories for mockups, choosing between full-scale panels or representative samples and linking each type to a clear risk-reduction objective. Specify concrete mixes, finishes, and curing conditions to test and tie them to decision thresholds. Plan documentation and governance for all mockups.
Outline timeline phases and buffers for design, fabrication, curing, testing, and reviews. Create go/no-go criteria and escalation steps for out-of-range results. Include budgeting, contingency for weather or delays, and a clear iteration and learning plan to close the loop on decisions.
Cost-benefit considerations and risk thresholds
Mockups are an investment. Weigh their cost against potential rework, warranty claims, or reputational risk.
Rework: Fixing mistakes after pouring can be expensive. Mockups help catch issues early.
Warranty Claims: A failed pour could lead to costly warranty claims. Mockups reduce this risk.
Reputation: A botched job can harm your rep. Mockups ensure quality, protecting your good name.
Recommended timeline and approval checkpoints
Use this checklist to schedule mockup activities.
- Design Review: Check plans, specs, and mix designs. Miss this, and you might pour wrong mixes.
- Mockup Fabrication: Build test panels or samples. Skip this, no tests!
- Curing: Monitor curing conditions. Wrong curing can skew results.
- Initial Inspection: Check for defects before testing. Missed defects can invalidate tests.
- Sealer Trials: Test sealers under real conditions. Skip this, you might not see sealer effects.
- Final Inspection: Check mockups again after all treatments. Miss this, you might miss changes.
- Decision Meeting: Review results, decide on final mix and finish. Skip this, no consensus!
- Sign-off: Get approval from all stakeholders. No sign-off, no go!
Quick rule: Always allow extra time for rework or delays.
Tools and materials checklist and specifications to confirm
Use this checklist before starting mockups. It ensures you’re ready.
- Concrete Mix: Confirm mix design with supplier. Wrong mix, wrong results.
- Admixtures: Check labels, dosages. Wrong additives can mess up tests.
- Aggregates: Inspect aggregates for size, shape, cleanliness. Bad aggregates ruin pours.
- Curing Equipment: Check heaters, humidifiers. No cure, no test!
- Testing Equipment: Calibrate tools before use. Bad tools give bad data.
- Sealers: Confirm sealer types and application methods. Wrong sealers can ruin finishes.
- Safety Gear: Check PPE, safety signs. No safety, no work!
Quick rule: Always cross-check with manufacturers’ guidance.
Conclusion
Mockups are your best bet for predicting the finished color, and they matter for safety, durability, and how the space will actually look. Use the same curing and sealing plan you’ll use on the real pour, document every result, and move from small areas to the full project with confidence.
First do the mockup under the same lighting and curing conditions you’ll use, compare the color to the target, note how the sealer changes the shade, record measurements and conditions, and only proceed to production after you’ve approved the sample in writing. Keep this as a simple, repeatable routine: create a few representative samples, document every difference, and confirm the final color in the real setting before you scale up.
Common mistakes to avoid are skipping pH- or moisture checks, proceeding without curing and sealing the same way on the mockup, and ignoring lighting when judging color. Safety rules are simple: test in a small area first, follow the same curing and sealing steps, wear protective gear, and stop if you see unexpected reactions or cracking. If the project is large or the specs are tight, consider bringing in a professional to validate the mockups and the plan before committing.
When in doubt about consistency, timing, or sealer compatibility, slow down and ask for a second set of eyes. With disciplined mockups, clear documentation, and careful execution, you’ll finish with a color that matches expectations and a resilient, well-protected surface. You’ve got this—keep the plan tight and stay safe.
FAQ
What should I look for when field distress shows up after finishing a mockup color test?
Note any color shifts in the same area as visible cracking, scaling, or blotches. Compare those spots to the mockup under similar light and moisture conditions. Mark locations and plan to inspect during different curing stages to separate color from distress.
How do I approach laboratory analysis if MRD or color anomalies are suspected?
Follow the manufacturer’s guidance for sampling and sending material to a lab. Look for petrographic or chemical tests described by the lab and request clear interpretation of results. If unsure, ask the lab to explain what the findings mean for your concrete color and durability.
What practical data rules should guide interpreting test results for color issues?
Base decisions on trends over single measurements. Look for consistent patterns across multiple samples and environments. If the data points don’t line up, double-check sample selection and curing conditions before changing color plans.
What are safe steps to prevent MRD-related color problems during future pours?
Stick to proven curing and sealing practices that match your mockup conditions. Use consistent mix, placement, and moisture control, and compare early pours to your mockup under the same light. If in doubt, confirm curing and sealing instructions from the product labels and manufacturer guidelines.